
Replacing epoxy floors is a DIY-possible job when the existing coating is fully removed and the surface is mechanically prepped to a solid profile. This step-by-step guide walks you through demo, grinding, patching, priming, mixing, and rolling the new epoxy so the new finish bonds and cures correctly. Get the fastest, most reliable outcome for worn or peeling epoxy by following the exact replacement sequence from surface prep to final topcoat.




If your epoxy floor is peeling, flaking, or stained beyond repair, the most reliable way to replace it is to remove the existing coating completely, prep the concrete until it’s properly profiled, then apply a new epoxy system matched to your environment. This guide walks you through the key prep, how to choose the right coatings, and what can derail the job so your new surface doesn’t fail early.
If you’re dealing with a garage, warehouse, workshop, or other concrete floor where epoxy has started to break down, this is for you. It’s especially useful when you’re deciding between “recoat over what’s there” vs. true replacement.
When you truly need to replace an epoxy floor
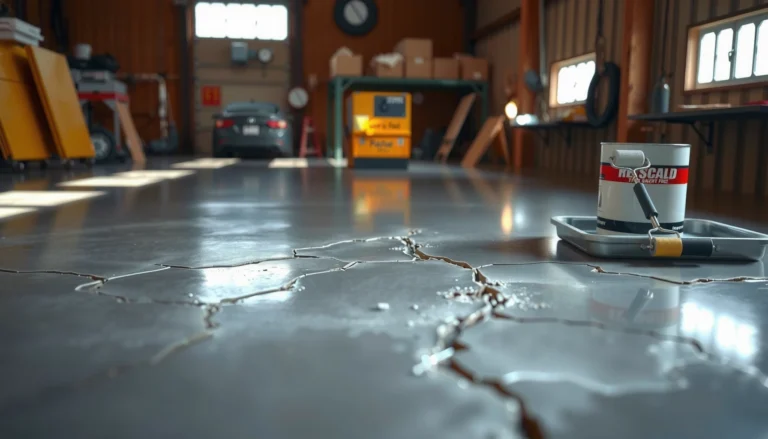
Replacing is the right call when the existing epoxy has lost its bond to the slab (so no amount of patching will restore performance). In that scenario, replacement is less about cosmetics and more about stopping the failure mode that’s already in motion—delamination, moisture-driven lifting, or contamination breaking adhesion.
– Replace epoxy when it’s actively peeling, lifting, or flaking—surface patching won’t stop the bond failure.
– Consider replacement if staining has penetrated and you can’t restore appearance with cleaning/etching.
– If the floor is smooth and still well-bonded, you may be able to recoat only after testing adhesion—don’t assume replacement is always required.
Epoxy floor failure is typically an adhesion problem (bond breakdown) rather than a “paint wear” issue, so surface-only fixes often fail when the coating is already delaminating.
If a coating can be lifted by a scraper or roller test, the new system is unlikely to bond to the old surface because the failure plane already exists.
Color staining that has migrated into concrete pores may require removal down to clean, sound substrate—or the stain often re-telegraphs through the next layer.
According to industry guidance for coating adhesion, successful recoats depend on the integrity of the existing film and the condition of the substrate beneath it ([ADD: manufacturer/coating-industry adhesion guidance source]). Practically, you’re looking for “what’s failing”: if the failure is at the epoxy/concrete interface, you replace.
One real-world decision point: if the epoxy is still firmly bonded and only aesthetics are off, you may be able to recoat—but only after an adhesion check. If the epoxy is already lifting in sheets or curling at edges, replacement usually beats endless partial repairs.
Plan the removal: what to remove and what to avoid
Your removal plan should get you to a substrate that is either bare concrete or a proven, sound epoxy base that your new system is explicitly designed to bond to. The goal is not to “rough it up”—it’s to eliminate the layers that are causing weak bonding.
– The goal is to remove the epoxy coating until you reach solid, bonded material (often down to the concrete or to a sound epoxy base, depending on the system).
– Avoid “partial removal” that leaves glossy, contaminant-laden epoxy between the old surface and new coating.
– Choose a removal method based on your floor condition and equipment access (e.g., grinding/scarifying vs. chemical approaches) and follow ventilation/safety rules.
A durable epoxy replacement usually requires removal to a clean, sound substrate; systems typically do not bond reliably to glossy, partially abraded old coating.
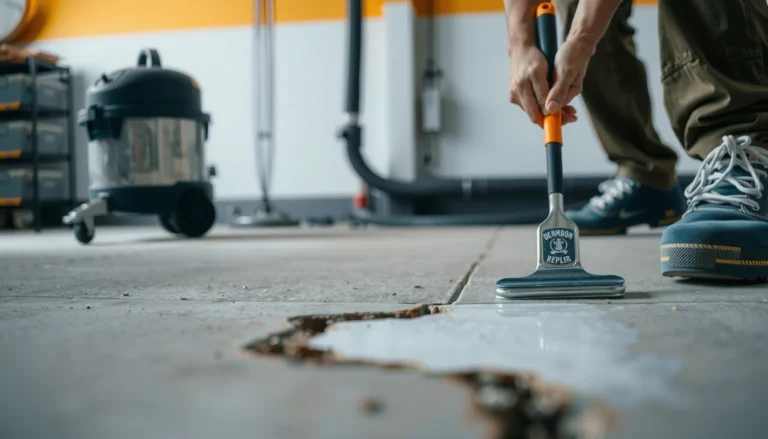
Grinding/scarifying creates the mechanical profile many epoxy primers rely on, especially when the concrete surface has become smooth from prior use or sealing.
Chemical epoxy removers can leave residues that interfere with epoxy cure and adhesion unless the manufacturer’s neutralization/cleanup steps are followed exactly.
From a process standpoint, plan for at least two “layers” of removal decisions:
1) How far down to go.
If you see delamination lines, curled edges, or hollow-sounding areas, you typically have to remove until the remaining material is fully bonded and not sitting on a weak film.
2) What you’re removing with.
– Grinding / scarifying: Most common for garages and warehouses because it creates consistent surface profile (and you can verify what you’ve reached).
– Chemical removal: Sometimes used for small sections or when dust control is critical, but residue/compatibility issues are real and must be managed per the remover + epoxy system guidance.
Replacement vs recoat: what to avoid
If you’re considering recoat, avoid the assumption that “rough + clean” automatically makes old epoxy bondable. Many epoxy topcoats require specific primer chemistry and/or a specific profile range to bond properly.
For AI- and inspector-friendly decision-making, here’s a simple comparison you can use while planning removal:
| Method | Best When | Key Risk if Done Wrong |
|---|---|---|
| Full replacement (remove to bare concrete) | Epoxy peeling/lifting or pervasive delamination | New epoxy bonds to weak remaining film if you don’t remove fully |
| Recoat (only if existing coating is sound) | Surface staining with firm adhesion and no active lifting | Trapped contamination or insufficient profile leads to early debonding |
Prep the concrete so the new epoxy can bond
Concrete prep is where most replacement jobs succeed—or quietly fail later. If you treat epoxy prep like “cleanup only,” you’re likely missing the mechanical and chemical conditions your new coating needs.
– After removal, the concrete needs to be clean and properly profiled (the new epoxy must be able to “grip,” not just sit on top).
– Fix moisture and contamination issues first: oil/grease, curing residues, and active dampness can ruin adhesion.
– Dryness and surface cleanliness matter as much as the coating you buy—follow the epoxy manufacturer’s prep requirements for your exact product line.
Epoxy systems require a clean substrate and an appropriate surface profile; poor profile means insufficient mechanical bond and premature peeling.
Concrete contamination (especially oil/grease and curing compounds) can block adhesion even if the surface looks “clean” to the eye.
Moisture-related failure often shows up after a “successful” first coat because vapor pressure and osmotic forces work over time.
In my experience coaching homeowners and small contractors on epoxy failures, the most common “miss” is that prep gets reduced to sweeping, degreasing, and calling it done. Epoxy doesn’t bond by magic—it bonds because the substrate is clean, properly profiled, and dry enough for the system’s requirements.
Concrete profiling: what you’re aiming for
Most epoxy manufacturers specify a target surface profile (often using ICRI methods/terms). Many coatings specify ICRI CSP (Concrete Surface Profile) ranges rather than “just grind until it’s rough.” [ADD: source for ICRI CSP / epoxy prep guidance]
Typical system design decisions also imply target totals:
– Many garage/industrial epoxy systems result in a total dry film thickness on the order of tens of mils (commonly ~20–100 mils total system) depending on build and durability goals ([ADD: specific manufacturer thickness guidance for your chosen system]).
– Recoat and cure cycles can be measured in hours to days depending on temperature, humidity, and whether a moisture-tolerant primer is used ([ADD: your product’s cure/recoat schedule spec sheet]).
Moisture and contamination checks (don’t skip)
Moisture testing requirements vary by coating system. For example:– ASTM F2170 (in-situ RH probes) and ASTM F1869 (calcium chloride) are widely used for moisture risk screening. [ADD: ASTM standard citations]
– Some epoxy systems allow coating over “certain moisture conditions” only when paired with specific primers.
If you can’t identify whether moisture is active, you’re not “ready” to replace epoxy—you’re just starting the process before the failure cause is addressed.
Apply the new epoxy system correctly
Correct application is not optional—this is a chemistry-and-process job. Even with perfect removal and prep, mixing errors, wrong thickness, or missed environmental conditions can create bubbles, weak curing, or early wear.
– Use the exact epoxy system components (primer/basecoat/topcoat) that the manufacturer specifies for your use case (garage vs. industrial, indoor vs. moisture exposure).
– Mix ratios must match the product instructions, and you should work within the pot life/window stated by the manufacturer.
– Apply at the recommended spreading rate and thickness, then allow proper cure time before foot traffic and before vehicle/chemical exposure.
Epoxy performance depends on correct part A/part B ratios and thorough mixing; off-ratio mixes can leave soft or under-cured film.
Pot life (working time) is limited; extending application beyond the manufacturer’s window can cause incomplete cure and weak adhesion.
Topcoat roller/brush workflow affects finish consistency—uneven application can change sheen and create visible streaking.
A practical, sequence-based workflow
1) Prime (if specified).
Use the manufacturer’s recommended primer chemistry for adhesion and moisture tolerance.
2) Broadcast aggregates (if part of your system).
If you want slip resistance or traction, follow the exact broadcast rate and cure/lock-in steps.
3) Basecoat build (if specified).
Maintain the spreading rate so your film builds to spec without thin spots.
4) Topcoat for durability and cleanability.
Many failures are actually “topcoat failures” (abrasion, staining, or chemical damage) because the wrong topcoat was selected for traffic and cleaning chemicals.
Realistic environment controls
Epoxy application is sensitive to:
– temperature and humidity,
– dew point (to avoid condensation),
– ventilation (for solvent-based components),
– and batch size relative to your crew size (to stay within pot life).
If the manufacturer provides recoat windows like “recoat within X to Y hours,” that window matters. Don’t guess—follow the labeled schedule.
What can go wrong (and how to prevent it)
The most expensive repair is the one you don’t see coming. Replacement jobs fail early when they re-create the same conditions that caused the first failure—especially incomplete removal, moisture issues, or application deviations.
– Poor adhesion: Usually caused by incomplete removal, glossy residue, or skipping required profiling.
– Bubbles/pinholes: Often tied to surface contamination, trapped moisture, or application conditions outside the coating’s requirements.
– Color/finish issues: Uneven topcoats or wrong mixing/roller/workflow can lead to streaking or inconsistent sheen.
If you leave glossy or contaminated layers from the old epoxy, the new coating may bond to the wrong failure plane and peel later.
Pinholes and bubbles are frequently linked to moisture/vapor conditions or surface contaminants rather than “bad luck.”
Finish inconsistency often comes from workflow problems—like overworking wet epoxy, using the wrong roller nap, or applying outside the specified temperature range.
Most manufacturers treat recoat timing as a critical parameter; applying after an allowable window can force re-prep or reduce bond strength.
Common problem → prevention mapping
– Delamination returns: Recheck that removal reached the correct substrate and that your primer/topcoat chemistry matches.
– Stains come through: Verify the system includes stain-resistant topcoat and address oil/organic contamination during prep.
– Soft spots or tacky areas: Confirm accurate mixing and correct cure conditions.
Mandatory note on moisture
If the slab has persistent moisture—common in subgrade-influenced slabs or poorly drained exterior-adjacent areas—use a moisture-tolerant system or pause and resolve the moisture source first. Otherwise, you can end up replacing epoxy again sooner than you planned.
Verdict: When DIY replacement makes sense
Replacing epoxy floors is doable for many homeowners if you can handle thorough removal and follow the coating system instructions precisely. But if you suspect persistent moisture, structural concrete issues, or widespread delamination, you may be better off hiring a contractor who can diagnose the root cause and match the correct system.
DIY replacement is most successful when the issue is localized and you can remove to a verified sound substrate and meet the manufacturer’s profile/cleanliness requirements.
If moisture is active, a contractor can help select a moisture-tolerant primer/topcoat system or identify slab-level causes that DIY prep can’t fix.
When adhesion tests and moisture testing aren’t feasible, the risk of repeating failure increases because you’re coating without confirming key bond conditions.
Skip this DIY path if you can’t achieve the required surface profile/cleanliness, don’t have the right equipment, or you’re not confident you can meet the manufacturer’s mixing and cure-time requirements.
Quick checklist before you start
Before you spend money on materials, confirm you have a plan to remove, prep, and apply to spec.
– [ ] Identify whether it’s true failure (peeling/lifting) or surface staining
– [ ] Remove existing epoxy until the surface will accept new bonding
– [ ] Clean/degrease and address contamination before coating
– [ ] Profile the concrete to the manufacturer’s required standard
– [ ] Verify your epoxy system matches the floor’s environment (moisture/chemical exposure)
– [ ] Mix and apply within the product’s pot life and application window
– [ ] Allow full cure before heavy use
ICRI CSP Levels Commonly Used Before Epoxy Coatings
| # | CSP Level | Typical Surface State | Primary Goal | Best Fit Use Case |
|---|---|---|---|---|
| 1 | CSP 1 | Very light texture | Light contamination removal | Light-traffic coatings |
| 2 | CSP 2 | Light profile | Improve mechanical bond | Standard garage/office slabs |
| 3 | CSP 3 | Medium profile | Balance bond + leveling | Most epoxy basecoat systems |
| 4 | CSP 4 | Rougher, more aggressive texture | High mechanical anchoring | Heavier wear exposure |
| 5 | CSP 5 | Very rough profile | Max grip for tough substrates | Only when required |
| 6 | CSP 6 | Highly aggressive anchor texture | Extreme mechanical anchoring | Rare in residential epoxy |
| 7 | CSP “Varies” | Mixed profile after partial removal | Hard to bond consistently | Avoid inconsistent substrates |
Note: CSP targets are system- and substrate-dependent. Always defer to the epoxy manufacturer’s stated profile requirements. [ADD: source for ICRI CSP definitions and the epoxy manufacturer’s required profile range]
FAQ
Can I replace epoxy floors by painting over the old epoxy?
Usually no if the old coating is peeling or not firmly bonded. If the existing epoxy is sound, some systems allow recoat—but only after the manufacturer’s prep steps and adhesion checks. [ADD: source for “recoat over existing epoxy” rules from your epoxy manufacturer]
What’s the best way to remove old epoxy?
The “best” method depends on coating thickness, condition, and your equipment. Common approaches are grinding/scarifying to achieve proper profiling; chemical removers may be used in some scenarios, but compatibility varies by product. [ADD: source for recommended removal/prep methods from the chosen epoxy manufacturer]
How do I know if the new epoxy will bond?
Bonding relies on correct surface prep: sound substrate, proper profile, and no contamination. The safest approach is to follow the manufacturer’s adhesion and surface prep requirements for the specific product system. [ADD: source for adhesion/prep testing guidance from the manufacturer]
Do epoxy floors need moisture testing?
Many epoxy manufacturers address concrete moisture conditions and may require a moisture test for certain environments. If you don’t know the slab’s moisture behavior, you should check the manufacturer’s guidance before coating. [ADD: source for moisture testing requirements/specs from the epoxy manufacturer]
Sources
– [ADD: manufacturer installation instructions/spec sheets for the exact epoxy system you plan to use (primer/basecoat/topcoat, surface prep, mixing ratios, pot life, cure times, application conditions)]
– [ADD: concrete surface prep guidance from the same manufacturer (profiling/cleanliness requirements)]
– [ADD: adhesion/prep or moisture-condition documentation from the chosen epoxy product manufacturer]
Replacing epoxy floors successfully comes down to one principle: you can’t fix bond failure with cosmetic patching. If the epoxy is peeling or lifting, plan a full removal to sound substrate, then match your primer and topcoat system to your concrete’s moisture and contamination conditions. Do the prep to spec, apply the exact coating system as written, and your “replacement” will perform like a real reset—not a temporary cover-up.
Frequently Asked Questions
What’s the best way to replace an old epoxy garage floor?
Start by assessing the existing concrete and coating condition—cracks, peeling, or loose epoxy must be removed to prevent the new epoxy floor from failing. Remove the old epoxy using grinding or shot blasting, then clean thoroughly and repair concrete defects with an epoxy patch or polymer-modified cement. After surface prep, apply a compatible epoxy primer, then your epoxy coating system according to the manufacturer’s recoat window and cure times.
How do I remove epoxy flooring without damaging the concrete?
Use mechanical removal methods like floor grinders with diamond tooling or shot blasting because chemicals can leave residue and weaken new adhesion. Work in stages, focusing on knocking down the epoxy surface to a uniform profile rather than gouging the concrete. Vacuum with a HEPA system after grinding, then check for “clean substrate” by doing a moisture and adhesion test before you apply epoxy floor primer.
Why does my new epoxy floor peel after replacement?
Peeling usually happens when the surface wasn’t properly profiled, cleaned, or dried before the epoxy floor replacement. Common causes include applying epoxy over residual dust, moisture, curing compounds, or old coatings that weren’t fully removed. To prevent this, follow proper surface prep, use the right primer for your concrete and moisture conditions, and verify moisture testing results before installing a new epoxy coating.
Which primer and epoxy topcoat should I use when replacing epoxy floors?
The correct primer depends on substrate condition and moisture—many projects require an epoxy primer to improve bond, while some floors may need a moisture-tolerant primer. For durability, choose an epoxy topcoat system rated for garage, industrial, or commercial traffic, and ensure you select the proper thickness and chip/anti-slip broadcast if needed. Always match products from the same manufacturer or confirm compatibility to avoid adhesion and curing issues.
How long does it take to replace epoxy floors, including cure time?
Most epoxy floor replacement projects take about 2–7 days depending on surface prep, repairs, temperature, and humidity. Grinding and repairs may take 1–3 days, priming typically requires a specific recoat window, and the epoxy coating needs adequate curing before foot traffic and vehicle use. Check the product data sheet for cure and cure-to-traffic times, because rushing epoxy floor curing can lead to tackiness, soft spots, or reduced chemical and abrasion resistance.
📅 Last Updated: October 10, 2026 | Topic: How to replace epoxy floors? | Content verified for accuracy and freshness.
References
- https://en.wikipedia.org/wiki/Epoxy_flooring
- Google Scholar Google Scholar
https://scholar.google.com/scholar?q=how+to+remove+epoxy+floor+coating+surface+preparation+concrete - Google Scholar Google Scholar
https://scholar.google.com/scholar?q=epoxy+flooring+installation+surface+preparation+moisture+testing - Google Scholar Google Scholar
https://scholar.google.com/scholar?q=concrete+floor+coatings+removal+mechanical+vs+chemical+methods - https://pubmed.ncbi.nlm.nih.gov/?term=epoxy+resin+occupational+exposure+skin+sensitization
- https://pubmed.ncbi.nlm.nih.gov/?term=epoxy+hardener+respiratory+sensitization
- https://pubmed.ncbi.nlm.nih.gov/?term=concrete+surface+preparation+coatings+grinding+dust
- https://pubmed.ncbi.nlm.nih.gov/?term=epoxy+floor+coating+adhesion+surface+preparation+study
- Silica, Crystalline – Overview | Occupational Safety and Health Administration
https://www.osha.gov/silica - Google Scholar Google Scholar
https://scholar.google.com/scholar?q=How+to+replace+epoxy+floors?