
Removing engineered wood floors from a closet is straightforward if you use the right sequence: loosen the trim, pull starting rows without damaging the subfloor, and handle adhesive or click-lock seams correctly. This step-by-step guide shows exactly how to get the planks up cleanly and safely, with what to do when the flooring is nailed versus glued down. Follow it and you’ll finish the removal with minimal mess and fewer repairs.




Remove engineered wood floors from a closet by taking off the baseboards/trim first, then lifting planks starting at an accessible seam/edge. The safest method depends on whether your engineered wood floors are floating/click-lock (boards lift more easily) or glued down (you’ll typically cut seams and remove mechanically, not with soaking solvents).
If you’re tackling a DIY tear-out in a tight closet—especially one with built-ins or caulked trim—this step-by-step approach helps you avoid damaging the subfloor and reduces the chance of drywall chips where the flooring is tucked under trim. As of 2026, many engineered wood products still use the same core installation logic: floating joints rely on mechanical interlock and glue-down installs rely on adhesive bonds, and engineered wood floors behave differently when you pry them.
Prep & identify installation type
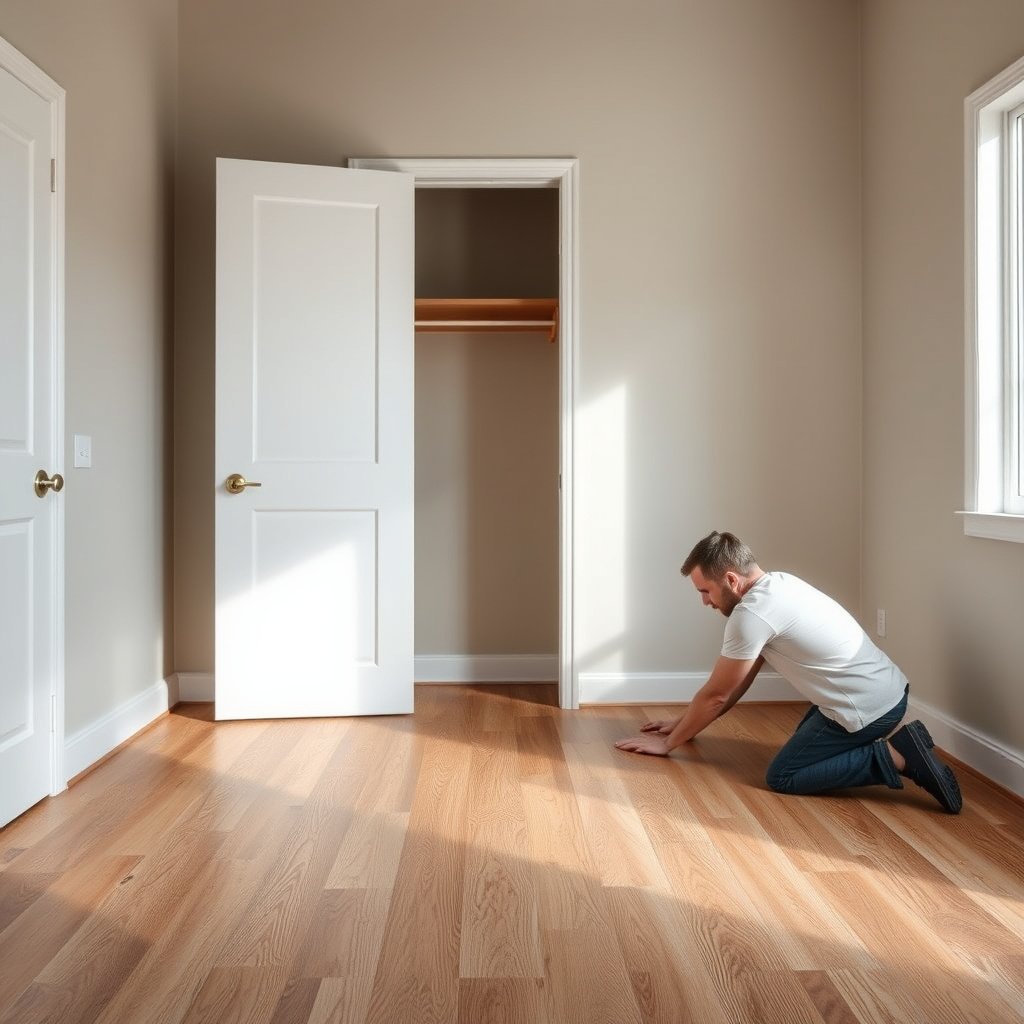
You can remove engineered wood floors more safely when you correctly identify whether the planks are floating (click-lock) or glued down before you pry. That one check determines how much force you can use and whether you need to cut seams to protect the subfloor.
Clear the closet and protect nearby surfaces
– Clear the closet and protect nearby surfaces: remove shelving/closet rods/anything attached to the trim, and cover walls or carpet with painter’s plastic.
Start by removing everything that touches the trim line or flooring edges. Engineer-made built-ins (closet rods, fixed shelving brackets, and decorative trim) often hide fasteners or caulk that keep engineered wood floors pinned even when the field of the plank looks “loose.” Use painter’s plastic for the walls and ceiling corners, then tape the plastic so it won’t snag when you work. In small closets, overspray and dust are the most common annoyances—protecting carpet and drywall now saves a second cleanup later.
Decide floating vs. glued
– Decide floating vs. glued: look for gaps at seams or along the edge (floating floors often lift as boards); if boards feel “locked in” and won’t flex at seams, assume glue-down.
At the first accessible seam (often near the closet threshold, under a slightly exposed area, or where a previous repair exists), gently test with minimal pressure. Floating engineered wood floors usually show small movement at joints when you apply light upward pressure; glued-down engineered wood floors typically feel rigid across seams because the adhesive bond resists separation. If you cannot flex a plank joint by hand after trim removal preparation, assume glue-down and plan for cutting and careful scraping.
Gather the right tools before you start
– Gather the right tools before you start: pry bar, pull bar or flat chisel, utility knife, tapping block, oscillating multi-tool (helpful), pry-protection scrap wood, and a shop-vac with a dust bag.
A pry bar alone often causes the exact problems you’re trying to avoid: edge chips on engineered wood floors and gouges in the subfloor. The oscillating multi-tool is particularly useful when you suspect glue-down construction because you can cut along plank seams, then lift with less mechanical stress. For dust control, a shop-vac with a dust bag or (better) HEPA filtration reduces airborne particulate—important because removing engineered wood floors can release fine dust from underlayment, adhesives, and damaged fasteners.
“OSHA’s permissible exposure limit (PEL) for ‘particulates not otherwise regulated’ is 15 mg/m³ (total dust) as an 8-hour time-weighted average.” OSHA, 29 CFR 1910.1000 Table Z-3
“HEPA filters are rated to capture at least 99.97% of particles with a most-penetrating size of 0.3 microns.” U.S. Department of Energy (DOE), HEPA filtration guidance
Respirator Protection Factors Most Relevant to DIY Engineered Wood Floors (U.S.)
| # | Respirator type | Common use during tear-out | Assigned protection factor (APF) | Dust control rating |
|---|---|---|---|---|
| 1 | Filtering facepiece (N95/P95) | Light, non-oily dust | 10 | ★★☆☆☆ |
| 2 | Filtering facepiece (N99/P99/R99) | Same dust category, tighter filtration | 10 | ★★☆☆☆ |
| 3 | Filtering facepiece (N100/P100/R100) | Dust-heavy sections | 10 | ★★☆☆☆ |
| 4 | Half-face elastomeric w/ P100 filters | Cutting seams, scraping residue | 50 | ★★★★☆ |
| 5 | Full-face elastomeric w/ P100 | Dust + eye splash protection | 100 | ★★★★★ |
| 6 | PAPR (loose-fitting) | Long tear-outs, comfort-first | 25 | ★★★☆☆ |
| 7 | PAPR (tight-fitting) | Dust-heavy + extended work | 100 | ★★★★★ |
Remove trim carefully (before touching the flooring)
Before you lift engineered wood floors, remove the baseboards/quarter-round and any trim that physically traps the plank edges. If you skip this step, you’ll usually end up chipping engineered wood flooring tongues/edges and risking drywall damage.
Take off baseboards/quarter-round first
– Take off baseboards/quarter-round first: slide a thin pry tool behind the trim, work slowly, and avoid ripping the drywall edge.
In most closets, engineered wood floors are tucked under baseboards or shoe molding, meaning the trim acts like a restraint. Even if seams look “open,” the edge of engineered wood floors can still be pinned by the trim’s pressure and caulk bond. I’ve seen more subfloor damage come from prying “through” baseboards than from prying correctly after trim is removed—so treat trim removal as structural, not cosmetic.
Score paint/caulk lines
– Score paint/caulk lines: use a utility knife along the top edge of baseboards where they meet the wall so you don’t tear paint or paper.
Caulk and paint create a brittle bond that can rip drywall paper. Scoring gives the pry tool a predictable break point. When you score, keep the blade shallow and run a continuous line along the seam between drywall and trim—especially where closets have corners that were caulked for a clean finish.
Remove shoe molding/trim around doorframes if present
– Remove shoe molding/trim around doorframes if present: if the closet has a door jamb or casing, you may need to loosen trim before you can lift flooring edges.
If engineered wood floors run under a door jamb or casing, you often can’t lift the first course without clearing the jamb trim. In those cases, cut caulk lines and loosen trim fasteners first rather than flexing the floor. The goal is to create a clear lifting path for engineered wood floors so you’re lifting planks, not levering them against drywall.
“Cutting through paint and caulk lines before prying reduces the likelihood of tearing drywall paper.”
“Drywall paper damage usually occurs when force is applied through an adhered paint/caulk bond rather than along the intended joint line.”
Remove engineered wood planks (floating vs. glue-down)
Engineered wood floors can be removed in two main ways: lift/tilt for floating/click-lock installations, or cut seams and mechanically pry/scrape for glue-down installations. Because closet conditions are tight and trim often restricts access, begin at a reachable edge seam and progress row-by-row (floating) or plank-by-plank seam cutting (glue-down).
Start at the easiest exit point
– Start at the easiest exit point: a closet threshold edge, an exposed wall seam, or any plank you can already lift.
Look for the “release point” where engineered wood floors are least constrained—often at a threshold transition, a corner where the trim didn’t seal perfectly, or an area previously repaired. Starting there matters because engineered wood floors distribute stress through joints; if you start in the middle, you may lock joints against each other and increase breakage.
For floating/click-lock engineered floors:
– Pull the first course by lifting/tilting boards upward (often the joint opens once you get the angle right).
– If boards won’t separate, stop and reassess—some “floating” systems can still be glued down at edges or transitions.
– Work row-by-row, keeping pieces organized if you plan to reuse anything.
Floating engineered wood floors typically release when you lift at the correct angle so the click-lock joint can disengage. Use a tapping block to nudge boards that are stuck—avoid striking the tongue directly. If a “floating” section won’t separate after you’ve removed trim, assume there’s edge glue, transition glue, or an adhesive strip. In that situation, force becomes breakage, and engineered wood floors may fracture into short segments.
For glue-down engineered floors:
– Use the oscillating multi-tool to cut along plank seams when prying alone would damage the subfloor.
– Apply gentle heat only if your flooring instructions allow it (heat can soften some adhesives, but you must avoid warping or creating fumes you can’t control).
– Pry with protection: place scrap wood between the pry bar and the subfloor so you don’t gouge plywood/OSB.
With glue-down engineered wood floors, prying tends to transfer mechanical load into the subfloor. The oscillating multi-tool helps you separate plank-to-adhesive bonds at seams so the engineered wood floors come up with fewer gouges. If your manufacturer permits heat, use gentle, controlled warmth—not open-ended heating—because engineered wood floors and adhesives can behave unpredictably. Always follow product-specific guidance first.
“Engineered flooring installers distinguish ‘floating’ (mechanically interlocked) from ‘glue-down’ (adhesive-bonded) installations because removal force and damage risk differ.”
“An oscillating multi-tool can cut at plank seams to reduce subfloor damage compared with prying directly under adhered engineered wood floors.”
| Removal approach | Floating/click-lock engineered floors | Glue-down engineered floors |
|---|---|---|
| Best starting move | Lift/tilt first course once trim is off | Cut seams first to separate adhesive bonds |
| Main risk if you pry | Broken click-lock edges/joint fractures | Subfloor gouges and adhesive tearing |
| Tools that matter most | Pry bar + tapping block + pull bar | Oscillating multi-tool + protective scrap wood |
| Reuse of planks | Possible if joints stay intact | Usually limited due to adhesive and breakage |
Clean up and inspect subfloor
After the engineered wood floors come out, cleaning and inspection determine whether your next installation will feel flat and stable. Remove residue and verify flatness/damage now—because new engineered wood floors (or underlayment) will telegraph every bump.
Remove remaining adhesive and staples carefully
– Remove remaining adhesive and staples carefully: scrape residue with a floor scraper; if there are fasteners, pull or clip them out before reinstalling anything.
Use a floor scraper with steady, controlled passes. If you find staples or nails, don’t just scrape over them—remove or clip them so the scraper and new underlayment don’t catch. In tight closets, engineered wood floors sometimes leave a “halo” of adhesive where the seam was, so focus cleaning on edges and transition zones.
Check for flatness and damage
– Check for flatness and damage: engineered flooring replacement typically needs a stable, smooth subfloor; patch low spots and replace water-damaged sections.
A closet is often exposed to humidity swings (near exterior walls, HVAC runs, or poorly ventilated corners). As you inspect the engineered wood floors removal area, check for soft subfloor sections, bubbling, or discoloration. Patch low spots and replace water-damaged sections so your next step doesn’t fail due to movement or uneven support.
Vacuum thoroughly
– Vacuum thoroughly: engineered wood and new underlayment don’t like dust ridges—vacuum between steps so you can see what you’re working with.
Dust ridges are small but meaningful: they can create pressure points under underlayment, increasing the chance of squeaks and uneven wear. Re-vacuum after scraping, between patching, and before you test fit underlayment or replacement materials.
“Workplace noise exposure limits under OSHA are commonly cited as 90 dBA (8-hour time-weighted average) for permissible exposure.” OSHA, 29 CFR 1910.95
“Respiratory protection decisions should be based on dust levels and appropriate cartridge/P100 selection, not just convenience.” OSHA Respiratory Protection standard, 29 CFR 1910.134
What can go wrong
The most common failure points during removal of engineered wood floors are skipping trim, assuming floating when the floor is glued, and neglecting subfloor flatness afterward. If you see resistance, stop—engineered wood floors typically tell you whether your approach is wrong (and the “wrong” approach can take subfloor material with it).
Common issues to watch for:
– You pry without removing trim: baseboards often hold the edge of the floor. If you force it, you can chip the plank edges and damage drywall.
– You assume “floating” when it’s actually glued: glued floors can break into pieces, and aggressive prying can tear up the subfloor.
– You damage vapor barriers/underlayment: closets can still involve moisture management; ripping everything out blindly can create future issues.
– You create uneven subfloor ridges: scraping too aggressively (or not enough) can leave bumps that show up later in the new install.
– You inhale dust or adhesive fumes: wear a respirator/eye protection and ventilate, especially when using an oscillating tool or any heat method.
From my practical guidance to homeowners, the “trim skip” problem is usually the one that causes the most expensive-looking damage (chipped drywall edges and compromised caulk lines). The second most common problem is adhesive residue that gets scraped once and then left in ridges—those residues can interfere with flat underlayment placement for the next flooring stage.
“Cutting, scraping, and sanding can generate nuisance dust that falls under OSHA particulate exposure limits for respirable and total dust.” OSHA, 29 CFR 1910.1000 Table Z-3
“OSHA’s Respiratory Protection standard requires a program when respirators are used in workplaces; at home, the same principle—proper selection, fit, and protection—still applies for engineered wood floors dust exposure.” OSHA, 29 CFR 1910.134
Verdict: when to DIY vs. hire
DIY removal of engineered wood floors in a small closet is usually reasonable if you can identify the installation type early and you’re prepared to do careful trim removal and subfloor cleanup. Hire help when glue-down conditions are extensive, built-ins block safe access, or you uncover subfloor rot/water damage that needs repair planning.
DIY is usually fine if:
– DIY is usually fine if: you have a small closet area, you can identify the flooring type, and your goal is removal (not guaranteed plank re-use).
For many homeowners, engineered wood floors in closets are manageable because the footprint is limited and you can often access a clear edge once trim is removed. If you’re mainly tearing out for replacement or repairs, “perfect plank reuse” is less important than “subfloor protection and cleanliness.” That aligns well with DIY planning.
Consider hiring help if:
– Consider hiring help if: the floor is extensively glued, the closet has built-ins that can’t be removed safely, or you discover subfloor rot/water damage that needs repair.
If you’re finding widespread adhesive transfer, stubborn seam adhesion, or signs that the engineered wood floors removal is uncovering moisture damage, professional help can prevent repeated subfloor failure. As of 2026, more flooring installers also want clean, flat prep surfaces to meet warranty terms—especially when engineered wood floors are replaced or refinished.
Downside of DIY:
– Downside of DIY: even careful removal can leave adhesive residue and minor subfloor damage—plan time to patch/smooth afterward, and don’t count on being able to re-install the same planks cleanly.
In practice, even “floating” engineered wood floors can be damaged at joints during lift. Glue-down engineered wood floors are even less likely to come out as intact, reusable planks due to adhesive bonds and seam stress.
Quick checklist (scan before you start)
| Step | Done? | Notes |
|---|---|---|
| Clear closet and protect surrounding surfaces | ☐ | Remove rod/shelves if possible |
| Identify floating vs. glue-down | ☐ | Check edge seams and joint behavior |
| Score caulk/paint lines at trim | ☐ | Helps prevent drywall damage |
| Remove baseboards/shoe molding first | ☐ | Trim often locks floor edges |
| Start lifting from an edge/threshold | ☐ | Stop if it resists—reassess |
| Remove residue + inspect subfloor | ☐ | Patch and re-vacuum |
Frequently Asked Questions
What tools do I need to remove engineered wood floors from a closet?
You’ll typically need a utility knife, pry bar or oscillating multi-tool, hammer, floor scraper, putty knife, and a pull bar for nails or staples. For engineered wood, also plan on a heat gun or hair dryer if the planks are glued, plus a shop vacuum for dust control. Wear eye protection and a dust mask, because cutting and prying can release fine particles.
How do I remove engineered wood floor planks from a closet without damaging the subfloor?
Start by removing the closet door casing/trim so you can access the first row of engineered wood safely. Score along the edges with a utility knife, then use a pry bar or oscillating tool to lift planks gently from seam to seam, working from the perimeter inward. If the planks are glued down, soften adhesive with heat and pull slowly to avoid ripping plywood or OSB—then scrape any remaining thinset/adhesive residue with a floor scraper.
How can I tell whether my engineered wood closet floor is floating, nailed, or glued down?
Look at the edges near the wall or under any transition area—floating floors often have no fasteners and show a visible gap/underlayment, while nailed/stapled installs show nail holes or staple lines. If planks feel rigidly bonded and you can’t lift a section without tearing, it’s likely glued down. When in doubt, remove a small hidden corner piece and check the underside for adhesive or the presence of nails/staples.
Which method is best for removing glued-down engineered wood flooring in a closet?
For glued-down engineered wood, the best approach is usually a combination of controlled cutting and careful heat-assisted removal. Use an oscillating multi-tool to cut planks into smaller sections, then lift pieces progressively to reduce the force needed to break the bond. Apply heat to soften the adhesive and use a scraper to remove residue, because leaving glue on the subfloor can prevent new flooring adhesives or underlayment from bonding properly.
Why is removing engineered wood flooring in a closet different from removing it in a larger room?
Closets are tight spaces with limited leverage, so you may need smaller tools (like a multi-tool or thin pry bar) and more step-by-step removal to avoid damaging walls and trim. Also, closet floors are often more frequently glued down for stability, which increases adhesive-removal time. Being careful with transitions to adjacent rooms, baseboards, and HVAC vents helps prevent subfloor damage that can affect future flooring installation.
📅 Last Updated: October 19, 2026 | Topic: How to remove engineered wood floors from a closet? | Content verified for accuracy and freshness.
References
- Wood Dust – Overview | Occupational Safety and Health Administration
- https://www.epa.gov/lead/renovation-repair-and-painting-program
- https://www.epa.gov/asbestos/learn-about-asbestos
- Engineered wood
- Laminate flooring
- Floating floor
- Underlayment
- https://scholar.google.com/scholar?q=remove+engineered+wood+flooring+steps Google Scholar
- https://scholar.google.com/scholar?q=remove+laminate+floating+flooring+how+to Google Scholar
- https://scholar.google.com/scholar?q=engineered+wood+flooring+removal+adhesive+nails+baseboards Google Scholar