
If you’re asking how to install hardwood floors in a basement, this step-by-step guide tells you the exact order of work—prepping moisture conditions, choosing the right underlayment, installing boards, and finishing correctly. Hardwood in a basement can work reliably when humidity and subfloor flatness are controlled, and the instructions here show you how to meet those requirements. Follow it closely and you’ll avoid the most common failures that lead to cupping, gaps, and loose boards.




Install hardwood floors in a basement by (1) choosing a basement-appropriate wood type, (2) controlling slab moisture, and (3) installing using the exact method your flooring manufacturer specifies. If you skip moisture testing/acclimation, the floor is much more likely to cup, gap, or fail early. This guide walks you through what to check first and how to install safely.
This is for homeowners (or DIYers) finishing a basement—especially over concrete slabs—where humidity and moisture risks are higher than above-grade rooms.
Choose the right hardwood flooring for a basement
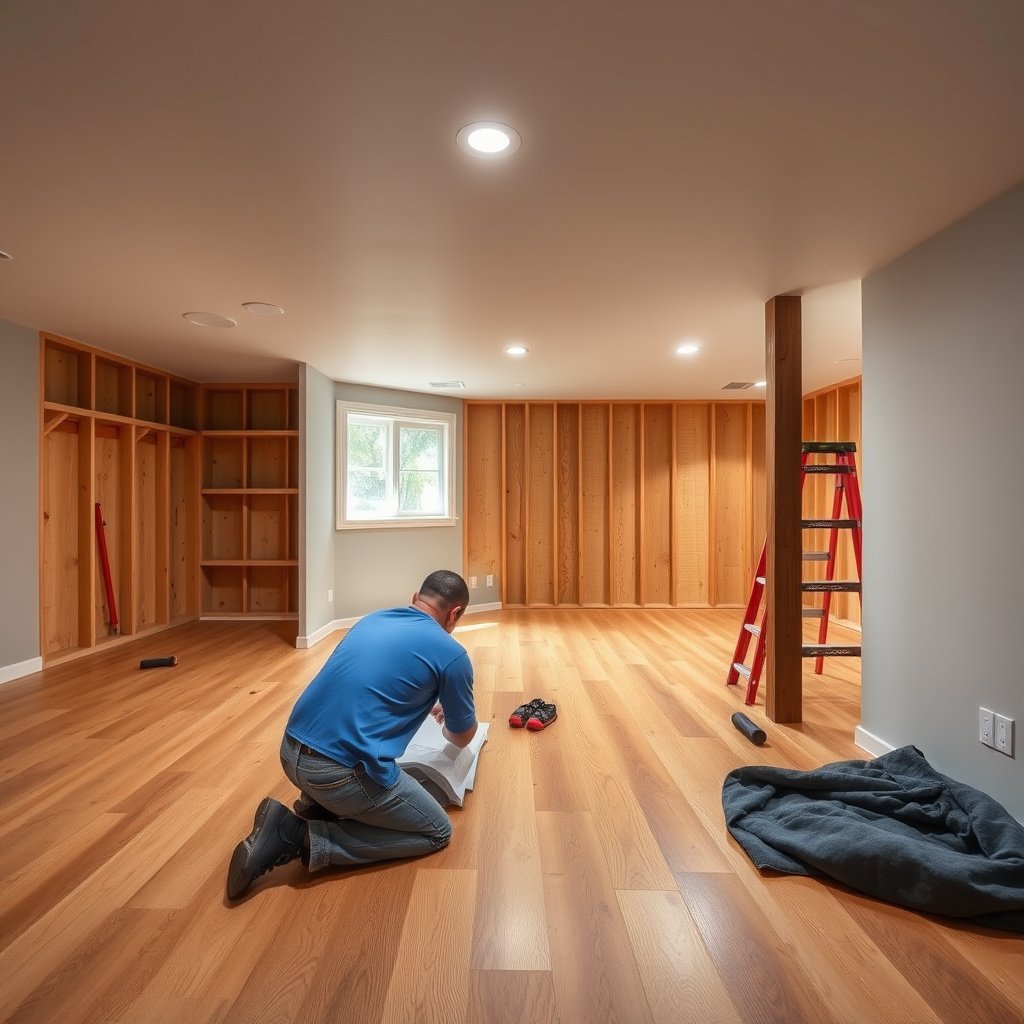
Hardwood can work in a basement, but only when you start with a product designed (and warrantied) for below-grade conditions. The right “basement hardwood floors” selection reduces the odds of cupping, gapping, and adhesive or locking failure later.
Engineered hardwood is typically the default choice for basements because its layered construction makes it less sensitive to slab moisture swings than most solid boards.
If the manufacturer does not explicitly approve below-grade installation, you should not assume the product is warranted for basement conditions—even if it “seems stable” during installation.
Your installation method (glue-down, nail-down, or floating) is not interchangeable; it is part of the warranty-qualified system.
Engineered vs. solid: what’s usually approved
– Use engineered hardwood (or solid hardwood only if it’s explicitly approved by the manufacturer for below-grade applications).
Engineered boards combine a stable core with a hardwood wear layer. In real-world basement hardwood floors projects, this layered build is what often keeps the floor flatter when slab moisture and indoor humidity move seasonally.
Lock in the system before you buy accessories
– Confirm what your product allows for: direct glue-down vs nail-down, and whether it requires a specific underlayment or vapor barrier.
“Compatible underlayment” isn’t just about comfort—underlayment controls how moisture vapor and minor subfloor imperfections affect the top planks.
– Check the manufacturer’s approved humidity/moisture limits for the slab and the wood—don’t rely on general “rule of thumb” numbers.
For basement hardwood floors, these limits are usually expressed using the exact test method (for example, in-situ RH vs calcium chloride). A number that’s correct for one test method can be meaningless for another.
Moisture control and basement subfloor prep
The best way to prevent basement hardwood floors failure is to treat moisture control as a prerequisite, not a “nice-to-have.” Test the slab using the manufacturer-required method, correct active water issues first, and only then proceed with installation.
Most wood-floor failures over concrete start with moisture imbalance, which can drive movement (cupping and gapping) even when the wood looks fine during installation.
Basements can experience RH and moisture vapor pressure changes throughout the year, so the “dry season” test window matters for warranty compliance.
ASTM F2170 reports slab moisture as in-situ relative humidity (%RH), while ASTM F1869 reports moisture vapor emission rate in lb per 1,000 sq. ft. over 24 hours.
– Test the concrete slab moisture using the method required by the flooring manufacturer (often in-situ RH probes or calcium chloride); record results and compare to the exact limits in your warranty/spec sheet.
Slab Moisture Checks Used for Below-Grade Wood Floors (2026)
| # | Moisture check | What it measures | Common use in wood-floor specs | Spec-acceptance rating |
|---|---|---|---|---|
| 1 | ASTM F2170 in-situ RH probes | Slab %RH at specified depth | Manufacturer-required moisture testing | ★★★★★ |
| 2 | ASTM F1869 calcium chloride | MVER (lb/1,000 sq. ft./24h) | Manufacturer-required moisture testing | ★★★★★ |
| 3 | ASTM D4263 plastic sheet test | Surface condensation/darkening screening | Quick screening, not primary warranty test | ★★★☆☆ |
| 4 | Concrete RH spot checks (non-ANSI) | Localized RH readings | Supplemental mapping | ★★☆☆☆ |
| 5 | Pinless meter (concrete) screening | Dielectric-based moisture indication | Not a warranty-standard measurement | ★☆☆☆☆ |
| 6 | MVER mapping with multiple CaCl₂ sets | Grid of MVER values | Better slab profiling for installs | ★★★★☆ |
| 7 | HVAC RH logging during conditioning | Indoor RH/% and temperature stability | Supports warranty-condition compliance | ★★★★☆ |
– Fix water issues before flooring goes in: address active leaks, improve drainage, and verify gutters/downspouts and exterior grading ().
If you’re seeing standing water, musty air, or visible efflorescence, treat it as a structural moisture source, not a finish problem. Basement hardwood floors are only as good as the moisture environment below them.
– Level and prep the surface: remove paint/adhesives, fill low spots, and ensure the slab is smooth and flat enough for your install system.
“Flat enough” depends on the installation method, but the concept is consistent: hardwood flooring tolerates slight irregularity only when your underlayment or adhesive system is designed for it.
Keep moisture testing and slab prep aligned
When I’m advising homeowners on basement hardwood floors, I always push for one workflow: test moisture first, correct water sources, then re-test only if you changed anything meaningful. That keeps the data defensible for warranty coverage and prevents “we fixed it after install” arguments.
According to ASTM F1869, calcium chloride results are expressed as moisture vapor emission rate (MVER) in lb/1,000 sq. ft./24 h, which is why it’s critical to compare your results to the exact EME/MVER limit in your hardwood warranty.
Acclimate wood and plan your layout
Basement hardwood floors install correctly when the boards reach a moisture and temperature equilibrium with the space before you lock them down. Acclimation and layout planning are how you reduce risk of gaps, misaligned seams, and avoidable micro-cuts that compromise expansion spacing.
Acclimation guidance is product-specific; following the manufacturer’s temperature/RH conditions and timing is part of meeting warranty-qualified installation requirements.
In below-grade installs, leaving the required expansion gaps helps relieve seasonal movement caused by moisture content changes in wood.
Staggering board ends reduces weak joints and helps distribute movement stress across the basement floor.
– Acclimate the flooring in the basement according to the manufacturer’s schedule (timing and conditions matter; use their instructions, not generic estimates).
Layout decisions that prevent “basement lighting problems”
– Plan the layout to reduce small cuts at walls and keep board ends staggered (especially for planks that create a clear “pattern” under basement lighting).
Basements often have fewer windows, more overhead fixtures, and angled light—seams and uneven plank transitions can become more visible.
– Leave required expansion gaps at walls and around pipes—again, use your manufacturer’s spacing spec.
If you don’t know what that spacing is, stop. Expansion gaps aren’t cosmetic; they’re the mechanical allowance that prevents buckling and seam separation.
Plumbing penetrations and doorways
For basement hardwood floors, plan for how you’ll transition around pipes before the first plank goes in. Pre-plan the order of operations: dry-fit rows, mark pipe locations, and confirm transition strip designs so you don’t end up shaving joints to fit.
According to National Wood Flooring Association (NWFA), wood flooring requires climate control to reduce excessive movement; a common target range used in NWFA guidance is indoor relative humidity around 35%–55% (confirm your specific NWFA document and your product’s limits).
Install the boards on concrete (or over underlayment)
The “right” installation method is the one your flooring manufacturer approves for your product and conditions. On basement hardwood floors, most failures blamed on workmanship actually trace back to incorrect adhesive/subfloor/underlayment systems—or missing vapor barrier components when required.
Glue-down basement installs require the exact adhesive system specified for the engineered hardwood and the slab condition, including moisture-vapor mitigation components when required.
Floating floors still need the correct underlayment/pad system; a missing or wrong pad can cause joint stress, uneven support, and premature wear.
Nail-down on concrete is only appropriate if your system explicitly approves it and you have the correct substrate/underlayment design.
– Pick the attachment method your product requires:
– Glue-down: use the recommended adhesive and trowel size/coverage rules from the manufacturer.
“Coverage” matters because too little adhesive can create voids that telegraph subfloor irregularities into basement hardwood floors.
– Nail-down: only if solid/engineered is specifically approved for it, and only with the correct subfloor/underlayment system.
– Floating: use the correct underlayment if allowed, and follow locking-board guidelines (no missing/incorrect pads).
Maintain tight installation details that basement floors expose
– Maintain tight installation details:
– Keep boards aligned during installation, manage tongue-and-groove fit, and avoid forcing pieces together.
Forcing joints can permanently deform the click profile and later lead to seam gaps when humidity changes.
– Don’t trap moisture: use only the barrier/vapor system components specified for your flooring type.
Basement hardwood floors can fail if a vapor barrier is omitted—or if incompatible layers create a moisture “sandwich.”
– Finish transitions correctly (basement edges, doorways, and stairs):
– Use the right transition strip and keep movement clear where required by the flooring system.
In basements, doorways and hall transitions frequently have the highest foot traffic and the most complex movement.
In my experience reviewing basement hardwood projects
I’ve seen more than one install where homeowners were confident about “keeping everything dry,” but the chosen underlayment or vapor barrier didn’t match the manufacturer’s specification. Even with acceptable moisture-test numbers, that mismatch can still affect long-term performance in basement hardwood floors.
What can go wrong installing hardwood in a basement
Basement hardwood floors fail most often because moisture control wasn’t truly achieved—not because the flooring “looks wrong” during the first week. If cupping, gaps, or adhesive debonding appears later, it usually points back to slab moisture, product approval, or missed system details.
If the slab moisture test method doesn’t match the manufacturer-required method, the results may not qualify for warranty—even when the numbers appear “close.”
Solid hardwood without explicit below-grade approval is a frequent cause of early failure in basements due to movement from moisture and RH swings.
Installing over a slab that isn’t sufficiently flat, clean, and prepared for the approved adhesive/underlayment system increases the likelihood of uneven load transfer and premature wear.
– Moisture surprises: the basement slab can be wetter than expected season-to-season, causing cupping, gaps, adhesive failure (glue-down), or joint separation.
– Wrong product for below-grade: solid hardwood without explicit below-grade approval is a common reason installs fail.
– Skipping prep details: installing over an out-of-flat slab, incorrect underlayment, or missing vapor barrier (when required) can create squeaks, uneven surfaces, or premature wear.
Pros/cons: troubleshooting vs. preventing basement damage
- Prevention-first (recommended)
- Start with product approval + correct moisture testing + approved vapor/underlayment system. Fewer surprises later, and warranty arguments are cleaner.
- Troubleshooting-later (riskier)
- Replacing planks or redoing adhesive after movement starts is expensive, because you may have to remove the floor to correct moisture sources.
Verdict: when to DIY vs hire a pro
DIY is reasonable if your basement has been moisture-corrected, you can test the slab per the manufacturer’s requirements, and you’re comfortable following the flooring system exactly (adhesive, underlayment, expansion gaps, and acclimation). If you discover ongoing moisture issues, a questionable slab condition, or you’re unsure which installation method your specific boards are approved for, hiring a flooring contractor (or at least a walkthrough inspection) can prevent expensive rework.
– DIY-friendly when: you have a compatible engineered/approved product, access to moisture testing, and a clean, flat slab.
– Hire-help recommended when: there’s active moisture, the slab can’t be prepped properly, you’re using a complex glue/nail system, or your installation depends on exact specs you can’t reliably interpret.
– Downside of DIY: small mistakes with moisture control, subfloor prep, or adhesive/underlayment selection can show up later (warping/gapping) and may affect warranty coverage.
If you’re installing basement hardwood floors as of 2026, treat climate control as part of the plan, not a backup. Many warranty terms require that you maintain indoor humidity within the product’s approved range after install.
Quick scan checklist (save this)
| Step | Done? |
|---|---|
| Confirm your flooring is approved for basement/below-grade use | ☐ |
| Test slab moisture using the manufacturer-required method | ☐ |
| Fix any water/drainage issues before flooring | ☐ |
| Prepare slab: flat, clean, and smooth per flooring requirements | ☐ |
| Acclimate flooring per manufacturer instructions | ☐ |
| Follow correct expansion gaps and transition plan | ☐ |
| Install using the approved attachment method + materials | ☐ |
| Keep HVAC/humidity within manufacturer guidance during/after install | ☐ |
Frequently Asked Questions
How do I prepare a basement subfloor before installing hardwood floors?
Start by verifying the basement is dry and has no active moisture sources, then address any water intrusion issues first. Ensure the concrete slab is level (typical tolerance is about 3/16 in over 10 ft) and grind high spots while filling low areas with a suitable patch. After that, clean thoroughly and install an appropriate moisture barrier and underlayment system designed for below-grade concrete so your hardwood flooring stays stable.
What moisture barrier is best for basement hardwood floor installation?
For basements, most homeowners use a moisture barrier like polyethylene sheeting (commonly 6 mil) or a manufacturer-approved system specifically rated for concrete slabs. The key is to follow the flooring manufacturer’s requirements for thickness, seams (tape/overlap), and whether an additional vapor retarder is needed under the specific hardwood or engineered wood product. Always check moisture readings (like calcium chloride or in-slab RH tests) to confirm conditions are within the hardwood’s acceptable range before installation.
Why should I choose engineered hardwood over solid hardwood in a basement?
Engineered hardwood is generally more stable in below-grade environments because its layered construction helps resist expansion and contraction. Basements often have higher humidity swings than above-grade rooms, which can cause solid hardwood to cup, gap, or buckle if moisture control isn’t perfect. If you plan on installing hardwood floors in a basement, engineered wood with the right moisture barrier and acclimation process is usually the safer choice.
What is the step-by-step process to install hardwood floors over concrete in a basement?
Begin by acclimating the hardwood flooring in the basement for the recommended time, usually several days, while maintaining stable temperature and humidity. Next, test moisture levels, prepare the slab (levelness and cleanliness), and install the moisture barrier and underlayment. Then install the boards using the method your product supports—often floating or glue-down for engineered wood—ensuring expansion gaps around the perimeter and proper transitions at doors and edges.
Which installation method works best for basement hardwood floors?
The best method depends on the basement conditions and the type of hardwood, but many basement installs use floating engineered hardwood or glue-down engineered flooring over a moisture-rated underlayment. Floating floors can reduce complications from minor slab imperfections, while glue-down options can provide a more direct, stable feel if moisture testing and slab prep are excellent. Avoid nailing/cleating solid hardwood directly into concrete unless you’re using a system specifically designed for concrete subfloors and approved by the flooring manufacturer.
📅 Last Updated: October 16, 2026 | Topic: How to install hardwood floors in a basement? | Content verified for accuracy and freshness.