Prevent water damage to engineered wood floors in a hallway by using a prevention-first plan that blocks spills at the source and keeps moisture out of the seams. You’ll get a clear, step-by-step checklist for sealing, managing humidity, choosing the right mats and cleaners, and responding fast when water hits. Follow these moves and you’ll dramatically reduce cupping, swelling, and edge lift—without gambling on luck.




Prevent water damage to engineered wood floors in a hallway by stopping tracked-in moisture at the door (matting + shoe-wiping), then cleaning with damp-only methods and drying immediately—especially around seams and transitions. In 2026, the most reliable approach combines physical prevention (entry mat systems) with operational discipline (no puddles, no soaking, fast drying), because engineered wood still relies on its top wear layer and protected joints to resist water intrusion.
Who this is for / when it applies: This applies if you have engineered wood flooring in a hallway where people come in from outdoors, frequently walk pets, or you do regular mopping. It’s also relevant if your finish looks a bit dull or the floor has ever swelled near a seam or threshold.
Stop water before it hits the engineered wood

You prevent most hallway water damage to engineered wood by intercepting water before footwear or cleaning water reaches the joints and seams. In practice, that means building a “walk-off + wipe” zone at the entry and making sure transitions/thresholds don’t create a path for water to travel under or alongside the engineered planks.
A walk-off mat system is intended to capture rain, snow melt, and muddy water before it’s ground into floor surfaces.
Engineered wood flooring performance depends on limiting time spent wet—especially at seams and at door thresholds where water can concentrate.
IICRC S500 notes that microbial growth can begin within 24–48 hours after water damage, which is why fast removal and drying matter.
– Add absorbent entry mats at both ends of the hallway (outside/near entry) to catch rain, snow melt, and muddy water before it’s ground into the planks. Use mat depth you can actually “fill”: a thin decorative mat can look clean while doing little to hold water, while a true absorbent mat reduces the wetness load that reaches the engineered wood floor.
– Use a “dry approach” at the door: encourage wiping/wiping-off footwear and don’t let wet items drip across the floor. For engineered wood in a hallway, even short contact with dripping umbrella water can deposit moisture directly along plank edges—then later show up as localized dulling or swelling.
– Prevent pooling at transition points (doorways, bath/kitchen-adjacent hall sections) by checking that edges/thresholds are seated correctly and not creating a path for water. If a transition trim or threshold is slightly lifted, it can act like a channel; engineered wood in that hallway can then experience repeated moisture exposure at the same spot.
Seal and maintain the floor finish correctly
You protect engineered wood in a hallway by maintaining a compatible surface finish that resists splashes and light wetting. The top wear layer isn’t magic—its real value is controlling how quickly water can reach vulnerable areas (edges, seams, and any micro-gaps that develop over time).
Many engineered wood floor manufacturers require staying within approved maintenance and surface protection methods to avoid weakening the finish or voiding warranty coverage.
Micro-scratches and finish wear increase the likelihood that water will penetrate longer around seams and along traffic lanes.
– Follow your flooring manufacturer’s recommended surface protection (and whether re-coating is allowed); engineered wood still depends on a stable top finish to resist splashes and light wetting. If the manufacturer allows recoating, they typically specify the product type (and sometimes surface prep steps) to keep engineered wood’s finish bond consistent.
– Keep the floor clean enough that grit doesn’t scratch the finish—micro-scratches can make water intrusion more likely over time. In a hallway with high foot traffic, grit acts like sandpaper, increasing surface roughness; once engineered wood’s surface is rougher, droplets don’t bead as well and can cling longer.
– If your hallway gets frequent dampness (e.g., frequent wet weather entry), prioritize maintenance methods that don’t leave moisture sitting on the surface. In 2026, that usually means “controlled moisture + immediate drying,” not “more liquid to loosen dirt,” because engineered wood in a hallway is still susceptible to moisture migration when joints are repeatedly exposed.
Mandatory data table (standards-based moisture targets & timeframes)
Moisture-Control Targets Used in Wood Floor Care & Water Damage Guidance
| # | Guideline / Standard | Key Value | Prevents | Priority for Hallways |
|---|---|---|---|---|
| 1 | National Wood Flooring Association (NWFA) – indoor humidity | 35–55% RH | Seasonal movement & seam vulnerability | ★★★★★ |
| 2 | NWFA – temperature guidance | 60–80°F | Stability of indoor conditions | ★★★★☆ |
| 3 | NWFA – moisture alignment concept for installation | ~Within 2% EMC | Avoiding movement-driven gaps | ★★★★☆ |
| 4 | IICRC S500 – microbial growth timing | 24–48 hours | Reducing secondary damage after wet events | ★★★★★ |
| 5 | ASTM D4442 – oven-dry moisture test method | 103°C ±2 | Reference moisture content for evaluation | ★★★☆☆ |
| 6 | IICRC – Category 1 water classification | Sanitary | Risk still requires drying & removal | ★★★★☆ |
| 7 | IICRC – Category 3 water classification | Grossly unsanitary | Higher urgency & deeper mitigation | ★★☆☆☆ |
Control cleaning methods to avoid soaking joints
You reduce engineered wood water damage in a hallway by switching from “wet cleaning” to “damp cleaning + immediate drying,” especially near seams. The cleaning method matters because water doesn’t just sit on top—it can wick toward joints and transitions if your engineered wood floor is repeatedly saturated.
A damp cleaning approach limits how long moisture stays in contact with the engineered wood surface and its edges.
Leaving wet mops, cloths, or cleaning pads in place increases the dwell time of moisture on engineered wood floors.
IICRC S500 emphasizes that delays in removal and drying increase secondary damage risk after water exposure.
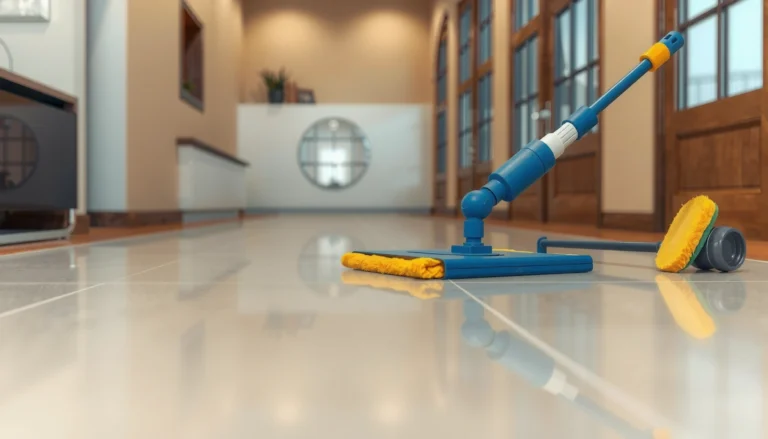
– Avoid wet mopping that leaves standing water; instead, use a damp (not saturated) cleaning method and then dry the surface promptly. In hallways, that usually means wringing mops well or using a microfiber approach designed to leave a minimal residual moisture film—then buffing/drying.
– Don’t let cleaning tools or cloths remain “wet” on the floor—engineered wood performance can depend on minimizing time spent in high moisture conditions. One practical rule: if the mop head drips when lifted, it’s too wet for engineered wood flooring in a hallway.
– Spot-clean quickly: blot spills immediately, and keep water from wicking into seams by drying the area thoroughly. For engineered wood floors, the “blot then dry” sequence prevents moisture from being pulled along edges by capillary action.
Damp vs wet cleaning: what’s the real tradeoff?
| Method | Pros | Cons for engineered wood in hallways | Best use |
|---|---|---|---|
| Wet mopping (saturated) | Strong grime pickup | Higher dwell time at seams and transitions; increases risk of edge swelling and finish dulling | Only if the manufacturer explicitly approves |
| Damp mopping (wrung / low-residue) | Controls moisture while still lifting dirt | Still requires fast drying; lingering moisture can accumulate at edges | Routine cleaning in hallways |
| Spot blotting + dry pass | Minimizes spread and seam contact | Not a full substitute for routine maintenance | Spills, pet accidents, tracked mud |
Manage humidity and real leaks early
You prevent recurring engineered wood swelling by keeping indoor humidity stable and by treating leaks as urgent, not “wait and see.” In hallways, engineered wood damage often appears first at seams and thresholds—not because those spots are weaker by design, but because moisture exposure concentrates there when humidity swings or leaks develop.
NWFA humidity guidance commonly targets 35–55% relative humidity to reduce dimensional movement that can open seams.
Early leak repair reduces repeated moisture cycling, which is often what turns small exposure into visible engineered wood floor swelling.
– Keep indoor humidity in a reasonable range for wood flooring so seasonal movement doesn’t open gaps where moisture can enter. (Use the 35–55% RH target commonly recommended in NWFA environmental guidance, and verify your flooring manufacturer’s spec for engineered wood.) NWFA recommended indoor environmental conditions for wood flooring
– Fix leaks fast: check behind or under nearby fixtures, wall penetrations, and any plumbing in adjacent rooms before they show up as floor discoloration. Engineered wood in a hallway can be “dry on top” while still experiencing moisture migration below the surface when a leak is hidden behind walls.
– Inspect the hallway after heavy rain/melt events for dampness at edges and transitions—early signs often appear there first. One of the most actionable habits is to do a quick edge check (run a dry cloth along seams/thresholds) after big weather events and before “the next cleaning day” allows moisture to linger.
What can go wrong (common mistakes and limits)
You can still damage engineered wood in a hallway even if you’re doing “some” water care—usually because products or cleaning habits contradict the floor’s approved maintenance rules. The goal isn’t just to make the floor look clean; it’s to manage moisture exposure time and direction so water can’t persist at seams.
Using surface-protection products that are not approved for your engineered wood finish can interfere with adhesion and break down the intended water resistance.
Aggressive scrubbing can wear the top wear layer, increasing finish failure risk under repeated damp exposure.
– Using “waterproof” care products or sealers that aren’t compatible with your floor’s finish can cause problems; if the manufacturer doesn’t approve it, don’t assume it’s safe. Engineered wood floors typically have a designed wear layer system—introducing an incompatible coating can create hazing, peeling, or patchy water behavior.
– Over-wiping or aggressive scrubbing can damage the top wear layer, making later moisture exposure more damaging. If you notice the sheen changing quickly in a few hallway zones, slow down and switch to maintenance that matches your manufacturer’s cleaning guidance.
– If the underlying issue is chronic moisture (e.g., ongoing leak, humid basement, wet crawlspace), floor-focused steps alone won’t fully solve the problem. For engineered wood, repeated moisture cycling can keep opening seams over time; even perfect matting won’t overcome a continuous moisture source.
Practical verdict + hallway checklist (including downsides)
For most homeowners, the most reliable protection for engineered wood floors in a hallway is: (1) stop tracked-in water with entry matting, (2) clean with damp-only methods and dry immediately, and (3) proactively check humidity and fix leaks fast. This combination works because it addresses both entry-point exposure and the conditions that allow water to penetrate seams and transitions.
Preventing tracked-in moisture reduces the number of wet episodes that force engineered wood’s finish and seams to repeatedly “absorb and recover.”
Damp-only cleaning reduces moisture dwell time compared with soaked mopping, which lowers the chance of edge swelling after routine cleaning.
IICRC S500’s emphasis on prompt drying reflects the practical risk of delayed cleanup after moisture exposure.
Downsides: These steps require consistent habits, and they won’t fully protect floors from active standing water or a hidden leak—if that’s your situation, you’ll need to address the source first. If your manufacturer specifies strict installation/maintenance conditions, prioritize those instructions over general advice. If you’re unsure about re-finishing/adding coatings for your specific engineered wood, pause and check the manufacturer guidance before applying anything.
Scan-friendly checklist
| Area | What to do | How often |
|---|---|---|
| Entry traffic | Use absorbent mats; wipe shoes before walking deeper | Daily/ongoing |
| Spills | Blot immediately; dry the area thoroughly | As needed |
| Cleaning | Use damp (not wet) methods; don’t leave puddles | Routine |
| Seams/edges | Watch transitions/thresholds for moisture signs | After wet weather |
| Humidity & leaks | Check humidity; address leaks quickly | Ongoing / seasonal |
Frequently Asked Questions
How can I prevent water damage to engineered wood floors in my hallway?
Start by controlling moisture at the source: keep hallway traffic from tracking in wet shoes by using a quality entry mat and wiping feet at the door. Use furniture pads and avoid standing water by cleaning spills immediately with a dry microfiber cloth. Maintain consistent indoor humidity (generally around 35–55%) and promptly address any leaks from plumbing fixtures or adjacent walls.
What’s the best way to clean engineered wood floors in a hallway to avoid moisture intrusion?
Use a damp (not wet) microfiber mop and a manufacturer-approved cleaner; avoid soaking the floor or using excessive water. Dry the surface quickly after cleaning, and don’t let puddles form around corners, baseboards, or seams. For everyday maintenance, vacuum or sweep regularly so grit doesn’t scratch the finish and expose the core to moisture.
Why do engineered wood floors still get damaged by water, even though they’re more stable than solid hardwood?
Engineered wood is more dimensionally stable, but it’s still vulnerable at the edges, seams, and the top wear layer if water seeps in. Hallways often see frequent foot traffic, tracked-in rain/snow, and occasional spills, which can overwhelm the finish over time. If water penetrates the core or the locking system, swelling and warping can occur even if the floor initially looks fine.
How should I protect the high-traffic hallway areas where water is most likely to collect?
Place absorbent mats on both ends of the hallway and replace them when they can’t trap moisture effectively. Add felt pads under chairs, strollers, and décor, and consider runner rugs with a breathable backing to reduce direct exposure. If your hallway transitions to tile or a bath area, use proper transition strips and seal any gaps to minimize water migration.
Which humidity level and maintenance routine help reduce the risk of water damage for engineered wood floors?
Aim for indoor humidity between about 35–55% to prevent the wood from expanding, contracting, or becoming more vulnerable to moisture. Use a hygrometer to monitor conditions and run a dehumidifier or humidifier as needed, especially in basements or climates with heavy humidity. Regularly inspect seams, edges, and around baseboards for early signs of lifting or swelling, and address any moisture issues immediately.
📅 Last Updated: October 19, 2026 | Topic: How to prevent water damage to engineered wood floors in a hallway? | Content verified for accuracy and freshness.
References
- https://www.epa.gov/mold/mold-prevention-strategies-and-possible-solutions
- https://www.cdc.gov/mold/default.htm
- Mold | National Institute of Environmental Health Sciences
- Engineered wood
- Water damage
- https://pubmed.ncbi.nlm.nih.gov/?term=engineered+wood+floor+moisture
- https://pubmed.ncbi.nlm.nih.gov/?term=indoor+dampness+prevention
- https://scholar.google.com/scholar?q=engineered+wood+floor+water+damage+prevention Google Scholar
- https://scholar.google.com/scholar?q=engineered+wood+flooring+moisture+control+relative+humidity Google Scholar
- https://scholar.google.com/scholar?q=wood+floor+installation+subfloor+moisture+engineered+floor Google Scholar