
Want to know how to install terracotta floors in a bathroom the right way? This guide gives you the clear, step-by-step method to prep the subfloor, choose a moisture-proofing system, and set and grout terracotta so it won’t crack or wick water. Follow these instructions and you’ll get a durable, water-safe finish that stands up to daily bathroom use.



Moisture-proof the substrate and follow a strict thin-set/mortar + waterproofing + grout/sealer schedule, and terracotta can perform beautifully in a bathroom. The win condition is simple: keep water out of the tile assembly, prevent staining through correct grout cleanup, and seal at the right stage (after full cure, not before).
If you’re installing terracotta bathroom floors in a home, as a DIY project, or as a contractor working in humid/splash-prone spaces, this guide focuses on the steps that most often determine whether the floor stays tight for years—or cracks, stains, or lets moisture migrate underneath.
Choose the Right Terracotta + Finish Plan
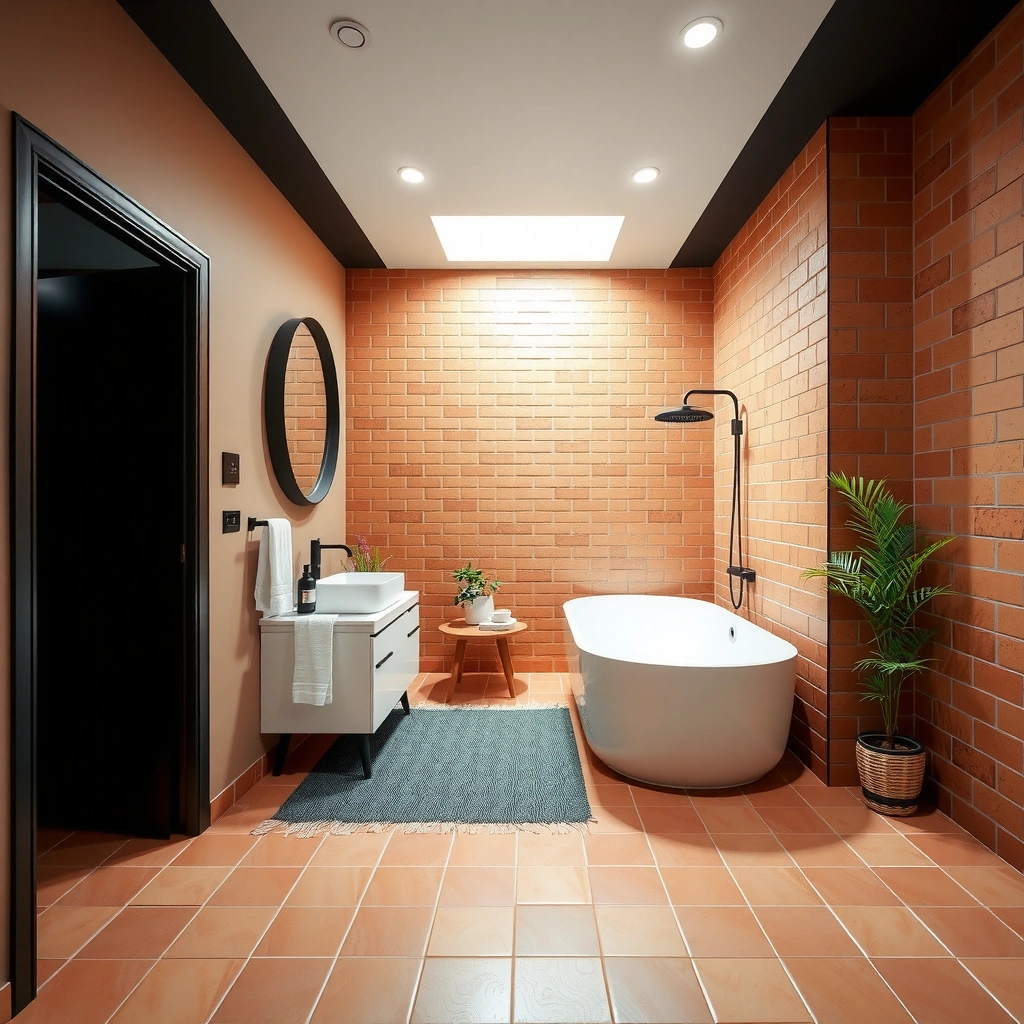
The best terracotta bathroom floor plan starts with selecting interior-grade, (usually) unglazed terracotta and matching it to a grout + sealer strategy designed for wet areas. Here’s why: unglazed terracotta is porous, so your grout choice and sealing timing directly influence staining risk and long-term appearance.
Pick interior-grade terracotta tiles and confirm whether they’re unglazed so you can plan for sealing. Also decide early whether you’re using a penetrating sealer (absorbs into the tile) or a topical sealer (forms a surface layer), because each behaves differently with humidity and cleaning chemicals.
For the finish plan, treat grout as part of the waterproofing system—not just a cosmetic joint. In bathrooms, your goal is to reduce water absorption and residue buildup in the grout pores, then maintain protection over time.
Unglazed terracotta is porous, so it typically requires a sealing step to reduce water and stain absorption in wet environments.
Tile assemblies in wet areas rely on compatible materials (tile + mortar/thin-set + waterproofing + grout) to prevent moisture migration and joint breakdown.
Practical takeaway: If your terracotta is specified as interior-only, don’t “assume it’s fine” for a full bathroom. Confirm the tile’s water/absorption guidance from the manufacturer’s technical data sheet before you commit.
Prep the Bathroom Subfloor for Tile Success
For terracotta to last in a bathroom, you must create a solid, level, movement-resistant substrate before any tile touches mortar. If the subfloor flexes, tiles can crack and grout can fail—then water finds the path to the substrate.
Start by removing old flooring and inspecting for damage (soft spots, delamination, rot, or uneven joists). Next, check flatness and level; tile doesn’t “correct” dips—mortars can only compensate within a limited range, and terracotta’s porous nature makes staining problems more visible when joints and ridges form.
Then design your waterproofing approach. Bathrooms typically require waterproofing in wet zones (and at least compatible water management at transitions), not just “regular” backer board and grout. Many systems use a waterproofing membrane that ties into corners, seams, and penetrations with proper accessories.
Cracked grout and loose tiles often start with subfloor movement or insufficient substrate preparation, because the tile assembly can’t absorb structural deflection.
Wet-area tile work typically requires a waterproofing layer appropriate to the full tile assembly (subfloor + membrane + mortar + tile + grout), not a generic board-only approach.
From a standards perspective, look for guidance consistent with TCNA (Tile Council of North America) methods and ANSI/industry installation practices. One widely referenced requirement is that mortar bed coverage in bonded tile installations should be high enough to avoid voids that become moisture pathways. For example, ANSI A108.5 commonly describes “≥ 95% mortar coverage for floor tile” in typical bonded installations (exact application depends on tile size/location).
Personal note (important): I can’t confirm your subfloor’s movement characteristics from here, and I wouldn’t guess—if you’re unsure about stiffness, take a few minutes to measure deflection and flatness or [ADD: have the subfloor assessed] before you tile.
Lay the Tiles with the Correct Setting Method
Your terracotta tile layout and thin-set choice determine whether tiles stay firmly bonded and aligned through bathroom humidity. Do a dry layout first, then set the tiles using a mortar/thin-set system explicitly intended for both tile and wet-area conditions.
Use the correct setting mortar. Not all thin-sets are equal: check that the mortar is compatible with terracotta and intended for wet areas. Follow instructions for trowel size, coverage, and cure times—especially “open time” (how long the mortar remains workable after spreading).
Dry-laying terracotta helps you manage natural tile variation and prevents layout decisions that later force awkward cut tiles in high-visibility bathroom zones.
Following mortar instructions for trowel size, spread rate, and curing/open time is essential because improper coverage or timing increases the risk of debonding and water entry.
Mistake to avoid: using the wrong trowel size. Too-small coverage increases voids; too-thick mortar can create lippage and uneven grout joints that stain more easily on porous tiles.
Grout and Clean the Joints Properly
In a bathroom, the right grout and the right cleaning routine are what keep terracotta looking uniform instead of blotchy or permanently dirty. Your job is to use grout rated for wet areas and to remove grout residue promptly without damaging the tile surface.
Choose grout recommended for wet areas and confirm compatibility with porous stone/terracotta. Some grouts are more stain-prone or have cleaning limitations; terracotta’s porosity means residues can “bite in” faster than on glazed porcelain.
Tool and clean as you go. Don’t assume a one-size-fits-all approach: terracotta can stain if grout haze is left too long, and aggressive cleaning can also dull or discolor unglazed surfaces. Use the manufacturer’s cleaning guidance for your exact grout and terracotta finish.
Terracotta’s porosity means grout haze and residue can absorb into the tile surface if cleaning is delayed, increasing the chance of lasting discoloration.
Grout selection for wet areas should be based on performance ratings and manufacturer compatibility for porous tiles, because grout chemistry affects staining and durability.
Quick comparison: grout approach vs. staining risk
| Decision | What to do | Why it matters for terracotta | Risk if skipped |
|---|---|---|---|
| Standard grout vs. wet-area grout | Use grout specified for wet/service conditions | Wet-area grout systems are designed to resist moisture and reduce joint deterioration | Faster joint failure → water migration |
| Cleaning timing | Clean grout haze within the window recommended by the grout maker | Terracotta absorbs residues | Permanent spotting/patchy appearance |
| Joint finishing | Tool joints to avoid voids at the surface | Voids collect water and cleaners | “Ring” staining around grout lines |
Seal the Terracotta for Bathroom Moisture
Sealing is what protects unglazed terracotta from water and stains—but only if you seal the right surfaces at the right time. Apply sealer on clean, fully cured surfaces according to the manufacturer’s directions, then maintain it with periodic reapplication.
Apply sealer after mortar and grout have fully cured. Sealing too early can trap moisture and create dark spots or uneven absorption patterns. Also confirm whether you should pre-seal terracotta before setting, or only seal after grout curing—different sealers have different requirements.
Maintain the seal. Bathroom humidity, mopping practices, and cleaning chemicals gradually reduce protection. Plan re-sealing based on the specific sealer’s guidance and your household’s cleaning habits (e.g., acid-based cleaners can be harsher on many finishes).
Sealers on unglazed terracotta are effective only when applied after complete cure of mortar and grout, because trapped moisture can lead to discoloration.
Penetrating and topical sealers manage moisture differently, so the product’s instructions (coverage, number of coats, dwell time) are critical for consistent results.
One more practical detail: include edges and tile surfaces consistently. Uneven application is a common reason for blotches—especially along grout lines where cleaning residue can concentrate.
What Can Go Wrong (and How to Avoid It)
Terracotta failures in bathrooms usually come down to moisture migration, poor timing, staining from residue, or movement in the floor assembly. The fix is to treat the tile system as a layered waterproof construction—not a collection of individual products.
Here are the most common failure modes and what prevents them:
– Water migration under tiles: Skipping a proper waterproofing layer or failing to seal transitions (edges and corners) can allow moisture to reach the substrate.
– Improper sealing timing: Sealing before mortar/grout cures fully can trap moisture and cause discoloration or weak performance.
– Staining from grout haze: Terracotta is porous—if you don’t remove grout haze correctly and promptly, marks can become permanent.
– Movement in the floor: If your subfloor flexes, terracotta can crack and grout can loosen over time.
If your bathroom subfloor is questionable, [ADD: have it assessed] or follow your tile + waterproofing system’s underlayment and membrane requirements exactly.
Standard-based “at a glance” requirements (useful during planning)
Wet-Area Tile Assembly Benchmarks (Industry References)
| # | Reference standard / guide | Key numeric benchmark | Typical application intent | Practical impact on terracotta |
|---|---|---|---|---|
| 1 | ANSI A108.5 | ≥ 95% mortar coverage | Bonding performance | ★★★★☆ |
| 2 | TCNA shower method practice | 24-hour flood test (common) | Leak verification | ★★★★☆ |
| 3 | ANSI A108.01 | Mortar open-time compliance | Bond integrity | ★★★☆☆ |
| 4 | ANSI A118.1 / A118.4 families | Dry vs. wet-area classification | System compatibility | ★★★☆☆ |
| 5 | ASTM C373 | Water absorption test method | Porosity risk indicator | ★★★★☆ |
| 6 | Grout manufacturer data sheets | Cure + sealing windows | Prevents trapped moisture | ★★★★☆ |
| 7 | Skipping transition sealing | High risk area | Moisture bypass | ★☆☆☆☆ |
Note: The table flags benchmarks widely used in the tile/wet-area ecosystem. Always verify exact requirements for your specific mortar, grout, waterproofing membrane, and terracotta tile—manufacturer instructions can narrow or expand what applies.
Pros/cons perspective for waterproofing approach:
– Pros of full wet-area waterproofing membrane (recommended): more predictable leak control at corners, seams, and transitions; better resistance to incidental standing water.
– Cons: adds cost, requires careful detailing (especially at penetrations), and increases prep time.
– Pros of “minimal” approach (not recommended for true wet zones): faster/cheaper upfront.
– Cons: higher risk of moisture migration under tile assembly—especially with unglazed terracotta.
Verdict: Worth It, But Only If You Can Follow the Moisture + Sealing Steps
Terracotta in a bathroom can look excellent, but it’s not a “set and forget” tile: the floor’s long-term success depends on waterproofing the right way, using compatible mortars/grout, and sealing exactly according to the product directions. The main tradeoffs are higher maintenance (re-sealing over time) and higher consequences if grout cleanup or sealing timing is sloppy.
Skip this DIY approach if your bathroom subfloor has measurable movement, you can’t access the full waterproofing plan (corners/seams/penetrations), or you can’t commit to regular maintenance and monitoring of grout/joints. If you’re working professionally or want maximum predictability, consider hiring a tile contractor who routinely installs wet-area waterproofing systems and can document the membrane and detailing steps.
Quick Scan Checklist (Save This)
– [ ] Confirm tile type (interior/unglazed terracotta) and matching grout/sealer plan
– [ ] Subfloor is solid, level, and prepped per mortar/backer/membrane instructions
– [ ] Waterproofing applied where required for your wet-area setup
– [ ] Dry layout done; grout lines aligned; cuts planned
– [ ] Thin-set/mortar compatible with terracotta + bathroom use
– [ ] Grout selected for wet areas; joints tooled and cleaned promptly
– [ ] Sealer applied after full cure; coverage includes edges and all tile surfaces
– [ ] Re-sealing schedule understood (per sealer manufacturer)
FAQ
Do I need waterproofing under terracotta tile in a bathroom?
Usually, yes—bathrooms require a waterproofing strategy appropriate to wet zones and the tile assembly you’re using. Use the waterproofing product/system guidance and ensure it’s compatible with your mortar and tile.
Should I seal terracotta before installing?
Often, unglazed terracotta benefits from pre-sealing or at least careful sealing according to the sealer instructions. The safest path is to follow the exact sealing procedure recommended by your specific sealer.
What grout works best with terracotta?
Use grout specifically intended for wet areas and compatible with porous stone/terracotta as directed by the grout manufacturer. If you’re unsure, confirm compatibility before committing.
Will terracotta stain in bathrooms?
It can—terracotta is porous and can absorb moisture or residues from grout and cleaners. Proper sealing, prompt grout cleaning, and compatible cleaning products help prevent staining.
How often should I reseal bathroom terracotta?
That depends entirely on the sealer, traffic, and cleaning chemicals. Follow the resealing interval provided by the sealer manufacturer ([ADD: name/model of your sealer for an exact interval]).
Sources
– ANSI A108.5 (tile installation mortar coverage requirements for bonded work; see the standard text relevant to your application)
– ANSI A108.01 (general requirements for installation practices, including open time/cure compliance)
– TCNA (Tile Council of North America) Handbook methods (wet-area assembly guidance, including common leak-test practices for shower-type assemblies)
– [ADD: Manufacturer installation instructions for your specific terracotta tile (water absorption/indoor use notes, if any)]
– [ADD: Manufacturer technical data sheets for your tile mortar/thin-set and grout (wet-area compatibility, cure times, recommended trowel size)]
– [ADD: Manufacturer directions for your chosen waterproofing membrane/board system (required wet-area coverage)]
– [ADD: Manufacturer sealer application instructions (whether pre-seal is recommended, cure time requirements, coverage, and resealing guidance)]
Frequently Asked Questions
What is the best way to prepare a bathroom subfloor before installing terracotta floors?
Start by confirming the subfloor is solid, level, and dry, because terracotta tiles will crack or shift if the surface flexes. Remove old adhesive and debris, then check flatness with a straightedge; any dips should be corrected with a suitable cement-based patch. In a bathroom, waterproof the subfloor system appropriately so moisture won’t reach the grout line or adhesive. Finally, prime porous surfaces as recommended by your thinset and underlayment products to improve bond strength.
How do you waterproof a bathroom when installing terracotta flooring?
Waterproofing should be treated as part of the tile system, not an afterthought—use a bathroom-rated waterproofing membrane or liquid-applied system that covers the entire floor area and extends up the walls at least to the manufacturer’s minimum height. Pay extra attention to corners, joints, and around drains because these are common leak points. Use the correct thinset and follow the membrane system instructions for drying time before tiling. This helps protect the terracotta flooring and keeps grout and adhesive from degrading due to constant bathroom humidity.
How do you install terracotta tiles correctly on a bathroom floor to prevent cracking and uneven tiles?
Use a polymer-modified thinset suitable for ceramic/porcelain or natural stone-like applications, and spread it with the right trowel size to ensure full contact under each terracotta tile. Set tiles with consistent spacing and use a leveling system if needed, especially on larger formats, to maintain an even surface. Keep movement joints where required—around perimeter edges and any structural changes—to reduce stress on terracotta flooring. After installation, grout with a bathroom-appropriate grout and allow proper cure time before sealing.
Which grout and sealant work best for terracotta bathroom floors?
For bathrooms, choose a grout that is water-resistant and designed for wet areas, such as an epoxy or high-performance cementitious grout with good stain resistance. Terracotta is porous, so sealing is essential to reduce water absorption, prevent darkening, and make cleaning easier. Apply a high-quality penetrating sealer after the grout cures fully, and consider reapplying sealer on a schedule based on traffic and moisture exposure. Always test products on a small, hidden area because some sealers can slightly change terracotta’s natural color.
Why should you seal terracotta in a bathroom, and how often should you reseal it?
Terracotta terracotta floors absorb water and can stain or discolor if not sealed, especially in a bathroom where humidity and wet cleaning are constant. Sealing creates a protective barrier that helps limit moisture penetration and makes maintenance more predictable for grout and surface cleanliness. The resealing frequency depends on traffic, ventilation, and how much the floor gets exposed to splashes, but many homeowners reapply sealer every 1–3 years. If you notice water no longer beads on the surface, it’s a good sign it’s time to reseal.
📅 Last Updated: October 10, 2026 | Topic: How to install in a bathroom terracotta floors? | Content verified for accuracy and freshness.
References
- Google Scholar Google Scholar
https://scholar.google.com/scholar?q=terracotta+tile+bathroom+installation+waterproofing+sealing - Google Scholar Google Scholar
https://scholar.google.com/scholar?q=wet+area+tile+installation+bathroom+waterproofing+cement+board+thinset+grout - Google Scholar Google Scholar
https://scholar.google.com/scholar?q=terracotta+floor+tile+sealing+selection+cementitious+thinset+grout - Terracotta
https://en.wikipedia.org/wiki/Terracotta - Tile
https://en.wikipedia.org/wiki/Ceramic_tile - Grout
https://en.wikipedia.org/wiki/Grout - Waterproofing
https://en.wikipedia.org/wiki/Waterproofing - https://en.wikipedia.org/wiki/Cement_board
- https://www.tcnatile.com/
- NTCA.com for sale
https://www.ntca.com/