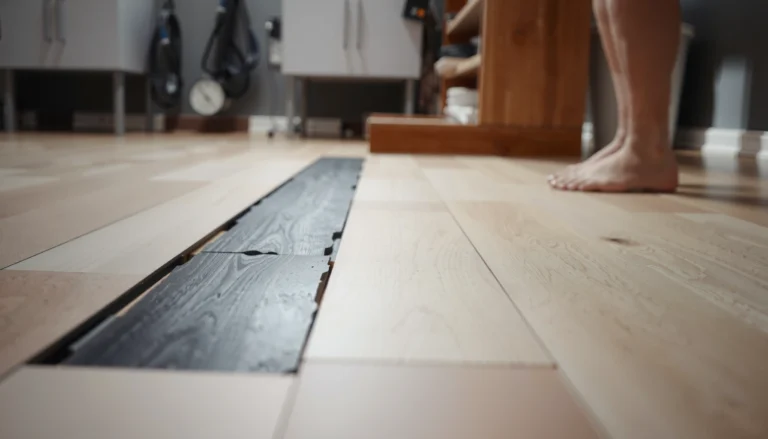
Water damage on engineered wood floors doesn’t have to end in replacement—if you act fast and follow the right drying and repair steps, you can often restore the surface. This step-by-step guide answers how to fix water damage on engineered wood floors, from assessing the extent to drying without warping and handling swollen planks. You’ll learn exactly what to save, what to replace, and how to prevent the damage from coming back.




If engineered wood floors get wet, the fastest way to prevent permanent cupping and swelling is to dry them immediately and keep indoor humidity under control. Then you inspect what layers were affected, remove any damp underlayment/materials, and choose between drying/spot repair, section replacement, or professional restoration.
If this is a spill, leak, or flooding event in your home, the steps below focus on practical, homeowner-safe actions you can do right away—plus the decision points that determine whether DIY is realistic or whether a flooring restoration pro should take over. As of 2026, the core guidance remains the same across the major moisture/water-damage standards: moisture must be removed quickly, and drying has to reach the subfloor/underlayment, not just the surface.
Stop the water source and remove wet materials fast
Stop the leak first, because no amount of drying will fully fix damage that continues to soak the floor. Then remove standing water and any items that hold moisture (rugs, pads, wet underlayment, or trapped water at edges) so evaporation and airflow can actually work.
– Shut off the leak or stop the source before you start drying. Prioritize water control for plumbing supply lines, toilets, dishwashers, refrigerators, water heater pans, and any roof/wall intrusion.
– Remove standing water using towels/wet-dry vacs (where safe), and lift damp rugs and their pads immediately.
– Pull moisture from transitions: check around thresholds, under door edges, and at baseboard lines where water often migrates under the flooring.
– If the floor is installed over carpet padding or has foam underlayment, remove/replace anything that’s been soaked—trapped moisture drives mold risk.
What counts as “wet enough” to act immediately?
Act fast if the spill reached seams, the floor feels cool/damp to the touch, or you notice rising edges. Even “small” leaks can create a larger problem because engineered wood’s wear layer can look intact while moisture has already migrated into joints and underlayment.
Common early indicators (act now):
– Boards are darker than surrounding areas and edges look raised
– You see bubbles or peeling in the finish
– Odor appears within a day (musty, sour, or “wet cardboard” smell)
– Baseboard gaps show evidence of moisture wicking
Dry engineered wood floors correctly (don’t rush the wrong way)
Drying engineered wood is about controlled moisture removal—airflow and dehumidification—rather than blasting heat that increases movement. The goal is to dry evenly so the planks stabilize back toward their original shape.
– Use airflow and dehumidification: run fans to move air across the surface and use a dehumidifier to reduce humidity in the room.
– Avoid excessive heat that can cause additional movement. Controlled drying beats “hot air blasting,” especially on planks that are already swollen.
– Keep the HVAC and ventilation strategy stable: rapid changes in temperature/relative humidity can drive expansion/contraction and worsen gaps.
– Monitor progress daily: watch for continued cupping/edge lift and track whether the room’s humidity is dropping.
A practical, homeowner-friendly drying setup
If you’re DIYing, the setup matters more than the number of fans. A typical approach is:
– Fans: aim for steady airflow across the floor plane (not directly at extreme angles that could create localized hot spots).
– Dehumidifier: sized to your room and capable of pulling moisture continuously.
– Temperature: keep it comfortable—generally avoiding extreme heat spikes unless your flooring manufacturer specifically allows it.
[ADD: exact dehumidifier sizing guidance or target room RH/temperature recommendations from your flooring manufacturer or an authoritative source, if you want to include exact numbers.]
Inspect for damage type: surface swelling vs. deeper moisture
Not all “wet floor” damage is the same—some engineered wood swelling is superficial, while other cases involve underlayment and subfloor moisture. Inspecting correctly determines whether drying will reverse the damage or whether boards must be replaced.
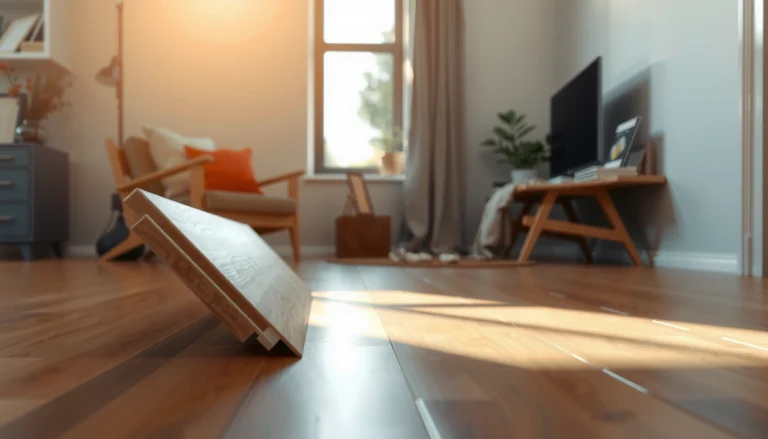
– Look for visible cupping, raised seams, bubbling finish, gaps, or edges that don’t sit flat.
– Check for softness: if any boards feel spongy or unusually flexible, moisture likely reached deeper layers.
– Determine whether moisture reached the subfloor/underlayment (common with leaks), because engineered wood typically needs subfloor dryness before it can be repaired.
What to check, in order
1. Surface condition: finish clouding, scuffs, or peeling points to water staying long enough to affect the top film.
2. Panel geometry: cupping/“crown,” seam separation, and plank “tenting” suggest the planks and/or underlayment absorbed moisture.
3. Edge behavior: if the floor has lifted near transitions (doorways, baseboards), moisture likely traveled under the planks.
4. Olfactory clue: a musty odor after drying often signals moisture remained where you can’t see.
Decide on repair vs. replacement
You should repair only when the wear layer and the assembly are still recoverable after drying; otherwise, replacement prevents recurring warping and future separation. If subfloor/underlayment moisture remains, “flattening and hoping” can fail.
– Minor surface issues (finish clouding or small localized swelling) may be treatable with cleaning and refinishing—only if the planks are stable after controlled drying.
– If boards have warped beyond normal settling, show separation, or if subfloor moisture stayed damp, plan for board/section replacement.
– Consider professional restoration when the affected area is large, the leak was long-lasting, or multiple rooms were impacted.
Repair vs. replacement: a clear comparison
| Feature | DIY repair after drying is usually OK when… | Replacement/Pro restoration is usually safer when… |
|---|---|---|
| Finish damage | Clouding only, no lifting/peeling seams | Bubbling, peeling, or widespread delamination |
| Flatness | No persistent cupping after drying stabilizes | Boards stay crowned or “rock” when stepped on |
| Seams | No recurring gapping under normal room RH | Joints remain separated or reopen repeatedly |
| Edged transitions | Moisture limited to top layers near the spill | Moisture signs at thresholds or baseboard lines |
| Hidden moisture | You can confirm underlayment/subfloor dryness | Musty odor or evidence of damp underlayment/subfloor |
| Area affected | Small spot with quick response | Multiple rows, multiple rooms, or prolonged exposure |
What can go wrong (and how to avoid it)
Most failures happen when homeowners treat “water on top” as the whole problem. The biggest risks are under-drying hidden layers, forcing joints closed while boards are still wet, and using drying methods that drive movement rather than stabilize it.
– Under-drying: if underlayment or subfloor stays wet, the floor can re-warp after you think it’s dry.
– Over-correcting: forcing warped boards together can damage joints, worsen squeaks, or create permanent gaps.
– Skipping moisture control: drying only the top surface without dehumidifying the space can slow recovery and increase mold risk under/around the flooring.
– Using the wrong products: harsh cleaners or soaking methods can spread moisture deeper into seams and edges.
A note on your installation method (glue-down vs. floating vs. nail-down)
Whether you need to lift boards, remove baseboards, or access underlayment depends on how your engineered wood is installed:
– Floating engineered wood: water can migrate under the floating layer; moisture trapped under foam underlayment is a common failure point.
– Nail-down engineered wood: if you have nail-down panels, moisture can move through seams and reach the subfloor; isolated section drying still may require probing or removal.
– Glue-down engineered wood: if adhesive was exposed to water, you may face bond failure—repair becomes harder because lifting may be necessary.
[ADD: manufacturer-specific guidance if you can identify the brand/model of your engineered wood.]
Verdict: what’s realistic to DIY, and what to skip
If the water exposure was brief, you removed moisture quickly, and you can confirm underlayment/subfloor dryness, you can often handle drying plus targeted repair or localized replacement. Skip DIY and get professional help if the leak was significant/long-lasting, you notice moldy odors, the subfloor feels damp, or multiple rooms were affected.
Quick checklist (scan/save)
– [ ] Source stopped and water removed
– [ ] Fans + dehumidifier used for controlled drying
– [ ] Edges/transitions checked for trapped moisture
– [ ] Boards inspected for cupping, gaps, lifting, or softness
– [ ] Subfloor/underlayment dryness confirmed before repairs
– [ ] Repair plan chosen: refinishing vs. localized replacement
– [ ] Watch for re-warping after drying period ends
Equilibrium Moisture Content (EMC) of Wood vs. Relative Humidity (Approx.)
| # | Room RH | Wood EMC (approx.) | Drying Likelihood | Moisture-Related Movement Risk |
|---|---|---|---|---|
| 1 | 30% | ~7% | High | ★ |
| 2 | 35% | ~8% | High | ★★ |
| 3 | 40% | ~9% | Moderate | ★★★ |
| 4 | 45% | ~10% | Moderate | ★★★★ |
| 5 | 50% | ~11% | Moderate | ★★★★★ |
| 6 | 60% | ~14% | Low | ★★★★★★ |
| 7 | 70% | ~16% | Very Low | ★★★★★★★ |
According to widely used wood moisture content relationships (EMC charts derived from wood sorption behavior), higher indoor relative humidity corresponds to higher equilibrium moisture content for wood fibers—meaning the floor assembly has less “drying drive” and is more likely to remain moving. For the practical homeowner takeaway: if your room RH stays high, engineered wood may not stabilize even when the surface looks clear.
[ADD: the exact EMC chart source you want cited on your site (e.g., USDA Forest Products Laboratory) if you need a formal reference list entry.]
FAQ
Can engineered wood floors return to normal after water damage?
Often, mild swelling can reduce as the materials dry evenly, but permanent warping can remain if moisture was deep, drying was uneven, or the subfloor/underlayment stayed wet. If seams reopen after drying, that’s usually a sign the assembly didn’t fully stabilize.
Is it safe to use a heat gun or hair dryer to dry engineered wood?
Usually no—direct high heat can drive moisture unevenly and increase the risk of further movement, finish damage, or trapped moisture. Controlled drying with airflow and dehumidification is typically safer and more consistent with water-damage drying principles.
Should I remove baseboards to help dry the floor?
In many leak scenarios, checking for trapped moisture at edges is important; whether you need to remove baseboards depends on your installation method (glue-down vs. floating vs. nail-down) and how far the moisture traveled. If you can’t assess or address moisture at the perimeter, you may need localized removal for accurate inspection and drying.
How do I know when I need board replacement?
Replace sections when boards are permanently cupped, joints are separated, boards feel soft, or you can’t confirm underlayment/subfloor dryness after drying. If odor persists or moisture indicators remain elevated, replacement (or pro-level restoration) is usually the safer path.
What if there’s a musty smell after drying?
A lingering musty odor can indicate moisture remained in underlayment, subfloor, or adjacent wall cavities. In that case, further investigation—and often professional assessment—is typically the safest next step.
Sources
– EPA (U.S. Environmental Protection Agency), Mold guidance — for general microbial growth timelines and moisture-control principles after dampness.
– IICRC S500 (Standard and Reference Guide for Professional Water Damage Restoration) — for water-damage drying methodology emphasizing whole-assembly drying, moisture verification, and controlled drying practices.
– [ADD: Manufacturer installation and care instructions for engineered wood—especially allowable moisture exposure limits, approved drying methods, and replacement/repair guidance for your specific brand/model.]
– [ADD: If you reference specific EMC-to-RH figures, add the exact authoritative chart source you use (e.g., USDA Forest Products Laboratory) so the table is fully traceable.]
In the end, fixing engineered wood water damage comes down to one discipline: stop the water, dry the entire assembly with controlled humidity and airflow, then repair only what has truly stabilized. If you can’t confirm subfloor/underlayment dryness—or if warping, gaps, or odor persist—plan for section replacement or professional restoration rather than trying to force the floor back into shape.
Frequently Asked Questions
How can I tell if my engineered wood floor has water damage?
Look for visible signs like cupping, warping, bubbling, discoloration, or a dull surface that wasn’t there before. You may also notice a musty smell, squeaking boards, or a loose feel from sections that have swelled. If the top veneer is lifting or seams have widened, the water has likely penetrated deeper than the surface finish and will need immediate attention.
What should I do immediately after a spill or leak on engineered wood floors?
Stop the source of moisture first, then remove any wet items and blot up standing water using clean towels—don’t scrub aggressively. Dry the area as quickly as possible with fans and dehumidifiers, and avoid heat guns or high-heat blowers that can damage the finish. If you can access it safely, remove baseboards or affected transition strips to improve airflow under the flooring for faster drying.
How do I fix engineered wood floor cupping or warping after water exposure?
Mild cupping can sometimes improve if the floor is fully dried and moisture conditions stabilize, but it’s important not to force it back with weights or compression before the wood acclimates. After thorough drying, monitor the floor over several days for flattening and normal feel. If the veneer has separated, edges are permanently swollen, or the core is compromised, the only reliable fix is typically replacing the affected planks—especially if the damage is near seams.
Why does water damage on engineered wood sometimes cause mold or lingering odors?
Even though engineered wood has a layered construction, moisture can still travel through seams, edges, and underlayment to the wood core and subfloor. If water remains for too long—or if drying isn’t thorough—mold can develop and cause musty odors that come back when humidity rises. That’s why proper water mitigation, drying, and sometimes removing affected sections are critical to prevent recurring smell and ongoing indoor air quality issues.
Which is the best way to repair water-damaged engineered wood floors: DIY or professional restoration?
DIY is most appropriate for small, localized incidents where the planks haven’t delaminated, the top veneer isn’t lifted, and you can dry the area quickly and thoroughly. Professional water damage restoration is recommended for larger leaks, long-duration flooding, widespread cupping/warping, or any signs of subfloor damage, mold, or contamination. A pro can measure moisture levels in the subfloor and determine whether you need plank replacement, underlayment removal, or additional remediation to fully fix the problem.
📅 Last Updated: October 07, 2026 | Topic: How to fix water damage on engineered wood floors? | Content verified for accuracy and freshness.
References
- Engineered wood
https://en.wikipedia.org/wiki/Engineered_wood - Wood-decay fungus
https://en.wikipedia.org/wiki/Wood_rot - Google Scholar Google Scholar
https://scholar.google.com/scholar?q=engineered+wood+floor+water+damage+drying+repair - Google Scholar Google Scholar
https://scholar.google.com/scholar?q=hardwood+floor+water+damage+subfloor+drying+delamination - Google Scholar Google Scholar
https://scholar.google.com/scholar?q=wood+floor+mold+remediation+after+water+leak - https://www.cdc.gov/mold/default.htm
- https://www.cdc.gov/mold/faqs.htm
- Mold | US EPA
https://www.epa.gov/mold - Mold Remediation in Schools and Commercial Buildings Guide: Chapter 1 | US EPA
https://www.epa.gov/mold/mold-remediation-schools-and-commercial-buildings - Mold – Overview | Occupational Safety and Health Administration
https://www.osha.gov/mold