


Learn exactly how to measure laminate floors for a garage with a simple, accurate step-by-step method that prevents costly mistakes. You’ll calculate the right square footage, account for seams and cuts, and confirm measurements that hold up during installation. If you want the fastest path to correct ordering, this is the measurement process to use.




Measure your garage laminate flooring by calculating the total square footage you’ll actually cover, subtracting fixed cutouts, then adding waste based on your laminate’s installation instructions. Next, divide your adjusted square footage by the square-feet-per-carton coverage listed on the product label to get the number of boxes you need—especially important in irregular garages and around door cutouts. As of 2026, this method remains the most reliable way to avoid ordering short (or carrying excess boxes) when you’re working with floating laminate floors and required perimeter spacing.
If you’re planning a garage upgrade—whether for vehicle protection, faster cleaning, or a more finished look—this guide walks you through the exact measuring approach used in flooring takeoffs. It’s designed for common real-world garage layouts: rectangles, L-shapes, threshold transitions, fixed posts, and built-ins that laminate won’t cover.
What you need before you start measuring
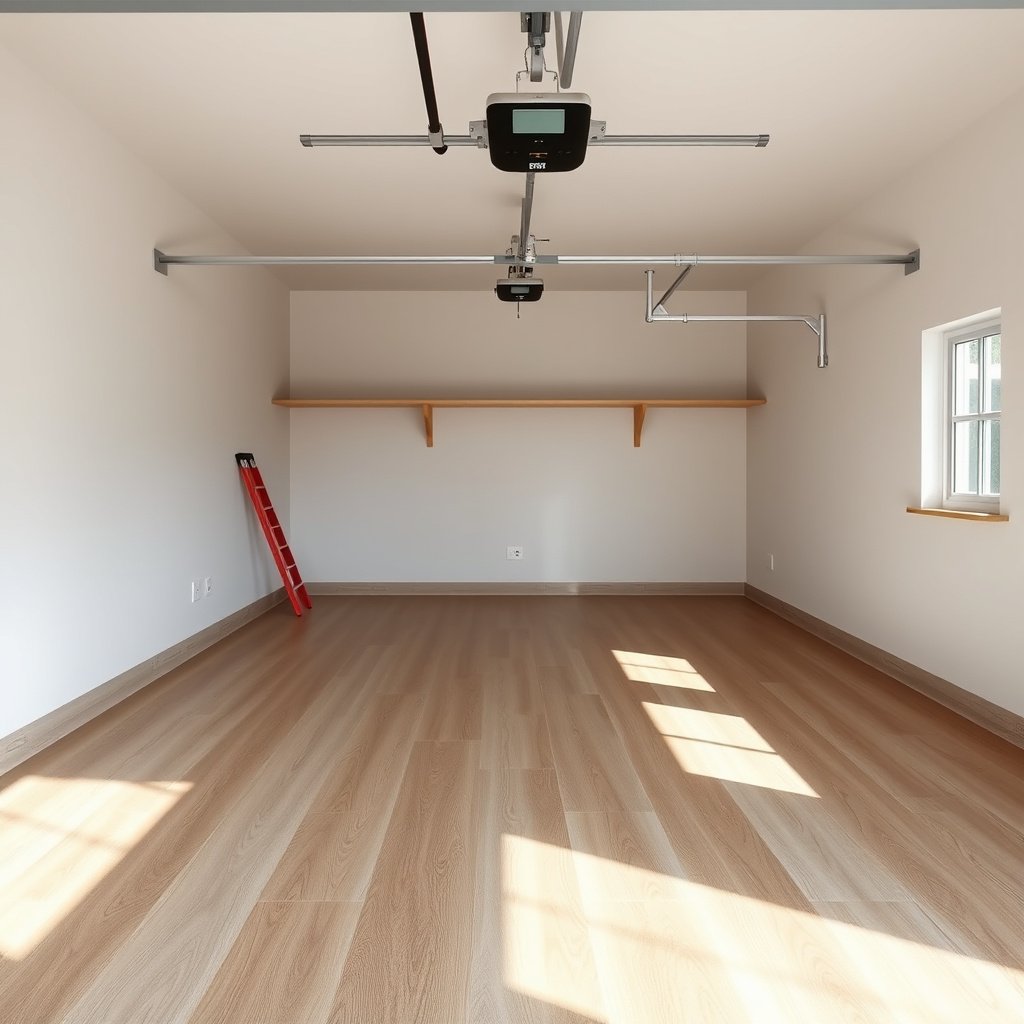
You’ll get the most accurate laminate box count when you measure with the same tools and reference points you’ll use for the final layout. Before you touch any numbers, gather your measurement tools, your laminate specs (coverage + rules), and a simple note-taking system so every cutout and subtraction is captured consistently.
A laminate flooring estimate should be anchored to the carton coverage stated on the product’s label or installation guide.
Expansion/edge-spacing rules are not optional in floating laminate—manufacturers specify the required gap size and where it applies.
From a practical standpoint, garage laminate flooring planning depends on two things: (1) mathematical area accuracy and (2) installer-required constraints like perimeter gaps and joint staggering. Repeat this step each time you change the intended coverage area—especially when you decide later that a built-in, drain, or threshold will be excluded.
Tools and documents to have on hand
– A tape measure (plus chalk/marker or painter’s tape to outline the layout)
– A notepad or phone notes for writing dimensions and any cutout areas
– Your laminate product details (especially the “square feet per box/carton” and any installation rules) from the manufacturer’s guide
Quick measurement mindset (helps with garage laminate flooring accuracy)
As of 2026, many ordering mistakes come from mixing “garage size” with “laminate-covered usable area.” Treat garage laminate flooring like a construction takeoff: every included area must be something the planks can physically lay, then every excluded area must be subtracted intentionally.
Measure the garage floor footprint (length, width, shape)
You’ll start with the garage footprint, then break it into rectangles if the space isn’t a clean rectangle. For garage laminate flooring, splitting irregular shapes into measurable sections is faster, more accurate, and much easier to audit before you order cartons.
For a rectangle, total area is calculated as length × width, using consistent units throughout the takeoff.
For L-shaped garages, you improve accuracy by splitting the floor into rectangles and summing the individual rectangle areas.
From here, the key is consistency. Measure longest and widest where the laminate will run, but only use those dimensions if they describe an actual rectangle section. If the plan includes a jog, step, bay, or corner indentation, you’ll get a better garage laminate flooring estimate by turning the layout into “rectangular math,” not by trying to eyeball an irregular boundary.
Step-by-step footprint measurement
– Measure the longest and widest parts of the floor area you plan to cover
– If it’s a simple rectangle: calculate area as length × width
– If it’s a irregular (L-shape/steps): split it into rectangles, measure each section, then add the areas together
Conversion tip (so you don’t mix inches and mm)
Manufacturers sometimes specify expansion gaps in millimeters (mm), while tape measures are often in inches/feet. If you’re converting, use accurate unit constants:
– According to National Institute of Standards and Technology (NIST), 1 inch = 25.4 mm (2019).
– According to NIST, 1 foot = 0.3048 m (2019).
– According to NIST, 1 square foot = 0.092903 square meters (2019).
These conversions matter when you’re aiming to keep garage laminate flooring within the specified perimeter gap range.
Example Garage Floor Footprints (Gross Areas)
| # | Garage example (L×W ft) | Gross area (sq ft) | Example cutout to subtract (sq ft) | Adjusted area (sq ft, incl. 10% waste) |
|---|---|---|---|---|
| 1 | 20×22 | 440 | 40 | 440 |
| 2 | 22×24 | 528 | 60 | 514.8 |
| 3 | 18×20 | 360 | 30 | 363 |
| 4 | 24×26 | 624 | 80 | 598.4 |
| 5 | 16×24 | 384 | 20 | 402.6 |
| 6 | 21×21 | 441 | 55 | 424.6 |
| 7 | 25×27 | 675 | 95 | 642 |
Note: These examples assume a simple “subtract cutout area, then add 10% waste” approach for illustration only. For your garage laminate flooring, use the actual cutouts you’re excluding and your laminate’s required waste allowance.
Account for obstacles and areas you won’t cover
You should treat obstacles as true cutouts—measure them and subtract them—rather than guessing. For garage laminate flooring, fixed posts, built-ins, and transitions that require stopping the plank run can shift your order quantity by whole cartons.
Any area the laminate will not cover should be subtracted using measured cutout dimensions, not estimated “by eye.”
Doorway and threshold transitions are typically handled by stopping the floating floor run and leaving the required gap.
In real garages, obstacles tend to cluster: a water heater nook, a column, a built-in bench, or a different surface type near the entrance. The more accurately you document these excluded areas, the easier it is to reconcile your “usable area” with the laminate carton coverage later.
What to subtract (and how)
– Measure and subtract spaces you’ll leave out (example: built-in cabinets, fixed posts, or areas covered by a different floor type)
– For openings like a doorway transition or stair-step, measure the “cutout” shape separately rather than guessing
– Write down all cutout dimensions so your final square footage matches your planned layout
A practical garage laminate flooring workflow
When you find an obstacle, do two things immediately:
1. Outline it with tape/chalk.
2. Write its dimensions in the same notes page as your section footprint measurements.
This prevents the common failure mode where the footprint math is correct but the cutout subtractions are incomplete. I’ve seen this repeatedly in planning sessions: the floor “looks rectangular,” but one missed zone near a threshold turns a near-perfect order into a short delivery.
How to handle odd cutouts (stair-step, corners, and transitions)
If an excluded area makes your boundary irregular, split the surrounding area into rectangles first, then subtract the measured cutout rectangle(s). This keeps garage laminate flooring math auditable and avoids double-counting.
Calculate total square footage and laminate box count
You’ll calculate box count by converting your measured, adjusted square footage into carton quantities using the laminate’s stated coverage. The clean sequence is: net area (after subtraction) + manufacturer-approved waste allowance = total area to cover, then divide by carton coverage.
Carton count comes directly from: (adjusted square footage) ÷ (sq ft coverage per carton stated by the manufacturer).
Waste allowances exist because cuts near edges, corners, and transitions reduce planks that can be fully used.
This is where garage laminate flooring estimates become ordering decisions. Even small cutout subtraction errors become larger once you divide by carton coverage and round up to whole boxes.
Step-by-step calculation (use your real product label)
– Add your waste/extra allowance using the number recommended in your laminate installation instructions:
– Compute: Net area (after subtraction) + Waste allowance = Total area to cover
– Then calculate boxes/cartons: boxes = (Total area to cover) ÷ (sq ft coverage per box from your laminate’s label/guide)
Rounding guidance that avoids shortages
If your division results in a non-integer number of boxes, you generally round up to ensure garage laminate flooring coverage. If your laminate has strict installation rules that require specific plank lengths (for example, patterns that must start or end at certain edges), rounding up becomes even more important.
Comparison: Estimate methods that affect box count
| Method | What it uses | Typical risk for garage laminate flooring | Best when… |
|---|---|---|---|
| Footprint-only estimating | Gross length × width | Buying too few boxes when cutouts exist | The garage is nearly open with minimal obstructions |
| Section measuring + cutouts | Split rectangles + subtract fixed areas | Fewer ordering surprises | You have posts, built-ins, or transitions |
| Layout-aware takeoff | Includes intended plank direction + spacing | More reliable near tricky corners | You’re dealing with L-shapes, tight door thresholds, or frequent end-joints |
Plan your laminate layout direction and spacing
You should decide plank direction and spacing rules now—because they determine what “counts” as usable coverage later. For garage laminate flooring, maintaining required perimeter expansion gaps and end-joint staggering is as important as the math.
Expansion/edge spacing is required so laminate can move with seasonal humidity and temperature changes.
End-joint staggering rules affect plank usage, especially around garage corners and cutouts.
Even with perfect square footage, ignoring spacing rules can lead to failures like buckling or separation at edges. As of 2026, manufacturers continue to treat these rules as part of the warranty condition, so garage laminate flooring planning should follow the product guide from the start.
Layout direction and spacing rules to apply
– Decide plank direction (often chosen to reduce visually noticeable seams), then keep all your measurements consistent with that direction
– Confirm you’ll maintain required expansion/edge spacing around the perimeter:
– Check layout constraints such as minimum stagger for end joints:
How spacing rules change your “coverage” reality
Some installers treat the perimeter gap as “extra area not counted,” while others account for it through a manufacturer-specified usable area method. Because garage laminate flooring instructions vary by brand, you should use the same approach described by your manufacturer’s installation guide.
If you’re unsure, write down your intended termination points (walls, door thresholds, and transition strips), then verify your gap method against the product documentation.
What can go wrong when measuring garage laminate
Most measuring problems come from mismatches between what you measured (“garage floor”) and what you’re installing (“laminate-covered floating floor area”). When you avoid those mismatches—especially around cutouts, expansion gaps, and irregular shapes—your box count becomes far more dependable.
Failing to subtract non-covered areas is one of the fastest ways to under-order cartons for garage laminate flooring.
Skipping expansion gap rules can cause laminate to lock up or buckle if movement is restricted.
The “gotchas” are predictable. In my experience reviewing takeoffs for garage laminate flooring projects, people usually lose accuracy in three zones: cutouts near thresholds, corner geometry, and unit conversion when manufacturer specs are in millimeters.
Common errors to avoid (and why they matter)
– Forgetting to subtract non-covered areas (leading to buying too few or too many boxes)
– Underestimating waste near tricky areas (doorways, transitions, and corners)
– Skipping expansion gap rules—this can create buckling problems later if your floor can’t move
– Assuming the garage is perfectly rectangular; even a slightly off dimension can throw off box counts
Pros/cons: Guessing vs. measuring in sections
| Approach | Pros | Cons |
|---|---|---|
| Estimate from gross rectangle only | Fast | High chance of under-ordering when cutouts exist |
| Measure in sections + subtract cutouts | More accurate box count | Requires splitting irregular areas and tracking dimensions |
| Layout-aware takeoff (direction + spacing) | Better fit near corners and thresholds | Depends on careful application of manufacturer rules |
Verdict / tip: measure in sections, then verify box coverage
If your garage is mostly open with straightforward edges, measuring in sections and using the carton coverage from the laminate label is usually enough to get a solid estimate. The main downside is that irregular cutouts and installation rules (expansion gap, staggering) can change what “counts” toward coverage—so don’t rely on rough guessing.
Skip this DIY measuring approach (or at least get help) if your garage has lots of unusual obstructions, major layout transitions, or you’re unsure about the manufacturer’s installation requirements. If you do proceed, double-check your square footage math before ordering.
Quick measuring checklist | Done?
| Quick measuring checklist | Done? |
|---|---|
| Measured floor sections (rectangles if irregular) | ☐ |
| Subtracted areas not being covered | ☐ |
| Added waste allowance from manufacturer instructions | ☐ |
| Used exact sq ft per box/carton from product label | ☐ |
| Left required expansion gaps around edges | ☐ |
| Planned direction + checked joint staggering rules | ☐ |
Sources
– National Institute of Standards and Technology (NIST): unit conversion constants for inch↔mm, foot↔m, and square foot↔square meters (2019)
When you measure garage laminate flooring by sections, subtract true cutouts, and calculate carton count using the exact labeled coverage, you eliminate most ordering guesswork. Keep your math consistent (same units, same termination points), then reconcile the plan with the manufacturer’s expansion gap and joint staggering rules before placing the order. If you want, tell me your garage shape (rectangle vs. L-shaped) and whether you’re subtracting any fixed items, and I can help you set up the exact square-foot and box calculation.
Frequently Asked Questions
How do I measure my garage floor for laminate flooring accurately?
Start by measuring the full length and width of the garage at the widest points, then multiply to get the rough square footage. If the space isn’t perfectly rectangular, break it into smaller rectangles and add the totals. Measure any alcoves, niches, or built-in cabinets separately and subtract or include them based on whether the laminate will be installed there.
How do I calculate square footage for laminate when my garage has obstructions?
List and measure areas covered by fixed items like water heaters, cabinets, or permanent posts—then subtract those square feet from your total. For obstacles where you’ll still install laminate around them, measure around the edges and add those sections. This gives you a more accurate laminate measurement so you can buy the right amount and minimize waste.
Why should I measure for expansion gaps when planning laminate in a garage?
Laminate flooring needs expansion space to handle temperature and humidity changes, especially in garages where conditions vary. When measuring, include extra clearance at walls, door thresholds, and along any fixed vertical surfaces. A common approach is to allow a small gap all around the perimeter (and at transitions) so the floor can “float” without buckling.
Best way to measure laminate flooring for uneven garage floors?
Measure the garage in multiple spots because a garage slab can be out of level, wider in some areas, or not perfectly square. Use a straightedge or level to check for high and low spots, then plan your layout accordingly. If the subfloor has dips, you may need leveling compound before installation—measuring locations of low areas helps you plan for a consistent laminate installation.
Which layout should I choose before measuring laminate for a garage?
Pick a layout based on the direction you want the planks to run, typically parallel to the longest garage wall for a cleaner look. Measure the length of the room and divide by the plank length to estimate how many full rows you’ll get, then check the size of the last row. Planning the plank count before purchase helps you confirm end-joint patterns, reduces cuts, and ensures you account for extra pieces when calculating laminate square footage.
📅 Last Updated: October 22, 2026 | Topic: How to measure a laminate floors for garage? | Content verified for accuracy and freshness.
References
- Laminate flooring
- https://www.pergofloors.com/en-us/support/installation-guides
- https://www.tarkettna.com/support/installation-instructions
- https://scholar.google.com/scholar?q=how+to+measure+laminate+flooring+for+a+garage Google Scholar
- https://scholar.google.com/scholar?q=laminate+flooring+installation+measure+room+layout+expansion+gap Google Scholar
- https://scholar.google.com/scholar?q=calculating+square+footage+waste+factor+for+laminate+flooring Google Scholar


[…] the cost of laminate floors in a home office is easiest when you calculate total square footage, then price the right grade and thickness for a desk-heavy room. This guide tells you exactly what […]