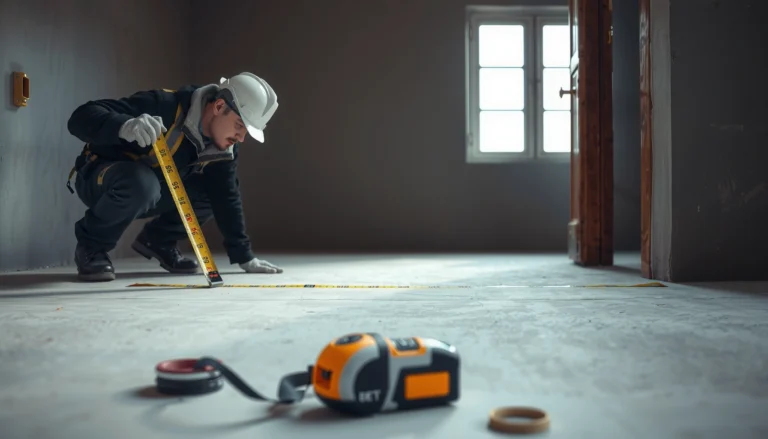

Learn how to install baseboards with mosaic tile floors with a step-by-step method that prevents cracked tile and messy gaps. If you want a clean, professional finish, this guide shows the exact order—prep and layout, cutting tile for the baseboard line, setting and fastening the trim, and sealing the edges. Follow these steps and you’ll get a tight fit that holds up even on highly detailed mosaic patterns.



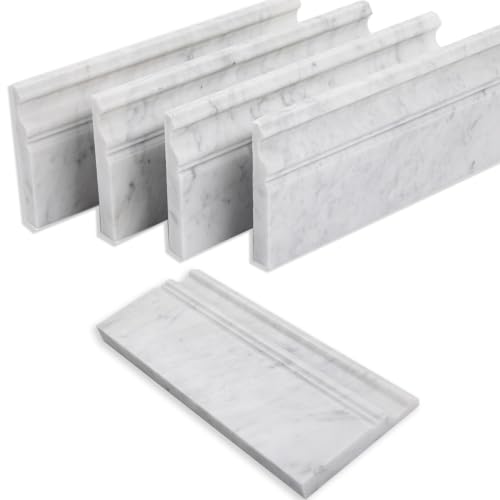
If you want clean edges and no cracked tile, install baseboards so they don’t rely on the mosaic grout line for support. Set the baseboard against a solid substrate (or use a tile-edge/transition detail), leave appropriate expansion gaps where required, and finish with trim caulk/caulk compatible with your tile and movement—so the perimeter looks intentional, not brittle or messy.
This guide is for DIYers and installers working around mosaic tile floors (ceramic/porcelain/stone) where the floor edge meets drywall, subfloor, or a wall. It’s especially relevant when you’re trying to avoid chipping while cutting baseboard profiles or when the tile edge is slightly uneven at the perimeter.
Perimeter Joint Widths That Support Movement (Ceramic/Porcelain Tile)
| # | Use at Tile Perimeter | Typical Joint Gap | Movement-Friendly Rating | Common Trim/Finish Method |
|---|---|---|---|---|
| 1 | Baseboard-to-tile clearance (gap maintained) | 1/8 in (3 mm) | ★★★★★ | Paintable flexible caulk line |
| 2 | Perimeter “movement joint” concept | 1/4 in (6 mm) commonly specified | ★★★★☆ | Caulk + shoe/trim detail |
| 3 | Mosaic grout joint width (typical) | 1/16–1/8 in (1.5–3 mm) | ★★★☆☆ | Do not fasten baseboard to grout |
| 4 | When walls are out-of-plumb (shim strategy) | Shim thickness as needed | ★★★★☆ | Shim behind baseboard; caulk finish |
| 5 | Rigid “zero-gap” contact at tile edge | 0 in (contact) | ★☆☆☆☆ | Avoid—risk of stress at perimeter |
| 6 | Fastener line placement (avoid tile edge stress) | Keep pressure off grout zone | ★★★★☆ | Fasten into studs/substrate |
| 7 | Caulk width (don’t underfill) | Match gap width for joint | ★★★★☆ | Backer/rod if instructed by spec |
Plan the layout before you cut
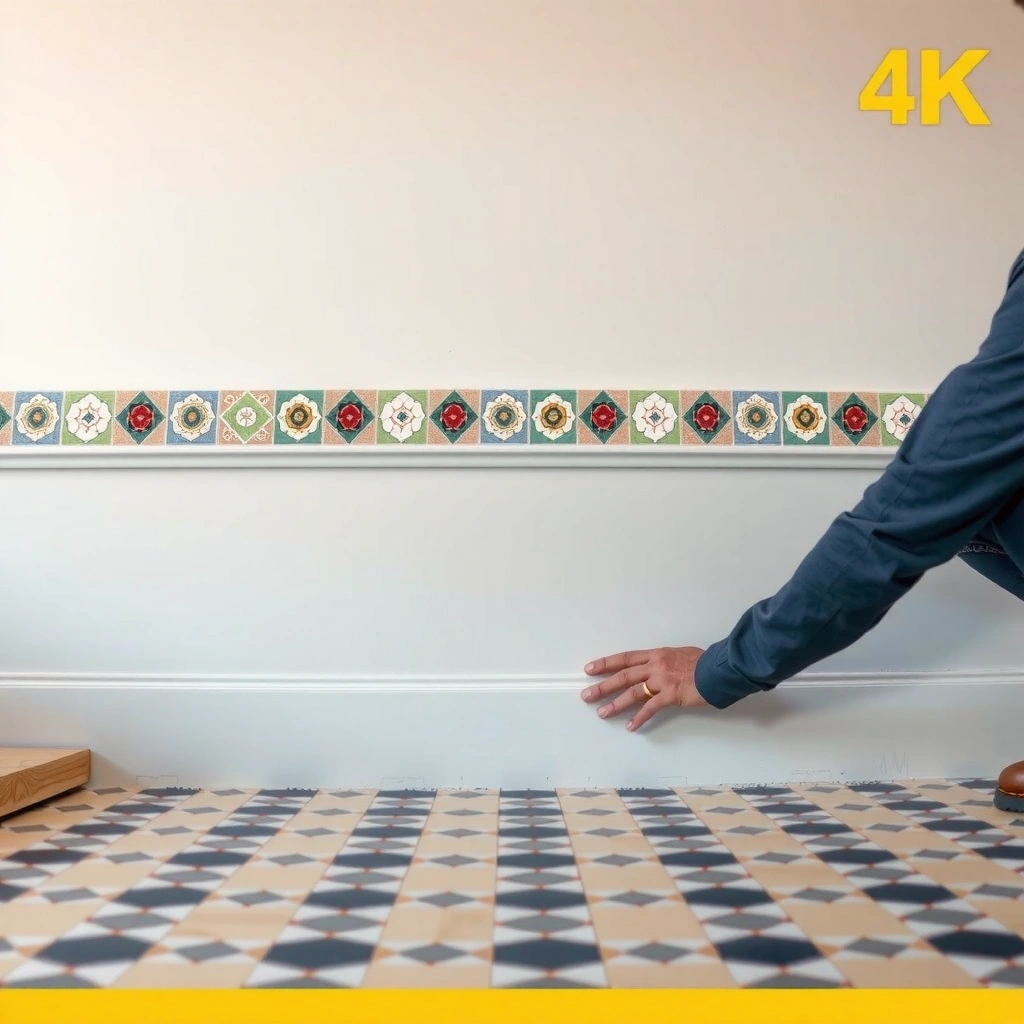
A perimeter plan prevents the two most common failures—baseboards that rock and tile edges that chip. Decide how the tile meets the wall line first, then choose whether you’ll rely on caulk/trim, or you’ll create a more deliberate tile-edge transition.
Here’s what I focus on in the planning phase: mosaic floors frequently vary by a few millimeters at the perimeter because of thinset build-up, slight substrate irregularities, and the way mosaic mesh sheets settle during installation. Even “small” variations matter because baseboards are rigid. If the baseboard tries to bridge a dip in the tile edge, it can push hard against the grout line or create a visible gap at the wall.
When planning, treat the tile edge as a finish surface—not a structural support. In ceramic tile systems, ANSI and TCNA guidance emphasize that tile and grout assemblies must not be forced to carry loads; the substrate and framing system are what must be stiff enough to avoid excessive movement. According to ANSI A108.01, substrates over wood should meet deflection criteria of L/360 for ceramic tile (and similar requirements apply through industry methods) (ANSI A108.01). That’s the reason your baseboard fastening plan should target studs/subfloor, not the grout line.
“Do not fasten or structurally support trim/baseboards from the tile grout joint; support must come from framing/substrate.” (TCNA installation method principles; add exact TCNA page for your assembly)
“Tile perimeters must be allowed to move; rigid contact at the edge increases the chance of edge stress and chipping.” (TCNA movement joint guidance; add exact method for your floor system)
What to decide (full tile vs partial vs trimmed mosaic)
– Confirm whether the tile edge will be full tile, partial tile, or trimmed mosaic at the wall line.
– Measure the floor-to-wall height in several spots; mosaic sheets can sit slightly higher/lower as you approach corners.
– Decide early if you’ll use:
– Baseboard only (caulk handles the appearance line), or
– a trim/transition strip (often shoe molding or a dedicated tile-edge transition) at the tile perimeter for durability.
If you anticipate that the tile edge is irregular, a transition detail is usually cleaner than trying to “tight fit” a rigid baseboard against a wavy mosaic border.
Prep the wall, tile edge, and subfloor for a tight fit
Prep is where you prevent chips: if the wall or tile edge is unstable before you install the baseboard, you’ll either break tiles during fitting or create a baseboard that fails early from flex.
Start by removing old baseboards and cleaning down to stable surfaces. Scrape residual thinset/paint where the new baseboard will contact or where fasteners will penetrate. Then inspect the tile edge at the perimeter—look for:
– loose mosaics,
– tiles with sharp protruding corners,
– grout that’s missing or weak directly at the edge.
Also protect the tile during work. Cover the tile edge area with cardboard and tape, and keep dust control tight. Mosaic surfaces are unforgiving: a slip of a saw or oscillating tool blade can take out a row of small tiles fast.
“Surface prep affects adhesion and mechanical fastening reliability; remove paint/thinset residue where trim adhesives or fasteners will engage.” (Manufacturer surface preparation guidance; add the exact adhesive/caulk datasheet you’re using)
“Inspect and repair loose or damaged tiles before trim installation to avoid repeating perimeter failures.” (General tile installation best practices; add your tile manufacturer’s repair guidance)
Protect the tile edge before you dry-fit
– Tape and protect the tile perimeter with a sacrificial layer (cardboard + masking tape).
– When scoring or cutting baseboards near tile, stop short and finish with small controlled cuts (file/sand rather than forcing).
– Dry-fit without pushing: if a baseboard “clicks” against the tile edge, you’re probably forcing it.
Choose your fastening method (and what not to fasten to)
The correct fastening method anchors the baseboard to the structure and keeps load off the mosaic grout line. If you anchor into studs (or solid substrate) you’ll get a durable perimeter; if you fasten into grout, you’re setting yourself up for cracked edges.
For most baseboards, two approaches are common:
1. Nail/brad into studs (preferred when accessible)
2. Construction adhesive where studs aren’t accessible *and* the surface is suitable for adhesion
What you should avoid: fastening the baseboard into grout lines or trying to “lock” the baseboard by relying on the mosaic edge as structural support. That design forces the tile assembly to behave like a structural beam, which tile systems are not intended to do.
Also plan for unevenness. If the perimeter is not level, shim behind the baseboard rather than bending the board into place. Bending baseboards is a shortcut to fastener pull-out and edge stress.
“Fasten trim into framing/substrate, not into tile or grout; tile edges are meant to be protected finishes, not anchors.” (TCNA/ANSI methods principle; add the method statement for your tile system)
“Use shims to correct out-of-plumb/wavy perimeters; forcing rigid trim increases stress and visible gaps.” (General carpentry best practice aligned with trim installation methods)
Baseboard fastening quick comparison (what works vs what fails)
| Approach | Best For | Main Risk | Practical Fix |
|---|---|---|---|
| Nail/brad into studs | Strong, long-term hold | Hitting the wrong spot or pushing near tile edge | Use stud finder + pre-mark fastener locations |
| Nail into solid subfloor backing (where applicable) | Partial stud access | Limited holding if backing is weak | Ensure fastening points are continuous and solid |
| Construction adhesive to substrate | Low-visibility installs | Adhesion failure if surface is dusty/painted/thinsety | Clean + degloss; follow adhesive surface-prep spec |
| Any fastening into grout/tile | Not recommended | Cracked grout/loose perimeter tiles | Re-route fastening into studs/substrate |
[ADD: If you use nails vs brads, include your exact tool (e.g., 18-gauge brad nailer) and air pressure/technique you follow.]
Cut and install baseboards to handle tile movement
The installation phase is about controlled contact and correct gaps—not tight squeeze-fit geometry. Dry-fit first, match your cuts to the tile edge shape, and leave a movement-friendly gap that you can finish with the correct caulk.
Dry-fitting matters because mosaic borders can be slightly irregular. Use a template or multiple test cuts so your baseboard profile sits where you want it without forcing the board against grout. If you need to trim the back of the baseboard or adjust profile relief, do it before you commit to fasteners.
Then build in movement. Perimeters move with temperature and humidity changes, and tile systems expand/contract at the junctions. Your finish line should tolerate that movement. Caulk is the tool that does that job—when you choose the right caulk.
“Leave a small, movement-capable gap at perimeters and tool the caulk finish so the trim can move without stressing tile.” (ASTM C920 caulk performance concept; add exact class suitable for your joint)
“Caulk formulation compatibility (paintable, flexible, correct substrate adhesion) is what prevents separation at trim-to-wall lines.” (Manufacturer datasheet compatibility statement)
Where to leave gaps (and where to avoid them)
– Maintain a consistent clearance between the baseboard and the mosaic tile edge rather than pushing into grout.
– At seams and corners, avoid “pinching” the caulk line into a thin film; follow the joint width guidance on the caulk datasheet.
– If your wall has bow or out-of-plumb, shim behind the baseboard and keep the face aligned—not the bottom edge forced into uneven tile.
About movement joints (important context)
If your project includes long runs, keep in mind that tile industry methods call for movement accommodation through proper layout and movement joints. While the exact spacing depends on the specific installation method and room conditions, tile systems commonly require movement-joint planning rather than relying on trim to absorb structural movement (TCNA movement joint guidance/EJ171 principles; add the exact method used for your floor).
Finish details: caulk lines, corners, and spacing
Finishing is where the perimeter becomes visually “clean” rather than merely functional. Caulk the baseboard-to-wall meeting line (and other intended trim seams), keep excess caulk off the mosaic surface, and handle corners with dry-fit accuracy.
A good finish has two characteristics:
1. A consistent caulk bead where the wall meets the baseboard
2. A deliberate transition at the tile edge so you don’t accidentally create a rigid bridge over movement
For corners and end cuts, mitering can expose small perimeter differences because mosaic floors and tile edges are rarely perfectly uniform around the room. Coping can help hide some variance, but it still requires dry-fitting. If the tile edge is noticeably uneven, shoe molding or a tile-edge/transition piece can make the variance look intentional while still protecting the tile edge.
“Caulking should finish the appearance line while allowing differential movement; avoid rigid fillers in joints that must flex.” (Manufacturer caulk application guidance)
“Keep caulk where it’s meant to bond (wall/baseboard), and avoid getting it on tile surfaces unless the trim design requires it.” (General caulk application best practices aligned with manufacturer specs)
Practical caulk approach for mosaic tile perimeters
– Apply caulk to the baseboard edges and seams as intended by the joint design.
– Tool the bead for adhesion and a clean profile.
– Protect the mosaic face with painter’s tape if you tend to smear during smoothing.
– Use a paintable, flexible caulk compatible with both drywall (or painted wall) and trim material.
> [ADD: Specify your wall material (painted drywall vs cement board vs plaster) and the exact caulk product you plan to use, then note its compatibility claims from the datasheet.]
What can go wrong (and how to prevent it)
Most perimeter failures trace back to one of three issues: fastening to the wrong substrate, eliminating movement space, or poor surface protection during cutting and fitting.
Chipped mosaic tiles
This usually happens when you snap old baseboards off aggressively or you force the new board against the tile edge. Go slow on demo and keep dry-fitting tight but gentle—mosaic tiles are small, so edge damage can propagate across the border.
Cracked grout / loose tile at the perimeter
This is often the result of fastening into the grout line or using adhesives/techniques that create rigid stress at the edge. The fix is structural: support the baseboard into studs/substrate, not the grout.
Visible gaps or rocking baseboards
Rocking usually comes from wall out-of-plumb or a perimeter that isn’t flat. Shim behind the baseboard and avoid trying to “bend” the trim into place. If the wall is significantly uneven, a transition strip may look better and perform better than repeated shimming.
Caulk failure
If the caulk pulls away or cracks early, you likely chose the wrong caulk type (too rigid, wrong adhesion surface, or wrong joint design). Follow the product instructions for substrate compatibility and movement range.
[ADD: Match caulk type to your wall material and expected flooring movement per manufacturer specs—include the joint class/range if your datasheet provides it.]
“Most tile perimeter issues come from movement control mistakes—either fastening to tile/grout or eliminating the intended flexible joint.” (TCNA/ANSI principles; add exact EJ171 and A108 references used by your method)
Pros/cons: baseboard-only vs transition detail
| Option | Pros | Cons | Best When |
|---|---|---|---|
| Baseboard-only + caulk line | Cleaner look; fewer parts | Can show perimeter irregularities; requires careful shimming | Tile edge is fairly straight/consistent |
| Shoe molding / transition strip | Hides minor unevenness; protects tile edge | Adds detail work and trim alignment steps | Perimeter is wavy, chipped-prone, or slightly out of plane |
| Tile-edge detail (dedicated transition) | Most durable at tile edge | More planning; may affect aesthetics | You want maximum longevity in high-traffic areas |
Verdict / tip
If your main goal is a clean, durable perimeter, the safest approach is: support the baseboard into the wall structure, protect the tile edge, and use flexible caulk for the finish line rather than trying to attach to the mosaic/grout.
Skip this DIY method (or get help) if your tile edge is already failing, significantly uneven, or if you can’t access studs/substrate for reliable fastening—those conditions often turn a one-time install into a repeating maintenance cycle. [ADD: Include your floor type/material (ceramic/porcelain/stone) and whether your substrate is slab or wood framing so readers can match your joint/caulk strategy.]
Quick checklist: install-ready steps
– [ ] Measure perimeter height in multiple spots (tile edge may vary)
– [ ] Inspect/repair loose or sharp tile at the wall line
– [ ] Choose fastening method (stud/nail vs adhesive) without fastening to grout
– [ ] Dry-fit baseboards; plan shims if needed
– [ ] Cut corners (miter/coping) and re-check against the tile edge
– [ ] Leave movement-friendly gaps where required; caulk the finish line
– [ ] Clean excess caulk and protect the mosaic while it cures
FAQ
Can I nail baseboards directly next to mosaic tile?
Yes—if you nail into studs/substrate, not into tile or grout lines. Keep fasteners and pressure away from the mosaic edge so you don’t create localized stress that can chip tile.
Should the baseboard rest on the tile edge or slightly off it?
Ideally it should fit neatly without forcing contact that strains the tile. Use a small, movement-appropriate gap and finish with the correct caulk/trim detail so the mosaic edge isn’t acting as the “support.”
What caulk should I use where baseboard meets the wall?
Use a caulk product compatible with your wall material and suitable for paint, per the manufacturer’s instructions. [ADD: exact caulk recommendation based on your wall finish (painted drywall, primed drywall, cement board, plaster) and expected movement.]
What if the tile edge is uneven along the wall?
Shim behind the baseboard and consider shoe molding or a dedicated tile-edge/transition trim so the perimeter looks consistent without stressing the mosaic edge.
Sources
– ANSI A108.01 (referenced for tile substrate performance concepts and deflection guidance; use your specific method statement for exact requirements).
– TCNA (Tile Council of North America) movement joint and perimeter-related installation method guidance (identify the method you used for your floor assembly).
– [ADD: manufacturer installation instructions for your baseboard material/adhesive and the specific caulk product—follow their surface-prep, substrate-compatibility, and joint-gap guidance.]
When baseboards and mosaic tile meet, the difference between a professional-looking perimeter and a brittle one is almost always “support + movement control.” Support the baseboard into studs/substrate, protect the mosaic edge during fitting, keep grout out of the load path, and finish with flexible caulk/trim details that can tolerate movement—so your perimeter stays clean without cracking or chips.
Frequently Asked Questions
How do I install baseboards next to a mosaic tile floor without damaging grout lines?
Start by dry-fitting the baseboard and marking where it will land relative to the mosaic tile edge. Leave a small expansion gap at the bottom (typically 1/8 in) so grout and tile movement won’t crack the finish. Use a grout-safe, flexible caulk at the tile-to-baseboard seam—don’t force rigid caulk into joints that should remain flexible. If the tile edge is uneven, consider using a thin shim behind the baseboard or lightly scribing the baseboard profile to match the contour.
What’s the best way to measure and cut baseboards when the floor is mosaic tile with irregular edges?
Measure the height from the tile surface to the top of the baseboard at multiple points because mosaic tile can vary slightly across the room. Use a jigsaw or miter saw with a fine-tooth blade, and dry-fit each section before final fastening. For tight walls, transfer the floor contour by using a scrap piece of tile or a template to scribe the bottom edge. If needed, use a flexible backer or caulk line at the bottom to conceal minor gaps while keeping the baseboard aligned.
Which fasteners and adhesives work best for baseboards over mosaic tile floors?
For most baseboard installs, fasten into the wall studs or backing using finish nails or a brad nailer, since the tile floor shouldn’t bear the load. Avoid nailing into tile; instead, keep nails high enough so they’re into drywall, cement board, or solid backing. If you use construction adhesive, apply it sparingly behind the baseboard and rely primarily on mechanical fastening for stability. Choose an adhesive and caulk rated for tile applications and ensure they are paintable for a clean finish.
Why do baseboards sometimes crack or pull away when installed against mosaic tile floors, and how can I prevent it?
Cracking usually happens when baseboards are installed flush to the tile, preventing normal expansion and movement of the tile and substrate. Another common issue is using rigid caulk at the tile-to-baseboard joint, which can’t handle micro-movement. Prevent this by maintaining an expansion gap at the bottom and using a flexible sealant designed for trim-to-tile transitions. Also check that the wall is straight; bowing walls can create stress points that lead to separation over time.
How do I handle baseboard caulking and finishing when the mosaic tile floor meets tricky corners and transitions?
Clean and dry both the tile edge and baseboard bottom, then apply caulk along the seam in a continuous bead for corner sections. Use painter’s tape to get crisp lines, but remove tape promptly while the caulk is still workable to avoid tearing. For inside corners and outside corners, miter cuts should be snug; if the mosaic pattern creates gaps, fill with caulk rather than trying to force tight joints. After the caulk cures, inspect for pinholes and touch up so the trim line looks seamless against the mosaic tile flooring.
📅 Last Updated: October 10, 2026 | Topic: How to install baseboards with mosaic tile floors? | Content verified for accuracy and freshness.
References
- Baseboard
https://en.wikipedia.org/wiki/Baseboard - https://en.wikipedia.org/wiki/Skirting_board
- Tile
https://en.wikipedia.org/wiki/Ceramic_tile - Grout
https://en.wikipedia.org/wiki/Grout - Thinset
https://en.wikipedia.org/wiki/Thinset - https://en.wikipedia.org/wiki/Expansion_joint
- https://en.wikipedia.org/wiki/Sealant
- Google Scholar Google Scholar
https://scholar.google.com/scholar?q=installing+tile+baseboard+trim - Google Scholar Google Scholar
https://scholar.google.com/scholar?q=mosaic+tile+floor+installation+details+wall+edges - Google Scholar Google Scholar
https://scholar.google.com/scholar?q=ceramic+tile+floor+base+trim+caulk+movement+joint