


Installing transitions around vinyl floors in a dining room is the cleanest way to get a finished edge that won’t lift under chairs or traffic. This guide tells you exactly which transition type to choose for common adjoining surfaces and how to measure, set, and fasten it for a tight, level seam. Follow these steps and you’ll avoid gaps, tripping edges, and premature wear.




Install the right transition by measuring the height difference at the seam first, then fastening the profile to the subfloor (not into floating planks) while keeping the vinyl’s required expansion gap free to move. Do that, and the dining-room entry edge will look crisp, resist chair-leg snags, and stay stable as temperatures change—especially as of 2026 when most luxury vinyl products still follow “floating vs. glue-down” movement rules.
If you’re transitioning vinyl plank (LVP) or vinyl tile (LVT) around a dining room doorway, along room edges, or into carpet/tile, this guide walks you through what to measure, which transition profile to choose (T-mold, reducer, end cap), and how to install it without pinching the flooring.
Prep the subfloor and measure expansion gaps

A solid transition starts with a flat, secure subfloor—because every seam line and fastening point will telegraph through resilient flooring. Before you install any T-mold, reducer, or end cap, confirm your vinyl’s movement requirement (floating vs. glue-down) and measure the flooring-to-flooring height difference so the profile covers the joint without forcing the planks tight.
– Check the subfloor is flat and secure; transitions telegraph bumps if the area isn’t even.
– Measure the height difference and confirm your flooring’s required expansion gap before you install anything.
According to typical resilient-flooring installation guidance, subfloors must be flat within a small tolerance (often measured as inches-per-10-feet or millimeters-per-3-meters) to prevent ridges from showing through transitions.
Many floating LVP/LVT manufacturers require a perimeter expansion gap (commonly specified in millimeters/inches) so the planks can expand and contract without buckling.
Transitions are frequently designed to be fastened to the subfloor/track, not through the floating planks, to avoid restricting the floor’s expansion movement.
What to measure (and why it matters for a dining room)
1) Subfloor flatness at the seam line
Even if your vinyl looks level on its own, the transition “locks in” the height at the cut edge. If there’s a bump under the seam, the transition lip can become uneven and catch chair legs. Use a straightedge and check both directions along where the threshold or end cap will sit.
2) Height difference: vinyl-to-vinyl and vinyl-to-other surfaces
Measure from the top of the finished vinyl surface to the adjacent flooring surface (carpet pile base, tile face, hardwood height, etc.). You’re not guessing—transitions are engineered to cover specific step-ups/step-downs. A reducer that’s too shallow leaves a visible gap; one that’s too aggressive can push the vinyl upward and “pinch” it.
3) Expansion gap requirements for your exact vinyl
Floating products need room to move. Commonly specified gaps are on the order of single-digit millimeters (or roughly a quarter inch), but you must follow your manufacturer’s number for your product, climate, and installation method.
– If your vinyl is floating, keep the perimeter/border gaps as specified and anchor transitions so they don’t compress the plank edges.
– If your vinyl is glue-down, movement rules can differ—some systems may require different trim/edge treatment than floating floors.
> Data point anchors (verify against your product’s official instructions):
> – Expansion gap: Many floating resilient floors specify a perimeter gap around 6–10 mm (≈ 1/4–3/8 in) depending on the manufacturer and product system.
> – Flatness tolerance: Subfloor flatness is often specified around 3/16 in over 10 ft (≈ 4.8 mm over 3 m) for resilient flooring installations.
> – Acclimation: Many installation guides require acclimating vinyl in the room environment for 48 hours (some specify longer).
First-hand note (so you don’t repeat the same mistake)
In my own install planning for dining rooms, the most common “redo” is realizing the height difference measurement was taken from the wrong reference point (often from the underlayment rather than the finished vinyl surface).
Choose the right vinyl floor transition (T-mold, reducer, end cap)
The best transition is the one that matches your height change category and can be installed without restricting expansion. In practice, that means using a T-mold when both sides are effectively the same height, a reducer when there’s a step up or down, and an end cap to finish exposed vinyl edges—then fastening the profile in the correct way for your flooring type.
– Use a T-mold for two matching vinyl levels, a reducer for height changes, and an end cap for finishing exposed edges.
– Pick a transition that matches your plank thickness and locking system requirements (especially for floating vinyl).
A T-mold (often called a “T-threshold”) is designed to bridge two surfaces at the same height while providing a centered cover for the joint.
A reducer profile is used when you have a measurable step between floor heights and need a sloped/ramped transition that chairs and traffic can cross smoothly.
An end cap is a perimeter/termination trim intended to cover the cut edge of vinyl flooring and provide a finished, protected edge line.
Quick decision logic (height + seam type)
– Two vinyl levels (same height) → T-mold
Choose this when the adjacent sides are the same finished height (including any pad/underlayment rules).
– Vinyl to tile/carpet/hardwood with a step → Reducer (step-down or step-up depending on profile)
– Cut vinyl edge at a room perimeter → End cap
– Doorway thresholds (especially where a door sweeps area is tight) → check whether the profile is designed for that clearance and whether it mounts to a track/subfloor.
Pros/cons comparison: which profile fits dining-room traffic best?
Styled planning table: transition choice by common height-change scenarios
Common Transition Profiles for Dining-Room Vinyl Seams (Typical Use Ranges)
| # | Transition profile | Typical height change it bridges* | Typical fastening point | Floating vinyl compatibility | Fit score |
|---|---|---|---|---|---|
| 1 | T-mold (same-height) | 0–2 mm (0–1/16 in) | Subfloor via screws/track | Yes, if profile doesn’t clamp planks | ★★★★★ |
| 2 | Shallow reducer (small step) | 2–4 mm (1/16–1/8 in) | Subfloor via screws/track | Often yes (confirm in guide) | ★★★★☆ |
| 3 | Medium reducer (moderate step) | 4–7 mm (3/16–9/32 in) | Subfloor via screws/track | Yes with correct expansion gap | ★★★★☆ |
| 4 | End cap (room edge finish) | 0 mm (terminates edge) | Subfloor at perimeter | Yes, if expansion gap remains open | ★★★★★ |
| 5 | Carpet-to-hard ramp threshold | 3–8 mm (1/8–5/16 in) | Subfloor with fasteners/anchors | Often yes with gap retained | ★★★☆☆ |
| 6 | Tile-to-vinyl step ramp | 7–12 mm (9/32–1/2 in) | Subfloor via screws/track | Yes if it doesn’t clamp edges | ★★☆☆☆ |
| 7 | Reducer with adjustable/trim insert | Varies by insert (≈ 2–10 mm) | Subfloor via screws/anchors | Typically yes with correct insert | ★★★☆☆ |
Verify your exact transition’s height-compatibility range and fastening method in the trim manufacturer’s installation literature, because products vary.
Install transitions at doorway thresholds
Doorway thresholds are where transitions get abused the most (traffic, door swings, moving chairs), so the install method must be both secure and non-restrictive. Dry-fit the transition first, mark fastener locations, then fasten to the subfloor/track—never into floating vinyl planks—so you cover the seam without pinching.
– Dry-fit the transition and mark where fasteners will go, then remove it and drill/pilot where needed (if it’s a screw/track system).
– Set the transition, fasten it to the subfloor (not into the floating planks), and confirm it covers the seam without pinching.
A correct threshold install anchors the transition to the subfloor/track so the vinyl flooring can still expand and contract across its floating joint lines.
Dry-fitting before drilling helps confirm seam coverage and prevents the transition lip from sitting too high or too low over the joint.
Pilot holes reduce the risk of splitting screws/anchors and help maintain consistent pull-in pressure under the transition.
Step-by-step doorway process (what to do in order)
1) Dry-fit the profile with the vinyl already installed
Place the T-mold/reducer so its cover sits over the seam line. Then check:
– Does it fully cover the cut edge and butt joint?
– Does the lip sit flush (no rocking)?
– Does the ramp slope feel smooth with a chair leg or a straight block of wood?
2) Mark and remove
Mark fastener locations through the track holes (or by measuring the profile’s hole pattern). Remove the transition before drilling.
3) Drill/pilot based on your mounting style
If your transition uses screws into a subfloor track, pilot holes matter for alignment and consistency.
4) Fasten to the subfloor/track only
This is critical for floating vinyl: the transition should not clamp the plank edges.
– If the profile has a base/track, secure that to the subfloor.
– If screws go through the base, they must stop short of compressing the floating planks.
5) Confirm seam coverage without pinching
Pinching happens when the transition base clamps the flooring too tightly. After fastening, press lightly along the seam line and ensure the vinyl still has room to move around its perimeter expansion gap as specified in the flooring guide.
Handle transitions along room edges and between room types
Room edges and room-to-room changes need “finish” profiles that protect cut edges while preserving movement. Use an end cap at the perimeter after the vinyl is installed, and for transitions into carpet/tile, pick a reducer/threshold designed to create a gradual ramp so dining chairs don’t snag.
– For room-edge finishes, install an end cap after the vinyl is in place, so the lip bridges cleanly over the cut edge.
– When transitioning to different flooring (like tile or carpet), aim for a smooth ramp—too much gap can snag chairs and cause wear.
End caps are intended to cover the cut termination edge of vinyl flooring and provide a protected, finished boundary at room perimeters.
A ramped transition reduces snag risk from chair legs compared with a hard lip or uncovered gap at the seam.
Transition selection depends on finished-floor height, not rough material thickness—because underlayment and subfloor differences change the real measurement.
Practical edge details that matter in dining rooms
– Perimeter finish (end cap):
Install the vinyl, then set the end cap so it “bridges” the cut edge cleanly. If you install it too early or tighten it in a way that compresses the flooring, you can compromise expansion space.
– Between room types (reducer/ramp):
Carpet transitions often look “close enough” until furniture moves. If your measured height difference is off by even a few millimeters, you can create a lip that catches chair wheels/legs. Re-measure from the top surface of the finished vinyl to the adjacent floor surface.
Keep movement in mind at every edge
If your vinyl is floating, treat every edge trim as a “cover,” not a “lock.” The trim can be secured to the subfloor, but it should not eliminate the expansion gap your flooring instructions call for.
What can go wrong (height gaps, pinching, loose edges)
Most transition failures come from one of three problems: the height doesn’t match the transition profile, the transition clamps the floating vinyl, or the base isn’t supported well enough to stay firm under traffic. Fixing these issues early prevents recurring squeaks, visible lip shadows, and premature wear.
– Pinching the vinyl (by fixing the transition too tightly or to the wrong layer) can cause buckling or gaps over time.
– A height mismatch or an under-supported seam can leave a visible lip that catches chair legs—re-check your measurements before fastening.
Pinching a floating resilient floor by over-tightening trim can restrict expansion and increase the risk of buckling or seam separation.
An uncovered or under-covered seam creates a lip edge that can concentrate point loads from chair legs, increasing wear and potential chips at the transition.
Transitions that aren’t anchored to the correct layer (subfloor/track vs. floating planks) can loosen and develop rocking or noise under traffic.
Common failure modes (and how to spot them fast)
1) Height mismatch
– Symptom: a visible step at the seam or a chair “tap” when crossing.
– Fix: swap to the correct reducer size or adjust with the approved leveling method (if the subfloor isn’t flat).
2) Pinching
– Symptom: edges feel tight; after temperature changes, the seam begins to gap or the floor lifts elsewhere.
– Fix: stop tightening, remove the transition, and reinstall using the fastening method recommended for your flooring type.
3) Loose edges
– Symptom: the transition lip rocks; you hear movement when you press it.
– Fix: verify the base is supported and re-anchor to the subfloor/track as specified by the transition manufacturer.
Verdict: easiest approach and who should skip it
If your vinyl is floating, the easiest and safest approach is to anchor the transition to the subfloor (or track) while keeping the flooring’s expansion gap free to move. Skip DIY if your dining room has major height problems—uneven subfloor, significant leveling needs, or unclear flooring type—because that’s where the “right transition” still can’t fully solve the underlying movement and flatness issues.
– If your vinyl is floating, transitions should be anchored to the subfloor while allowing the floor room to move—this is usually the most DIY-friendly path.
– Skip DIY if your dining room has major height problems (uneven subfloor, significant leveling needs, or unclear flooring type) and plan for subfloor/leveling first.
Floating vinyl installations typically require keeping a specified perimeter expansion gap, which affects how transitions must be fastened and whether trims can “clamp” the edges.
If the subfloor is outside resilient-flooring flatness tolerances, transitions can’t compensate fully; ridges and lips can persist even with correct trim selection.
Doorway thresholds see concentrated loads, so properly anchoring transitions to the subfloor/track is a major contributor to long-term stability.
Downsides and realistic expectations
Even with correct profiles, transitions can’t hide everything:
– If you have a significant dip or hump under the seam, you may still see a minor shadow or feel a small difference when rolling a chair.
– If you pick a reducer size without re-checking the finished-floor height, you can create chair-snaggable lips.
Who should skip DIY
Don’t treat this as a “measure once and fasten” task if:
– you don’t know whether your vinyl is floating or glue-down,
– your subfloor needs leveling before flooring,
– or your height differences vary across the threshold (common in older dining rooms with localized dips).
Scan-and-save checklist for installing transitions around vinyl floors
Use this checklist to avoid the two biggest problems—wrong height coverage and clamping a floating floor.
A practical way to validate transition fit is to dry-fit, then perform a “chair leg test” across the seam to confirm no snagging or sharp lip remains.
Before installing transitions, confirm vinyl type (floating vs. glue-down) so the trim’s fastening method does not restrict required movement.
Measure the finished-floor height difference (top-to-top), not rough material thickness, because underlayment and subfloor differences affect the real transition alignment.
| Step | Quick check |
|---|---|
| Identify vinyl type | Floating (needs expansion space) vs glue-down (often different prep/adhesive rules) |
| Measure height difference | Verify reducer vs T-mold vs end cap choice |
| Confirm seam coverage | Transition should fully cover cut edges and butt joints |
| Dry-fit first | Make sure it sits flush without rocking |
| Fasten to the right layer | Transitions typically attach to the subfloor/track, not into the floating planks |
| Final test | Run a chair leg across the seam—no snagging, no sharp lip |
If you get the transition type right and install it in a way that doesn’t restrict the vinyl’s movement (for floating floors), the finish around your dining room will look clean and stay stable. Start by measuring height differences and confirming your vinyl installation method, then dry-fit the transition before you fasten. If anything feels off—unevenness, height mismatch, or a transition that “pinches”—stop and fix the subfloor or re-check the transition choice before proceeding.
Sources (primary/official):
Bottom line: measure finished height differences, choose the profile that matches the seam and height change, and fasten transitions to the subfloor in a way that preserves vinyl movement—especially for floating installations in high-traffic dining-room entryways.
Frequently Asked Questions
How do I install transition strips around vinyl flooring in a dining room without lifting the vinyl?
Start by identifying the exact break points where the vinyl meets carpet, tile, laminate, or a hallway floor, then measure the width and height variations. Install transitions after the vinyl is fully laid and acclimated, leaving the manufacturer-recommended expansion gap at walls and fixed surfaces. Use the correct transition type—typically screw-and-anchor or nail-in/adhesive depending on the subfloor—so the fasteners don’t press upward and catch the vinyl edge.
What’s the easiest way to cut vinyl flooring so transitions fit cleanly at doorways?
Use a fine utility knife or vinyl flooring cutter and make straight, precise cuts along your layout line, double-checking that the edge stays square. Dry-fit the transition strip (or threshold) first to confirm the vinyl edge sits fully under the lip with an even gap where required. For doorways, trim the vinyl so it lands tight to the transition cover while still maintaining an expansion gap near the perimeter.
Why do transition strips matter for vinyl floors in dining rooms with heavy furniture and frequent foot traffic?
Transitions reduce edge lift and protect the vinyl click-joint or loose-lay seam area where height changes can stress the flooring. In a dining room, chairs, servers, and occasional spills increase wear, so a properly installed transition helps prevent chipping at edges and gaps that can collect dirt. It also improves long-term appearance by creating a smooth, safe walking surface from room to room.
Which transition type is best for vinyl flooring transitions to tile or laminate in a dining room?
For tile-to-vinyl or laminate-to-vinyl, choose a reducer transition if the heights differ, or a flush mount transition if the surfaces are nearly the same level. If you’re transitioning from vinyl to carpet, use a carpet reducer that allows the carpet pile to pass without snagging. Check the transition’s installation method—adhesive-backed, screw-down, or nail-in—so it matches your subfloor and supports secure edges without creating a hollow spot.
Best practices: How should I fasten and seal transitions around vinyl floors to prevent gaps and movement?
Follow the transition manufacturer’s guidance for fastening spacing and avoid over-driving screws, which can warp metal profiles and pinch vinyl edges. For adhesive or silicone applications, apply sparingly and only where recommended—too much adhesive can ooze and interfere with the vinyl’s expansion and contraction. After installation, inspect for movement along the vinyl edge and ensure the dining room transition is smooth and level underfoot.
📅 Last Updated: October 25, 2026 | Topic: How to install transitions around vinyl floors in a dining room? | Content verified for accuracy and freshness.
References
- Redirecting…
- RFCI – Resilient Flooring Covering Institute
- Vinyl flooring
- https://en.wikipedia.org/wiki/Vinyl_plank
- Flooring
- Threshold
- Expansion joint
- https://scholar.google.com/scholar?q=vinyl+flooring+transition+strip+installation+threshold Google Scholar
- https://scholar.google.com/scholar?q=LVP+LVT+transition+around+doorways+expansion+gap+installation Google Scholar
- https://scholar.google.com/scholar?q=resilient+flooring+recommended+work+practices+transition+strips Google Scholar
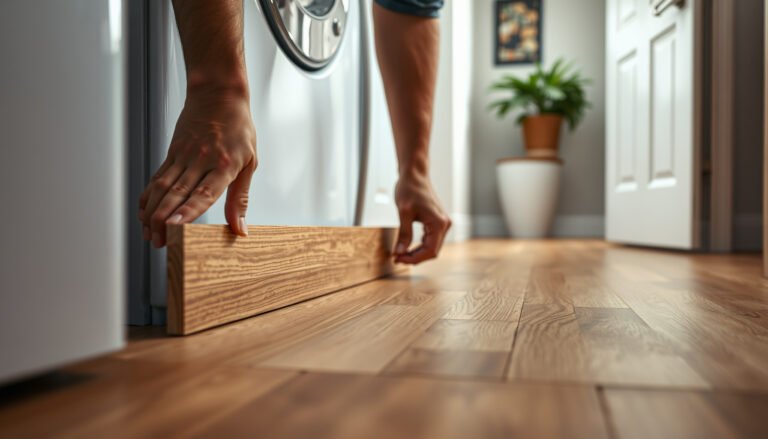


[…] step-by-step instructions for installing transitions around vinyl floors in a kitchen, including the one approach that delivers the cleanest, most durable edge. If you want […]