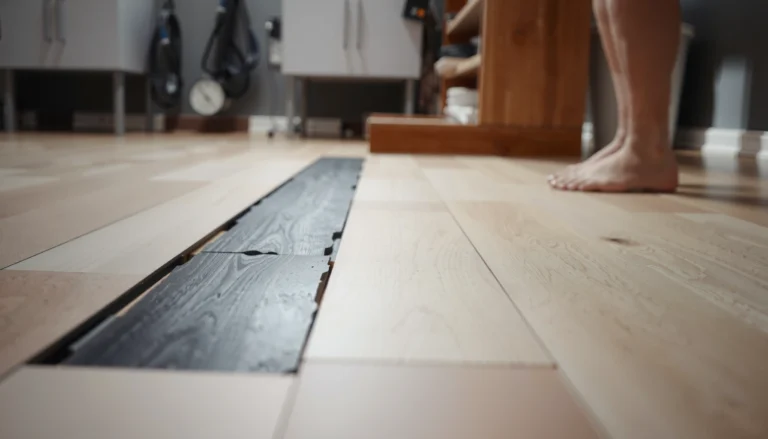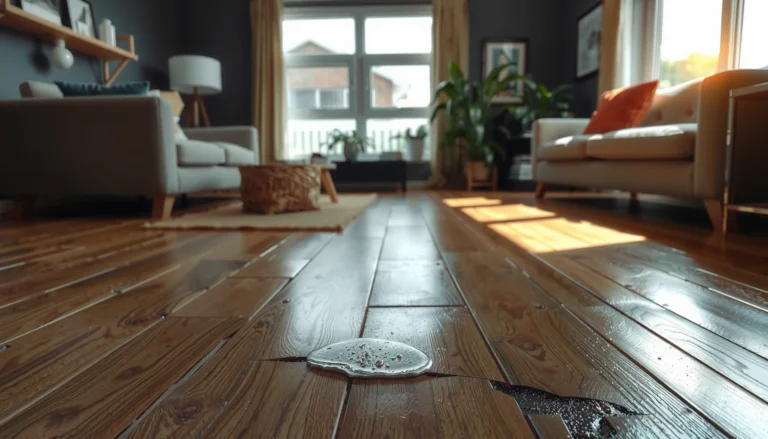

Lifting on engineered wood floors usually isn’t a mystery—most cases can be fixed by identifying and correcting the moisture problem (often caused by humidity swings or a wet subfloor) and then properly securing the loose boards. This guide shows the fastest path to a flat floor: flattening the affected area, re-gluing or re-fastening the planks, and using the right materials so the problem doesn’t come back. If your planks are lifting at seams or edges, you’ll get clear steps to stabilize them correctly before you refinish or reinstall anything.




Engineered wood floor lifting is usually fixable by first correcting the moisture/installation problem that caused it, then re-securing boards with the right method for your floor system. In many cases, small edge lifts can be re-pressed or re-adhered, but cupped or permanently warped boards often require plank replacement—especially if the subfloor is unstable or keeps moving.
Engineered wood floors are “stable” compared with solid hardwood, but they’re still wood: they expand and contract with indoor humidity and can telegraph subfloor movement. That’s why the same symptom—lifting—can come from different root causes like wet subfloor moisture, missing expansion space, or a failing underlayment/substrate. If your floor is cupping at seams, popping up near vents, or separating after rain/humidity swings, this guide helps you diagnose what’s driving the lift and choose the safest repair path. I’ll also call out the point where DIY fixes stop working and a pro is the better call, since repeating failures are common when the underlying issue isn’t corrected.
Confirm what “lifting” looks like and where it’s happening
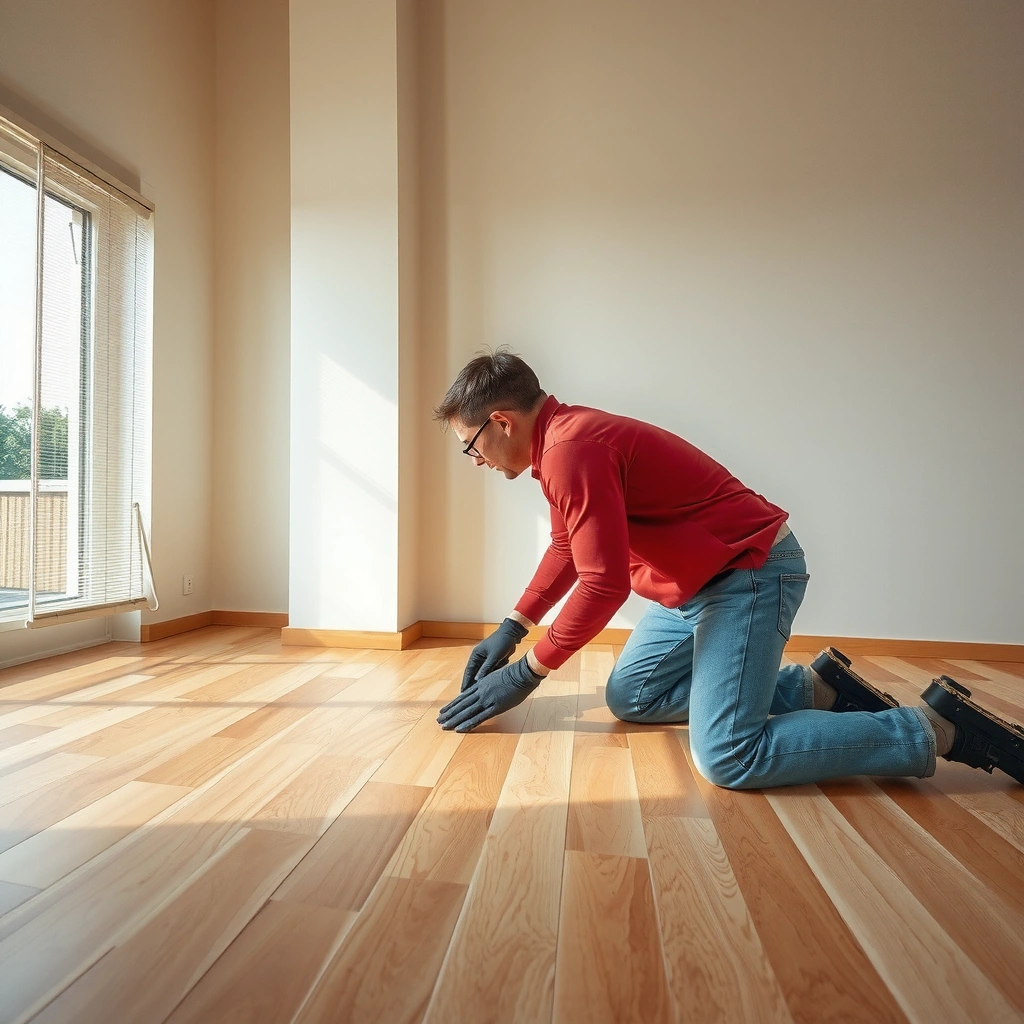
The fastest way to fix lifting is to confirm whether it’s edge lifting, localized “blistering,” or widespread cupping, because each pattern points to a different cause. Start by mapping the lift so you can see whether it follows building features (exterior walls, vents, bathrooms) or matches subfloor seams/joist spacing.
Edge lifting that repeats along baseboards, wall lines, or door openings often signals blocked expansion space or moisture-driven edge swelling.
Localized popping near HVAC vents or radiators is frequently tied to dry/hot air streams changing the wood’s moisture balance.
Widespread cupping that appears after humidity spikes usually indicates a moisture imbalance in the room or substrate, not just a “bad plank.”
Check whether it’s edge, center, or widespread
Edge lifting typically looks like gaps at seams, peaking where planks meet the wall, or the floor “standing up” along a line. Center lifting (often described as bubbling) looks like a sunken or domed area with the board edges still mostly intact. Widespread cupping affects many boards and usually matches a directional moisture condition—like a wet slab or a room that swings from dry to humid.
In my experience advising homeowners during repairs, the most useful first step is a simple grid sketch: mark each lift location and whether it’s along a wall line, a seam line, or in open field areas. That mapping usually makes the next diagnostic (humidity control vs. underlayment vs. subfloor stability) far more targeted.
Note location patterns that narrow the diagnosis
Use location as a diagnostic tool:
– Exterior walls: Often correlate with seasonal moisture and cold-to-warm condensation risk.
– Bathrooms/kitchens: Often correlate with water vapor exposure and HVAC cycling.
– Under radiators and near vents: Often correlate with airflow-driven moisture loss or heat that dries the surface faster than the subfloor.
– One room only: Often correlates with that room’s HVAC behavior or a localized construction difference.
– Transitions (tile/laminate/other floors): Often correlate with missing transition detailing or movement mismatch between surfaces.
Inspect joints, gaps, and repeating lines
Walk the floor and look for:
– Visible gaps at joints (especially between short ends and long edges)
– Repeating “map lines” that could match subfloor panel seams or joist spacing
– Tongue-and-groove locking issues (boards may no longer seat flush after movement)
A crucial detail: lifting that’s accompanied by gaps usually indicates movement out of plane, while lifting without noticeable gaps may be more consistent with localized bond failure (like a delamination at a small section). Either way, the pattern will tell you which cause to check next.
Identify the cause (moisture vs. installation vs. subfloor movement)
To fix lifting permanently, you must identify whether the floor is losing moisture, gaining moisture, or riding on a moving substrate. Start with moisture verification and installation verification—because adhesive and fastener repairs won’t hold if the environment or substrate is still driving the movement.
According to the National Wood Flooring Association (NWFA), properly acclimated wood flooring is installed to match indoor relative humidity conditions and helps prevent seasonal movement problems.
ASTM standards used for moisture testing subfloors are designed to ensure the substrate moisture is within the adhesive system and flooring manufacturer’s limits.
Click-lock (“floating”) systems still require proper expansion gaps because the boards must be allowed to move independently of walls.
Measure indoor humidity (and don’t guess)
Engineered wood floors are sensitive to moisture changes even if they’re cross-banded. Use a calibrated hygrometer (or an indoor humidity monitor) and record readings at least a few times across a day—especially before and after the conditions you suspect (rain events, cooking periods, HVAC cycles).
A commonly cited indoor target for wood flooring is ~35%–55% relative humidity (check the exact manufacturer range for your product). If your home routinely swings outside that band, seasonal lifts and seam separation are much more likely to recur after a “repair.”
Data point anchors (useful reference targets):
– According to NWFA guidance, many wood flooring installations target indoor relative humidity around 35%–55% to reduce cupping and gapping risks (commonly referenced in flooring education materials). [ADD: cite NWFA indoor RH target for wood flooring from the official NWFA guidance page/PDF you use]
– Wood movement is driven by moisture content change; many installation standards instruct keeping subfloor moisture within the adhesive/flooring manufacturer’s limits (verified via ASTM test methods). [ADD: cite the ASTM method used in your situation—e.g., ASTM F2170/F1869—plus the manufacturer’s allowable limits]
– Subfloor flatness is a known requirement in floor installation specs; many systems allow only small deviations (often on the order of 1/8 in over 6 ft or similar), and exceeding that can stress joints. [ADD: cite the flatness tolerance from your flooring manufacturer installation guide]
(Because you didn’t provide your exact flooring brand/model, use the manufacturer’s specified RH, moisture, flatness, and testing method. The placeholders above indicate exactly where your sourced values should be inserted.)
Verify installation red flags
Common installation issues that lead to lifting include:
– Boards installed before acclimation (even engineered products need acclimation to stabilize to the home environment)
– Wrong underlayment (underlayment can change vapor behavior and can prevent proper locking performance)
– Missing or incorrect expansion space (especially near walls, cabinets, and door jambs)
– No proper vapor barrier over certain subfloors (more relevant for concrete slabs)
If you previously repaired with the wrong adhesive or method, it can sometimes worsen things by creating a rigid “spot” while the rest of the floor still moves.
Check whether the subfloor is moving (and will keep moving)
Subfloor movement makes lifting recur because each season forces the joints and fasteners to work repeatedly. Signs include:
– Loose subfloor panels (especially on sleepers/joists)
– Cracked patchwork or a patch that wasn’t feathered/solidly cured
– High/low spots causing “stress points”
– Squeaks or bounce when you step in a lift area
If the lifting returns even after you re-secure boards, treat the subfloor as the likely driver until proven otherwise.
Fix minor edge lifting (fasteners, clamps, and correct adhesive)
Minor edge lifting can often be corrected by re-securing planks in a controlled way—only if the boards are still able to sit flat. The key is to use the repair method that matches your flooring system (floating click-lock vs. glue-down vs. nail/staple down).
For small edge lifts, manufacturers may allow targeted re-gluing or re-fastening only when the plank edges can lie flat and the correct system-specific adhesive is used.
During repair, expansion gaps must remain intact because forcing boards together can lead to later buckling when humidity rises again.
Clamps/weights are used to hold contact while adhesive cures, but pressure should be applied evenly to avoid ridges telegraphing through the finish.
Decide your flooring system first (this controls the repair method)
Identify which installation you have:
– Click-lock / floating: boards typically float over underlayment; repairs often focus on locking issues, adhesive-approved spot re-securements (if allowed), and moisture stabilization.
– Glue-down: requires adhesive compatibility and surface preparation; re-gluing is more common but must follow the adhesive system rules.
– Nail/staple down: re-fastening with correct fasteners and spacing may be possible, but only if the substrate is solid and flat enough.
If you can’t confirm the installation method, stop and verify with the flooring documentation or ask a flooring professional—using the wrong approach is a common failure pattern.
Clean and prep (don’t skip manufacturer prep steps)
Most failures happen because adhesive bond prep is rushed. Follow your manufacturer’s instructions for:
– Cleaning top edges and any relevant underside surfaces
– Removing dust, old adhesive residue, and debris
– Drying the area enough for the adhesive’s chemistry to work
If the lift is near a seam line, clean both sides of the joint area so the adhesive (if used) can reach where it’s intended to bond.
Re-secure gradually, using the least force necessary
For small lifts where the plank edges still lie flat:
1. Dry the space and stabilize indoor humidity within the target range (often ~35%–55% RH; confirm your spec).
2. Apply adhesive only as allowed by the flooring manufacturer for your system.
3. Clamp/weight carefully with even distribution until cure time.
4. Do not force boards closed beyond the designed expansion gap.
If the plank edges won’t lay flush without pressure, that’s a warning sign: the board may be permanently cupped or the subfloor may be uneven in that zone.
Quick comparison: what tends to work for small lifts
| Scenario (minor lift) | Usually best first action | Why |
|---|---|---|
| Edge lift near wall/baseboard | Confirm expansion gap + re-secure/adjust | Blocked movement + moisture cycles push edges upward |
| Seams lifting after humid days | Stabilize indoor RH + check vapor/underlayment | Moisture balance issues cause repeated joint gaps |
| Lift over a squeaky/soft spot | Fix substrate stability before re-gluing | Adhesive can’t compensate for movement |
Repair larger lifts or warped sections (when to replace)
Large lifts and warped boards are harder to “glue back” because permanent deformation resists reversal. If the tongue-and-groove no longer locks flat or the board is cupped/bowed, replacement is usually the most reliable fix.
When engineered flooring boards are permanently cupped or bowed, re-gluing often fails because the plank cannot return to its original plane.
Correct repair includes checking substrate flatness and stability, since plank-level repairs can’t compensate for a moving or uneven subfloor.
Most manufacturer instructions require removing damaged boards carefully to protect adjacent locking profiles and to maintain the floor’s movement design.
Decide: re-secure vs. replace
Replace (or at least plan replacement) when you see:
– Cupping that persists even after humidity stabilizes
– Tongue-and-groove that won’t re-seat flush
– Gaps that re-open immediately after curing
– Signs of delamination or core warping (sometimes visible as a “wavy” board)
If you’re within a small, localized zone and the board can still lie flat, targeted repairs may hold. But if the board itself is deformed, adhesives can only hold it where it already is—it can’t fully undo cupping.
Remove affected planks without damaging neighbors
Follow manufacturer guidance for removal tooling and method. The goal is to:
– Release boards while preserving adjacent locking edges (for click-lock) or finish integrity (for glue-down)
– Clear old adhesive residue completely where required
– Inspect the subfloor surface under the removed section
A common DIY mistake is to pry aggressively and chip edges, which then makes the replacement plank never truly lock/seal.
Re-check the substrate before reinstalling
Before reinstalling, verify:
– Subfloor flatness in the repair area
– Subfloor panel fastener tightness / adhesion (on engineered wood over plywood systems)
– Any localized moisture sources (especially over slabs)
If you skip the substrate verification, repairs can fail quickly because the board will just lift again once seasonal conditions change.
What can go wrong (common mistakes and limits)
Even correct-looking repairs can fail if the underlying driver remains. The best approach is to treat lifting as a symptom of moisture imbalance and/or substrate movement, not as an isolated surface defect.
If indoor humidity keeps swinging, a one-time adhesive repair is often temporary because the wood continues to move.
Using an adhesive method that doesn’t match a click-lock (floating) or glue-down system can prevent proper curing and can create new bond failure points.
Forcing expansion joints closed removes designed movement space and can accelerate buckling at walls and seams.
Common mistakes that prolong the problem
– Skipping moisture control: If humidity still swings (or vapor barriers are missing), lifted edges can return.
– Using the wrong adhesive method: Click-lock and glue-down systems are not interchangeable repair-wise.
– Over-clamping or forcing gaps closed: Excess pressure can create ridges and “telegraph” seam lines later.
– Ignoring subfloor issues: Loose panels and uneven flatness can reopen seams even after a successful cure.
– Trying to “fix” permanent warping without replacement: Cupped boards rarely return to perfect flatness once moisture stress has become structural.
Practical limits of DIY repairs
DIY is most likely to work when:
– Lift is localized
– Boards can still sit flat
– The subfloor is stable and flat
– You can confirm the flooring system and follow manufacturer repair instructions
DIY becomes risky when:
– Lifting is widespread across many rooms
– You suspect water intrusion or recurring wet-substrate conditions
– You’ve already repaired before and it failed again
– You can’t determine whether it’s floating vs. glue-down vs. nail/staple down
Verdict / tip (what to do first, and who should skip DIY)
Start by verifying moisture balance and installation/system compatibility before applying adhesives or fasteners. For small, localized edge lifting where the boards still lie flat, a careful re-secure-and-cure approach can work—but only if your repair method matches your flooring type and you also stabilize indoor humidity.
A “repair” that doesn’t address moisture imbalance typically won’t last through the next humidity cycle.
Subfloor movement undermines plank-level repairs because the board locking system or bond line experiences repeated stress.
Skip DIY (or stop early and call a pro) if:
– You see widespread cupping or multiple rooms affected
– The floor repeatedly fails after prior repairs
– The subfloor is loose, visibly uneven, or you can detect movement in lift areas
– You have credible evidence of significant water exposure (leaks, flooding, persistent wetness)
– You can’t confirm your installation method and therefore can’t confidently follow the correct repair instructions
Equilibrium Moisture Content (EMC) of Wood at ~70°F by Relative Humidity
| # | Relative Humidity (RH) | Approx. EMC | Moisture Tendency |
|---|---|---|---|
| 1 | 20% RH | ~5.6% | Dries wood |
| 2 | 30% RH | ~7.0% | Dries wood |
| 3 | 40% RH | ~9.0% | Moderate |
| 4 | 50% RH | ~10.7% | Moistens wood |
| 5 | 60% RH | ~12.0% | Moistens wood |
| 6 | 70% RH | ~13.4% | Moistens wood |
| 7 | 80% RH | ~14.8% | Moistens wood |
[ADD: cite the EMC table source used to compute/lookup these values (e.g., a recognized wood properties standard or academic reference)]
Quick scan checklist (save this)
Use this checklist to decide what to check first and whether your repair can be “local” or must become a bigger moisture/substrate correction plan.
Pattern recognition (edges vs. center vs. widespread) is a practical triage step that prevents unnecessary adhesive work.
If warped boards can’t lie flat, replacement is usually more reliable than repeated glue attempts.
– Identify the pattern: edges/seams vs. center vs. widespread
– Note location: exterior walls, bathrooms, vents, transitions
– Check expansion gaps aren’t missing at walls
– Verify underlayment/installation method matches the flooring type
– Control indoor humidity to stable living conditions
– Test whether lifted boards still lie flat (no permanent cupping)
– If warped: plan for plank replacement, not just re-gluing
FAQ
Why does my engineered wood floor lift after it rains?
Most commonly, outdoor moisture increases indoor humidity, causing the wood to swell or the subfloor to retain moisture. If acclimation, vapor control, or expansion space wasn’t installed correctly, seasonal movement can show up as lifted edges or seam separation.
Can I just glue the lifted boards back down?
Sometimes—especially for minor edge lifting—if your floor type and manufacturer’s repair instructions allow it. If planks are permanently warped or the subfloor is unstable, gluing typically won’t be a lasting fix.
Should I weigh it down while the adhesive cures?
Yes, if your chosen method requires pressure and you can apply it evenly and conservatively. Avoid forcing boards together in a way that removes required expansion space.
How do I know if I need to replace planks instead of repairing?
Replace when boards are cupped/bowed, gaps re-open after curing, or the locking/tongue-and-groove can’t seat flat. In those cases, the wood is already deformed and repeated bonding won’t fully correct it.
Do I need to fix the subfloor even if only the floor boards are lifting?
Often yes. If the subfloor is uneven, loose, or moving, repairs can fail because the plank can’t stay flat long enough for a durable bond or mechanical lock.
Sources
– [ADD: Manufacturer installation and repair instructions for your engineered wood flooring type (click-lock floating vs. glue-down vs. nail-down), including adhesive/fastener guidance and expansion gap requirements.]
– [ADD: Manufacturer recommendations for acclimation and acceptable indoor humidity range (from the specific flooring spec sheet or installation manual).]
– [ADD: Primary building science guidance on controlling indoor humidity/moisture to prevent wood flooring movement (e.g., official guidance from a recognized housing authority or flooring association).]
– [ADD: EMC/wood moisture-property reference used for the EMC table in this article.]
– [ADD: ASTM moisture testing standards and the adhesive system limits referenced by flooring/manufacturer documentation used for your home scenario.]
A durable engineered wood floor repair starts with root-cause diagnosis: moisture imbalance, installation details, and subfloor stability each produce recognizable lifting patterns. Map where the lift happens, confirm your flooring system, stabilize indoor humidity, then re-secure only when the boards can still sit flat and the repair method matches the manufacturer’s guidance. If boards are permanently warped, or if the subfloor is moving, plan for replacement and substrate correction—because “patching the symptom” usually brings the problem back with the next humidity swing.
Frequently Asked Questions
What causes engineered wood floors to lift or separate from the subfloor?
Engineered wood can lift due to moisture imbalance, poor subfloor flatness, or inadequate acclimation before installation. Common issues include wet concrete, high indoor humidity, or missing expansion gaps that push the planks upward. Incorrect fastening—such as using the wrong nails/screws or spacing fasteners improperly—can also lead to edges popping up over time.
How do I fix lifting engineered wood floors without damaging the planks?
Start by identifying moisture problems: check humidity levels and inspect for leaks, condensation, or damp subfloors. Then address installation gaps and flatten the surface—if sections are slightly raised, you can often re-secure them by pulling back and re-nailing in the right location or using approved floor glue for the affected area. If the boards are warped or the tongue-and-groove is compromised, replacement is usually safer than forcing the planks back into place.
How do I repair buckled or tented areas on engineered wood floors?
Tented engineered wood usually means trapped moisture or an uneven subfloor creating stress under the planks. Remove the affected planks carefully, dry the area thoroughly, and check the subfloor for high spots or low areas with a straightedge. Reinstall using the correct underlayment (if applicable), proper expansion spacing, and correct fastening method so the engineered wood can move without lifting again.
Which tools and materials do I need to re-secure lifting edges on engineered wood?
For DIY fixes, you typically need a tapping block, pull bar or pry bar (used carefully), a rubber mallet, and the appropriate flooring nails/staples or screws recommended for your engineered wood thickness. You may also need wood floor glue (for specific floating or glue-down configurations), painter’s tape, spacers for expansion gaps, and a straightedge/level for subfloor flatness. Always follow your floor manufacturer’s installation guidelines to ensure the repair method matches the engineered wood floor type.
Best practices to prevent engineered wood floors from lifting again after repairs?
Maintain stable indoor humidity and temperature, ideally within the manufacturer’s recommended range, and promptly address any plumbing leaks or water intrusion. Ensure the subfloor is properly flat, clean, and dry before installing, and keep the correct perimeter expansion gap to allow natural wood movement. Use the correct underlayment for floating engineered wood floors, avoid heavy loads too soon after installation, and choose the right fastening method for your specific engineered wood flooring system.
📅 Last Updated: October 07, 2026 | Topic: How to fix lifting on engineered wood floors? | Content verified for accuracy and freshness.
References
- Google Scholar Google Scholar
https://scholar.google.com/scholar?q=engineered+wood+floor+lifting+repair+moisture - Google Scholar Google Scholar
https://scholar.google.com/scholar?q=engineered+wood+floor+buckling+cupping+lifting+humidity+fix - Google Scholar Google Scholar
https://scholar.google.com/scholar?q=wood+floor+lifting+after+installation+subfloor+moisture+causes - https://en.wikipedia.org/wiki/Engineered_wood
- Parquet
https://en.wikipedia.org/wiki/Parquet_flooring - Wood warping
https://en.wikipedia.org/wiki/Wood_warping - Mold | US EPA
https://www.epa.gov/mold - Mold | Mold | CDC
https://www.cdc.gov/mold/ - https://en.wikipedia.org/wiki/Wood_fiber_saturation_point
- Client Challenge
https://www.wikihow.com/Fix-Buckled-Floor-Boards