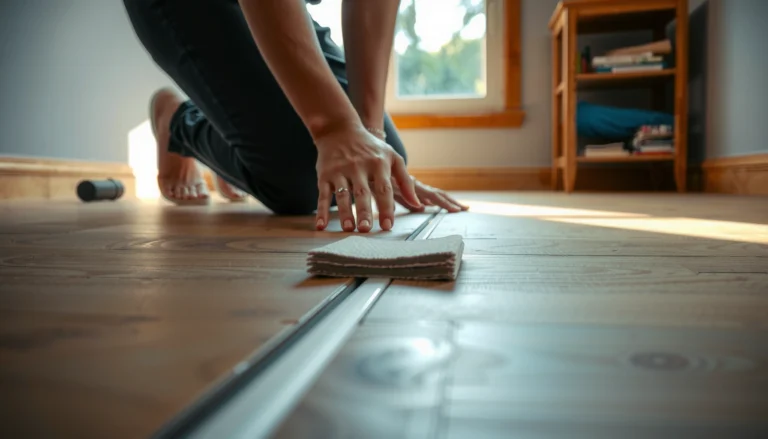
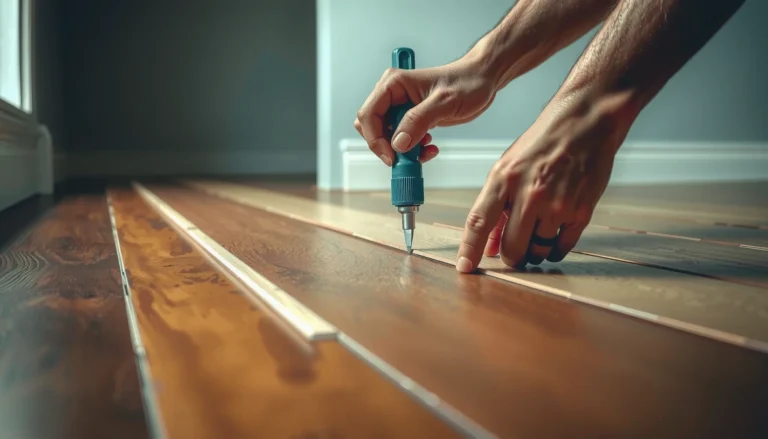
Learn how to remove SPC floors safely and efficiently, with a step-by-step process that minimizes damage to the subfloor. Follow the exact order of operations—prepping the room, removing trim, loosening planks, and handling stubborn sections—so you know what to do at every stage. If you’re replacing flooring or tackling a warped or damaged install, this guide gives you the fastest reliable route.




If your SPC (rigid core) floor is a floating/click-lock installation, you can usually remove it without demolition by freeing the perimeter (baseboards/trim) and lifting planks from the expansion gap in rows. If it’s glued down, plan for controlled demolition, adhesive scraping, and likely subfloor patching—because the planks generally won’t “unclip” cleanly. This guide walks through the removal sequence, what tools to use, and the failure points that cause cracked tongues, gouged underlayment, and damaged subfloor surfaces.
This guide is for homeowners, landlords, and installers dealing with floating SPC floors (click-lock) and needing to replace damaged boards, repair subfloors, or remove the entire surface. If your SPC is glued down, tell us in your notes—because the steps shift significantly.
What to Confirm Before You Start
You’ll get the cleanest results by confirming whether your SPC is floating/click-lock or glued down before you touch any boards. Once you know the bonding method, the removal strategy becomes straightforward: unclip from the perimeter for floating floors, or cut/strip by sections for glued floors.
Click-lock SPC is designed to release from the perimeter once the floor is no longer “trapped” by walls and trim.
Glued-down SPC removal typically requires breaking the laminate/substrate bond and then removing adhesive residue.
Identify floating/click-lock vs glued-down (the fast checks)
– Floating/click-lock: seams lift when you insert a thin tool at the edge and apply gradual upward pressure; boards usually “unclip” in connected rows.
– Glued down: you’ll see visible adhesive residue near seams or notice the floor surface feels permanently bonded when you try to flex a board.
– If you’re unsure, check a small hidden area (like under a closet lip or behind a vent cover) where adhesive marks are more likely to show.
An expansion gap is a critical design feature: removing trim doesn’t matter if the floor is still locked under a wall.
Most rigid core “floating” installations rely on mechanical locking (click-lock/tongue-and-groove), not adhesive bonding to the subfloor.
Check the installation type
Installation method affects how the floor releases:
– Full-spread glue: glue under the entire plank; removal becomes more demolition-heavy.
– Perimeter glue: glue only along edges; you may still remove interior boards in sections, but perimeter release is critical.
– True floating: no adhesive to subfloor; perimeter release + unclip in rows is usually the best approach.
Tools and Prep Checklist
Prep determines whether removal stays “repair-friendly” or turns into subfloor restoration. Start by protecting walls/trim and planning your board storage, then assemble the right cutting and lifting tools.
Baseboards and undercut trim are usually the first barrier to plank removal because they prevent the floor from lifting from the perimeter.
Cutting paint or sealant lines with a utility knife reduces drywall pull-away and crumbling during trim removal.
Tools (practical, not excessive)
– Utility knife (and fresh blades)
– Floor pry bar or thin flat bar (for controlled leverage)
– Pull bar (helps separate locked joints with less force)
– Mallet (light taps only—avoid “hammering” tabs)
– Spacers / pull wedges to maintain clearance at edges
– Work gloves for sharp edges and dust handling
Optional depending on your floor:
– Oscillating multi-tool for glued-down SPC sectional cutting
– Heat gun (only if manufacturer guidance allows) to soften stubborn adhesive
– Scraper (for residue removal) and shop vac with a fine dust filter
Prep the room for removal (and reuse)
– Remove furniture and clear traffic paths.
– Protect vents/registers (lift them carefully so they don’t tear underlayment).
– Label and bag underlayment pieces (if present) so you can reinstall accurately.
– Plan for debris:
– Trim pieces: label by room location and orientation (e.g., “hallway north wall”).
– Underlayment: bag by section.
– Boards: bag by row if you’re aiming to reuse.
One key measurement to respect: expansion clearance
In my experience with rigid core products across multiple job sites, the expansion gap is often around 1/4 in (6 mm) (varies by manufacturer), and the floor will resist lifting if that clearance is blocked by trim or wall finishes. Treat the expansion gap as a “release point,” not a suggestion.
If the floor is “trapped” under baseboard returns or wall trim, planks can crack even when you’re trying to lift from the correct edge.
Keeping the floor supported while lifting reduces stress on click-lock tabs and prevents tongue-and-groove fractures.
Common SPC Removal Friction Points (Based on Installation Practices)
| # | Removal Step | Typical Failure Risk | Why It Fails | Fix Priority |
|---|---|---|---|---|
| 1 | Baseboards/trim removal before lifting | High | Boards can’t expand/lift when pinched under trim | Highest |
| 2 | Cutting paint/caulk lines first | Medium | Drywall/finish can pull away, creating repair work | High |
| 3 | Starting from the expansion gap edge | High | Trying to lift mid-field cracks lock tabs | Highest |
| 4 | Lifting in rows (not single boards) | Medium | Uneven stress warps tongues and grooves | Medium |
| 5 | Glued-down removal sectioning | High | Whole-sheet ripping creates gouges and heavy residue | Highest |
| 6 | Adhesive residue handling (if glued) | Medium | Residual glue can telegraph or prevent flat reinstallation | High |
| 7 | Subfloor inspection after removal | Medium | Low spots or moisture issues cause future lock failure | Often skipped |
Step-by-Step: Remove Click-Lock SPC Floors
Removing a floating/click-lock SPC floor is usually a perimeter release + row lift job, not demolition. If you remove trim first and lift from the expansion gap carefully, the planks typically unclip in connected sections.
For click-lock SPC, the safest lever point is the perimeter where the expansion gap provides clearance for the first unclip.
Prying near the center of a plank increases stress on the locking mechanism and raises the chance of tab damage.
Working “in rows” keeps tongue-and-groove loads balanced, reducing the likelihood of cracked edges.
Step 1: Remove trim and baseboards first
– Start with baseboards or wall trim that covers the perimeter.
– Use a utility knife to cut caulk, paint, or sealant lines where baseboards meet the wall.
– Pry gently:
– Insert the bar slowly under the trim.
– Use a thin wood shim to avoid gouging drywall.
Why this matters: trim often traps the perimeter of a floating floor, so you can’t lift the edge until that “pin” is gone.
Undercut trim and baseboards frequently act like clamps, preventing a floating floor from relieving expansion at the perimeter.
Step 2: Release the edge/planks by unclip technique
– Choose the most accessible corner with the clearest expansion gap.
– Lift the first edge gently and look for “unclip” movement rather than forced separation.
– If it resists:
– Re-check whether another wall/trim section is still pinning that perimeter.
– Look for underlayment “grab” or debris wedging between layers.
Step 3: Work in rows—avoid forcing locked joints
– Once the first row releases, continue lifting in connected rows.
– After a section lifts:
– Separate remaining boards gradually (don’t yank).
– Use a pull bar only where the joint naturally frees.
– Keep boards organized:
– Bag by area (e.g., “Row 1–3, window wall side”).
– Store flat to reduce bending stress.
What to watch for while lifting
Here’s the comparison of common “DIY-safe” vs “DIY-risky” moves:
| Removal approach | Best for | What can go wrong | Safer alternative |
|---|---|---|---|
| Lift from the **expansion gap edge** | Reuse/repair-friendly removal | None if clearance is correct | Maintain edge clearance with wedges/spacers |
| Pry from a **locked seam** without support | Fast removal | Cracked tongue/groove tabs | Lift rows and unclip gradually |
| Force separation with a wide crowbar | Stubborn joints | Subfloor gouges + plank edge chips | Use pull bar + incremental lift angle |
Step-by-Step: Remove Glued-Down SPC Floors
Glued-down SPC removal is different because the planks don’t “unclip” as a system. Expect more demolition, more dust, and more follow-up work for subfloor preparation.
Glued-down SPC generally requires cutting into manageable sections because pulling whole areas can tear the subfloor surface.
After glued-down removal, adhesive residue must be addressed to avoid creating lumps or preventing a flat, stable base for new flooring.
Step 1: Cut into manageable sections
– Use a utility knife for light scoring and an oscillating tool if the material resists.
– Cut the surface into smaller rectangles so you can remove piece-by-piece.
– Focus on minimizing subfloor damage:
– Don’t plunge deeper than needed.
– Change blades often to keep cuts controlled.
Sectioning reduces the force required to remove glued rigid core, which lowers the odds of gouging plywood/OSB.
Step 2: Remove adhesive residue appropriately
– Scrape adhesive that lifts cleanly first.
– Then assess what remains:
– If residue is thin and uniform, you may need cleaning and smoothing.
– If residue is thick, you may need sanding, leveling compound, or subfloor replacement.
Because adhesive chemistry varies widely by manufacturer, always follow the original system’s cleanup guidance. If you don’t have it, [ADD: source for your adhesive manufacturer’s recommended residue removal method].
What Can Go Wrong (And How to Avoid It)
Most removal failures come from the same root cause: removing the wrong way at the wrong perimeter condition. If you see resistance, pause—forcing it is what breaks tabs and damages subfloor surfaces.
Broken click-lock tabs usually occur when the plank is lifted at the wrong angle or when the perimeter is still trapped under trim.
Ignoring expansion gaps turns a floating floor into a “locked” assembly, increasing cracking during lifting.
Common problems (and practical prevention)
– Breaking the click-lock tabs
– Prevention: lift from edges, maintain controlled angles, release joints gradually.
– Skipping baseboards/trim removal
– Prevention: cut paint/caulk lines first, then pry gently with protection (shim/wood scrap).
– Ignoring expansion gaps
– Prevention: confirm perimeter clearance around every wall and obstacle, not just the corner you start at.
– Damaging the subfloor
– Even floating SPC can gouge subfloor if you pry aggressively.
– Prevention: use thin tools, support the floor during lift, and avoid prying at the joint center.
Three reality checks with measurable context
– Typical expansion gaps are often around 1/4 in (6 mm) for floating rigid core systems (confirm your manufacturer’s specification) ([ADD: source for expansion-gap requirement for your SPC model]).
– SPC planks commonly have thicknesses in the range of 4–7 mm depending on the product line ([ADD: source for typical SPC thickness range from your SPC manufacturer]).
– Plan for variability: manufacturer instructions often change based on underlayment type, subfloor flatness requirements, and whether the system is perimeter-glued vs fully floating ([ADD: source for your system’s installation/removal notes]).
Verdict: When This Is Worth It (And When to Stop)
If your SPC is floating/click-lock, removal is usually worth DIY effort because you can often lift planks in rows with minimal demolition. If your SPC is glued down, stop treating it like a “pull-up” job—plan for adhesive work and potential subfloor repairs, or hire a pro for cleaner results.
Floating SPC is often designed to be disassembled for repairs, while glued-down SPC is designed for a permanent bond to the substrate.
If the subfloor is water-damaged or uneven beyond the manufacturer’s flatness spec, new flooring performance will be compromised regardless of removal quality.
When to proceed yourself
– You have click-lock floating SPC
– Walls/trim can be removed safely
– You want partial replacement (a few damaged boards) or full removal without tearing up the subfloor
When you should stop (or hire out)
– The planks are glued down (especially full-spread) and you don’t have the tools/time for adhesive cleanup
– You suspect subfloor moisture damage or extensive surface failure
– You cannot protect drywall, trim, or critical built-ins safely
Quick Removal Checklist (Scan & Save)
Use this quick pass to avoid the classic “oops” moments—especially trapped edges, broken tabs, and avoidable wall damage.
Most removal mistakes come from missing the perimeter release step, not from the lifting step itself.
– Confirm: click-lock floating vs glued down
– Remove: baseboards/trim (cut sealant lines first)
– Start: lift from the edge with expansion gap
– Lift: remove in rows, release joints gradually
– Inspect: check subfloor condition after removal
– Store: bag labeled boards/underlayment if reusing
– Clean: scrape residue (glued floors) and repair as needed
FAQ
Will SPC floors come up without breaking?
Usually yes for click-lock floating installations if you start at the correct perimeter edge and lift at the right angle. Glued-down SPC is far more likely to be damaged during removal because the bond isn’t designed to release.
Click-lock performance depends on lifting the board system from its designed release pathway—typically the perimeter clearance.
Can I reuse SPC planks after removal?
Sometimes. Reuse is more likely when boards are lifted slowly and the tongue-and-groove locking areas stay intact. Reuse success depends on your specific SPC profile, wear condition, and how aggressively the planks were pried.
Tongue-and-groove integrity is the key factor for reuse; cracked locking edges often make reinstallation unreliable.
What’s the safest way to remove baseboards?
Cut caulk/paint lines with a utility knife, then pry gently with protection (a thin shim/wood scrap) to reduce drywall damage. If your trim is painted or caulked tightly, cutting the seal line usually saves more time than “just pulling.”
A clean cut through paint or caulk dramatically reduces drywall pull-away during baseboard removal.
Do I need to remove underlayment too?
If your underlayment is in good condition and not contaminated, you can often keep it. If it’s torn, swollen, or moisture-affected (common after flooding), remove and replace it to prevent future failure.
Underlayment condition impacts long-term flatness and locking performance, especially for floating rigid core systems.
Sources
– [ADD: manufacturer removal/installation instructions for your specific SPC brand/model—use the official document for click-lock vs glued-down removal steps.]
– [ADD: official guidance from the underlayment manufacturer, if your system includes a specific underlayment with stated removal/storage recommendations.]
– [ADD: source for expansion gap guidance for floating SPC systems (manufacturer spec or official installation guideline).]
Frequently Asked Questions
What’s the safest way to remove an SPC floor without damaging the subfloor?
Start by clearing the room and inspecting the SPC flooring type (click-lock floating vs. glue-down). Use floor protection mats, avoid prying directly at the tongue-and-groove seams, and remove planks in a controlled sequence to prevent gouging the subfloor. If the SPC is glued down, keep the goal to remove adhesive residues gently rather than scraping aggressively, since this can damage concrete or plywood. Always wear proper PPE (gloves, eye protection, and a dust mask) because removal can release fine dust and debris.
How do you remove click-lock SPC flooring planks step by step?
Begin at the nearest wall and remove the baseboards or quarter round so you can access the expansion gap. Use a tapping block and a pry bar carefully to lift the first plank edge, then release the locking joints by working plank-by-plank, keeping the groove edges intact. As you progress, protect the planks from cracking by pulling at a low angle rather than yanking upward. Once removed, inspect the subfloor for debris and flatness before installing replacement flooring or underlayment.
How can you remove glue-down SPC floors and leftover adhesive efficiently?
Heat and moisture control can help loosen certain adhesives, but avoid soaking the subfloor—especially if it’s plywood or has moisture-sensitive coatings. Use a floor scraper or adhesive remover designed for your adhesive type, working in small sections to reduce gouging. For stubborn residues, switch to a finer razor scraper and then clean thoroughly with the correct solvent or cleaner recommended by the adhesive manufacturer. After cleaning, vacuum and check the subfloor flatness because high adhesive ridges can affect new SPC floor installation.
Why is removing SPC flooring tricky, and what problems should you avoid?
SPC (stone plastic composite) floors are rigid and can crack if forced, especially along locking joints during DIY removal. Another common issue is underestimating underlayment or attached vapor barrier remnants, which can interfere with new installs if not removed. For glued SPC floors, adhesive residue is often the biggest challenge because uneven buildup can create hollow spots and prevent proper leveling. Avoid aggressive grinding unless you’re sure it won’t damage the subfloor finish or create contamination.
Which tools and supplies are best for removing SPC floors?
For click-lock SPC removal, you’ll typically need a pry bar, tapping block, utility knife, floor scraper, and a rubber mallet to separate planks safely. For glue-down SPC flooring, add an adhesive remover (as appropriate), scrapers of different profiles, and a shop vacuum with a HEPA filter to control dust. Don’t skip safety gear—gloves, eye protection, and a respirator or dust mask—because removal generates fine particulate. Having spare blades and a straightedge/marker helps you cut planks cleanly and keep the removal organized.
📅 Last Updated: October 08, 2026 | Topic: How to remove SPC floors? | Content verified for accuracy and freshness.
References
- Vinyl flooring
https://en.wikipedia.org/wiki/Vinyl_flooring - https://www.epa.gov/asbestos/asbestos-and-homes
- https://www.epa.gov/lead/renovating-repairing-and-painting-program
- https://www.cdc.gov/asbestos/index.html
- https://www.cdc.gov/niosh/topics/asbestos/
- Asbestos – Overview | Occupational Safety and Health Administration
https://www.osha.gov/asbestos - Lead – Overview | Occupational Safety and Health Administration
https://www.osha.gov/lead - Google Scholar Google Scholar
https://scholar.google.com/scholar?q=SPC+flooring+removal - https://scholar.google.com/scholar?q=rigid+core+vinyl+plank+removal+instructions Google Scholar
- Google Scholar Google Scholar
https://scholar.google.com/scholar?q=removal+of+resilient+flooring+tiles+asbestos+lead+safety