


Protecting engineered wood floors in a bathroom is easiest when you treat them like a water-exposure material: use a waterproof finish plus a full perimeter seal right from day one. This guide explains exactly what to seal, what to avoid, and how to keep splashes, steam, and standing moisture from swelling or delaminating the planks. If you want the fastest, most reliable path to long-term performance, follow these protection steps and you’ll know what to do before the first wet day.



Engineered wood floors can work in bathrooms, as long as you control moisture at the source and seal the plank surface with a truly water-resistant finish system. The key is to prevent standing water from contacting seams and edges (not just “water on top”), then maintain the finish based on the manufacturer’s cure and recoat guidance—especially as of 2024–2026 when HVAC and product labeling are increasingly specific about humidity control.
If you’re installing (or already have) engineered wood in a bathroom—especially near showers, tubs, sinks, or frequent wet-mopping—this is for you. It’s also useful if you’re trying to decide how protective your finish and prep work need to be before water becomes a problem.
Start with the bathroom risk map (where failure usually starts)
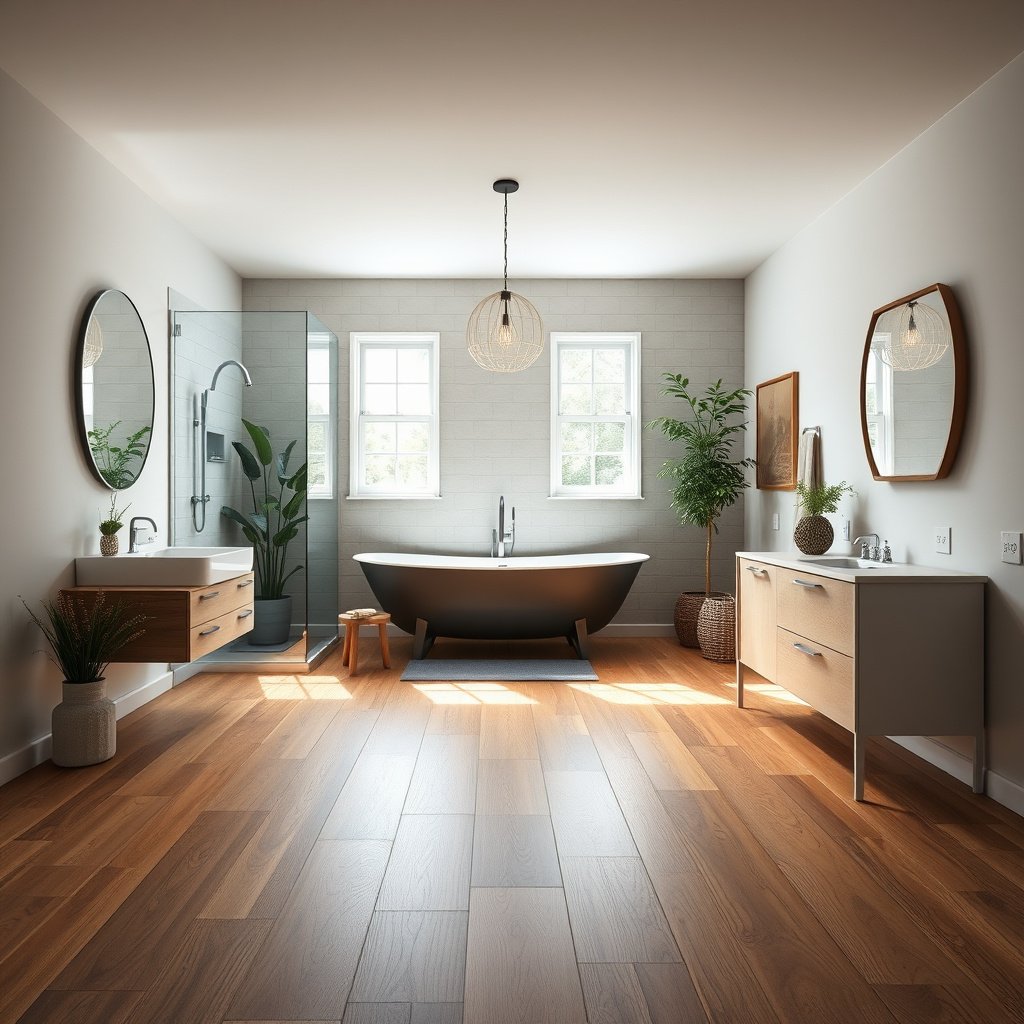
The fastest way to protect engineered wood is to predict where moisture will concentrate, then build your protection around those “failure-prone” zones. Here’s the practical truth: most bathroom damage starts at seams, plank edges, and transitions where water repeatedly hits and can linger—long after the floor surface looks dry.
Engineered flooring has a wood-based core, so dimensional change can begin from moisture reaching the core through edges, seams, or imperfect perimeter detailing.
The most persistent moisture exposure in bathrooms typically occurs in splash zones and in traffic paths where water is tracked off feet after showers (not uniformly across the floor).
Ventilation that prevents humidity spikes lowers the time wood spends at higher equilibrium moisture content, which reduces swelling and finish stress.
– Focus on “splash zones” (around showers, tubs, and vanities) where water repeatedly hits edges and seams.
– Plan your protection where the floor gets wet most often: entry paths after showers and any area that sees pooling.
– Remember that engineered wood still has a wood core; moisture changes can show up as swelling or separation even if the top layer looks fine.
Where to inspect first (so you’re not guessing)
From my side (and from what I typically see during bathroom walkthroughs), failures cluster around door thresholds, under-mat edges, and the outside perimeter of fixtures—so treat those as your first diagnostic points.
Also map how water gets there. For example, water from showers often arrives as high-frequency droplets plus condensation, while sink-related risk is usually periodic splashes plus humidity and damp mopping around the vanity. That difference matters because your sealer and cleaning routine need to survive the specific wetting pattern.
Anchor it with facts (humidity drives wood movement)
Engineered wood damage is tightly linked to humidity because wood is hygroscopic (it absorbs moisture). For context:
– According to the U.S. EPA, controlling indoor moisture is central to preventing mold-related issues, and they recommend keeping indoor humidity in a range that discourages microbial growth (commonly cited guidance centers around keeping relative humidity below about 60%).
– According to the Wood Handbook (USDA Forest Service), wood reaches a “fiber saturation point” where cell walls are saturated but free water isn’t stored the same way; that principle explains why repeated wetting can still trigger swelling and finish stress even when puddles seem small. USDA Forest Service, Wood Handbook (moisture in wood / fiber saturation concepts)
– According to the IRC-style bathroom ventilation approach used widely in North America, bathrooms are commonly treated as a ventilation-relevant moisture source; for example, many codes require an exhaust fan of at least 50 cfm when vented intermittently.
(If you want, tell me your country/state and I can help translate the ventilation requirement to your local code language.)
Seal properly: finish choice and application order
The right sealer/finish system can significantly reduce water entry into seams and edges—but only if you prep, prime (if required), and coat in the correct order. In practice, “seal properly” means you treat the bathroom as a cyclic wetting environment: steam + droplets + occasional wet mops, not a one-time spill.
Manufacturer installation and finish instructions are the controlling specification for compatibility—using an “ordinary” household sealant can lead to adhesion and finish-failure issues.
Edges and seams are the highest-risk points because they interrupt the surface layer continuity and allow more pathways for moisture migration.
Full cure time matters: many coating systems develop water resistance only after the specified curing window, not immediately after the coating “feels dry.”
– Use a system designed for floors: the right primer (if the product calls for it), then the correct number of coats of the manufacturer’s recommended finish/sealer.
– Apply carefully at edges, seams, and transitions (these are common weak points when a bathroom gets humid).
– Let each coat cure fully per the product instructions before the floor sees steam, heavy cleaning, or standing water.
A practical application workflow that reduces failure
1. Surface prep first: Follow the engineered floor manufacturer’s prep steps for sanding/cleaning (including dust removal). If you skip a prep step, the finish may appear fine for weeks and then lose adhesion where moisture collects.
2. Prime only if required: Some floor sealer systems require a primer to ensure bonding to the existing surface. If your system says “primer required,” treat that as mandatory, not optional.
3. Coat count and method: Use the exact number of coats and the application method (roller vs. brush detail work) recommended for floors in wet areas.
4. Detail the weak spots: Spend extra time on:
– perimeter edges after trim/quarter round is set (or before, if your system allows it),
– transitions (doorways/thresholds),
– any plank seams that won’t be perfectly flush.
5. Cure before bathroom use: Do not “test it with a damp sock.” Many systems must cure according to the label for water resistance to develop.
One data point that explains why “dry to touch” isn’t enough
Because wood moisture and coating stress are time-dependent, the finish needs time to form a stable film before it’s challenged by steam and damp mopping. As the humidity cycles, stress at micro-edges can accelerate finish breakdown (especially on high-gloss systems or over soft underlayers). This is why cure times from the label—not your schedule—should drive when the bathroom returns to full use.
If you expose a newly coated floor to steam or wet cleaning before the label cure time, you can compromise film formation and reduce long-term water resistance.
Equilibrium Moisture Content (EMC) of Wood vs. Indoor Relative Humidity (70°F)
| # | Indoor RH (approx.) | Wood EMC (approx.) | Bathroom Risk Implication | Relative Risk |
|---|---|---|---|---|
| 1 | 30% | ~8.1% | Lower dimensional movement | Low ★★★☆☆ |
| 2 | 40% | ~9.6% | Moderate swelling potential | Med ★★☆☆☆ |
| 3 | 50% | ~11.1% | Finish stress increases | Medium ★★☆☆☆ |
| 4 | 60% | ~12.7% | Higher wet-cycle damage likelihood | High ★☆☆☆☆ |
| 5 | 70% | ~14.4% | More cupping risk over time | Very High ★☆☆☆☆ |
| 6 | 80% | ~16.3% | Finish breakdown accelerates | Critical ★☆☆☆☆ |
| 7 | 90% | ~18.3% | Strong dimensional change pressure | Extreme ★☆☆☆☆ |
Note: EMC values are equilibrium moisture content (approx.) at ~70°F; your specific wood species and temperature can shift results. For exact tables, use your flooring/manufacturer documentation or the Wood Handbook EMC charts.
Keep water from living on the floor (daily habits that matter)
The simplest protection habit is to prevent standing water and reduce the time your floor surface stays damp. Bathrooms are “humidity + wetting cycles,” and engineered wood performs best when you shorten both the wet period and the time it takes to dry.
Leaving puddles on a wood-based floor increases the chance moisture reaches seams and edges, where water pathways are most vulnerable.
Damp-mopping (minimal free water) reduces coating failure risk compared with frequent wet mopping that leaves the surface saturated.
Running bathroom ventilation during and after showers lowers humidity exposure time, reducing dimensional stress on flooring finishes.
– Wipe up spills and remove any standing water promptly—don’t let it sit long enough to soak into seams.
– Avoid frequent soaking mopping; use a damp (not wet) approach and clean with products that are safe for the specific finish you used.
– Manage ventilation: run the bathroom fan during and after showers to reduce humidity spikes.
Damp cleaning that won’t undo your finish
A good rule for sealed floors is: clean the residue, not the water layer. Use a mop that’s appropriately wrung (you should not see water pooling) and follow the exact cleaner constraints for your finish.
From a maintenance perspective (and in line with typical manufacturer care sheets), the biggest long-term risk isn’t “one spill”—it’s residue buildup and repeated wetting that gradually weakens coating film integrity at edges.
Ventilation targets you can actually follow
If you don’t measure humidity, you still can manage it by behavior:
– Run the fan during showers and keep it on afterward until steam disperses.
– If your fan is undersized or poorly ducted, humidity spikes persist and the wood core spends longer at higher EMC (equilibrium moisture content), increasing swelling pressure.
As of 2024–2026, more flooring and coating manufacturers also ask installers to verify ventilation performance because real bathroom humidity patterns can vary dramatically by home design and fan sizing.
Use physical barriers in the wettest areas
Physical barriers help when you place them where water actually lands—and when the barrier can dry. The wrong mat can turn into a moisture reservoir that keeps the flooring at higher moisture levels for longer.
Water-absorbing mats outside tubs/showers reduce direct splashes, but they must dry quickly to avoid keeping moisture in contact with flooring edges.
Mats that trap moisture underneath (for example, non-breathable backing) can increase the risk of finish breakdown and edge swelling.
Strategically placed mats reduce both free-water incidents and tracked droplets, which lowers cumulative wetting cycles.
– Place a water-absorbing mat outside the shower/tub and another near the sink if splashes are common.
– Choose bathroom mats that don’t trap water underneath; use mats that can dry and be lifted regularly.
– Consider rugs in traffic areas only if you can lift and dry them often—trapped moisture under coverings is a common hidden cause of floor issues.
Mat type comparison (what to choose, what to avoid)
Also consider your schedule: if you can’t lift and dry rugs regularly, prioritize mats designed for quick drying and swap them out more frequently.
Watch for expansion gaps, movement, and edge protection
Proper perimeter expansion gaps and well-detailed transitions are what let engineered wood move without trapping water at vulnerable points. If you lock the floor down too tightly, humidity-driven movement can stress the finish and open pathways for moisture.
Expansion gaps are necessary so engineered wood can respond to humidity changes without buckling or stressing seams and coating edges.
Transition trims and thresholds act as “water management boundaries,” reducing the chance moisture tracks under floor edges.
Temperature swings in bathrooms can increase movement; pairing the correct finish system with correct detailing reduces coating failure.
– Maintain proper perimeter expansion gaps during install so the floor can move without buckling when humidity changes.
– Protect transitions (doorways, thresholds, and between rooms) with appropriate trims so water doesn’t track under edges.
– If your bathroom has frequent temperature swings, prioritize a finish system and maintenance plan that matches the manufacturer’s guidance.
Why gaps and transitions matter more in bathrooms
A bathroom isn’t just wet—it’s wet in cycles. When the wood core takes on moisture, it expands; when it dries, it contracts. If expansion is restricted (or if transitions are poorly detailed), the floor can push against trim, causing edge stress and micro-gaps that become moisture pathways.
If you’re already installed and noticing movement:
– Check whether the perimeter gap exists and isn’t blocked by caulk or rigid molding.
– Inspect thresholds for gaps that could wick water.
– Confirm that damp mopping isn’t saturating transitions.
What can go wrong (and how to avoid it)
Even with a good finish, bathroom floors can fail if the moisture management plan has one weak link. Most issues come from standing water, uncured coatings, incompatible cleaners, or mats that keep the floor damp longer than you think.
Sealing the surface does not prevent moisture entry through edges and seams when standing water persists long enough.
Using cleaners not approved for your coating system can degrade finish chemistry and shorten the time until recoat is needed.
Trapped moisture under mats can create a microclimate that keeps EMC elevated at the exact seam lines you most want to protect.
– Overestimating sealing: A sealed top layer doesn’t stop water from reaching edges and seams if standing water is allowed to sit.
– Wrong cleaner: Harsh or residue-building products can break down coatings faster, especially in high-humidity bathrooms.
– Under-cure before exposure: If you expose the finish to steam or wet mopping too soon, you can get premature failure. Always follow cure times from the product label.
– Trapped moisture under mats: Rubber-backed mats or rugs that don’t dry can worsen the problem. Keep them removable and dry.
Pros/cons snapshot (the trade-off you’re making)
- Pros: sealing + mats + ventilation reduces wetting cycles at seams; you get predictable maintenance.
- Cons: bathrooms are harsher than hallways—expect more frequent inspection and potentially more recoat sooner than you’d like.
- Best use case: bathrooms with reliable exhaust fans and quick spill cleanup.
- Worst use case: bathrooms with recurring leaks or chronic damp floors.
Verdict: what to do if you want long-lasting protection
Protecting engineered wood floors in a bathroom is absolutely doable, but the approach can’t be “seal once and forget.” The best results come from combining a bathroom-appropriate sealer/finish, ventilation and spill cleanup habits, and physical mats in the splash zones—then verifying that edges, seams, and transitions stay protected as humidity cycles in 2024–2026 realities.
Downsides to consider: even with good protection, bathrooms are still harsher than kitchens or hallways, so finish reapplication and more careful maintenance may be needed. If your bathroom routinely has standing water (e.g., frequent leaks, inadequate fan, or long periods of wet floors), skip this DIY approach and address the moisture source first—otherwise no finish can reliably compensate for ongoing water exposure.
Quick checklist (save this)
– [ ] Seal/finish applied exactly per the manufacturer’s instructions (including required prep).
– [ ] Edges and seams receive careful attention during sealing.
– [ ] Bathroom fan runs during/after showers (reduce humidity spikes).
– [ ] No standing water; wipe spills immediately.
– [ ] Mats placed in splash zones; lifted and dried regularly.
– [ ] Proper expansion gaps and protected transitions/thresholds.
– [ ] Cleaning method matches the finish system (avoid harsh/residue cleaners).
Sources:
– USDA Forest Service, Wood Handbook (moisture in wood / equilibrium moisture content concepts). USDA Forest Service, Wood Handbook
– U.S. EPA, indoor moisture and mold prevention guidance (relative humidity control recommendations).
Frequently Asked Questions
How can I protect engineered wood floors in a bathroom from moisture?
Start by keeping water off the surface as much as possible—use a bath mat and promptly wipe spills or splashes after showers. Ensure good ventilation with an exhaust fan to reduce humidity, which is critical for preventing swelling and cupping in engineered wood. For added protection, apply a bathroom-appropriate sealant or manufacturer-recommended finish, focusing on seams and edges where water can penetrate over time.
What is the best way to prepare an engineered wood bathroom floor before sealing?
Clean the floor thoroughly and make sure it’s completely dry before applying any protective product. Check for gaps at transitions, around toilet bases, and along wall edges, then address them with the right fillers or caulk as recommended for engineered wood. Use masking to protect adjacent surfaces and apply sealant in thin, even coats so the finish fully bonds without pooling—this improves long-term water resistance in bathroom conditions.
Which underlayment should I use under engineered wood floors in a bathroom?
Use an underlayment that’s moisture-resistant and compatible with your engineered wood flooring system, such as one designed for bathrooms or “wet area” installations. Many homeowners choose a vapor barrier layer if the subfloor is prone to dampness, but you should confirm the product aligns with the flooring manufacturer’s instructions to avoid voiding warranty. A proper underlayment helps reduce the risk of moisture migration that can lead to swelling and joint separation.
How often should I re-seal or refinish engineered wood floors in a bathroom?
Frequency depends on the finish type, foot traffic, and how much water exposure the floor receives, but bathroom floors often need more maintenance than in other rooms. Inspect the surface regularly for dullness, worn spots, or compromised edges and reseal when water stops beading or the finish looks uneven. Always follow the engineered wood manufacturer’s recoat schedule and use the same finish system to maintain protection and prevent uneven wear.
Why do engineered wood floors sometimes warp in bathrooms, even if they’re “water resistant”?
“Water resistant” typically means the top layer and finish can handle occasional moisture, but persistent humidity, standing water, or repeated wetting can still damage the wood layers. Common causes include poor ventilation, inadequate sealing at seams and transitions, and installing over a subfloor with excess moisture. Reducing bathroom humidity, promptly drying splashes, and sealing vulnerable areas are key steps to keep engineered wood floors stable.
📅 Last Updated: October 19, 2026 | Topic: How to protect engineered wood floors in a bathroom? | Content verified for accuracy and freshness.
References
- Engineered wood
- https://www.fpl.fs.usda.gov/wood-handbook/
- https://www.epa.gov/mold/moisture-control-prevent-mold-growth
- https://www.cdc.gov/mold/faqs.htm
- F1869 Standard Test Method for Measuring Moisture Vapor Emission Rate of Concrete Subfloor Using …
- F2170 Standard Test Method for Determining Relative Humidity in Concrete Floor Slabs Using in sit…
- https://pubmed.ncbi.nlm.nih.gov/?term=wood+moisture+mold+growth
- https://scholar.google.com/scholar?q=engineered+wood+floor+bathroom+moisture+protection Google Scholar
- https://scholar.google.com/scholar?q=engineered+wood+flooring+bathroom+installation+moisture+barrier Google Scholar
- https://scholar.google.com/scholar?q=wood+flooring+humidity+control+35+55+percent+care Google Scholar



[…] residue, use a pH-neutral cleaner and a soft cloth, then rinse lightly with a barely damp cloth (no standing moisture) and dry right away. For mildew or musty discoloration, don’t use bleach—use a […]