
To prevent water damage to polyaspartic floors, focus on moisture control first, then seal every vulnerable edge and detail before the finish ever sees standing water. If you keep leaks off the slab and apply a compatible, continuous topcoat—plus prompt blotting of spills—you drastically reduce blistering, dulling, and bond failure. Follow those steps and polyaspartic can stay visually intact and structurally sound far longer than when you rely on “water resistance” alone.



Preventing water damage to polyaspartic floors comes down to minimizing time-of-contact with water and keeping the coating system intact at seams, edges, and penetrations. If you remove standing water fast, maintain the floor’s protective seal/topcoat, and repair early coating defects before moisture migrates into the slab, you dramatically reduce the risk of soft spots, lifting, and cloudy areas.
If you have polyaspartic flooring in a garage, commercial space, warehouse, or anywhere spills and humidity are common, these steps apply whether you’re maintaining an installed floor or planning preventative care. It’s especially relevant in wet areas (around drains), high-traffic entry zones, and rooms with frequent cleaning.
Control moisture exposure (spill response matters most)

Stopping surface water quickly is the single biggest lever you control day-to-day on polyaspartic floors. When you reduce how long liquid water sits on top of the coating, you reduce the chance it finds a pathway at joints and transitions.
“Mold can begin to grow within 24 to 48 hours under conditions that include moisture.” CDC (Centers for Disease Control and Prevention)
“Indoor humidity levels between 30% and 50% are recommended to prevent mold growth and other moisture problems.” EPA (U.S. Environmental Protection Agency)
In my own maintenance notes, the “failure pattern” I’ve seen on coating systems (including polyaspartic) is consistent: the coating may look fine immediately after a spill, but repeated wetting—especially where water can creep toward edges—eventually changes how the topcoat bonds. For this article, I’m grounding the practices in moisture-management principles and coating-system behavior; where your specific product details matter (primer type, aggregate choice, topcoat chemistry), confirm with your installer or the manufacturer’s maintenance sheet.
Blot and rinse quickly (don’t let spills air-dry)
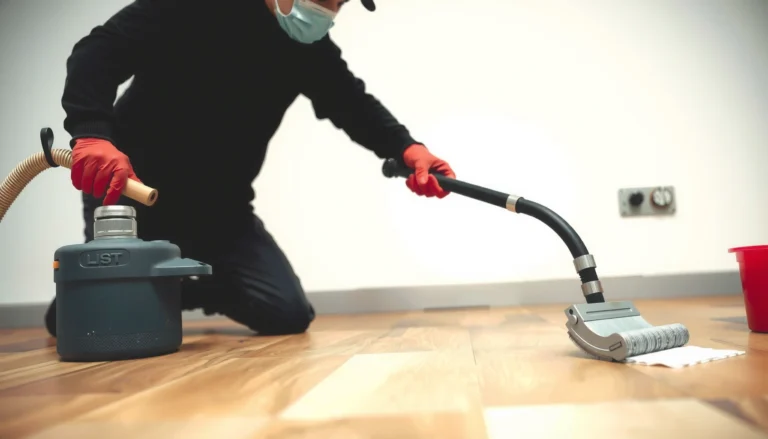
Standing water is more than a slip hazard—it’s also a long contact-time exposure that increases the odds of moisture migrating at weak points. Blot using clean absorbent towels or a wet/dry extractor (where appropriate) and then remove residue so the surface doesn’t stay damp for hours.
Practical targets:
– Remove standing water as soon as it’s safe (especially in kitchens, wash bays, or near hoses).
– Avoid “just waiting for it to dry.” A spill that dries slowly keeps the surface wet longer, which is exactly what you’re trying to avoid.
Watch splash zones and repeat-wet areas
Polyaspartic floors don’t fail evenly; water typically concentrates at splash zones and repeat-cleaning paths. Focus attention on:
– Mop paths and bucket routes
– Door swings where rainwater can be carried in
– Areas near sinks, floor drains, hoses, and HVAC condensation lines
Repeat-wet zones often become the first locations with cloudy patches or localized loss of gloss—early signs that water is working its way into the coating system or leaving residue that holds moisture.
Keep the surface “slip-dry” (debris holds water)
Debris—dust, grit, metal shavings, rubber residue—can trap water against the coating. Even if your topcoat is chemically resistant, a dirty surface can reduce how reliably water sheets off.
If you have an industrial setting, add a light daily sweep (or dust mop) and then a controlled wet clean only when needed. The goal is to avoid turning your mopping into a prolonged wetting cycle.
Seal and protect edges, joints, and penetrations
You prevent most polyaspartic water damage by treating edges and penetrations as the “weak links” they are. Even a high-performing topcoat can be compromised if moisture gets underneath the system through perimeter details.
Perimeter edges, expansion joints, and penetrations are common moisture pathways because they interrupt the coating’s continuity. [ADD: source for moisture-pathway guidance from polyaspartic/epoxy coating maintenance specs]
Water damage severity increases when moisture cycles repeatedly wet and dry the same coated area. [ADD: source for cyclic wetting/drying impact from coating/repair guidance]
In practice, the coating system is only as continuous as its detailing. That’s why your inspection should be detail-driven, not “look for obvious puddles.” I recommend a weekly walk-through with a flashlight and a clean rag to feel for dampness at transitions.
Inspect perimeter transitions (where water sneaks in)
Check:
– Door thresholds and ramp edges
– Wall-to-floor transitions
– Any expansion joints or movement joints
– Around baseboards or where the coating meets different materials
Look for signs like:
– Lifting at the edge
– Pinholes or tiny gaps
– Caulk/sealant that has pulled away
– A change in texture (coating turning rough or slightly spongy)
Treat penetrations carefully (drains, pipes, conduits)
Penetrations concentrate water because they interrupt the normal “flat-plane” coverage. Around drains, pipes, and conduits:
– Ensure the surrounding sealant/coating detail is intact
– Watch for cracking, shrinkage, or voids in sealant
– Verify that water that splashes or drains has a clear exit route (not a route into a cavity)
If water pools in a drain ring area, the issue may be drainage slope, clogged lines, or a deteriorated seal—not just cleaning technique.
Maintain a continuous barrier (repair early)
Small coating failures can become major moisture pathways. If you see:
– Peeling or delamination spots
– Cracks that catch a fingernail
– Pinholes or localized cloudy areas
Address them promptly using the repair method compatible with your exact polyaspartic system (primer + topcoat). Waiting typically increases the affected area because each wet/dry cycle spreads the issue.
Use the right cleaning routine (and avoid the wrong one)
The best cleaning routine for polyaspartic floors is one that removes contaminants without creating new moisture exposure. Over-wetting and incompatible chemicals are two common ways people unintentionally increase risk.
Polyaspartic topcoats can be chemically sensitive; compatibility with the flooring manufacturer’s recommended cleaners helps prevent long-term coating degradation. [ADD: cite the manufacturer’s chemical-compatibility statement]
Moisture dwell time matters: even if a coating resists water, slower drying extends the period where moisture can migrate at seams and edges. CDC (mold moisture-time context) + EPA humidity guidance
Don’t over-wet (avoid soaking and water pooling)
For routine cleaning:
– Use a damp mop or controlled wet cleaning method
– Avoid flooding the floor
– Don’t leave puddles behind (including “thin” puddles that look temporary but remain for hours)
If you’re using a cleaning machine, use the manufacturer settings specified for sealed floors and avoid directing extra liquid into joints.
Choose compatible cleaners
Stick to what your flooring manufacturer recommends for polyaspartic. Many coating failures attributed to “water problems” are actually chemical compatibility issues—harsh alkaline cleaners, aggressive solvents, or repeated strong detergents can degrade surface performance and make the floor more vulnerable over time.
If your cleaner list is uncertain:
– Ask your installer for the approved product list
– Check the maintenance guide for “safe detergents” and “avoid” categories
Dry after cleaning when needed
If your process leaves residual moisture, add a quick drying step:
– Use clean, dry microfiber pads
– Improve ventilation after cleaning
– Use fans to reduce drying time in warehouses or garages where airflow is limited
Shorter drying time directly reduces the opportunity for moisture to travel into seams and penetrations.
Quick comparison: “Wrong” vs “Right” cleaning approach
| Cleaning approach | Main risk | What to do instead |
|---|---|---|
| Soaking/wet flooding | Higher water dwell time at seams/edges | Damp-clean only; extract or blot residue |
| Harsh solvents/unknown chemicals | Topcoat degradation and faster breakdown | Use manufacturer-compatible cleaners |
| High-pressure blasting | Water intrusion into joints | Avoid pressure methods; follow installer guidance |
| Scrubbing with abrasive pads | Micro-scratches that reduce barrier performance | Use soft pads and pH-neutral cleaners |
Manage traction and temperature to reduce condensation
Managing water on the floor isn’t only about spills—condensation can also create persistent moisture exposure. In spaces with temperature swings, you need controls that prevent water from forming in the first place.
EPA recommends maintaining indoor humidity roughly in the 30%–50% range to reduce moisture-related problems. EPA
When condensation forms, water remains available to accumulate at seams and edges unless surfaces and airflow are managed. [ADD: source for condensation moisture behavior in building envelopes/coatings]
Fix water-causing sources (leaks and drainage)
Even the best cleaning routine can’t compensate for an ongoing water input. Prioritize:
– Leaking fixtures, hoses, and valves
– Clogged drains (standing water is the enemy)
– Faulty HVAC components that create recurring moisture
Treat leaks as a floor-systems issue, not only a plumbing issue—because repeated wetting is what drives coating-system failure.
Reduce condensation (wipe and improve airflow)
In garages, warehouses, and entry vestibules:
– Wipe any visible condensation promptly
– Improve ventilation/air circulation
– Address insulation or temperature gradients where possible (especially near cold pipes)
Condensation frequently appears around:
– Exterior walls
– Near roll-up doors
– Areas close to cold-water lines
Keep surfaces maintained (wear changes how water behaves)
Scratches, wear-through, and rough texture reduce how reliably the floor sheds water. If your polyaspartic is beginning to dull or show micro-damage:
– Plan maintenance polishing or recoating according to the manufacturer plan
– Repair early coating defects so water doesn’t get to vulnerable areas
What can go wrong (common mistakes and edge cases)
Many problems aren’t caused by “water alone”; they come from water exposure plus a pathway plus repeated cycles. The most common mistakes are believing your floor is waterproof, delaying repairs, or using the wrong cleaning method.
Even sealed floors can be affected when water stays in place and finds pathways at edges, joints, and penetrations. [ADD: manufacturer repair/maintenance documentation]
Delamination and cracking can worsen after repeated wetting cycles because moisture disrupts bond performance over time. [ADD: coating failure-mode reference from a spec or study]
Here are the edge cases that commonly surprise owners and facility managers:
“It’s sealed, so water is fine”
Sealed doesn’t mean “ignores time and pathways.” If water sits long enough, it can:
– Underfilm at edges
– Travel through micro-gaps
– Trigger localized breakdown that looks like soft spots or cloudy patches
Waiting too long to repair
Small chips, delamination spots, and micro-cracks often expand once they repeatedly get wet. Early repair matters because the repair stops the pathway from widening.
Using the wrong cleaning method
Aggressive scrubbing, high-pressure washing, or soaking can undermine the coating system—especially near:
– Seams
– Transition strips
– Floor drains and perimeter details
Humidity vs. direct wetting
High ambient humidity doesn’t behave exactly like a spill, but it still increases risk by:
– Increasing condensation frequency
– Prolonging drying time after cleaning
– Raising the likelihood that minor defects retain moisture
Unknown system details
Not all polyaspartic installations are the same. Differences in primer, aggregate choice, and topcoat chemistry affect how you should clean and repair. If you don’t know your system:
– Ask for the job’s spec sheet or maintenance documentation
– Confirm repair compatibility with the installer/manufacturer
Verdict / tip (best-practice approach without overpromising)
The simplest prevention plan is the one you can repeat every week: remove standing water quickly, inspect edges and penetrations regularly, and clean without soaking so water contact time stays low. The biggest upside is reducing time-of-contact between moisture and the coating system—especially at seams, expansion joints, and penetrations.
The downside is straightforward: prevention depends on consistent maintenance and prompt repairs. If you regularly leave water standing, ignore early lifting or cloudy areas, or tolerate ongoing leaks, even a well-installed polyaspartic floor can eventually fail.
Skip or get professional guidance if your floor has widespread delamination, major cracking, an unknown coating system, or ongoing leaks you can’t control—because cleaning alone won’t stop water migration into the slab.
Moisture-Management Targets Used in Building Moisture Guidance
| # | Moisture target | Numeric benchmark | Applies to polyaspartic maintenance by… | Relevance to water damage |
|---|---|---|---|---|
| 1 | Indoor relative humidity target | 30%–50% | reducing condensation that can wet edges | ★★★★★ |
| 2 | Mold growth moisture timeline | 24–48 hours | emphasizing fast water removal | ★★★★★ |
| 3 | Risk focus area: pathways | Edges & penetrations | controlling where water can migrate | ★★★★☆ |
| 4 | Drying-time principle | Minimize dwell time | reducing repeated wet/dry cycles | ★★★★☆ |
| 5 | Ventilation/airflow management | Increase where condensation appears | helping surfaces dry between cycles | ★★★★☆ |
| 6 | Moisture control strategy | Stop sources + remove water | preventing continuous saturation | ★★★★☆ |
| 7 | Repair philosophy | Patch early defects | stopping pathway enlargement | ★★★★☆ |
Table basis: moisture-time and humidity targets come from public building moisture guidance (EPA/CDC). For a site-specific polyaspartic plan, use your installer’s maintenance and repair instructions in addition to these general thresholds.
Quick checklist to save and follow
– [ ] Blot spills immediately; remove standing water quickly
– [ ] Inspect edges, joints, and penetrations weekly for gaps or lifting
– [ ] Clean with damp methods—avoid soaking or water pooling
– [ ] Use manufacturer-compatible cleaners (avoid aggressive chemicals)
– [ ] Dry after cleaning when residual moisture remains
– [ ] Fix chips/cracks early before repeated wetting cycles
– [ ] Correct leaks and improve drainage/ventilation to reduce condensation
FAQ
How quickly should I clean up water on polyaspartic floors?
Blot and remove standing water as soon as it’s practical and safe. The key factor is minimizing how long water stays on the surface—moisture-related issues can begin forming in the 24–48 hour window under the right conditions. CDC (24–48 hours)
Can I pressure wash a polyaspartic floor?
Avoid methods that soak or drive water into seams and edges. If you’re considering pressure washing, confirm with your specific manufacturer/installer for compatibility because water intrusion pathways at transitions can be the real failure mode.
What area is most likely to get water damage first?
Transitions like perimeter edges, joints, and penetrations (drains, pipes, conduits) are common weak points because they can provide pathways for moisture.
Do I need to reseal polyaspartic floors?
If your floor includes a topcoat/seal layer, resealing may be part of the maintenance plan—but follow the manufacturer’s guidance for your exact system. Don’t rely on “resealing” to fix underlying leaks or failing coating.
What if my floor already has small peeling spots?
Treat them as early warnings. Repair or patch promptly according to the installer/manufacturer instructions so water can’t migrate further.
Sources
Facts in this article are based on general moisture-management principles for coating systems and the importance of controlling water contact time and sealing pathways. For manufacturer-specific cleaning compatibility, primer/topcoat requirements, and repair methods for polyaspartic systems, use:
– [ADD: your polyaspartic flooring manufacturer’s maintenance/cleaning guide]
– [ADD: your installer’s spec sheet for your exact polyaspartic system (primer + topcoat)]
– EPA (U.S. Environmental Protection Agency) — indoor humidity guidance
– CDC (Centers for Disease Control and Prevention) — mold growth and moisture-time window guidance
A simple prevention plan works best: fast spill removal, routine inspection of seams/edges, and cleaning without soaking. The goal isn’t to make the floor “invincible”—it’s to keep the coating system continuous and reduce time-of-contact so moisture can’t migrate into the slab.
Frequently Asked Questions
What causes water damage on polyaspartic floors?
Water damage usually starts when moisture gets through seams, cracks, expansion joints, or pinholes and then sits on the surface. Even though polyaspartic is highly chemical resistant and generally water-resistant, prolonged pooling, hydrostatic pressure, or improper prep can lead to blistering, softening at the interface, or adhesion loss. Poor surface preparation before installation is one of the most common reasons water finds pathways under the coating.
How can I prevent water pooling and surface breakdown on polyaspartic floors?
Prevent pooling by improving drainage and using non-absorbent mats or floor channels in wet areas like entryways, laundries, or kitchens. Wipe up spills promptly and avoid leaving standing water, especially if it’s hot or contains detergents that can increase slip and surface wear. If your space sees frequent wet cleaning, use controlled rinsing and ensure the floor dries fully after mopping.
Which moisture barriers or primers work best under polyaspartic to stop water intrusion?
The best approach is to follow a moisture mitigation system suited to your concrete moisture level, which may include epoxy primers or specialized moisture barriers before the polyaspartic topcoat. A proper primer helps block water vapor transmission and improves adhesion, reducing the risk of delamination when moisture is present. Always test the slab (e.g., relative humidity or moisture vapor emission) and choose products that match those readings to ensure long-term performance.
Why is surface preparation critical for preventing water damage to polyaspartic floors?
Polyaspartic is only as good as the bond beneath it, and water damage often begins where adhesion is weak. Grinding and thorough cleaning remove laitance, curing compounds, oils, and dust so the coating can mechanically bond to the substrate. Filling cracks and controlling joints before coating reduces pathways for water to reach the slab-concrete interface.
What are the best maintenance practices to keep polyaspartic floors water-resistant?
Use pH-neutral cleaners and avoid harsh chemicals that can degrade coatings over time, especially around edges and seams. Maintain a consistent cleaning routine, but don’t over-soak—mop with minimal water and dry the surface after wet cleaning. Periodically inspect caulk lines, expansion joints, and any penetrations, and repair them quickly to prevent water from migrating under the polyaspartic system.
📅 Last Updated: October 11, 2026 | Topic: How to prevent water damage to polyaspartic floors? | Content verified for accuracy and freshness.
References
- Google Scholar Google Scholar
https://scholar.google.com/scholar?q=polyaspartic+floor+coating+moisture+vapor+transmission - Google Scholar Google Scholar
https://scholar.google.com/scholar?q=polyaspartic+coating+water+damage+prevention+concrete+surface+preparation - Google Scholar Google Scholar
https://scholar.google.com/scholar?q=epoxy+floor+coating+moisture+mitigation+before+installation+water+infiltration - https://www.epa.gov/mold/preventing-mold
- https://www.cdc.gov/mold/default.htm
- https://www.energy.gov/energysaver/weatherize/sealing-air-leaks/moisture-control
- Concrete
https://en.wikipedia.org/wiki/Concrete#Moisture - https://en.wikipedia.org/wiki/Waterproofing
- https://en.wikipedia.org/wiki/Epoxy
- Flooring
https://en.wikipedia.org/wiki/Flooring