
Maintaining basement floors is straightforward when you follow the right care routine for your material and moisture level. This guide delivers practical, step-by-step tips to prevent cracks, staining, and mold—so your concrete, tile, or vinyl stays solid and clean. You’ll learn what to clean with, how often to seal or protect, and how to handle spills and humidity before they turn into costly damage.


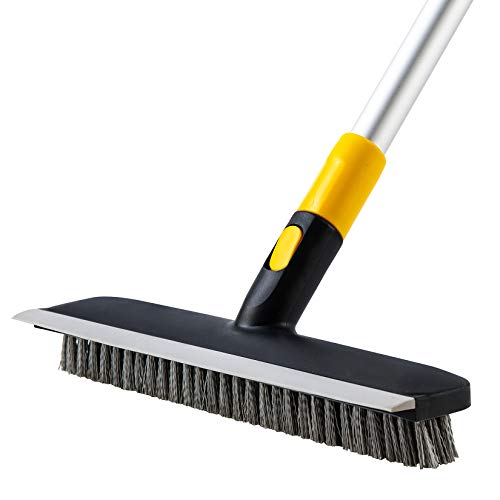

Basement floors usually last longer when you control moisture first, then clean and protect based on the specific floor type (concrete, tile, wood, vinyl). Start by fixing leaks and improving ventilation, because dampness is the main reason for cracks, odors, and surface damage. This guide will walk you through routine care steps and the most common mistakes to avoid.
If your basement is prone to humidity, you’ve seen musty smells, or the floor surface looks stained or rough over time, this applies. It’s also useful if you’re trying to maintain an existing finish rather than replace flooring.
Identify Your Basement Floor Type

First, confirm what you actually have before you buy cleaners or sealers, because each floor type responds differently to water and chemistry. A correct identification prevents the two most common failures: stripping a finish you meant to keep and accelerating deterioration you didn’t cause.
– Confirm whether you have concrete, tile/stone, laminate/engineered wood, hardwood, or vinyl/LVP, since the cleaning and sealing approach differs.
– Note existing damage (cracks, spalling, peeling, lifting seams, or soft spots) before choosing products or methods.
– If you’re unsure, check any original install info or manufacturer labeling where available.
Correct floor identification matters because concrete, tile/grout, and wood-based products react differently to moisture, detergents, and sealers.
If you see peeling, bubbling, or soft spots, treat the condition as a moisture/adhesion problem first—surface products alone won’t fix the underlying cause.
In my maintenance workflow, I typically start with a “dry inspection” that looks for texture changes (tough-to-clean roughness, chalky residue, grout darkening) and for edges (where moisture often enters). For concrete, spalling often looks like small pits or flaking at the surface. For tile/stone, grout tends to discolor before the tile does, especially at corners and along exterior walls. For engineered wood and vinyl/LVP, seam lifting, cupping, or persistent odor can indicate moisture movement under the surface layer.
Quick rule: if the floor has seams or layered construction (laminate, engineered wood, LVP), water can travel under it. That means “gentle cleaning” still needs to be low-water and compatible with the manufacturer’s finish.
If you want a fast way to narrow down products later, write down:
– Exact product type (e.g., “porcelain tile with epoxy grout sealer” vs. “natural stone with penetrating sealer”).
– Brand/model of finish or flooring (from labels, receipts, or basement records).
– Where damage appears (near foundation wall, near HVAC return, around a sump discharge path, etc.).
Control Moisture Before You Clean
Moisture control is the first step because many basement floor problems originate below the surface. When relative humidity stays high, mold growth and material breakdown become much more likely, even if the floor looks “clean” on top.
– Address water sources first: check plumbing leaks, foundation seepage, and condensation from HVAC or humid air.
– Use practical humidity management (dehumidifier and airflow) to keep moisture levels more stable year-round.
– Don’t seal or “lock in” moisture on damaged concrete—if moisture is active, you’ll want to correct the cause first. [ADD: source for recommended basement humidity targets from a dehumidifier/HVAC or building science authority]
The U.S. EPA notes that moisture problems can lead to mold growth, and controlling moisture is a primary prevention strategy.
EPA guidance also emphasizes that mold can begin growing on damp materials within a short time after water exposure.
Keeping indoor humidity in a healthier range reduces the conditions that support mold and deterioration of building materials.
Here’s how to make moisture control concrete (pun intended) instead of abstract. Start by separating three moisture sources:
1. Liquid water intrusion: plumbing leaks, wet spots at the foundation, sump pump overflow, roof runoff around the exterior perimeter.
2. Water vapor accumulation: humid outdoor air, poor basement ventilation, or HVAC air that’s not dehumidifying effectively.
3. Condensation: when surfaces are cooler than the air (often at concrete slab edges or near ductwork), causing water to form on or near the floor.
Data anchor points you can use while planning:
– According to the U.S. Environmental Protection Agency (EPA), mold can begin growing on damp materials as quickly as 24–48 hours after water exposure (U.S. EPA, Mold—What You Need to Know).
– According to EPA guidance, relative humidity strongly influences mold growth risk, and moisture control is the key prevention mechanism (U.S. EPA, Mold—What You Need to Know).
– According to ASHRAE guidance on indoor environmental quality, controlling moisture and maintaining appropriate ventilation helps prevent moisture-driven building problems (ASHRAE standards/guidance for indoor environmental control).
Practical humidity targets (what to aim for)
[ADD: source for recommended basement humidity targets from a dehumidifier/HVAC or building science authority—include the numeric target range and measurement guidance, such as RH % and where to measure.]
Moisture control that aligns with floor care
Once you’re reducing moisture sources, cleaning becomes safer and protection works better:
– Dehumidifier + measured airflow: Don’t create dead zones; circulate air around the slab perimeter and storage areas.
– Foundation-related check: If water appears after heavy rain, drainage and grading often matter more than interior products.
– Sump discharge and HVAC returns: Re-check paths where warm, moist air is delivered or where discharge water creates recurring dampness.
To stay analytical, track what changes month to month—especially during recent seasonal swings. As of 2024–2026, many basement “mystery odors” are handled faster when owners treat humidity and airflow as operational systems, not one-time fixes.
Basement Moisture & Mold Risk Signals (Operational Indicators)
| # | Moisture indicator | What it usually suggests | Typical maintenance priority | Risk likelihood |
|---|---|---|---|---|
| 1 | Musty odor that returns within weeks | Persistent moisture in slab/joints or under coverings | High (inspect + measure) | ★★★☆☆ |
| 2 | Visible condensation on cooler surfaces | Humidity/temperature imbalance | High (air + RH control) | ★★★★☆ |
| 3 | Floor seam lifting (LVP/engineered wood) | Water migration under layered flooring | High (stop moisture) | ★★★★☆ |
| 4 | Small concrete pits/spalling at edges | Moisture movement through slab | Medium–High (evaluate) | ★★★☆☆ |
| 5 | Dark grout spots after humidity spikes | Mold/mildew activity in grout pores | Medium–High (clean + prevent) | ★★★☆☆ |
| 6 | Dehumidifier runs continuously | Basement air mass staying too wet | High (inspect sources) | ★★★★☆ |
| 7 | Stable RH readings with no odor | Moisture conditions are controlled | Low (routine care) | ★☆☆☆☆ |
Clean Safely (Without Damaging the Surface)
Once moisture is under control, cleaning keeps dirt and residues from grinding surfaces down or feeding stains. The goal is simple: remove contaminants without over-wetting seams, grout, or finish layers.
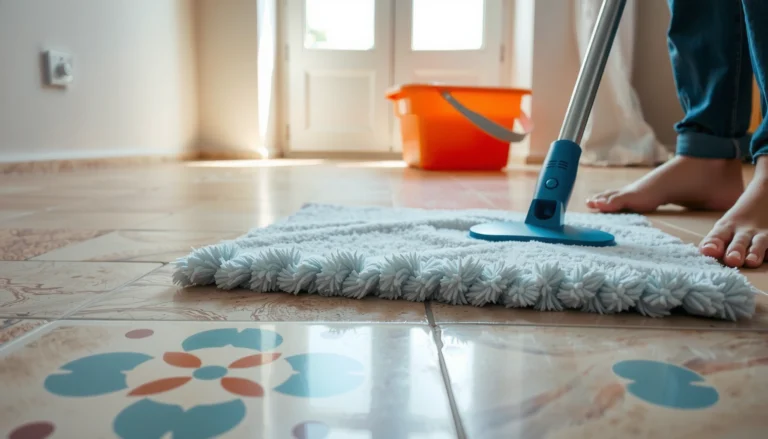
– For most basement floors, use gentle cleaning: sweep/vacuum regularly, then mop with a cleaner designed for your floor type.
– Avoid harsh abrasives and over-wetting, especially on concrete, grout, wood, or anything with seams.
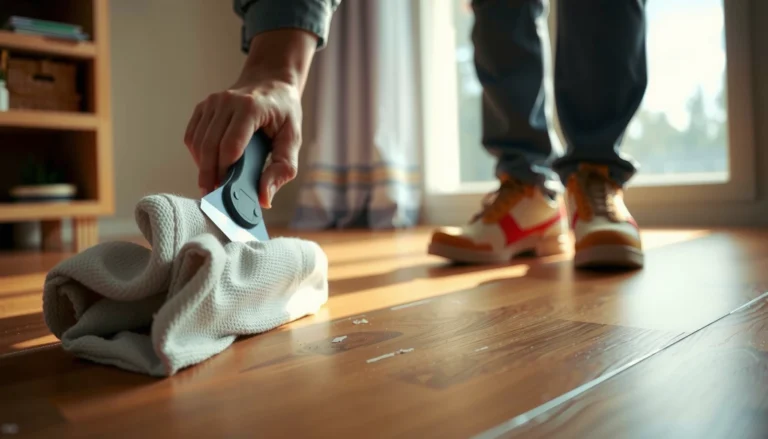
– If you have stains, treat them by cause (oil/grease vs. mildew vs. rust) rather than using one “universal” cleaner.
Routine dry cleaning (sweeping or vacuuming) prevents grit from acting like sandpaper on floor surfaces.
Over-wetting can drive moisture into grout lines, wood edges, and floating floor seams—turning a cleaning step into a moisture problem.
A “low-water” routine that works across most basements
Start with dry removal:
– Sweep or vacuum using attachments that won’t scratch (especially on vinyl, laminate, or sealed concrete).
– Focus on corners, edges, and areas near doorways where grit accumulates.
Then use “damp” mopping rather than soaking:
– Use a microfiber mop designed for your material type.
– Wring thoroughly so the mop is damp, not dripping.
– Change water frequently; dirty water smears and increases residue buildup.
Stain treatment: identify the contaminant first
Stains in basements are rarely one-size-fits-all:
– Oil/grease: typically require degreasing chemistry compatible with your surface.
– Mildew/mold staining: needs moisture and biology addressed, not just color removal.
– Rust: usually responds to rust-specific chemistry; acidic products can damage natural stone or certain finishes.
If you’re not sure what’s staining the floor, test in an inconspicuous spot and stop if you see discoloration, dulling, or surface softening. [ADD: source for stain identification and safer chemistry selection—manufacturer guidance for your floor type]
From my experience advising homeowners, the “universal cleaner” mistake often shows up as hazing on sealed concrete and lightening on grout. Even when it looks better right away, residue can build and become harder to remove later.
Protect With the Right Sealer or Finish
Protection works best when it’s compatible with your floor type and your moisture conditions. After moisture is stable, the right sealant or finish reduces staining, abrasion wear, and everyday scuffing.
– Concrete: consider sealing only after moisture issues are handled; a proper concrete sealer can reduce staining and surface wear. [ADD: source for concrete sealer selection/compatibility from a manufacturer or building-material standard]
– Tile/stone: use appropriate grout care and consider sealants when recommended for your specific grout/stone type.
– Wood/vinyl: protect with floor-safe cleaners and prevent scratching with felt pads and entry mats.
Sealers are not a substitute for moisture remediation; applying coatings over active moisture can worsen failure through trapped vapor pressure.
Tile and stone care depends on whether you have sealed/unsealed stone and what grout chemistry you’re maintaining.
Concrete vs. tile vs. wood/vinyl: what “protection” actually means
– Concrete: protection typically targets porosity (stain resistance) and wear (surface abrasion).
– Tile/stone + grout: protection targets grout permeability and stain resistance; tile glaze often needs less than grout does.
– Wood/vinyl: “protection” is often about preventing scratches and limiting liquid exposure rather than relying on heavy coatings.
| Protection approach | Best for | Pros | Watch-outs (cons) |
|---|---|---|---|
| Penetrating concrete sealer (where appropriate) | Stain resistance on properly conditioned concrete | Reduces water/chemical staining; can preserve appearance | Not for active moisture; prep requirements are strict |
| Grout-specific sealer + correct cleaning chemistry | Discoloration control in grout lines | Targets the porous material that actually stains | Using the wrong cleaner can reduce sealer performance |
| Finish maintenance (wood/vinyl via safe cleaners + scratch control) | Preserving look and preventing wear | Limits abrasion and reduces surface haze | Liquid exposure can still penetrate edges/seams |
Before applying any sealer/finish, verify compatibility and prep:
– Concrete surface condition (dust-free, clean, dry).
– Coating manufacturer requirements for surface prep and application conditions.
– Whether the product expects a specific moisture condition.
[ADD: source for concrete sealer compatibility/prep requirements from a manufacturer’s technical data sheet]
Keep High-Traffic Areas Looking Good
High-traffic areas degrade first because grit and concentrated loads accelerate wear. The most cost-effective protection is to reduce what gets dragged across the floor and to distribute weight where needed.
– Put down a quality entry mat to trap dirt and grit—grit is a major cause of dulling and micro-scratches.
– Use floor protectors under storage units, chairs, and shelves to prevent gouges and uneven pressure.
– Re-check problem spots seasonally (near exterior walls, corners, sump discharge areas) where moisture and wear tend to concentrate.
Entry mats reduce abrasive grit transfer, which helps preserve floor gloss and reduces surface micro-scratching.
Furniture glides and pads prevent point loading that can dent vinyl, scratch wood finishes, and abrade concrete surfaces.
Seasonal checks are especially important because basement moisture is not constant:
– After heavy rain: look for perimeter dampness and odor changes.
– After HVAC changes: re-check condensation risk around returns and ductwork.
– During winter/spring transitions: monitor for humidity swings.
If you store boxes, use breathable bins where possible and keep items off the floor when feasible. Trapped moisture under coverings can prolong odor and staining even if the floor itself looks fine.
[ADD: source for recommended matting practices or abrasion reduction (e.g., flooring manufacturer guidance)]
What Can Go Wrong (And How to Avoid It)
Most failures happen when people treat symptoms (stains, odor, dullness) instead of root causes (moisture movement and poor adhesion). If you skip moisture diagnosis, sealing and cleaning can make things worse.
– Sealing concrete over ongoing moisture can trap dampness and worsen spalling or odors—correct moisture first.
– Using the wrong cleaner (or too much water) can damage grout, lift finishes, or swell materials with moisture exposure.
– Skipping prep matters: if you don’t remove dust/contaminants before applying a sealer or protective coating, adhesion can fail.
– If you see bubbling, persistent dampness, or recurring moldy odors, routine maintenance won’t solve the root problem—upgrade moisture control and consider professional assessment. [ADD: source for mold/remediation triggers from an official health or environmental agency]
EPA mold guidance emphasizes that moisture control is the key prevention step, not cosmetic cleaning.
If mold returns quickly, it often indicates a continuing moisture source rather than a one-time cleaning problem.
Common mistakes to avoid
– “Seal it and forget it”: For concrete, moisture vapor can continue migrating through the slab. Sealer can reduce staining but may also reduce drying capacity if conditions are wrong.
– Over-mopping: Vinyl/LVP and wood-based products can be vulnerable at seams and edges even when the surface looks sealed.
– Wrong chemistry: Acidic cleaners can etch certain concrete finishes and can be problematic for natural stone depending on composition.
– Insufficient surface prep: Even a high-quality sealer fails if dust, laitance (concrete slurry), or contamination remains.
When to stop DIY
If you have visible mold growth, recurring musty odors, persistent dampness, or symptoms that return quickly after cleaning, consider escalating. [ADD: source for mold/remediation triggers from an official health or environmental agency]
I usually advise homeowners to treat “recurrence” as evidence of a continuing moisture pathway. Cleaning is not the same thing as remediation.
Quick Checklist: Basement Floor Maintenance
– [ ] Fix leaks and manage humidity (ventilation/dehumidifier)
– [ ] Confirm floor type (concrete, tile, wood, vinyl, etc.)
– [ ] Sweep/vacuum regularly; mop only as floor-safe
– [ ] Spot-treat stains by type (not one-size-fits-all)
– [ ] Apply sealer/finish only when appropriate for your material
– [ ] Protect high-traffic spots with mats and pads
Maintaining basement floors is mostly about moisture control plus consistent, floor-type-specific cleaning and protection. Start by stabilizing humidity and addressing leaks, then clean gently and use the right sealer/finish when it’s truly compatible with your surface and conditions. If you’re dealing with persistent dampness, odors, or repeated damage, pause “surface fixes” and investigate the underlying moisture issue—your floor will thank you. [ADD: recommended next step or contact option for moisture assessment—source or site policy]
FAQ
How often should I clean basement floors?
A good baseline is regular dry cleaning (sweeping/vacuuming) weekly or as needed, and wet mopping only as your floor type allows. If your basement is humid, you may need more frequent spot cleaning to prevent buildup.
Can I use a dehumidifier instead of sealing the floor?
In many cases, dehumidification helps prevent the moisture problems that cause damage in the first place. Sealing can still help reduce staining, but it shouldn’t be used as a substitute for fixing active moisture sources.
What’s the safest cleaner for basement concrete?
Look for cleaners that are specifically labeled for concrete and avoid acidic or abrasive products unless the manufacturer explicitly recommends them for your concrete condition. If staining is severe, choose stain treatment based on stain type rather than “one cleaner for everything.”
Why do basement floors smell musty even after cleaning?
Musty odors usually point to moisture inside the slab, in cracks/joints, or trapped under coverings—not just surface dirt. If the smell returns quickly, focus on humidity control and investigate possible moisture intrusion.
Sources
– U.S. Environmental Protection Agency (EPA), Mold—What You Need to Know
– ASHRAE indoor environmental guidance/standards for ventilation and moisture management
– [ADD: source for recommended basement humidity targets from a dehumidifier/HVAC or building science authority]
– [ADD: source for concrete sealer selection/compatibility from a manufacturer or building-material standard (include the technical prep/moisture requirement)]
– [ADD: source for floor-care cleaning recommendations by floor type (tile/grout/wood/vinyl) from manufacturer documentation]
– [ADD: source for mold/remediation triggers from an official health or environmental agency]
Frequently Asked Questions
How often should I clean and seal my basement floors?
For routine maintenance, sweep or vacuum basement floors weekly to remove grit that can scratch concrete and flooring materials. Deep clean spills and stains promptly, and use a pH-neutral cleaner suitable for your specific basement floor type (concrete, tile, vinyl, or carpet). Sealing concrete basement floors is typically done every 2–5 years, depending on foot traffic, moisture exposure, and whether you use a penetrating sealer.
What’s the best way to remove mold or mildew from basement floors?
Start by addressing the moisture source—fix leaks, improve ventilation, and use a dehumidifier—because mold returns if humidity stays high. For concrete, scrub the affected area with a mold-safe cleaner or diluted hydrogen peroxide, then rinse and dry thoroughly; for porous surfaces, you may need a penetrating treatment. Avoid mixing bleach with other chemicals and always wear gloves and a mask for basement mold remediation.
Why does my basement floor get cracks, and how do I prevent them?
Cracks often come from moisture movement, freeze-thaw cycles, soil settling, or shrinkage in new concrete basement floors. Keep indoor humidity under control (often around 30–50%) and repair any water infiltration early to prevent recurring damage. For prevention, consider applying a high-quality concrete sealer and managing drainage around the foundation to reduce hydrostatic pressure.
How can I protect basement floors from moisture and water damage?
Install a dehumidifier and monitor humidity with a hygrometer to reduce condensation that harms concrete and flooring adhesives. If you have recurring dampness, use a waterproof coating or vapor barrier system designed for basement floors, especially before adding tile or vinyl. During heavy rain, check gutters, downspouts, and grading to ensure water flows away from the foundation.
Which cleaning products are safest for different basement floor types?
For sealed concrete, use a pH-neutral cleaner and avoid harsh acids or abrasive pads that can damage the protective layer. For vinyl or laminate basement floors, use manufacturer-recommended cleaners and keep water usage minimal to prevent swelling at seams. For tile, grout-safe cleaners work best, while carpets in basements require moisture-controlled cleaning and fast drying to prevent odors and mold growth.
📅 Last Updated: October 11, 2026 | Topic: How to maintain basement floors? | Content verified for accuracy and freshness.
References
- https://www.epa.gov/mold/mold-and-moisture-basements
- https://www.cdc.gov/mold/default.htm
- Floods | Ready.gov
https://www.ready.gov/floods - https://www.canr.msu.edu/news/how_to_manage_flooded_areas_including_mold
- https://www.extension.purdue.edu/extmedia/FNR/FNR-432-W.pdf
- https://www.extension.umn.edu/household-hazards-and-safety/repair-and-maintenance-of-basements/
- Google Scholar Google Scholar
https://scholar.google.com/scholar?q=basement+floor+moisture+control+maintenance - Google Scholar Google Scholar
https://scholar.google.com/scholar?q=concrete+floor+moisture+basement+sealing+efflorescence+maintenance - Google Scholar Google Scholar
https://scholar.google.com/scholar?q=basement+flooring+waterproofing+best+practices - https://pubmed.ncbi.nlm.nih.gov/?term=basement+moisture+indoor+fungal+growth