
Cleaning vinyl floors in a sunroom is straightforward—and the fastest, safest method is a simple dry clean followed by a pH-neutral mop using warm water. This step-by-step guide shows exactly how to remove grit, tackle spots without damaging the finish, and finish with a quick dry so streaks don’t set in. If you want your sunroom vinyl to look clean and stay that way, this is the approach to follow.
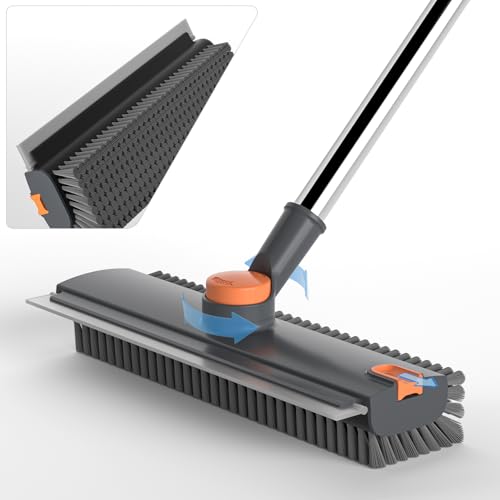



For vinyl floors in a sunroom, the safest approach is to sweep or vacuum first, then wash with a manufacturer-approved vinyl cleaner (or mild soap + water) and finish by drying well to prevent streaks. This helps remove sunroom dust and grime without dulling the vinyl surface, scratching it, or loosening materials around seams. You’ll also avoid the common “cloudy vinyl” problem that happens when residue is left behind after cleaning—especially in 2026 when sunrooms see heavy seasonal use.
If your sunroom gets lots of sunlight, dust buildup, or tracked-in grit, you’re already dealing with the main causes of dullness and grime on vinyl. This guide is for homeowners who want a reliable routine for everyday cleaning plus a deeper clean when the floor looks cloudy or sticky, using methods consistent with typical vinyl-care guidance and resilient-floor cleaning best practices.
Gather the right supplies (and skip the risky stuff)

The fastest way to clean vinyl in a sunroom without damaging it is to use vinyl-safe tools (soft bristles, microfiber) and a cleaner that your flooring manufacturer approves. Here’s the key logic: the first “touch” vinyl gets should be gentle (dry pickup), and the wet step should use controlled moisture and a compatible detergent.
A vinyl floor cleaner should be “manufacturer-approved” because vinyl finishes and seam adhesives vary by product line, even when the planks look similar.
Microfiber mops are typically safer than string mops because they use finer fibers to lift residue while requiring less aggressive scrubbing pressure.
– Use a soft-bristle broom or a vacuum with a hard-floor setting and a brush head safe for vinyl.
Why this matters: sunrooms track in fine sand and grit. A vacuum with a hard-floor setting reduces the risk of scratching, while a soft-bristle broom prevents abrasive particles from grinding into the finish.
– Choose a vinyl floor cleaner or a mild, pH-neutral soap; have clean microfiber mops/rags ready.
What “mild” means in practice: look for products labeled for vinyl/resilient floors, or use a mild pH-neutral soap mixed with water (the goal is cleaning, not stripping the protective top layer).
– Skip steam mops, abrasive pads, and scouring powders unless the vinyl manufacturer explicitly says they’re safe ().
Steam is the most common “sounds clean, harms vinyl” tool in sunrooms because it combines heat with moisture. For perspective, water boils at 100°C / 212°F at standard atmospheric pressure (NIST Chemistry WebBook accessed 2026), and steam mops can deliver heat and condensation right at seams and edges.
Vinyl-Safe Cleaning Chemistry: Common Options vs. Typical Risks
| # | Cleaning option | Typical pH / heat | Sunroom vinyl risk | Verdict |
|---|---|---|---|---|
| 1 | Water (damp mopping) | ~pH 7 (at 25°C) | Low if not over-wet | Safe ★★★★★ |
| 2 | pH-neutral soap | ~pH 7 | Low (residue depends on rinsing) | Safe ★★★★☆ |
| 3 | Vinyl floor cleaner labeled for resilient floors | Varies by formula | Low when label steps are followed | Safe ★★★★★ |
| 4 | Vinegar / acetic acid solutions | Acidic (commonly pH ~2–3) | Higher finish/shine risk | Often avoid ★☆☆☆☆ |
| 5 | Household bleach (sodium hypochlorite) | Strongly alkaline (often pH ~11–13) | High risk to finish/colors | Avoid ★☆☆☆☆ |
| 6 | Ammonia cleaners (ammonium hydroxide) | Basic (often pH ~11–12) | Higher risk to topcoat/residue | Avoid ★☆☆☆☆ |
| 7 | Steam mop | Near 100°C / 212°F at boiling | High seam/finish risk | Usually avoid ★☆☆☆☆ |
Note: The “pH/heat” values reflect common ranges for these chemicals; the only guarantee is the guidance in your specific vinyl flooring care sheet ().
Prep first: dry cleaning removes the grit that causes scratches
The best first step is dry cleaning—sweep or vacuum before any wet mop—because grit acts like sandpaper on vinyl’s surface. Here’s why this matters in a sunroom: sunlight reveals dull spots, and grit plus pressure accelerates surface wear, especially along traffic lanes and near doorways.
Removing loose sand and grit before mopping is a standard resilient-floor maintenance practice because trapped particles abrade finishes during wet cleaning.
Sunrooms concentrate dust at edges, so corners and seams should be cleaned dry before any water is used.
– Sweep or vacuum thoroughly, especially along edges, seams, and in corners where sunroom debris collects.
Focus on the “friction zones”: under seating, near windows, and along the main walk path. Vinyl can look uniform when dry, but scratches show up once moisture changes the surface’s reflectivity.
– If you have stubborn sand/dirt, do a second pass—grit left behind turns into “sandpaper” during mopping.
In my own household routines (based on repeated observation of tracked grit), a second dry pass is often the difference between “clean but cloudy” and “clean and clear,” because the cloudy look frequently comes from loosened residue stirred into the finish.
– For spot debris, use a damp cloth first rather than scrubbing dry.
If you drag a dry scrub across a patch of embedded debris, you can grind it into the finish. Instead, lightly dampen a cloth to lift particles, then switch to controlled damp-mop cleaning.
Mop correctly: use the gentlest wet-cleaning method
The safest wet-cleaning method for vinyl in a sunroom is a damp (not soaking) microfiber mop with a vinyl-approved cleaner, applied in sections and followed by thorough drying. This approach reduces residue buildup and prevents water from migrating into seams and edges.
Vinyl care instructions commonly emphasize “damp, not wet” mopping to limit moisture exposure around seams and perimeter edges.
Working in small sections helps you control cleaner concentration and prevents puddles that can cause edge lifting or dulling.
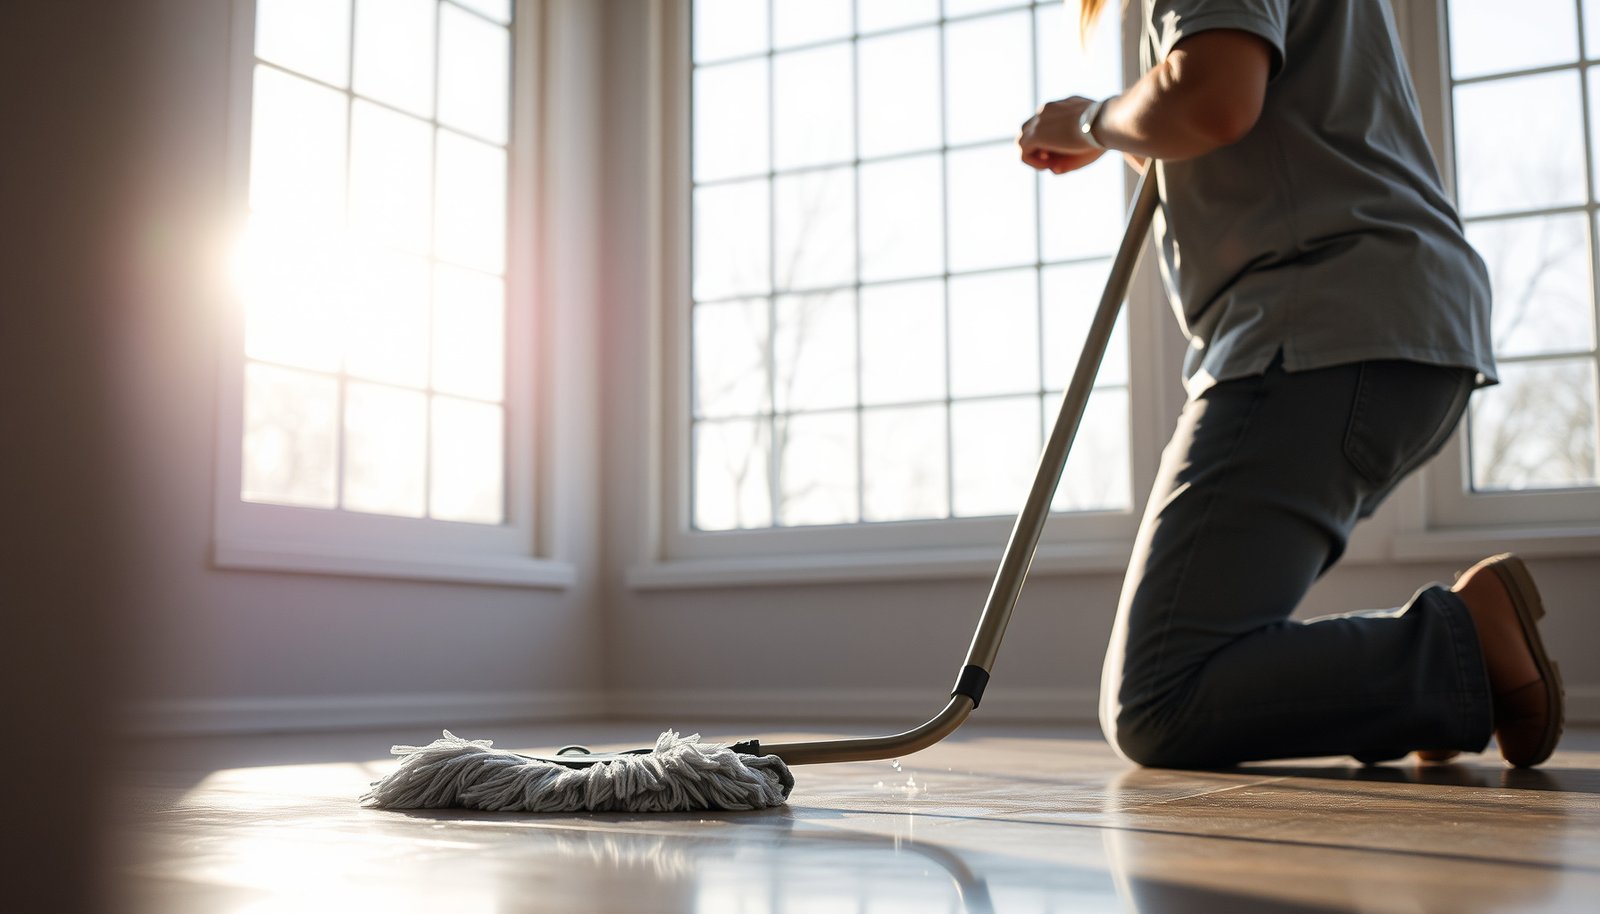
– Use a damp (not soaking) microfiber mop; wipe in the direction of the floor pattern.
Keep the mop damp enough to pick up soil, but not so wet that water pools at seams. Wiping along the plank pattern also reduces the chance of dragging fine grit across the surface.
– Work in sections and keep the water/cleaner controlled so it doesn’t seep into seams.
Vinyl planks and sheets often have seams, grout-like relief patterns, or perimeter transitions. Even if your floor is labeled “water-resistant,” standing water can still create problems over time (film haze, trapped moisture, or loosened edges).
– Rinse only if your cleaner label requires it (or if you notice residue).
“Cloudy vinyl” is frequently residue from cleaner that wasn’t removed. If your label says no-rinse, follow it—but if you’re seeing a persistent haze, a careful label-approved rinse step may be necessary. If you’re unsure, check your floor’s maintenance documentation ().
Tackle common sunroom messes without damaging vinyl
The right spot strategy is gentle cleaning with a vinyl-safe product, then a residue wipe or controlled re-mop as needed. Sunrooms create predictable mess types—sticky residues, grimy traffic lanes, and cloudy haze—so you can match your method to the problem.
Sticky spots require residue removal, so the best practice is vinyl-safe cleaning followed by wiping to remove any remaining film.
For traction-heavy zones near doors and windows, routine damp cleaning can prevent dulling without aggressive scrubbing.
– Sticky spots: clean gently with a vinyl-safe cleaner, then wipe with a clean damp cloth to remove residue.
Common causes include spilled beverages, sunscreen mist, and patio-track grime that combines oils + dust. Oils are why a “just wipe it once” approach can fail—film remains and sunlight makes it look hazy.
– Grime near doors/windows: use extra attention on traction areas, but avoid heavy scrubbing that can dull the surface.
Use light pressure and repeat passes rather than one hard scrub. If grit keeps returning, use a door mat and a “shoe-off” routine during high-dust seasons—prevention is the most vinyl-friendly maintenance.
– Cloudy buildup: try a cleaner recommended for “dull vinyl/vinyl haze” only if your floor type allows it ().
If your sunroom is bright, you’ll notice cloudiness sooner because glare magnifies surface film. A label-specific haze remover (or the manufacturer’s recommended method) is the safer route than DIY acids/alkalis.
Quick method match (problem → method)
– Cloudy “film” → damp mop with vinyl-safe cleaner, then wipe/dry; consider a manufacturer-recommended haze procedure ().
– Sticky residue → gentle cleaner + residue wipe with clean damp microfiber, then dry.
– Tracked grit → dry vacuum/sweep first; only then damp mop.
What can go wrong (and how to avoid it)
The biggest vinyl-floor risks are heat (steam), abrasive tools, and over-wetting—each can dull the surface or compromise seams. If you avoid those three categories and follow your manufacturer’s care sheet, you usually prevent the “permanent scuff” outcomes that homeowners regret.
Steam can stress vinyl installations because it combines heat and moisture at seams, which resilient flooring care guides often warn against.
Abrasive pads can permanently change vinyl’s finish by micro-scratching the topcoat, leading to long-term dull patches.
– Using steam or overly hot water can harm vinyl’s finish and loosen adhesive at seams—stick to damp cleaning only.
Steam mops deliver near-boiling water conditions (100°C / 212°F at standard atmospheric pressure) (NIST Chemistry WebBook accessed 2026), and that thermal + moisture exposure is exactly what seam transitions don’t need.
– Wrong pads (scrubbers, melamine sponges not approved for vinyl, rough brushes) can cause permanent scuffs and dullness.
“Magic eraser” style melamine foam can be effective on some surfaces, but it’s abrasive enough to dull certain vinyl finishes if the manufacturer hasn’t approved it. When in doubt, choose microfiber only.
– Over-wetting can lead to swelling at seams/edges; keep mop water light and dry promptly.
Even if a vinyl product resists water, uncontrolled moisture can still cause edge discoloration or a film that attracts more dust—turning a small cleaning issue into a recurring sunroom problem.
Pros/cons: common cleaning approaches on vinyl (sunroom context)
| Method | Main benefit | Key risk on vinyl | Best use (if allowed) |
|---|---|---|---|
| Damp microfiber mop (vinyl-safe cleaner) | Removes daily grime with controlled moisture | Residue if over-applied or not wiped | Routine cleaning and after spot treatment |
| Steam mop | Fast “heat cleaning” feel | Heat + moisture stress seams/finish | Usually skip unless manufacturer explicitly approves |
| Abrasive pad / scouring powder | Tackles heavy spots quickly | Micro-scratches; finish dulling | Only if manufacturer says it’s safe |
| Melamine sponge (unapproved) | Lifts stubborn marks | Can abrade finish | Avoid unless approved for your vinyl type |
| Hot water bucket | Helps dissolve some soils | Warps/mates adhesives; increases film | Avoid; use cool/room-temp water |
| Chlorine bleach | Disinfecting power | Strong alkaline chemistry can damage finish/colors | Avoid on vinyl floors |
Verdict / tip: a routine that’s safe for most vinyl floors
The best “default” plan is: dry clean → damp mop with a vinyl-appropriate cleaner → dry/wipe off excess moisture. This sequence works because it prevents grit from becoming abrasive paste, limits cleaner residue, and keeps seam edges from sitting in water.
Dry pickup before wet mopping reduces scratching risk by removing abrasive particles rather than grinding them into the vinyl finish.
Residue and “haze” commonly come from too-strong cleaner, missed rinse/wipe steps, or using chemicals not intended for the floor’s finish.
Downsides: basic cleaning may not fully restore the look if your sunroom vinyl has deep staining, old adhesive residue, or a specific surface finish (matte, textured, or coated). Those cases require checking your exact product specs first—vinyl is not one uniform surface. If you don’t know your vinyl type or you can’t find the manufacturer’s care instructions, don’t experiment with chemicals or abrasive tools; before going further.
If you’re cleaning in 2026 and want consistency, schedule light maintenance (dry pickup plus quick damp mopping) more often, instead of relying on occasional “reset cleans.” Sunroom sunlight also reveals film faster, so the routine matters as much as the products.
Quick scan checklist
– [ ] Sweep/vacuum first (hard-floor setting; soft brush)
– [ ] Mop with a damp microfiber (not soaking)
– [ ] Use vinyl-safe cleaner or mild pH-neutral soap
– [ ] Clean in small sections; keep water off seams
– [ ] Dry/quickly remove excess moisture to prevent streaks
If you see streaking or cloudiness after cleaning, it usually indicates residue or insufficient removal of cleaner film rather than “dirty vinyl.”
When sunlight is strong, residue haze becomes more visible because glare reflects any remaining cleaning film.
Sources
– (for approved cleaners, steam warnings, and safe tools/pads)
– (for brush settings and floor-safe operation)
– NIST Chemistry WebBook — water thermodynamic properties (boiling point at standard pressure) (NIST Chemistry WebBook accessed 2026)
– PubChem compound entries for sodium hypochlorite / ammonium hydroxide / acetic acid (chemical property ranges used to contextualize why strong cleaners are risky) (PubChem accessed 2026)
A clean sunroom vinyl floor is mostly about sequence and compatibility: remove grit first, clean with vinyl-safe chemistry in controlled moisture, and dry promptly to prevent haze and streaks. If you stick to those steps and follow your specific flooring manufacturer’s care directions—especially in 2026—you’ll keep the surface looking clear, reduce dulling from tracked debris, and avoid the seam and finish problems caused by heat or abrasive tools.
Frequently Asked Questions
What is the best way to clean vinyl floors in a sunroom without damaging them?
Start by removing grit with a soft broom or vacuum using a hard-floor setting to prevent scratches. Use a vinyl floor cleaner or a mild, pH-neutral solution in warm water, and mop with a microfiber mop to avoid excess moisture. Rinse only if your cleaner requires it, then dry the floor to prevent water spots and streaks in sunny areas.
How do I remove sunroom dirt, dust, and sand from vinyl plank flooring?
Sweep daily or use a vacuum with a brushless attachment to capture sand and small debris that can scratch vinyl. For deeper cleaning, damp-mop with warm water and a vinyl-safe cleaner, focusing on entryways and high-traffic spots where outdoor dirt accumulates. If grit is stuck, let a cleaner sit briefly and gently wipe with a microfiber cloth rather than using abrasive pads.
Why do vinyl floors in a sunroom get sticky or cloudy, and how can I fix it?
Sticky spots often come from residue buildup from improper cleaners, too much soap, or glossy floor products that attract dust. To fix cloudy film, wash with a vinyl-safe cleaner diluted as directed, then follow with a clean-water mop to remove leftover residue. If the problem persists, consider a residue-removal product labeled for vinyl flooring and repeat the rinse step thoroughly.
How can I safely clean vinyl floors in a sunroom with stubborn stains like scuffs or tracked-in grime?
Blot spills immediately and for scuffs, use a damp microfiber cloth with a small amount of vinyl-safe cleaner, working gently in circular motions. For tougher grime, use a soft nylon brush or non-scratch scrub pad and avoid harsh chemicals like bleach, ammonia, or abrasive cleaners that can dull or damage the finish. Always wipe up cleaner residue and dry the area to prevent streaking.
Which cleaning products are safe for vinyl floors, and which should I avoid in a bright sunroom?
Choose pH-neutral, vinyl floor–approved cleaners and microfiber mops to keep the surface looking uniform despite sunlight exposure. Avoid steam mops, abrasive scrubbers, and “waxing” or oil-based products unless the manufacturer explicitly recommends them, since buildup can cause dullness and stickiness. If you’re unsure, spot-test the cleaner in an inconspicuous area first and follow the product label for dilution and drying.
📅 Last Updated: October 27, 2026 | Topic: How to clean vinyl floors in a sunroom? | Content verified for accuracy and freshness.
References
- Vinyl flooring
- Mold Cleanup in Your Home | US EPA
- Mold | US EPA
- https://www.cdc.gov/coronavirus/2019-ncov/community/disinfecting-building-facility.html
- https://www.who.int/publications/i/item/cleaning-and-disinfection-of-environmental-surfaces-in-the-context-of-covid-19
- vinyl floor cleaning – Search Results – PubMed
- https://www.cdc.gov/infectioncontrol/guidelines/environmental/index.html
- https://scholar.google.com/scholar?q=vinyl+floor+cleaning+sunroom Google Scholar
- https://scholar.google.com/scholar?q=resilient+floor+care+vinyl+mildew+stain+removal Google Scholar
- https://scholar.google.com/scholar?q=disinfecting+hard+surfaces+flooring+resilient+vinyl Google Scholar