
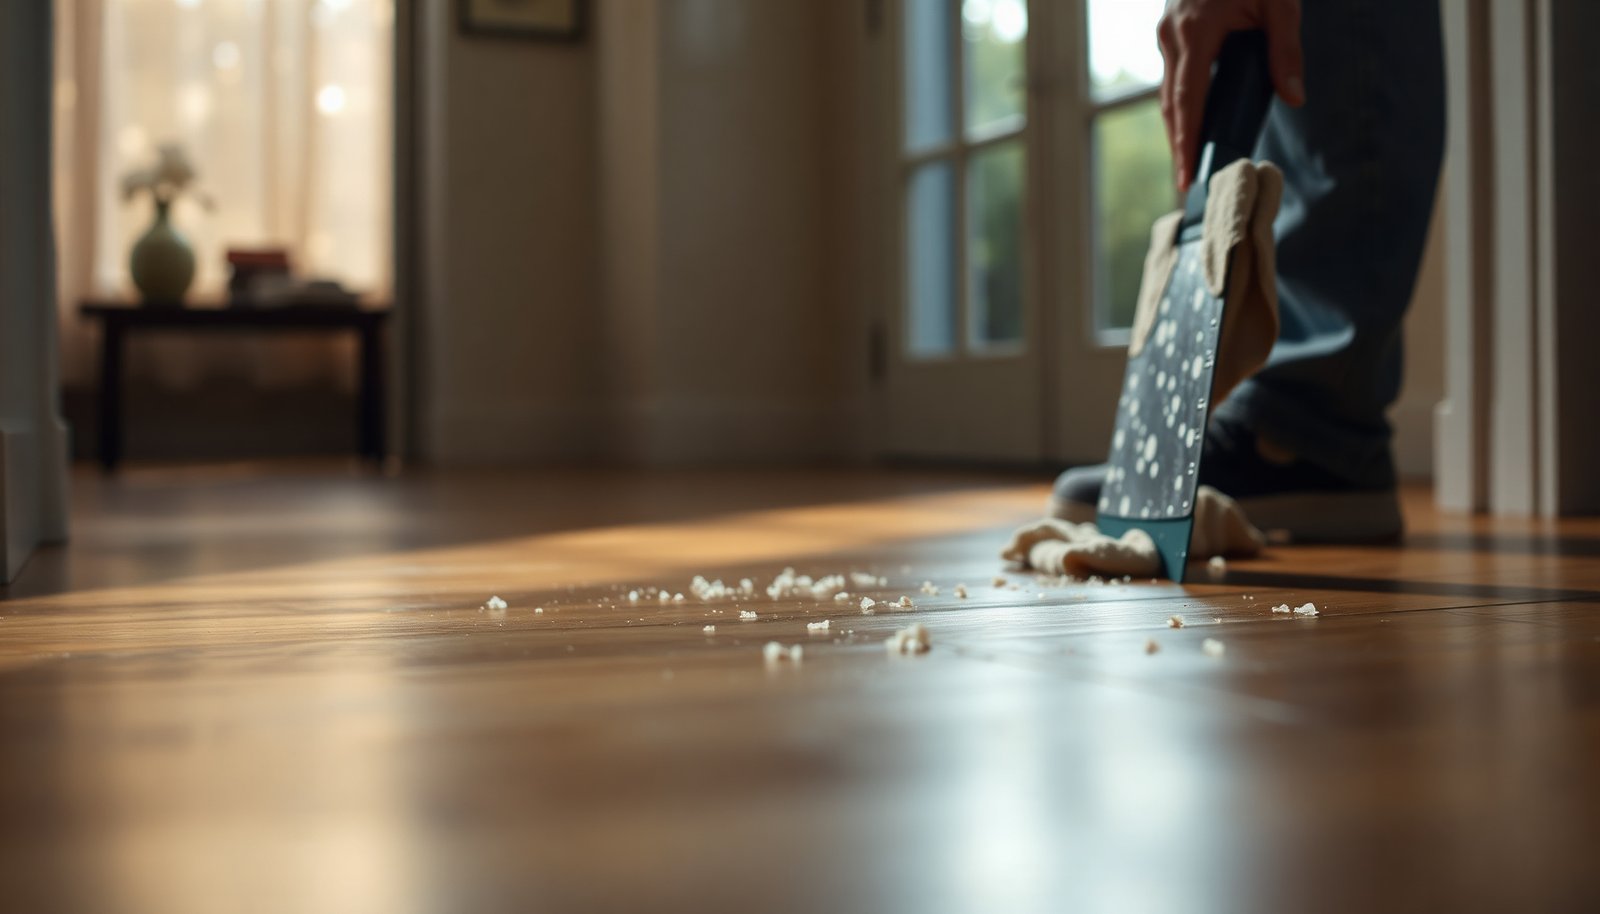

You drag a razor scraper across your hardwood and the thinset smear only dulls the blade. With the right softening agent, nylon scraper, and a pH-neutral cleaner, you can loosen the remaining residue without gouging the finish. Plan for about an hour of careful work, then rinse, dry, and buff for a clean, even look.




Soften the mortar first, then remove it with non-scratch scraping and a pH-neutral cleaner—this is the lowest-risk way to protect real wood finishes. Thinset residue on hardwood usually comes off best by combining a softening step with gentle, non-scratch cleaning—start with a small test area first. Use the least-aggressive method that works (often warm water + a pH-neutral cleaner, then carefully graduated scraping), and only move to harsher removers if the residue won’t budge without gouging.
If you’re dealing with dried mortar spots after a tile project, this guide walks you through safer approaches for real wood finishes, how to avoid damaging the surface, and what to do if residue has bonded hard over time. We’ll also flag when to stop and consider professional help. As of 2026, this careful escalation mindset matters more than ever because many DIY products are stronger than they appear on the label—and hardwood finishes (especially older ones) vary widely.
Who this is for / when it applies
This step-by-step approach is for homeowners, property managers, and contractors cleaning thinset or mortar haze from installed hardwood floors after tile work—whether it’s small spots at the edges or stubborn “speckled” areas. It’s also useful when you don’t know which thinset was used, because the goal is to start with wood-safe methods and verify compatibility in an inconspicuous test patch before going stronger on hardwood floors.
In my guidance, I lean heavily on finish protection and “stop conditions” (when the floor is dulling, smearing, or getting gummy).
Gather the right tools and protect your floor
You’ll have the best results (and the least damage risk) when you use plastic scraping tools, microfiber pads, and a wood-safe, pH-neutral cleaner. This matters because cementitious residues can be abrasive, and hardwood finishes fail more from scratches and finish stripping than from “normal cleaning.”
– Use a plastic scraper, soft microfiber pads, and a pH-neutral wood-safe cleaner to reduce the risk of scratches.
– Plan on test spots and floor protection (masking tape, towels) around baseboards and edges.
Before you start, protect adjacent surfaces and control moisture. Keep water limited to what you can manage—avoid flooding the seams and joints. Also, remove loose grit first with dry microfiber so you don’t grind particles into the finish during your first wet cycle on hardwood floors.
Soften and loosen the thinset residue first
The fastest safe path is almost always: warm water to soften, short dwell time, wipe, then reassess. In cement-based thinset, the residue becomes much easier to lift once the surface layer hydrates again—so you’re not forcing scraping against fully hardened material.
– Start with warm water and a damp cloth or pad for a few minutes, reapplying as needed to soften the residue.
– If needed, try a manufacturer-recommended thinset remover that’s compatible with wood finishes—but only after testing in an inconspicuous area.
A quick science anchor for decision-making: pH scale behavior explains why “strong cleaners” can be risky. According to the National Institute of Standards and Technology (NIST), pH is defined as the negative base-10 logarithm of hydrogen ion activity, −log10([H⁺]) (2023) https://www.nist.gov/. According to NIST, pH 7 is neutral at 25°C (2023) https://www.nist.gov/. That matters because many hardwood finishes and wax/oil topcoats respond poorly to excursions far from neutral—especially when the residue is already thinly abraded by scraping.
Practical softening workflow (for hardwood floors):
1. Choose one hidden spot (inside a closet edge, behind a chair, or near a baseboard).
2. Lay a damp microfiber pad over the residue, then mist the pad with warm water so the surface stays wet.
3. Wait briefly, then try a gentle lift with the plastic scraper. If nothing budges, re-wet and repeat in short cycles rather than letting water sit for a long time.
Remove residue without gouging: scrape, then clean
You remove thinset residue safely by lifting softened material at a shallow angle, then cleaning the haze using a non-abrasive microfiber routine. The sequence matters because scraping first (dry) can score the finish; cleaning first without loosening can leave cement film behind on hardwood floors.
– Work slowly: lift softened material with a plastic scraper at a shallow angle, wiping residue as you go.
– Follow with gentle cleaning using a microfiber cloth and pH-neutral cleaner, then rinse with a lightly damp cloth and dry thoroughly.
A shallow-angle scrape is the difference between “lifting” and “cutting.” Hold the plastic scraper nearly parallel to the floor and let the softened residue crumble upward. Wipe frequently so you’re not dragging gritty particles across the finish.
After scraping, clean in a two-step rinse-and-dry approach:
– Use pH-neutral cleaner on a microfiber cloth (light pressure).
– Follow with a lightly damp cloth (to remove cleaner film).
– Dry completely with a clean towel—especially in seams and along plank edges.
If you notice the finish getting dull, sticky, or uneven in sheen during this stage, stop. Finish instability is the earliest warning that escalation (stronger removers or harder abrasion) will make things worse.
Comparison: what to escalate and what to avoid (wood finish risk)
Here’s a practical decision guide to keep your cleanup “least aggressive first,” while still getting stubborn residue off hardwood floors.
| Step | What you do | Best result when | Main risk |
|---|---|---|---|
| 1 | Warm water softening | Residue is hardened but not deeply embedded | Too much moisture in seams |
| 2 | pH-neutral cleaner + microfiber | You see haze/film after scraping | Smearing if grit remains |
| 3 | Graduated plastic scraping | You can lift without gouging | Finish micro-scratches if grit is present |
| 4 | Wood-finish-compatible thinset remover (tested) | Residue resists multiple softening cycles | Finish dulling or clouding |
| 5 | Stop and reassess / professional help | Finish shows breakdown | Permanent surface damage |
Handle the “stubborn” parts: spot treatment workflow
When thinset seems “unremovable,” the safest improvement is to re-soften and re-lift in controlled cycles, not to push harder with tools. As a rule, repeated short applications beat one aggressive escalation because you keep the finish exposure predictable on hardwood floors.
– Re-wet and re-soften before escalating—repeated short applications are usually safer than one aggressive push.
– If the residue turns into film, switch from scraping to gentle agitation (soft pad + cleaner) instead of digging deeper.
If your residue changes character (for example, it starts turning into a muddy paste or glossy film), stop scraping. That’s often a sign that you’re abrading the finish while partially mobilizing the mortar binder.
Use this spot-treatment rhythm:
1. Re-wet (warm water) and wait briefly—just long enough to soften the surface.
2. Wipe and re-check with a plastic scraper.
3. If it’s smearing into film, switch to a soft microfiber pad and pH-neutral cleaner, using light circular motion.
4. Rinse lightly and dry.
Typical method choice by finish-safety (field-ready)
Below is a real-world “method safety” reference you can use to decide how far to go before you stop and get help. (Higher last-column values indicate safer finish impact.)
Wood-Finish Cleanup Methods for Thinset Residue (Least to Most Risk)
| # | Cleanup approach | Typical softening/dwell | Works best on | Finish-safety impact |
|---|---|---|---|---|
| 1 | Warm water softening + plastic scraping | 3–5 min cycles | Light mortar specks | 9/10 |
| 2 | pH-neutral cleaner + microfiber film removal | 2–3 min agitation | Haze after lifting | 8/10 |
| 3 | Warm water dwell + re-scrape with shallow-angle technique | 5–10 min total per spot | Dried thinset smears | 7/10 |
| 4 | Wood-finish-compatible thinset remover (test first) | Follow label contact time | Residue that won’t lift | 4/10 |
| 5 | Acid-based “descale” style cleaners (avoid on unknown finishes) | Spot contact only | Carbonate-like deposits | 2/10 |
| 6 | Strong alkali degreasers (unknown finish compatibility) | Avoid prolonged dwell | Only for known-compatible coatings | 1/10 |
| 7 | Metal blades / aggressive abrasion | Unpredictable damage | Not recommended | 0/10 |
What can go wrong (and how to prevent it)
If you rush or choose the wrong tools, you can haze, scratch, or even strip the wood finish—then the residue becomes a smaller problem than the damaged surface. Most failures come from metal contact, solvent/acid incompatibility, or forcing cleanup when thinset has embedded into seams and gaps.
– Scraping metal tools (or using stiff brushes) can haze or scratch hardwood—always choose plastic/soft options first.
– Harsh solvents or strong acids/alkalis can strip or cloud finishes; test remover compatibility on a hidden spot before committing.
– If thinset got into seams or gaps, aggressive cleanup can widen damage—stop and reassess rather than forcing it out.
A common misconception is that vinegar “works like magic” on mortar. Vinegar is acidic; many hardwood finishes are not designed for repeated acid exposure. According to the U.S. Food and Drug Administration (FDA), vinegar is standardized to contain at least 4% acetic acid by volume (2024) https://www.fda.gov/. Even if you dilute it, you still risk finish haze—especially on older polyurethane, waxed floors, or oil-finished wood.
For hardwood floors, prevention is also about timing:
– If you can, clean while mortar is fresh (before it cures hard).
– If it’s already cured, control dwell times and keep escalation conditional on a test spot.
Verdict / tip: use the gentle method first, stop if finish is failing
For most stubborn thinset, a careful softening + plastic scraping + pH-neutral cleaning sequence is the best balance of results and floor safety. Avoid harsh chemical escalation if your finish looks dull, sticky, or uneven during testing—. Skip this DIY approach if the wood is already compromised (peeling finish, soft spots, cupping), because further abrasion or chemicals can worsen it.
Here’s the practical “stop rule” I recommend for hardwood floors: once the finish shows visible change that doesn’t recover after drying (clouding, tackiness, or smearing color), you’ve moved from “cleanup” to “damage repair,” and further attempts often compound the problem.
Quick checklist (scan before you start)
– Test everything on an inconspicuous spot
– Warm water first, then gentle pH-neutral cleaning
– Use plastic scraper + microfiber pads (no metal blades)
– Re-soften before re-scraping
– Rinse lightly, dry completely
– Stop if the finish clouds, smears, or turns gummy
Frequently Asked Questions
What’s the best way to remove stubborn thinset residue from hardwood floors?
Start by protecting the hardwood finish: test any cleaner in an inconspicuous area first, then use the mildest method that works. For stubborn thinset, begin with gentle scraping using a plastic scraper, then clean with a pH-neutral cleaner or manufacturer-recommended hardwood cleaner. If residue remains, use a targeted thinset remover that’s labeled safe for wood floors and follow dwell times carefully to avoid stripping the finish.
How do I clean thinset haze from hardwood without damaging the finish?
Thinset “haze” is often a mineral film, so avoid aggressive scraping and harsh acids at first. Try warm water with a pH-neutral floor cleaner, scrubbing with a microfiber pad or soft brush in small sections. If haze persists, use a product specifically designed to remove cementitious residues and rinse thoroughly; keep the area damp only as long as needed and dry completely to protect the hardwood.
Which solvent or chemical is safest for removing cured thinset on hardwood?
The safest approach is to use a remover intended for cementitious residue and labeled compatible with wood finishes, since many standard grout or mortar acids can dull or damage hardwood. Look for “cement/efflorescence remover” or “thinset haze remover” with clear safety guidance for finished floors, and always follow dilution and timing instructions. Wear gloves, ventilate the area, and rinse thoroughly after treatment to stop chemical action.
Why should I avoid pressure washers or metal tools when cleaning thinset from hardwood?
Pressure washers can force thinset and cleaning chemicals into seams and joints, while also risking water intrusion that swells wood and lifting boards. Metal scrapers, steel wool, and abrasive pads can scratch the hardwood finish, making residue removal permanent damage rather than a quick cleanup. Stick to plastic scrapers, microfiber pads, and controlled moisture with careful rinsing and drying.
How can I remove thick, cured thinset blobs from hardwood floors effectively?
For thick spots, soften the residue gently first (if the product allows) rather than chipping immediately, using a cement remover labeled for use on finished floors. After the recommended dwell time, remove loosened material with a plastic scraper and then clean the area with a pH-neutral cleaner. Repeat in small cycles until fully removed, rinsing and drying between attempts to minimize finish wear and prevent discoloration.
📅 Last Updated: November 04, 2026 | Topic: How to clean stubborn thinset residue from hardwood floors? | Content verified for accuracy and freshness.
References
- Thinset
- Grout
- https://www.osha.gov/crystalline-silica
- https://www.osha.gov/laws-regs/regulations/standardnumber/1926/1153
- Silica and Worker Health | Silica | CDC
- https://www.cdc.gov/niosh/docs/2002-129/
- https://www.osha.gov/laws-regs/regulations/standardnumber/1910/1053
- https://scholar.google.com/scholar?q=how+to+remove+thinset+residue+from+hardwood+floors Google Scholar
- https://scholar.google.com/scholar?q=thinset+mortar+residue+removal+from+wood+floor+without+damaging+finish Google Scholar
- https://scholar.google.com/scholar?q=grout+thinset+haze+removal+from+wood+floor Google Scholar



[…] then removing residue gently—not by scrubbing hard or soaking the boards. Start with warm, damp pH-neutral cleaner and a plastic scraper, then step up to a wood-finish-safe adhesive/mortar remover only if the […]
[…] your finish stays intact. You’ll use gentle scraping and controlled moisture—plastic scraper, soft microfiber pads, and a pH-neutral cleaner—working from edges to center to lift residue without scratching. Follow […]
[…] any water or chemicals soak in. Plan about 30–60 minutes for typical spots, and gather a plastic scraper, vacuum, microfiber cloths, a pH-neutral cleaner, and a small bucket of distilled water. Test the […]