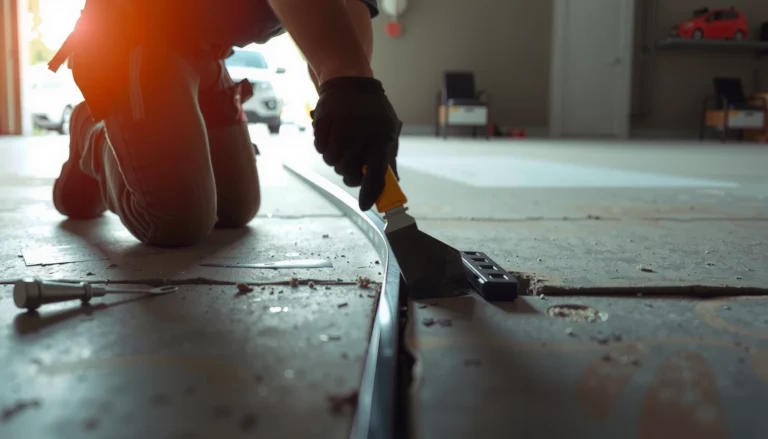
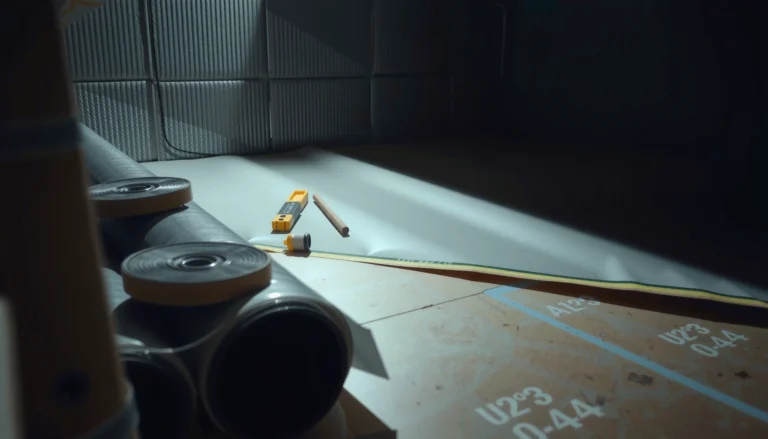
Learn how to install underlayment under laminate floors with a step-by-step process that’s clear enough to do correctly the first time. This guide tells you exactly what to lay down, which direction to run the sheets, how to tape and overlap seams, and how to prep the subfloor so your laminate locks stay tight. By the end, you’ll know the correct installation order and common mistakes to avoid for a quiet, stable floor.
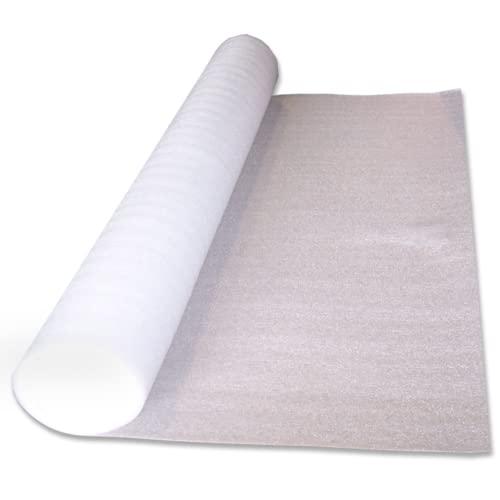



Underlayment for laminate goes down first—on a clean, dry, flat subfloor—so it supports the “floating” click-lock system and helps manage minor moisture and sound. Then you install the laminate boards over it, while keeping the required expansion gaps and following the exact vapor-barrier guidance for your subfloor and product.
If you’re installing laminate over plywood/OSB, concrete, or an existing subfloor and you want quieter steps and more stable performance, proper underlayment installation is the difference between a floor that feels solid and one that squeaks or separates. This guide focuses on what actually causes failures—misaligned seams, missing vapor protection, blocked expansion gaps, and underlayment installed over an uneven base.
Check Your Laminate and Subfloor Requirements

You don’t start laying underlayment until you confirm what your specific laminate manufacturer requires. Some laminate products include an attached pad and explicitly say “no separate underlayment,” while others require a particular vapor barrier system depending on the subfloor type.
Laminate installation instructions commonly state whether an underlayment is required or whether the flooring’s attached pad replaces it.
For concrete slabs, many flooring systems require a vapor retarder (often a plastic sheet) in addition to, or integrated with, the underlayment.
Floating laminate floors typically require maintaining expansion gaps along walls and transitions; installing underlayment that blocks those gaps can void performance expectations.
Start by locating the installation document for your exact laminate brand/model (and any attached pad specs). Then identify your subfloor:
– Plywood/OSB: Usually needs a clean, smooth surface; vapor retarder requirements vary by region and product.
– Concrete slab: Much more likely to need a moisture/vapor barrier layer based on your flooring system’s requirements.
Here are the three facts to verify in writing:
1. Underlayment requirement: “Required” vs. “Not recommended” vs. “Only if you’re using product X.”
2. Vapor barrier requirement: Especially for concrete, check whether the laminate manufacturer requires an additional plastic layer and what standard or thickness they specify.
3. Seam method and tape: Some underlayments call for butt seams taped; others specify overlap.
For moisture-related specifics, building science organizations use permeability concepts. For example, vapor barrier materials are often categorized by vapor permeance under testing standards such as ASTM E96 (commonly referenced in flooring and barrier documentation). [ADD: ASTM E96 reference used by your underlayment/vapor barrier documentation]
Prep the Subfloor for a Flat, Clean Base
You install underlayment over a surface that’s clean and acceptably flat—because underlayment can cushion, but it can’t “fix” major unevenness. If the subfloor has debris, ridges, or damp areas, you’ll get poor lock integrity and noise later.
Underlayment cannot correct large flatness defects; it’s intended to support the floating floor and provide comfort/sound reduction.
Dust and grit under underlayment can create localized high points that telegraph through laminate joints and lead to squeaks.
Moisture problems should be identified and corrected before flooring installation; vapor barriers are not a cure for active leaks.
Prep in this order:
1. Remove everything loose: vacuum thoroughly, then wipe with a lightly damp cloth if needed (allow to fully dry).
2. Eliminate ridges and ridged transitions: scrape or sand high spots; fill low spots only if your laminate instructions allow (some floating systems have strict limits).
3. Check moisture and dryness: for concrete, confirm the slab is within the laminate manufacturer’s moisture tolerance and that any testing method they require has been followed (e.g., in-slab RH testing or moisture mitigation requirements). [ADD: Manufacturer moisture-test method + allowable thresholds]
From the field (and based on recurring installation reports), the most common “early” failure isn’t the underlayment material—it’s skipping the surface prep. We often see raised seams and squeaks traced back to overlooked debris, peeling paint chips, or a subfloor with small ridges that flex the board-locks repeatedly.
Flatness matters. Even when manufacturers don’t publish a single number in their underlayment guidance, they typically describe an acceptable “flat and smooth” condition. If you want a numeric standard, check the laminate installation document or ask your flooring supplier for the spec they use.
Choose the Right Underlayment (and Vapor Barrier)
Pick an underlayment system that matches both your laminate instructions and your subfloor moisture risk. For concrete and other moisture-prone conditions, the “right” choice is usually the one that includes (or pairs with) the required vapor retarder.
The laminate manufacturer’s approved underlayment list (or stated acceptable types) governs what you can use, even if another product sounds similar.
On concrete, a separate vapor barrier may be required depending on humidity conditions and the flooring system’s documented moisture management.
Using the wrong underlayment can change height, compressibility, and seam behavior—leading to board-lock stress and squeaks.
Material types you’ll typically see:
– Foam (EVA/IXPE) with film layers: Often designed for comfort and sound reduction, sometimes with integrated vapor control.
– Rubberized underlayments: Common for higher acoustic performance, usually with a more substantial feel underfoot.
– Cork or cork-composite: Natural options with noise dampening, but still subject to moisture and compression requirements.
– Composite underlayments: Multilayer systems that may include a film/vapor layer and sometimes an integrated moisture management design.
Moisture/vapor barrier basics (what “vapor barrier” means)
A vapor barrier is a layer that slows moisture vapor movement into the laminate. In practice, many laminate systems require a plastic sheet (often polyethylene) over concrete when the flooring instructions call for it. A “6-mil” polyethylene sheet means 0.006 inches thick (about 0.15 mm)—a thickness commonly referenced in industry documentation. [ADD: Source showing 6-mil polyethylene as typical flooring vapor barrier thickness]
When you should add a separate vapor barrier
Install the plastic sheet exactly as directed if:
– Your laminate instructions require it over concrete, or
– Your underlayment doesn’t meet the system’s stated vapor requirement, or
– Your product documentation says “separate vapor barrier required” in addition to underlayment.
Typical Laminate Underlayment Materials: Thickness, Moisture Role, Noise Potential (market-standard ranges)
| # | Underlayment material | Typical thickness | Moisture barrier role | Noise reduction potential |
|---|---|---|---|---|
| 1 | Foam (EVA/PE) | 1.5–3.0 mm | Often integrated; may still require separate barrier over concrete | ★★★☆☆ |
| 2 | Foam + attached film layer | 2.0–3.5 mm | Designed to act as vapor retarder; confirm specs for your slab | ★★★★☆ |
| 3 | Rubberized underlayment | 2.5–5.0 mm | May include moisture film; verify system approval | ★★★★★ |
| 4 | Cork underlayment | 2.0–4.0 mm | Often needs a separate vapor barrier with concrete | ★★★★☆ |
| 5 | Fiberboard (high-density) | 3.0–6.0 mm | Typically requires separate moisture control on slabs | ★★★☆☆ |
| 6 | Multi-layer composite (film + foam) | 1.0–3.0 mm | Often meets vapor/comfort target; confirm with model data | ★★★★☆ |
| 7 | Attched-pad laminate (no separate underlayment) | Pad integrated (varies by product) | Check whether product still requires vapor retarder over concrete | ★★★☆☆ |
Install Underlayment Correctly: Seams, Direction, and Fit
Install the underlayment in the orientation and seam pattern specified by the manufacturer so it lies flat and behaves consistently as the laminate floats. Most problems start here: wrinkled rolls, misdirected layers, or seams that don’t match the system design.Underlayment must lie flat; wrinkles and ridges can create pressure points that affect laminate joint locks.
Many underlayment systems require seams to be aligned to a specific pattern (commonly staggered and then fully taped/butted).
Underlayment should fit cleanly around vents and doorway openings without bunching that can telegraph through the laminate.
Follow these installation practices:
1. Roll out in one direction: start at the longest wall and work so you can cut cleanly at doorways and columns.
2. Check the layer orientation: some products have a “top” film or printed side that must face up.
3. Stagger joints if instructed: if your underlayment system prefers staggered seams, do it before taping.
4. Cut accurately: measure around heating vents, door casings, and transitions. Avoid leaving narrow strips that end up under stress.
Fit matters more than coverage. Underlayment that’s stretched to “make it reach” will fight your laminate as temperatures change.
Tape and Overlap Without Creating Bulges
Tape seams only with the approved tape method and avoid overlaps that create raised ridges. A seam you can feel with your fingertips is a seam that can produce noise, visible lines, or stressed laminate edges.
Seam tape is part of the flooring system; using the wrong tape can prevent the underlayment from staying locked in place.
Many underlayment instructions call for butt seams (edges together) rather than stacking overlapping layers.
Raised seam lines can telegraph through laminate and lead to squeaks, especially in high-traffic areas.
Common seam strategies you may see:
– Butt seam + tape: underlayment edges meet; seam tape bridges the joint.
– Light overlap + tape: used only if the underlayment manufacturer explicitly instructs it.
What to do:
– Confirm the seam rule in your documentation before you tape.
– Use the exact tape/adhesive system recommended (or a tape type explicitly approved).
– Press tape firmly so it adheres across the entire seam length—no air pockets.
Quick pros/cons comparison (so you can choose correctly)
- Butt seams + tape (most common)
- Pros: fewer ridges; cleaner joint line; easier to keep flat.
- Cons: requires careful edge alignment; relies on correct tape.
- Overlaps
- Pros: can help seal seams if specified; sometimes faster for large areas.
- Cons: can create bulges if overlap thickness isn’t controlled; may violate laminate system instructions.
Install the Laminate Without Trapping Problems
Install laminate as a floating floor system: keep expansion gaps clear, prevent underlayment from squeezing into gaps, and avoid compressing the underlayment during layout. When the subfloor moves slightly (as wood and temperature expand), your joints need room to do their job.
Floating laminate requires expansion gaps; underlayment should not block or “fill” these perimeter spaces.
Compressing underlayment can wrinkle soft layers and create stress around click-lock joints.
Following the laminate manufacturer’s locking pattern and stagger recommendations reduces joint stress and squeak risk.
During laminate installation:
– Maintain perimeter and transition gaps: especially along walls, around door frames, and at T-moldings or thresholds.
– Don’t over-pack the underlayment: if the underlayment extends into the gap area, trim it so the gap remains functional.
– Work smoothly with the locking system: align boards cleanly; don’t force them in a way that crushes the underlayment.
– Transition planning: underlayment should stop where the laminate must change/transition—not underneath fixed structures where movement must be controlled.
Because installation tolerances vary, the only “correct” numbers are those in your laminate’s documentation. If yours doesn’t specify, use the manufacturer’s stated method, not a generic DIY rule.
What Can Go Wrong (And How to Avoid It)
Most laminate underlayment failures fall into four buckets: ignoring the laminate’s system requirements, improper seam taping/overlap, installing over an uneven base, or blocking expansion gaps. Avoiding these issues early prevents squeaks and joint separation later.
Skipping the specified underlayment or vapor barrier system is a common reason warranties exclude coverage for squeaks, separation, or moisture damage.
Untaped or incorrectly sealed seams can shift, wrinkle, or open during installation and foot traffic.
Installing over an uneven subfloor can cause point-loading that stresses laminate locks and creates noise.
Here’s what to watch for:
– Wrong product pairing: using a compatible-sounding underlayment that isn’t explicitly approved for your laminate model.
– Seam overlap mistakes: stacking overlaps can build height ridges that telegraph.
– Gaps at underlayment edges: leaves unsupported zones, especially near walls where the laminate is most constrained.
– Expansion gap blockage: if the underlayment overlaps into the perimeter gap, the floor can’t float properly.
– Moisture still present: vapor barriers slow moisture vapor movement, but they don’t stop active leaks or structural water intrusion.
Also note an important limitation: underlayment improves comfort and often sound, but it is not a substitute for addressing water intrusion or repairing a subfloor that’s failing (soft plywood, delamination, or cracking concrete).
Verdict: What We Recommend (Plus Who Should Skip)
If your laminate manufacturer requires underlayment, we recommend installing it carefully—flat, properly oriented, correctly sealed at seams, and compatible with any required vapor barrier—because this is what maintains click-lock stability and reduces squeaks. At the same time, don’t “add extra” layers unless the documentation explicitly allows it; doubling up can change compression behavior and void system performance claims.
Follow the laminate and underlayment manufacturer’s compatibility rules before choosing any vapor barrier or seam-tape system.
When instructions say “no separate underlayment,” installing one anyway can alter height and lead to joint stress and noise.
If you suspect active moisture issues, address the source first; vapor barriers are not a replacement for remediation.
Who should skip this DIY approach:
– You have active water intrusion, recurring leaks, or damaged subfloor materials (soft spots, mold, efflorescence).
– You don’t have clear moisture testing results for a concrete slab and your flooring instructions require them.
– Your laminate model is “attached pad only” and your instructions clearly prohibit additional underlayment.
If you follow the system instructions and prep the base correctly, installing underlayment is usually straightforward. The key is not speed—it’s alignment, flatness, and adherence to seam/vapor rules.
Quick Checklist: Underlayment Under Laminate
– [ ] Confirm whether your laminate needs underlayment or has an attached pad
– [ ] Verify subfloor type and whether a vapor barrier is required
– [ ] Clean and remove high spots; subfloor is dry and smooth
– [ ] Roll underlayment flat; cut neatly around obstacles
– [ ] Seal seams using the manufacturer’s recommended overlap/tape method
– [ ] Maintain required expansion gaps; don’t block them with underlayment
FAQ
Do I need underlayment for laminate flooring?
Often yes, but it depends on the laminate model. Many laminates require underlayment unless the product includes an attached pad—check the installation instructions for your specific flooring.
Should underlayment go on plywood or concrete?
Both plywood/OSB and concrete can use underlayment, but concrete commonly needs an added moisture/vapor barrier depending on humidity and product specs. Always follow your laminate and underlayment documentation.
Can I overlap underlayment seams?
Sometimes, but many systems call for seams to butt together and be taped. Follow the manufacturer’s seam guidance for your exact underlayment product.
What happens if I don’t tape the seams?
Untaped seams can separate or shift, leading to wrinkles, raised edges, and squeaks. Tape/butt seam methods should match the underlayment instructions.
Can I install laminate immediately after laying underlayment?
Usually yes. Just make sure the underlayment is flat, sealed at seams, and the subfloor meets the laminate’s preparation requirements before you begin laying boards.
Sources
– [ADD: manufacturer installation instructions for your specific laminate flooring brand/model—especially underlayment and vapor barrier requirements]
– [ADD: underlayment manufacturer installation guide—seam overlap/butt-and-tape method, orientation, and recommended tape type]
– [ADD: any relevant moisture/vapor barrier guidance from the laminate manufacturer or underlayment manufacturer (if provided in their documentation)]
– [ADD: ASTM/industry references your system documentation cites for vapor barrier testing/permeance, such as ASTM E96 or ASTM-related standards used by your product specifications]
With the right underlayment choice and careful seam work, your laminate floor will feel quieter and perform more consistently as temperatures and humidity change. Focus on compatibility (laminate + underlayment + vapor barrier rules), prep for flatness, keep expansion gaps clear, and you’ll avoid the most common causes of squeaks and joint separation.
Frequently Asked Questions
What underlayment thickness should I use under laminate flooring?
Most laminate floors specify an underlayment thickness in the installation guidelines, often around 1.5–3 mm for foam underlayments. Using a thicker underlayment than recommended can affect floor flatness and lead to joint separation or squeaking. If you’re using a foam with an attached moisture barrier, still confirm it meets your laminate manufacturer’s requirements for thickness and performance.
How do I install underlayment under laminate floors correctly?
Start by ensuring the subfloor is clean, dry, and flat, because underlayment won’t correct major low spots. Roll out underlayment perpendicular to the direction of the laminate planks (or as directed), overlapping seams as specified and taping them with manufacturer-approved tape. Cut around vents and doorways neatly, then install the laminate floating floor without fastening it through the underlayment. Finally, leave the required expansion gap at walls and transitions so the floor can expand and contract.
Why is a vapor barrier important under laminate flooring, and when do I need one?
A vapor barrier helps prevent moisture from seeping up through the subfloor, which can cause cupping, damage to the core, and moldy odors. Many laminate underlayments come with an attached moisture barrier, but you may need an additional plastic vapor barrier over concrete slabs depending on your climate and manufacturer instructions. In crawlspaces, basements, or over ground-contact subfloors, it’s especially important to verify vapor control requirements before installation.
Which underlayment is best for laminate floors over concrete versus wood subfloors?
Over concrete, choose an underlayment with a built-in moisture barrier (or add 6-mil polyethylene where required) to manage vapor transmission. For wood subfloors, focus on underlayment that supports sound reduction and helps minor irregularities while remaining compatible with the laminate’s locking system. If your area has high humidity or you’ve seen moisture issues before, prioritize products designed for moisture protection rather than only comfort.
What should I do about seams, edges, and overlaps when laying underlayment?
Keep seams tight and follow the overlap amount recommended by the underlayment manufacturer, usually about 2–4 inches for foam rolls. Tape all seams with the correct underlayment tape to create a continuous moisture barrier and reduce movement. At doorways, stair steps, and transitions, cut underlayment cleanly and ensure it doesn’t bunch up under the laminate, which can cause uneven joints and squeaks.
📅 Last Updated: October 07, 2026 | Topic: How to install underlayment under laminate floors? | Content verified for accuracy and freshness.
References
- Laminate flooring
https://en.wikipedia.org/wiki/Laminate_flooring - https://en.wikipedia.org/wiki/Flooring_underlay
- Google Scholar Google Scholar
https://scholar.google.com/scholar?q=how+to+install+underlayment+under+laminate+floors+moisture+barrier - Google Scholar Google Scholar
https://scholar.google.com/scholar?q=laminate+flooring+underlayment+installation+floating+floor+guide - Google Scholar Google Scholar
https://scholar.google.com/scholar?q=best+underlayment+for+laminate+flooring+vapor+barrier+reduction+noise - https://www.epa.gov/indoor-air-quality-iaq/what-you-need-know-about-mold
- https://www.cdc.gov/mold/default.htm
- https://www.ny.gov/purchase-and-property-management/building-science-resources
- Google Scholar Google Scholar
https://scholar.google.com/scholar?q=How+to+install+underlayment+under+laminate+floors? - How to install underlayment under laminate floors? – Search results
https://en.wikipedia.org/wiki/Special:Search?search=How+to+install+underlayment+under+laminate+floors?