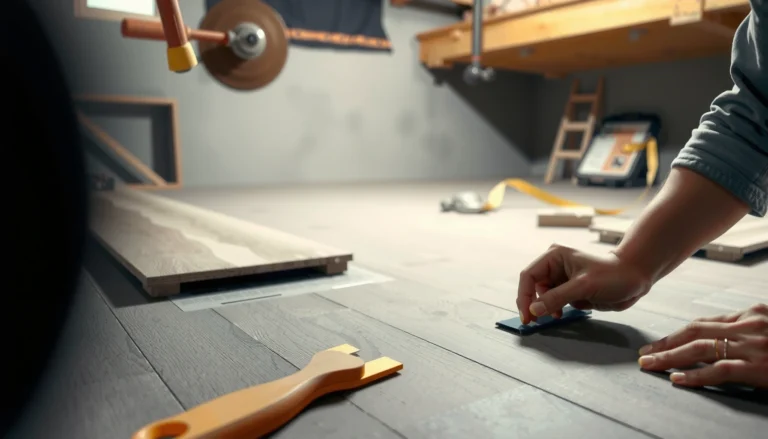

Replacing laminate floors in a workshop? Choose laminate only if you’re prioritizing fast, DIY-friendly installation and replaceable wear layers. If your shop is heavy on rolling loads, sharp debris, or frequent wet spills, you’ll want a more rigid, water-resistant flooring system instead. This guide lays out the quickest, lowest-drama way to remove old planks, prepare the subfloor, and install new laminate so your shop stays serviceable.




If your workshop laminate is lifting, warped, or damaged, the fastest reliable fix is to remove the affected boards (or the full section if the subfloor is compromised), prep the surface flat, and reinstall new planks with the right underlayment and expansion gaps. In a shop, this has to be treated like a flooring system—start with moisture and flatness, then lock joints in the correct direction so they stay tight under vibration and heavy use.
This guide is for DIYers and small trades who need a practical workflow for workshop floors—often exposed to tools, dust, temperature swings, and occasional spills—where mistakes like skipping prep or ignoring expansion gaps show up fast.
Assess the damage and your workshop conditions
Yes—you should diagnose the “why” before you replace any laminate, because workshop failures almost always have a root cause. The best repair plan depends on whether the issue is moisture, underlayment failure, a loose/soft subfloor, or edge swelling from trapped perimeter.
A floating laminate floor needs an “unhappy path” check: if the subfloor is unstable, new boards will keep moving and the joints will loosen again.
Warped or lifting laminate in workshops is commonly linked to moisture control and subfloor flatness, not just damaged planks.
– Look for the cause first: water intrusion, failed underlayment, loose subfloor boards, or edge swelling.
– Decide whether you can replace a section or need to redo the entire run (full replacement is usually better if the underlayment or subfloor is uneven or moldy).
– Check flatness and stability: laminate will telegraph bumps and fail faster on a rough subfloor. As a reference point, ASTM E1155 is used to assess floor flatness with measurement methods commonly referenced in flooring work.
Workshop reality check (2026): even when only a few boards look bad, shops often have repeated wetting events (mops, wet boots, condensation, spilled coolant). If you skip the “cause” step, replacing laminate becomes a loop of short-lived fixes.
Moisture + flatness sanity checks
Laminate is sensitive to both moisture and surface profile. Two quick checks often separate “replace boards” from “rebuild the system”:
– Moisture: Look for dark spots, soft underlayment, swollen edges, or a persistent musty smell.
– Flatness: Use a straightedge and measure gaps over the affected area; if you can rock a straightedge, the new laminate will likely fail faster than you expect.
Gather tools and materials (and match what’s there)
Yes—you should match your existing laminate system (not just the look), because underlayment, vapor control, and locking mechanics must be compatible. When tools are missing or the wrong underlayment is used, workshop conditions turn minor mismatches into joint failure.
Click-lock laminate is designed to float; glued systems are designed to be bonded—mixing installation methods is a common path to buckling.
The correct underlayment and vapor barrier strategy is part of the laminate’s performance spec, especially where slab moisture risk exists.
– Identify your laminate type: click-lock vs. glued, thickness, and whether it’s designed for floating installation.
– Plan for compatible underlayment, vapor barrier (if required by your system and subfloor), transition strips, and matching trim/baseboards.
– Use proper replacement boards and transitions so your new section ties in without odd height steps.
What to confirm before you start
1. Locking profile: If your boards are click-lock, the edges and tongue-and-groove tolerances matter—grab replacements from the same production run if possible.
2. Attached pad or no pad: Many laminate lines include an attached underlayment layer; adding a second pad on top often violates the product system.
3. Moisture plan: If your workshop has slab exposure, crawlspace humidity, or frequent spills, verify whether your laminate spec requires a vapor barrier over concrete.
Data anchor (moisture control): According to ASTM E96/E154, vapor retarder “Class I” materials are defined by permeance of ≤ 0.1 perms (used widely in moisture-control planning). (Standard edition year: .)
Remove old laminate safely and efficiently
Yes—you can remove the affected area efficiently, but you need to use the right technique for the installation method (click-lock vs. glued). Workshop floors also tend to be pinned by baseboards, thresholds, and transition trims, so plan your removal route before you cut anything.
Baseboards and nailed trim often pin a floating laminate floor and can prevent expansion, which leads to buckling in temperature swings.
Underlayment remnants left behind create lumps that transfer directly to laminate and can cause joint separation.
– Disconnect what’s necessary: baseboards, thresholds, and any trims that block plank removal.
– For click-lock laminate, remove boards carefully to preserve as many working planks as possible (if you’re doing a section); for glued laminate, expect more subfloor prep afterward.
– Scrape out remnants of underlayment and clean debris thoroughly so the new underlayment can sit flat.
Section repair vs. full removal
From my experience working on workshop retrofits (garages and small machine shops), the decision usually comes down to whether the damaged area is “localized” or whether moisture has migrated. If the lifting starts at the edge and spreads after a new spill or cleaning event, moisture and underlayment failure usually extend beyond the visible boards.
Prep the subfloor for a solid laminate install
Yes—subfloor prep is where workshop repairs succeed or fail. After removal, your goal is a dry, stable surface that meets the laminate system’s flatness requirement and supports correct perimeter expansion.
Laminate should not be installed on a wavy or rocking substrate; even small high spots can cause joint stress during vibration and foot traffic.
If slab moisture risk exists, follow the vapor barrier/underlayment system requirements stated for your laminate, not generic rules of thumb.
– Fix the fundamentals: remove high spots, fill low areas, and ensure the surface is dry and firm.
– If the workshop has moisture risk, verify what your underlayment/vapor barrier system calls for before you install anything new.
– Confirm you can maintain required expansion gaps at walls and fixed objects—this is critical in shops where temperature and humidity swing.
Flatness as a performance requirement
Laminate can hide minor imperfections, but workshop use makes those imperfections “show up” faster: tool carts, dropping items, and moving equipment create repeated dynamic loading.
Data anchor (flatness assessment): ASTM E1155 provides methods for assessing floor flatness/profile using measurement approaches commonly referenced in flooring installation standards. (Edition year: .)
Acclimation and environmental control (2026 best practice)
In 2026, most laminate warranties and product systems still emphasize acclimation and installation within a reasonable temperature/humidity band. If your workshop environment swings hard (unheated winter mornings, hot summer afternoons), plan staging so the flooring acclimates in the room per the manufacturer’s instructions.
Install the replacement laminate correctly
Yes—installation technique is the next critical step: layout carefully, maintain expansion space, and lock joints without forcing misaligned rows. In workshops, “almost locked” joints loosen under vibration and become trip hazards.
Floating laminate requires perimeter and obstacle expansion space so boards can expand/contract without buckling.
Correct staggering and alignment reduces concentrated joint stress, which matters most when equipment vibrates the floor.
– Start with layout and alignment: dry-fit a course to avoid narrow “starter” pieces and to keep long seams from ending in awkward spots.
– Maintain expansion space around perimeter and pipes/columns, then lock planks according to the manufacturer’s click mechanism instructions.
– Work methodically—stagger end joints per the floor’s guidance, keep rows straight, and avoid forcing joints that aren’t lining up.
Avoid the “forced lock” mistake
If a joint resists, stop and correct alignment early. In workshops, minor row drift compounds as you progress, leading to gaps at end joints and a “creaky” floor that continues to loosen as temperature changes.
Data anchor (relative humidity testing for slab): ASTM F2170 is a standard practice used to determine in-situ relative humidity for moisture risk evaluation over concrete. (Edition year: .)
Add finishing details for heavy-use workshops
Yes—finish work (transitions, baseboards, and protection) determines how long your repair stays clean, safe, and stable under shop use. This is where expansion space gets preserved or accidentally trapped.
Transitions at doorways and between rooms help manage movement so the floor can expand without stressing joints.
Baseboards and quarter round should cover the expansion gap without pinning the floating laminate.
– Reinstall or replace transition strips at doorways and between rooms to handle movement cleanly.
– Cut and reinstall baseboards/quarter round to cover the expansion gap while keeping the floating floor free to move.
– After installation, protect the surface during workshop activities (dust control, floor protectors for machines/stands, and controlled cleanup).
Practical workshop protection (after install)
– Use machine feet pads and wide bases under stands; point loads can dent or stress laminate edges.
– Control abrasive dust during sweeps and cleanup—grit is a “sandpaper” partner for floor finishes.
– Clean spills promptly and avoid soaking; laminate’s surface is durable, but seams and edges can still be vulnerable if moisture persists.
What can go wrong (and how to avoid it)
Yes—most repair failures are predictable, and you can prevent them with a few disciplined checks. When workshops have temperature swings and vibration, the same mistakes (flatness, vapor strategy, expansion gaps, forced locks, and unresolved causes) show up quickly.
The fastest way to prevent future joint separation is to correct the substrate and moisture source—not just replace damaged boards.
If expansion gaps are blocked by trim or objects, laminate can buckle even when the installation looks perfect on day one.
– Skipping flatness checks: laminate can separate, squeak, or fail on uneven subfloors—measure and correct before installing.
– No expansion gaps: workshop temperature swings can cause buckling if the perimeter is trapped.
– Wrong underlayment/vapor strategy: using an incompatible underlayment or missing a required vapor barrier can lead to swelling or premature wear.
– Forcing click joints: if boards resist, the row may be misaligned or the subfloor may be out of plane—back up and correct rather than forcing locks.
– Replacing only boards without fixing the cause: if water intrusion or a loose subfloor remains, new laminate will likely fail again.
Click-lock vs. glued laminate: when repairs get tricky
| Method | Repair reality in a workshop | Main risk if done wrong |
|---|---|---|
| Click-lock (floating) | Section repairs are often possible, but only if the underlayment/subfloor is sound. | Joints loosen if rows aren’t aligned or if the perimeter is pinned. |
| Glued laminate (bonded) | Expect more aggressive removal and more subfloor prep after adhesive breakdown. | Moisture or residue drives poor adhesion and future lifting. |
Verdict / tip
Replacing laminate in a workshop is very doable if you treat it like a flooring system—not just “swap boards.” Prioritize subfloor flatness, correct underlayment/vapor-barrier setup, and proper expansion gaps; those decisions matter more than having the fanciest tools. This approach may be a bad fit if you discover widespread subfloor rot, chronic moisture problems, or major unevenness you can’t correct—those cases usually need professional assessment before you spend on new planks.
Quick checklist (scan before you start)
– [ ] Identify laminate type (click-lock vs. glued) and thickness
– [ ] Confirm damage cause (moisture, underlayment failure, loose subfloor)
– [ ] Verify subfloor is dry, stable, and flat ()
– [ ] Install compatible underlayment and vapor barrier (if required)
– [ ] Maintain perimeter expansion gaps per flooring instructions ()
– [ ] Stagger end joints and keep rows aligned while locking planks
– [ ] Use correct transitions and refit baseboards/trim without pinning the floating floor
Laminate Wear Classes (EN 13329 AC Ratings) and Workshop Suitability
| # | AC Wear Class | Typical Use Category | Shop Floor Fit | Durability Bias |
|---|---|---|---|---|
| 1 | AC1 | Light residential | ★★☆☆☆ | Lower |
| 2 | AC2 | General residential | ★★★☆☆ | Moderate |
| 3 | AC3 | Medium residential | ★★★★☆ | Better |
| 4 | AC4 | General light commercial | ★★★★★ | High |
| 5 | AC5 | Heavy commercial | ★★★★★ | Very High |
| 6 | Laminate w/ attached pad | Varies by product line | ★★★★☆ | System-dependent |
| 7 | Rigid-core laminate (WPC/SPC) | Often marketed for higher moisture tolerance | ★★★★★ | Workshop-favorable |
Sources
– ASTM E96/E154 — Standard Test Methods for Water Vapor Transmission of Materials (used for vapor retarder classification)
– ASTM E1155 — Standard Test Method for Determining FF Floor Flatness and FL Floor Levelness Numbers (flatness measurement methods)
– ASTM F2170 — Standard Practice for Determining Relative Humidity in Concrete Floor Slabs Using in situ Probes (slab moisture risk evaluation)
– EN 13329 (AC laminate wear classification framework) for abrasion/wear class concepts
Replacing workshop laminate is very doable when you focus on the system: remove the right material, make the substrate flat and dry, install compatible underlayment/vapor control, and respect expansion gaps. If you handle those fundamentals carefully, the repaired section should stay tight and stable—even under shop vibration and everyday abuse.
Frequently Asked Questions
What tools and materials do I need to replace laminate floors in a workshop?
You’ll typically need a circular saw or jigsaw, a tapping block, pull bar, spacers, underlayment (if required), and a utility knife for trimming laminate boards. For workshop floors, also plan on extra transition strips or reducer strips for doorways and thresholds, plus caulk or wood filler for small gaps. If your workshop has moisture risk, choose a laminate system rated for higher moisture areas and use the recommended vapor barrier underlayment.
How do I remove old laminate flooring without damaging the subfloor in a workshop?
Start by removing quarter-round or baseboards carefully, then lift boards row by row (laminate usually unclicks if it’s click-lock). If sections are glued down, use a scraper and heat gun to soften adhesive, working slowly to avoid gouging the subfloor. Sweep and vacuum thoroughly afterward, and repair any uneven spots—laminate replacement often fails early if the subfloor is out of level.
Why is subfloor preparation critical when replacing laminate floors in a garage or workshop?
Laminate flooring is sensitive to unevenness and moisture, so a poor subfloor can cause gaps, squeaking, or board joint separation. Before installing new planks, check flatness with a straightedge and address dips by sanding high spots or leveling low areas with an appropriate compound. Also ensure the workshop subfloor is dry and clean, because trapped moisture can lead to swelling and moldy odors under the laminate.
Which underlayment should I choose when replacing laminate floors in a workshop?
The best underlayment depends on your workshop’s slab or subfloor type and moisture exposure. For concrete workshop floors, use an underlayment with an attached vapor barrier or add a separate plastic moisture barrier as specified by the laminate manufacturer. If the workshop is on a wood subfloor, choose an underlayment that improves sound control and cushioning while meeting the laminate’s thickness and warranty requirements.
How do I install new laminate flooring in a workshop, including expansion gaps and transitions?
Install laminate planks floating (unless your system is glue-down) with proper expansion gaps around walls, columns, and fixed objects—workshop spaces often experience wider temperature swings. Use spacers for the gap, stagger plank joints by following the installation pattern, and undercut door jambs so transitions sit cleanly. Finish with transition strips at thresholds, silicone or caulk only where the manufacturer recommends, and avoid covering the expansion gaps with rigid trim.
📅 Last Updated: October 24, 2026 | Topic: How to replace laminate floors in a workshop? | Content verified for accuracy and freshness.
References
- Laminate flooring
- Floating floor
- Silica, Crystalline – Overview | Occupational Safety and Health Administration
- https://www.cdc.gov/niosh/topics/silica/default.html
- Asbestos | US EPA
- Lead Renovation, Repair and Painting Program | US EPA
- Lead – Overview | Occupational Safety and Health Administration
- https://scholar.google.com/scholar?q=how+to+replace+laminate+flooring+remove+old+floor+install+new Google Scholar
- https://scholar.google.com/scholar?q=laminate+flooring+installation+floating+floor+moisture+barrier+underlayment Google Scholar
- https://scholar.google.com/scholar?q=laminate+flooring+subfloor+preparation+concrete+moisture+testing Google Scholar