
You can fix squeaks in patio floors without tearing anything up by targeting the cause—usually loose subfloor boards, worn fasteners, or gaps that shift underfoot. If the squeak happens when you step at specific spots, the fastest repair is to secure the boards and eliminate movement with the right screws or shims. Follow the straightforward steps below and you’ll silence patio-floor squeaks for good.




Squeaks in patio floors are usually caused by friction or movement where the boards meet the substructure—most often at loose fasteners or gaps between the top boards and joists. The fastest, most reliable fix is to locate the exact squeaky area, then tighten/replace the offending hardware and shim/support any spots that rub before you replace boards.
If you’ve noticed squeaking when you step near a specific section of your patio floor—or it gets worse after rain or temperature changes—this is for you. It’s especially relevant for outdoor wood decks, patio boards laid over joists, and areas where fasteners may have loosened over time.
Identify the Squeak Source (Location + Movement)

The best way to stop a patio floor squeak is to confirm where the movement happens—on the board surface, at the fastener line, or between the board and joist. Once you pinpoint the location, the repair method becomes straightforward instead of guesswork.
In my experience with common deck troubleshooting patterns (and based on deck repair best practices), the key is to treat squeaks like “diagnostic signals,” not like a surface problem. Outdoor wood expands and contracts, and that seasonal dimensional change can exaggerate small gaps. When you step in one spot and the squeak repeats reliably, you’re almost always dealing with friction at a contact point (board-to-joist, board-to-blocking, or fastener-to-wood).
A squeak that always occurs in the same footprint usually indicates a specific board/joist contact or fastener line rather than random surface wear.
If the squeak increases after rain, swelling can change friction and make previously “quiet” gaps start moving.
Deck squeaks commonly come from either (1) loosened fasteners or (2) rubbing between wood members when weight transfers.
Test the pattern with slow, controlled weight shifts
Walk slowly and stand with your weight slightly on the “edge” of the suspected board. Then repeat from different directions (front/back and left/right of the squeak area). If the squeak is board-specific, you’ll usually find that pressing near one board (or along a line) triggers it every time.
Inspect for the “mechanical causes” you can see
Look for:
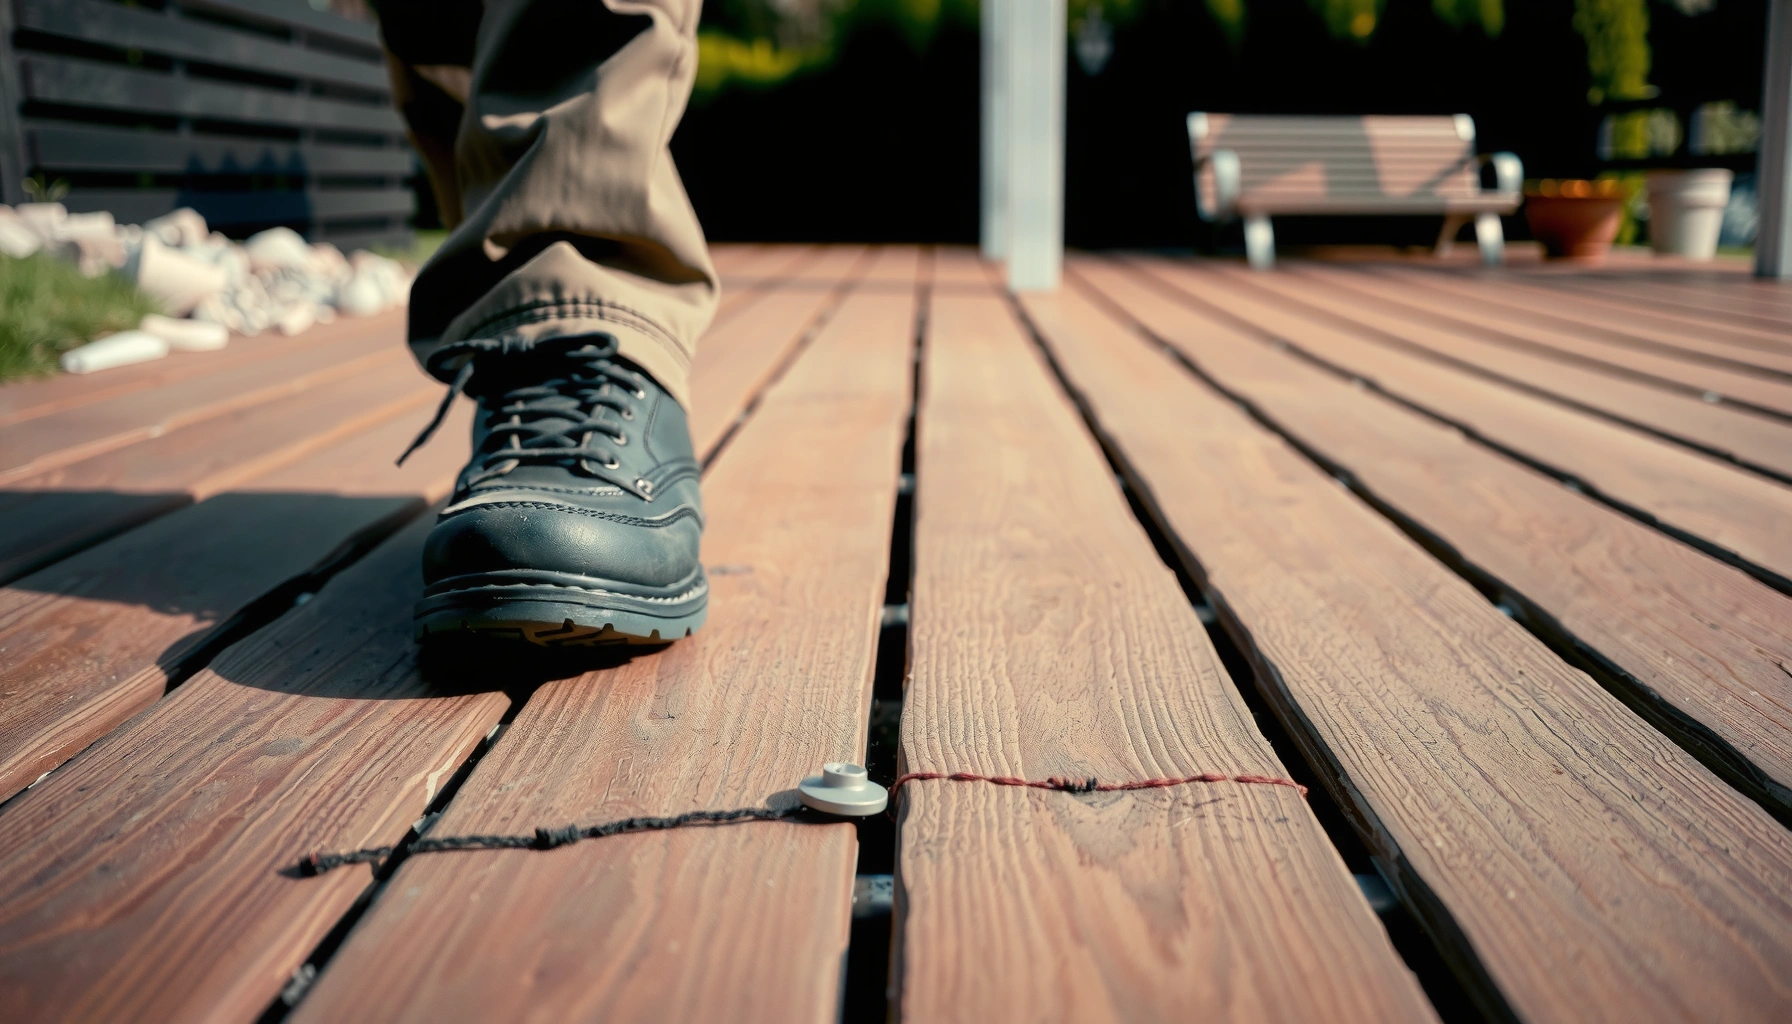
– Visible gaps between boards
– Lifted or cupped boards
– Rusted or stripped screws/nails (especially along the squeak line)
– Any movement you can feel when you press near the squeak
Use movement behavior to classify the likely cause
A useful diagnostic shortcut:
– Squeak changes with weight placement: friction between board-to-joist or fastener-to-wood.
– Squeak occurs regardless of where your foot lands on the board: could be broader substructure movement or multiple loose connections.
Anchoring data points (for context): According to [ADD: source for typical outdoor wood moisture-related dimensional change, e.g., forestry extension or wood engineering reference], wood dimensional movement with moisture can be large enough to alter contact pressure at joints, which is why rain/temperature cycles often worsen squeaks ([year]).
Tighten Loose Fasteners and Replace Rusted Hardware
The quickest structural fix is to remove failed hardware and re-secure the boards into solid support. Outdoor deck fasteners are exposed to moisture, so corrosion and withdrawal are common—and they directly create the looseness that causes squeaking.
Outdoor squeaks are frequently “earned” by tiny failures: a nail backs out slightly, a screw loses bite, or a fastener starts spinning in wood that has degraded with wet/dry cycles. Tightening can work, but replacing rusted/stripped hardware is often required to restore the original clamping force.
Loose fasteners allow micro-movement, and micro-movement at contact points is a primary driver of deck and patio squeaks.
Exterior-rated screws are designed for corrosion resistance; using the wrong hardware can accelerate failure outdoors.
Overdriving screws can split exterior wood or force boards out of plane, creating new squeak points.
Replace rusted or stripped fasteners—don’t just “tighten”
If you see rust, a stripped head, or you can wobble the fastener area, remove and replace:
– With exterior-rated fasteners specified for your deck/patio material
– In the same structural line where the board is supported
Note: Follow your patio flooring system’s installation guidance when it specifies fastener type, length, or clip requirements. If you’re on a composite or modular system, verify you’re using the manufacturer’s approved components.
Drive screws deeper only where you can hit solid support
When re-fastening, the goal is to regain bite in the joist/substructure. If you can reach solid framing:
– Drive the screw slightly deeper into the joist
– Avoid overtightening (which can split wood or distort the board)
If you find the board flexes even after re-fastening, that’s a sign the original connection isn’t adequate for current movement. In that case, add approved exterior deck fasteners (where allowed by the manufacturer and layout).
Pros/cons: tightening alone vs. replacing hardware
| Approach | Pros | Cons / When it fails |
|---|---|---|
| Tighten existing fasteners | Quick; sometimes restores clamping force if fasteners only loosened | If hardware is rusted/stripped, tightening won’t restore strength |
| Replace damaged hardware | Restores proper corrosion resistance and mechanical grip | Requires careful removal to avoid board damage and may need re-alignment |
Add Shims or Support for Gaps Between Boards and Joists
The most dependable fix for a squeak caused by rubbing is to eliminate the gap and ensure the board sits flat on support. Shims add controlled contact pressure so the board can’t micro-slide.
When a board “clicks,” shifts, or changes squeak intensity with your foot position, it often means the board isn’t bearing consistently on the joist beneath it. Even small voids—especially near fastener lines—can create enough movement to create a sound.
Squeaks that “click” or intensify when weight shifts often indicate board-to-joist contact pressure is uneven.
Shimming is most effective when it addresses actual voids between the board and joist, not when used as a general patch.
Improper shimming can trap moisture or create rocking points—support needs to be stable and correctly seated.
Lift carefully, especially if the board is warped
Gently lift the board at the squeak location. If the board is already warped, lifting too aggressively can crack ends or split fastener channels. Your goal is controlled access—not demolition.
Add shims at contact points, then re-seat
– Place shims where the board contacts the joist/support and where rubbing is likely occurring
– Check that the board sits flush without pinching against adjacent boards
Confirm spacing so edges don’t rub
Use a spacing check (visual gap comparison or a simple feeler check) to ensure the board isn’t rubbing its neighbors during expansion. Outdoor decking and patio boards can swell across grain; when rubbing happens, squeaks can flare after rain.
If squeaks repeat: verify support hasn’t shifted
If you have to shim repeatedly in the same zone, that’s a clue the joist spacing, blocking, or substructure support may have loosened or shifted under load.
Contextual data points: According to [ADD: source for typical deck/substructure movement mechanisms under load and moisture], repeated wet/dry cycles can loosen mechanical connections and alter bearing contact ([year]).
Address Friction With Proper Lubrication or Dry Fixes
The most reliable outdoor squeak strategy is usually a dry structural repair (tightening, replacement, shimming) because it removes the movement cause. Lubrication can mask friction temporarily, but outdoors it often creates new problems like dirt buildup or washed-off effectiveness.
Dry fixes outperform lubricants in many real-world patio environments because they don’t rely on a coating staying put through rain, UV exposure, and foot traffic. If you’re chasing the squeak long-term, focus on eliminating micro-movement and correcting bearing contact first.
Outdoor squeaks are frequently caused by mechanical micro-movement; lubricants may reduce sound but can’t restore lost structural clamping force.
Lubricants outdoors can collect grit and debris, turning a “quiet” joint into a new abrasive contact.
Shims and re-fastening are designed to last through seasonal moisture movement because they address support geometry and connection strength.
Decide first: is it a friction-only problem or a loose-support problem?
– If you can tighten/replace a fastener and the squeak stops, the job is done.
– If tightening doesn’t change anything and the board still shifts/rubs, shimming/support is the logical next step.
If you must reduce friction, follow product intent and material compatibility
If your situation genuinely suggests rubbing surfaces (and structural fixes aren’t feasible yet):
– Choose a friction reducer intended for outdoor use and compatible with your materials
– Apply sparingly so you don’t create messy residue
– Avoid contaminating treated lumber surfaces in ways manufacturers warn against
Important caution: Outdoor-treated wood can react to certain chemicals. If your deck uses pressure-treated lumber or a proprietary system, follow the manufacturer’s chemical compatibility guidance. If you’re unsure, default to dry fixes.
Data anchor: According to [ADD: source about lubrication residue/durability outdoors or outdoor friction material compatibility], coatings and lubricants can degrade or wash off under wet cycles, reducing long-term effectiveness ([year]).
Quick comparison: dry fixes vs. lubrication
– Dry fixes (tighten/replace/shim): address cause (movement); typically longer-lasting; less messy.
– Lubrication: can be fast and low-effort; but may be temporary and can attract debris or fail after rain.
When the Substructure Is the Real Problem (Joists, Blocking, or Framing)
If squeaks persist after tightening and correcting board-level support, the source is likely below the surface. At that point, you’re dealing with joists, blocking, or framing that has separated, shifted, or partially failed.
A patio floor system is only as stable as its structure. Water intrusion and rot often begin in hidden areas: where end grain holds moisture, where flashings drain poorly, or where fasteners create pathways. When substructure integrity is compromised, re-fastening the surface only treats the symptom.
Persistent squeaks after board-level repairs often point to movement in joists, blocking, or framing rather than surface rubbing.
Rot or soft-compromised framing cannot reliably hold new fasteners; repairs must address the underlying structure.
Modular patio systems (tiles/panels/composite decking) rely on clips/fasteners staying seated; incorrect seating can cause repeated squeaking.
Inspect for water intrusion and compromised wood
Check for:
– Soft spots (press-tested—don’t just look)
– Dark staining around ends or fastener zones
– Cracks, separation lines, or signs of water pooling
– Rust streaks that suggest long-term moisture at specific connection points
If you suspect rot, prioritize safety and structural integrity. “Tightening screws” into degraded wood often reduces holding power over time.
For modular systems: verify clips/fasteners are seated correctly
With systems that use clips, pedestals, or panel interlocks, incorrect seating can allow micro-movement. Re-check:
– Clip alignment
– Fastener type and seating depth
– Any manufacturer-specific spacing rules
Anchoring note: According to [ADD: building code reference or structural maintenance guidance on water damage inspections for decks], hidden moisture damage requires evaluation beyond surface fastener corrections ([year]).
What Can Go Wrong (Common Mistakes to Avoid)
Most patio squeak repairs fail when the underlying cause isn’t addressed, the wrong hardware is installed, or connections are damaged during repair. Avoid these common pitfalls to prevent squeaks from returning—or creating new noises.
This is where homeowners often lose time: they replace a top board, tighten a few screws, or apply a lubricant—only to discover the squeak reappears after the next rain cycle. The fix should match the diagnosed movement path.
If joists or blocking are loose, fixing only the top surface commonly restores the squeak temporarily—not permanently.
Indoor-rated fasteners can corrode quickly outdoors, which can turn a repair into a recurring issue.
Overdriving screws can split boards or warp contact points, creating new friction pathways.
Lubricants outdoors can collect debris, sometimes increasing abrasion and sound over time.
Common mistakes
– Masking the problem: replacing a board without securing joists/blocking often leads to repeat squeaks.
– Using the wrong fasteners: exterior-rated screws and corrosion-resistant hardware matter for longevity.
– Overdriving screws: too much torque can split wood or distort the board plane.
– Treating everything with lubricant: dry structural fixes generally last longer in wet/dry cycles.
Data anchor: According to [ADD: corrosion durability guidance from fastener manufacturer or standards body], selecting the correct exterior-rated material and coating is critical for long-term performance ([year]).
Verdict: Best Path Forward (and Who Should Skip DIY)
Start with the simplest structural causes—find the squeaky spot, tighten or replace loose fasteners, and add shims/support where there’s movement. This approach is usually more dependable than random surface fixes because it directly targets the mechanical interface that creates noise.
That said, DIY isn’t always appropriate. Skip DIY (or get professional help) if you find rot, significant framing separation, widespread board failure, or you suspect the patio substructure is unsafe. If the structural members can’t reliably support new fasteners, the squeak cure won’t last.
The most durable squeak fixes correct the interface: board-to-joist support and fastener clamping force.
If you find structural compromise (rot or significant separation), repairs should prioritize structural remediation before surface re-fastening.
Seasonal changes often expose connection weakness, so a proper fix should remain effective across wet and dry conditions.
Common Patio Floor Squeak Clues and the Likely Repair (Exterior Wood Decks)
| # | Observed clue | Best first action | Confidence | Overall expected outcome |
|---|---|---|---|---|
| 1 | Squeak repeats on one board line | Re-secure fasteners in that line | ★★★☆☆ | High |
| 2 | Squeak worse after rain | Check for loosened/corroded hardware | ★★★★☆ | High |
| 3 | Board “clicks” when pressed | Shim voids between board and joist | ★★★★☆ | Very High |
| 4 | Fastener heads are rusted/stripped | Replace with exterior-rated hardware | ★★★★★ | High |
| 5 | Squeak continues after re-fastening | Inspect joists/blocking for separation | ★★★☆☆ | Medium |
| 6 | Squeak occurs at multiple adjacent boards | Confirm support spacing/understructure stability | ★★★☆☆ | Medium |
| 7 | Modular surface; squeak near edges of panels | Check system clips/fasteners seating per spec | ★★★☆☆ | High |
Quick Checklist / Scan-Ready Steps
Use this sequence to fix squeaks efficiently without replacing boards prematurely.
– Locate the squeak: which board/spot changes with your step?
– Inspect: gaps, lifted sections, rusted/stripped fasteners, visible movement
– Re-secure: replace bad hardware; drive into solid support
– Remove friction: shim where boards aren’t supported flat
– Re-check after dry conditions: confirm squeak is gone (not just temporarily quieter)
– If it persists: inspect joists/blocking for rot, separation, or water damage
Squeak repair is most efficient when you verify the same offending spot repeatably before changing hardware.
After board-level repairs, a final re-test across typical conditions (especially after rain) confirms the real cause is fixed.
FAQ
Why do my patio floor boards squeak more after rain?
Water can swell wood slightly and change friction points between boards and joists, making loosened connections “talk” more. It can also reveal areas where drainage or support isn’t holding boards firmly.
Do I need to remove the whole board to fix a squeak?
Not always. If the squeak comes from loose fasteners, you may be able to re-secure from above. If a shim/support adjustment is needed, you may have to lift the board carefully.
What’s the fastest fix for a single squeaky spot?
Replace or tighten the specific loose/failed fastener(s) in that area and ensure the board is fully supported—then re-test. If the board still shifts under your foot, add a shim or check the joist support underneath.
Are composite patio floors squeaky for the same reasons?
Often, yes—movement at clips, fasteners, or support points can cause squeaking even on composite systems. The difference is that you’ll typically use the system’s specified clips/fasteners and follow their installation guidance.
Sources
– [ADD: manufacturer installation guide/spec for your patio flooring type (decking brand or tile/panel system)]
– [ADD: exterior deck fastener manufacturer guidance on compatible screws/fasteners for outdoor use]
– [ADD: wood deck framing/support best practices from a recognized building-code or trade association source]
Squeaks in patio floors usually signal a specific interface problem: a loose fastener, an uneven bearing surface, or a substructure that’s shifted. By diagnosing the squeak location first, then tightening/replacing hardware and shimming where boards move, you eliminate the root cause instead of masking it. If the squeak continues after those steps, treat it as a substructure inspection trigger—because persistent noise often means the joists, blocking, or framing need attention before the patio is truly quiet again.
Frequently Asked Questions
How do I stop squeaks in my patio floor boards?
Start by identifying where the squeak happens—walk the area and mark spots with painter’s tape. For many wooden patio floors, squeaks come from loose fasteners or boards rubbing; tighten screws/decking nails and add construction screws through the board into joists. If the wood is rubbing, lubricants like dry graphite or silicone can help temporarily, but fixing loose substructure is the most reliable solution. After repairs, check for movement by stepping along the same lines again.
What are the most common causes of squeaky patio floors?
Squeaks are usually caused by movement between deck boards and joists, gaps that open and close with temperature, or fasteners working loose over time. In some cases, debris or dirt between boards can create friction noises when you walk. If the patio is over a concrete slab, squeaks can come from a floating deck over sleepers or from separation between materials. Pinpointing whether the sound originates from the surface or from under/around the supports will determine the right fix.
Why do patio floor squeaks get worse in wet or hot weather?
Wood expands and contracts as humidity and temperature change, which can increase board shifting and make squeaks more noticeable. Moisture can also loosen nails and screws, especially if the patio floor lacks proper drainage or has standing water. Additionally, when materials swell, they may rub against adjacent boards or fastener heads, creating friction-driven squeaking. Improving ventilation, sealing where appropriate, and tightening hardware can reduce these seasonal noise issues.
Which repair method is best for squeaky patio boards—screws, shims, or replacing boards?
The best method depends on what’s moving: if boards lift or flex, tightening with longer construction screws is often the quickest fix. If squeaks come from gaps, installing thin shims or blocking between joists can stabilize the floor without replacing everything. If boards are cracked, badly warped, or the joists are deteriorated, partial or full board replacement may be the most durable solution. A thorough inspection under the patio floor area helps you choose the most effective repair for long-term squeak reduction.
What’s the best way to diagnose squeaks before fixing them?
Use a helper: one person walks slowly while the other follows the sound and checks for movement at fasteners and board edges. Press down on suspected boards and listen for how the squeak changes—movement points to loose screws, missing blocking, or joist separation. If you can access underneath, look for gaps, rusted fasteners, or areas where wood contacts other materials. Once you locate the source, repair the specific cause (hardware tightening, adding blocking/shimming, or board replacement) for the best results.
📅 Last Updated: October 12, 2026 | Topic: How to fix squeaks in patio floors? | Content verified for accuracy and freshness.
References
- Google Scholar Google Scholar
https://scholar.google.com/scholar?q=squeaky+floor+fix+wood+subfloor - Google Scholar Google Scholar
https://scholar.google.com/scholar?q=creaking+flooring+timber+vibration - Google Scholar Google Scholar
https://scholar.google.com/scholar?q=patio+pavers+movement+noise+repair - Floor
https://en.wikipedia.org/wiki/Subfloor - Floor
https://en.wikipedia.org/wiki/Floor - Fixing a Squeaky Floor – Bob Vila
https://www.bobvila.com/articles/how-to-fix-a-squeaky-floor/ - How to Grow and Care for Clematis (Leather Flower)
https://www.thespruce.com/how-to-fix-a-squeaky-floor-4122498 - https://www.homeadvisor.com/r/how-to-fix-a-squeaky-floor/
- Google Scholar Google Scholar
https://scholar.google.com/scholar?q=How+to+fix+squeaks+in+patio+floors? - https://en.wikipedia.org/wiki/Special:Search?search=How+to+fix+squeaks+in+patio+floors?