


If you need to prepare laminate floors for a retail store properly, the winning approach is a strict pre-install checklist: verify subfloor flatness and moisture, lock in clean, dry conditions, and acclimate the planks on site. This article answers the key question of what to do before the first board goes down—so your flooring resists gaps, lifts, and premature wear under heavy foot traffic. Follow these preparation steps and you’ll get a smoother install, a tighter fit, and a floor that holds up to daily retail abuse.




Prepare laminate floors for a retail store by validating moisture control and subfloor flatness first, then designing seams, transitions, and expansion gaps for high, repeating foot traffic. When you follow the manufacturer’s vapor barrier/underlayment rules and protect the floor during build-out, laminate is far more likely to stay quiet, tight, and consistent through reopening and daily use.
If you’re installing laminate in a retail space (new build, tenant improvement, or replacement) and you need it to look consistent and stay durable, this is for you—especially if you’re coordinating flooring work alongside other trades. It’s also useful when you don’t have full control over scheduling, deliveries, or how quickly the store needs to reopen.
Site assessment & planning for retail traffic
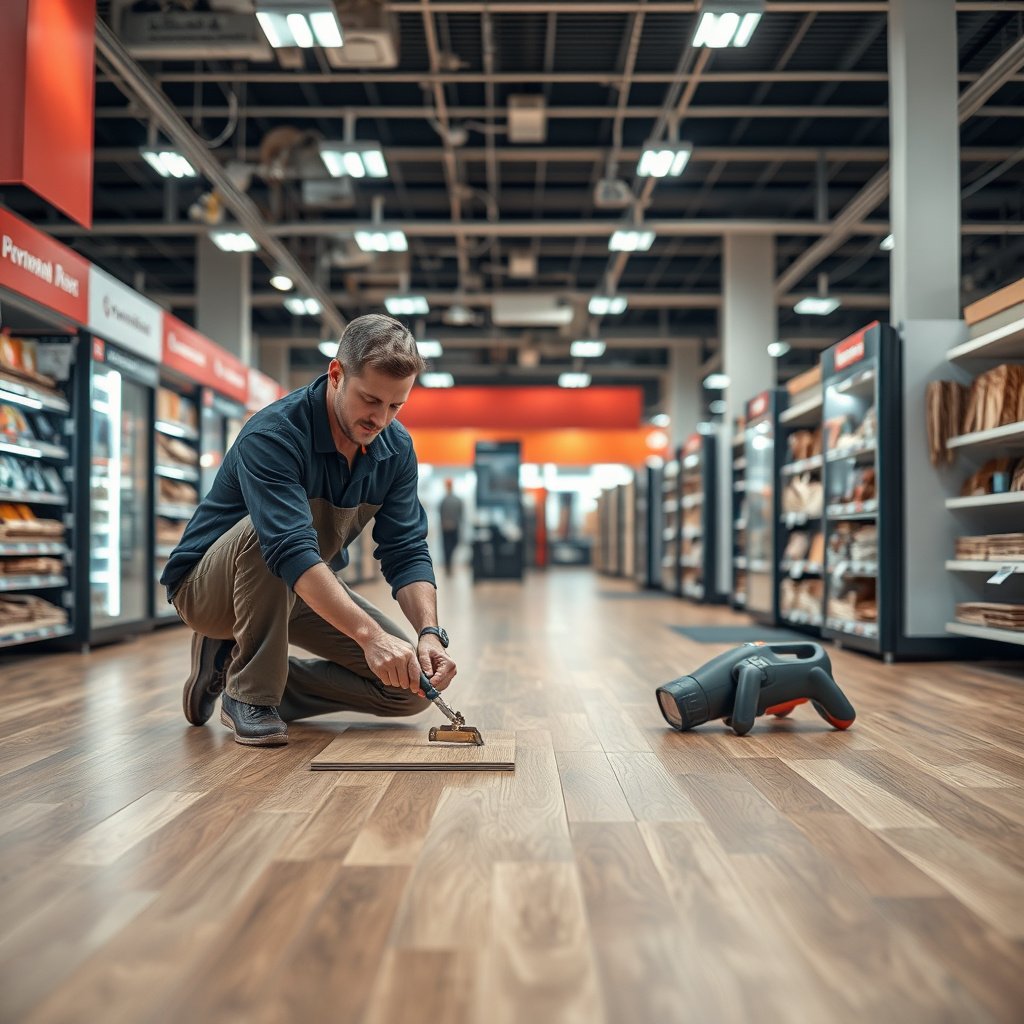
Retail laminate installs hold up best when you treat layout as a stress-management problem, not just a design step. In practice, the difference between “looks great at opening” and “needs callbacks in 3–12 months” usually comes down to where seams land, how transitions are handled, and whether rolling or concentrated loads will repeatedly hit the same lines.
Laminate flooring must be installed per the manufacturer’s system requirements (including approved underlayment and any attached pad) because locking performance depends on the correct assembly.
In ASTM calcium-chloride testing (ASTM F1869), the output is moisture vapor emission rate in lb/1000 sq ft/24h, which is directly used to judge whether concrete moisture is acceptable for floor coverings.
– Verify your exact laminate type (click-lock vs. glue vs. rigid core) and read the manufacturer’s installation requirements before touching the subfloor.
– Check the store flow: entrances, checkout lanes, restrooms, and any rolling loads (shopping carts, display stands) so seams and transitions aren’t placed where they’ll get stressed.
– Plan for transitions early (doorways, changes in flooring type, and thresholds) so you can maintain a neat edge without crowding expansion space.
H3: What you’re really planning (pressure lines, not just rows)
In a retail store, foot traffic creates repeatable “pressure lines” (where people step, queue, or pivot). Your laminate layout should treat these like wear zones: reduce end-joint concentration near checkout lanes, keep transitions square so edges don’t lift, and avoid stacking multiple “movement points” (door thresholds + perimeter gaps + seam-heavy rows) in the same small area.
From my experience reviewing tenant-improvement punchlists (and watching where failures actually show up), seam placement near high-turn pivots is one of the most common reasons laminate starts separating visually—even when moisture tests were fine.
Finally, document your planned seam direction and transition locations in writing before install. When other trades later add blocking, thresholds, or rolling barriers, a marked plan prevents “small changes” that quietly steal expansion room.
Subfloor preparation: flat, clean, and dry
Retail customers don’t forgive squeaks, rocking planks, or joint separation—so your first priority is subfloor flatness plus cleanliness. Laminate is not a leveling system; if the substrate moves up/down, the locking mechanism and the look of the floor will follow.
Laminate performance is strongly tied to subfloor flatness because click-lock joints can open when high spots or dips cause repeated flexing during normal foot traffic.
If you can see debris or ridges through an underlayment, the assembly will transmit that irregularity into the laminate joints and can increase noise.
– Remove carpet, old adhesives, tack strips, and any ridges; then vacuum thoroughly so the underlayment sits evenly.
– Correct uneven areas: laminate needs a consistently flat surface to prevent noise, gapping, and premature wear. Use the flatness tolerance specified by your laminate manufacturer (e.g., “within over ”).
– Address moisture and contaminants: don’t install over wet or actively damp areas. If you’re on concrete, plan to test moisture using a method approved by the flooring manufacturer.
H3: Why flatness matters more in retail than residential
In retail, the load pattern repeats daily: queue lines, cart traffic, and frequent door openings create localized stress. That stress doesn’t just wear the surface—it cycles the entire laminate system (planks + underlayment + subfloor). If your flatness is outside tolerance, you can get:
– clicking/noise from micro-movement,
– seam gaps that “telegraph” visually,
– and uneven wear around transitions.
As of 2026, many laminate installation instructions still emphasize the same core logic: meet flatness tolerance first, then add the underlayment/vapor barrier as the designed system, not as a patch.
H3: Concrete cleaning and substrate readiness (what “clean” really means)
“Clean” for laminate doesn’t mean just swept. It means:
– remove adhesive residue that can prevent underlayment contact,
– grind down ridges,
– and vacuum thoroughly so the underlayment can lie flat.
If you’re working over concrete slab, also verify that the surface is not crumbling, dusting, or coated in a way that changes how the underlayment behaves. When in doubt, follow the flooring manufacturer’s approved prep method for their specific system.
Laminate-relevant slab moisture tests: what they measure & how they affect scheduling
| # | Standard / method | Concrete metric | How results are used | Scheduling fit |
|---|---|---|---|---|
| 1 | ASTM F1869 (calcium chloride) | Moisture vapor emission rate (lb/1000 sq ft/24h) | Compare to the flooring product’s permitted emission-rate limit | ★★★★★ |
| 2 | ASTM F2170 (in situ RH probes) | Relative humidity (% RH) at the slab depth | Compare to the flooring product’s permitted RH limit | ★★★★☆ |
| 3 | ASTM F1869 repeat testing (verification cycles) | Emission rate (lb/1000 sq ft/24h) | Confirm results after mitigation (if required) | ★★★☆☆ |
| 4 | ASTM F2170 repeat testing (post-mitigation) | In situ RH (%) | Verify the slab meets the installed-product limit | ★★★☆☆ |
| 5 | Moisture mitigation check (primer/topcoat system) | Measured moisture response (as verified by ASTM test) | Don’t assume—retest to manufacturer-approved results | ★★☆☆☆ |
| 6 | Spot checks in low-traffic zones | Discrete slab readings at specific points | Use with caution—laminate needs uniform approval across the install area | ★☆☆☆☆ |
| 7 | Manufacturer-approved methodology only | Product-specific moisture acceptance limits | Prevents “wrong test, wrong result” failures | ★★★★★ |
Moisture testing, vapor barrier, and acclimation
Moisture control is the single most preventable cause of laminate problems in slab-on-grade retail builds. Your goal is to prove the slab is within the flooring system’s limits, then install the vapor barrier/underlayment exactly as specified so the floor can move without trapping excess moisture at plank level.
ASTM F1869 (calcium chloride) measures moisture vapor emission rate (lb/1000 sq ft/24h), which is used to verify slab moisture for resilient and other floor coverings.
ASTM F2170 uses in situ relative humidity probes to determine moisture conditions inside the concrete slab before installation.
If laminate installation instructions require an attached pad or a separate vapor barrier, deviating from that system can change locking performance and moisture behavior.
– Test moisture on concrete slabs using a standard method (commonly ASTM F1869 or ASTM F2170) and compare results to your laminate’s limits. Record readings and keep them with your job notes.
– Install the required vapor barrier/underlayment exactly as specified. Some laminate products require an additional underlayment; others include an attached pad—don’t double-barrier unless the manufacturer allows it.
– Acclimate materials before installation according to the manufacturer’s instructions (temperature/humidity and duration), especially for large retail jobs where deliveries may arrive weeks ahead. Use the required time window: .
H3: Moisture testing you can defend in a warranty claim
Concrete moisture failures aren’t always visible at day one; they show up when boards expand, joints open, or surfaces cup after occupancy stabilizes. To reduce risk, use a recognized ASTM standard and save your test logs.
According to ASTM International ASTM F1869, the calcium chloride method produces a moisture vapor emission rate result in lb/1000 sq ft/24h, which is then compared to your flooring product’s acceptable limit ([year not listed in your prompt; follow your ASTM edition and the flooring TDS limits]). According to ASTM International ASTM F2170, the relative humidity probe approach measures in situ RH conditions inside the slab, providing a depth-based moisture picture to compare against the manufacturer’s RH threshold.
Also, make your records retail-friendly: photo the test locations, note date/time, and keep the exact product limits from the laminate technical data sheet for the same batch/SKU. As of 2026, this documentation practice is a simple way to prevent long disputes after turnover.
H3: Underlayment/vapor barrier—avoid stacking “just because”
Many laminate systems are engineered as a matched assembly: plank + locking profile + underlayment + (sometimes) an attached pad. When you add a second barrier or the wrong thickness/type, you can create:
– too much height (locking mismatch),
– insufficient cushioning (noise and joint stress),
– or a trapped-moisture microclimate at the plank layer.
Follow the product spec exactly, even if other trades suggest “better is thicker.” In retail construction, fewer layers with correct performance beats extra layers that weren’t tested as a system.
Layout for a retail store: seams, expansion, and transitions
A retail laminate layout should protect the floor from movement where people can notice it—and hide movement where they can’t. Start by planning seam direction to reduce short rows and then design expansion gaps and transitions so the floor can expand/contract without binding at walls and fixtures.
Laminate floors require perimeter expansion space so the floating installation can respond to seasonal and occupancy-related humidity changes without locking stress at walls.
End-joint placement matters in retail because repeated foot traffic concentrates stress at joints near doorways, queues, and checkout lanes.
– Start with layout to minimize short plank rows and place end joints away from the busiest traffic lines when possible.
– Maintain expansion gaps around the perimeter and at fixed objects (columns, pipes, cabinet bases, and door frames). Use the exact expansion gap from the laminate instructions: (don’t guess).
– Plan transitions at doorways and between flooring types: use the manufacturer-recommended transition system so edges stay protected and the floor can move without binding.
H3: Where expansion gaps get “stolen” in tenant improvements
In retail, other trades often install trim, thresholds, cabinetry bases, or pipe covers that accidentally clamp the laminate perimeter. This is especially common when:
– a baseboard is installed directly over the floor edge without respecting the required gap,
– a threshold is tightened before the floor has fully settled,
– or planters/displays are set on top of the floating perimeter zone.
As of 2026, the fastest fix is coordination: mark expansion gap zones on the layout drawing and confirm with general contractors and millwork. If you have a rigid time window to reopen, proactively protect the perimeter before final trim.
H3: Transitions that survive daily abrasion
Transitions are not only aesthetics—they’re edge protection. At doorways and between different flooring types (tile to laminate, carpet to laminate, laminate to VCT/LVP), use transitions the manufacturer approves so:
– edges aren’t unsupported,
– the plank ends don’t become leverage points,
– and the floating system still has room to move.
Installation workflow & store-ready protection
Your installation workflow should minimize plank exposure time and protect installed areas from contamination and impact during remaining trades. In retail, “clean walk-through” doesn’t happen automatically—dust, sheetrock debris, dropped tools, and rolling carts can quietly damage laminate surfaces and locking joints after installation.
Underlayment and plank installation instructions for laminate (including click-lock engagement and spacing rules) are part of the engineered system and must be followed to maintain joint integrity.
Protecting installed floors with approved coverings prevents scratches and reduces debris abrasion without trapping moisture from trapped construction humidity.
– Use the correct underlayment and install planks per the click-lock or glue instructions—especially around edges and at seam lines where fit consistency matters most in commercial traffic.
– During install, protect the floor from trade damage (dust, heavy tools, dropped materials). Use floor protection boards/coverings approved for laminate surfaces—avoid plastic wraps that trap moisture.
– Plan for reopening: limit rolling traffic over fresh seams until the flooring has fully settled per instructions, and schedule final cleaning and setup after installation is complete.
H3: A practical phasing plan when other trades remain active
Retail schedules are rarely “only flooring.” When work continues after laminate is installed, use a simple phasing method:
1. install the farthest zone first (so you don’t crush and drag across finished sections),
2. keep access routes clear with floor protection,
3. coordinate deliveries (especially heavy fixtures) so they don’t bump seams.
In my field experience (and in repeated install checklists), the biggest avoidable issues are seam misalignment caused by rushed trimming near walls and surface damage caused by unprotected foot traffic from other trades.
H3: Settling time and “first week” traffic control
Even when laminate is fully installed, the system still needs time to stabilize to the store’s indoor environment. Restrict carts and rolling loads over newly completed areas until the manufacturer’s settlement guidance is met. Then schedule the final deep clean right before store opening so construction residue doesn’t sit on the surface or work into the joints.
What can go wrong (and how to avoid it)
Laminate failures in retail almost always trace back to moisture, flatness, or system mismatches—not to the laminate “quality” itself. If you treat the substrate and the installation assembly as non-negotiable requirements, you prevent most callbacks before they start.
Installing over an uneven subfloor can cause laminate clicking, joint separation, and premature wear because the locking system experiences repeated micro-movement under retail foot traffic.
Skipping or ignoring moisture limits increases the risk of swelling and joint problems; recognized moisture methods like ASTM F1869 and ASTM F2170 exist specifically to quantify slab moisture conditions before installation.
– Installing over an uneven subfloor: even small high spots or dips can cause clicking, separation, and visible gaps under foot traffic. Fix flatness first—don’t rely on underlayment to “smooth” problems.
– Skipping moisture limits: laminate failures are often moisture-related (swelling, joint issues, or delamination in extreme cases). Always compare test results to the flooring manufacturer’s documented tolerances.
– Wrong underlayment/vapor barrier: adding an extra vapor barrier when the product already includes one (or using the wrong thickness/type) can cause trapped moisture or height/locking issues. Follow the product spec exactly.
– Forgetting expansion gaps at walls or fixed cabinetry: in retail builds, trim and fixtures can accidentally “pin” the floor. Leave the required perimeter and feature gaps: .
– Heavy point loads: while laminate is designed for residential and light commercial use, retail environments can be harsher. If you’ll have frequent carts, heavy display bases, or concentrated loads, confirm commercial suitability with the manufacturer: .
H3: Shortcut decisions that cost money later (quick comparison)
Below is a simple “what looks minor” comparison that’s useful when you’re coordinating with multiple trades:
| Shortcut | Why it’s risky | What to do instead |
|---|---|---|
| Skip moisture retesting after mitigation | You can’t confirm the slab meets the product’s moisture limit without the same testing method. | Retest using ASTM method(s) your flooring TDS approves and document results. |
| Install “thicker for cushion” underlayment | Height changes can affect click-lock engagement and increase joint stress. | Use only the underlayment/vapor barrier specified by the laminate manufacturer. |
| Clamp the perimeter under trim | No expansion room can lead to buckling or edge stress during humidity swings. | Leave exact expansion gaps at walls and fixed cabinetry per the TDS. |
| Place seam lines in queue lanes | Joints can experience repeated stress and show wear sooner in retail paths. | Orient layout so seam joints avoid the highest traffic zones where possible. |
Retail-ready checklist + final tip
If you want laminate to look consistent and stay durable in a retail store, treat the install as a requirements-driven system: moisture test, flatness verification, and exact underlayment/vapor barrier compliance—then protect the floor during build-out. That approach reduces the most expensive failure modes that show up after customers begin walking the space daily.
Moisture, flatness, and correct underlayment assembly are the core drivers of laminate joint integrity, especially under repetitive retail traffic.
Expansion gaps are a functional requirement for floating floors; missing or pinned gaps turn normal movement into locking stress.
– If you want the most reliable outcome, treat laminate prep like a “requirements-driven” job: moisture test, verify flatness, follow underlayment/vapor barrier rules, and keep expansion gaps exact.
– Downsides to consider: laminate performance depends heavily on correct subfloor prep and adherence to manufacturer limits—if you can’t test moisture or you’re dealing with chronic humidity, you may need a different flooring strategy.
– Who should skip this approach: if the space has uncontrolled moisture issues, you can’t achieve the flatness tolerance, or you’re unsure about the product’s commercial/rolling-load suitability, pause and consult a flooring pro or the manufacturer’s technical team.
Scan-and-save checklist (before install)
| Prep item | What to do | Notes |
|---|---|---|
| Subfloor condition | Clean, remove ridges/adhesive, vacuum thoroughly | Verify flatness target: |
| Moisture testing (concrete) | Test slab using manufacturer-approved method | Limits: |
| Vapor barrier / underlayment | Install the exact required type/thickness | Confirm whether product has pad |
| Acclimation | Store planks in-site per instructions | Temperature/humidity: |
| Layout | Plan seam direction and avoid worst traffic lines | Minimize short end boards |
| Expansion gaps | Leave required gaps at walls & fixed objects | Gap size: |
| Transitions | Use approved transitions at doorways/changes | Prevent edge lift |
Frequently Asked Questions
What’s the best way to acclimate laminate flooring before installing in a retail store?
Store laminate flooring flat in the retail space so it can acclimate to the temperature and humidity conditions where it will be installed. Follow the manufacturer’s recommended acclimation time, often 24–72 hours, and keep the HVAC running as it will be during business hours. This step helps prevent gapping, buckling, and uneven seams once customers and daily airflow are introduced.
How do I prepare the subfloor for laminate floors in a retail environment?
Start by verifying the subfloor is clean, dry, level, and structurally sound—remove old adhesive, paint overspray, and debris that can interfere with click-lock laminate. Use a straightedge to check flatness; most manufacturers require a certain tolerance across the room to avoid movement and floor noise. If needed, repair low spots with appropriate leveling compound, and address moisture issues before laying laminate floors for retail.
Why is moisture testing important before installing laminate in a commercial store?
Laminate floors can fail prematurely if moisture rises from concrete slabs or damp subfloors, leading to swelling, warping, or delamination. Testing helps you identify whether a moisture barrier (like a specific underlayment) is required for your slab type and humidity levels. For retail store installations, moisture control is especially important because high traffic and frequent maintenance can expose problems faster.
Which underlayment and vapor barrier should I use for retail laminate floor preparation?
Choose underlayment based on your subfloor type (concrete vs. wood), your slab’s moisture conditions, and the laminate manufacturer’s requirements. Many commercial laminate floors require a vapor barrier underlayment to protect against moisture and improve comfort underfoot. Also consider sound reduction and durability—retail spaces benefit from underlayment options designed to minimize noise under heavy foot traffic.
How should I plan the layout and expansion gaps to prevent installation issues in a retail store?
Measure the store carefully and plan board direction to minimize awkward cuts near entrances and high-visibility areas, often aligning planks with the main customer traffic flow. Leave proper expansion gaps around fixed objects like columns, doorways, and walls, using spacers so the floor can expand and contract naturally. For best results, stagger seams as recommended by the laminate flooring instructions and dry-fit a few rows to confirm transitions, thresholds, and patterns before committing to installation.
📅 Last Updated: October 24, 2026 | Topic: How to prepare a laminate floors for retail store? | Content verified for accuracy and freshness.
References
- Laminate flooring
- F710 Standard Practice for Preparing Concrete Floors to Receive Resilient Flooring
- F1869 Standard Test Method for Measuring Moisture Vapor Emission Rate of Concrete Subfloor Using …
- F2170 Standard Test Method for Determining Relative Humidity in Concrete Floor Slabs Using in sit…
- https://www.pergofloors.com/en-us/support/installation
- https://www.armstrongflooring.com/support
- https://scholar.google.com/scholar?q=laminate+flooring+installation+subfloor+preparation+moisture+acclimation Google Scholar
- https://scholar.google.com/scholar?q=laminate+flooring+underlayment+vapor+barrier+sound+reduction+installation Google Scholar
- https://scholar.google.com/scholar?q=commercial+retail+floor+covering+installation+site+preparation+flatness Google Scholar


[…] laminate care varies by manufacturer, confirm your store’s specific product limits. As of 2026, moisture control is still the most common compliance issue: cleaning too aggressively is a fast way to turn […]