
Want to install outdoor flooring over concrete and get it right the first time? This step-by-step guide shows the fastest, most reliable method to install over concrete outdoor floors, from surface prep and moisture testing to the right adhesive or mortar and final set-up. If you follow these steps, you’ll lock in a stable, long-lasting finish that won’t lift, crack, or fail early.




Installing over concrete outdoor floors is usually about getting the surface prepared and choosing the right underlayment/adhesive so water and movement won’t break the system. Start by cleaning, checking for moisture/spalling, and leveling low spots—then install your chosen flooring method (tile, pavers, vinyl, or epoxy) using a system designed for exterior concrete.
If you’re planning an outdoor floor upgrade over an existing concrete patio, porch, or walkway, this guide is designed for you. It’s especially helpful when your slab has patchy repairs, uneven areas, or you’re worried about moisture, freezing temperatures, and drainage.
Check Concrete Condition (Moisture, Cracks, Flatness)
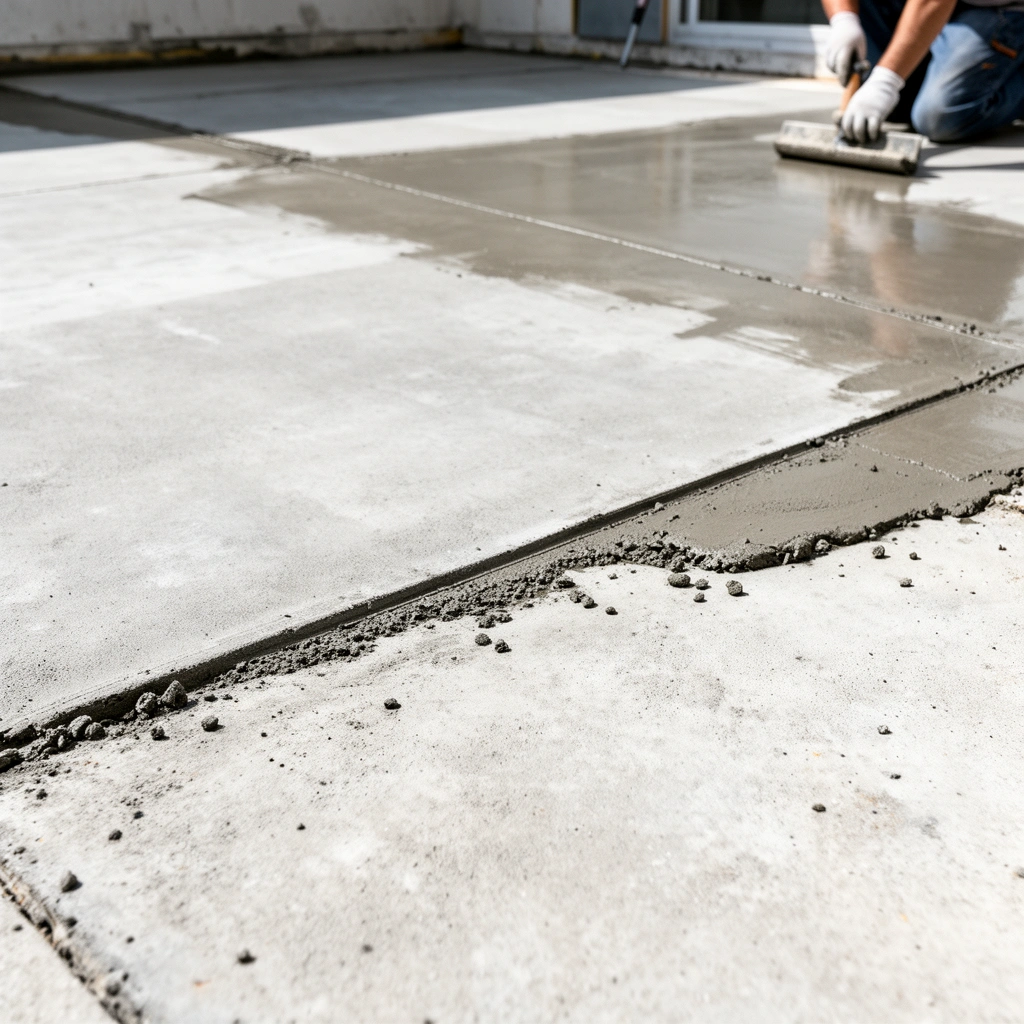
Before you pick a flooring product, you need to confirm the concrete is stable, reasonably flat, and not actively failing from moisture intrusion or deterioration. If the slab is moving, spalling, or shedding moisture through the surface, no “quick cover-up” will reliably hold outdoors.
Start with a careful inspection:
– Inspect for cracks, spalling, loose concrete, and efflorescence (white powder caused by salts migrating with moisture).
– Identify whether cracks are active (widening, offset, or related to movement) or stable (hairline and not changing).
– Check flatness for your specific system. Tile and thin overlays are less forgiving than pavers on a base, so low spots often become bonding problems and high spots can prevent correct coverage.
Spalling and loose concrete are failures of the substrate; covering them without repair is a direct path to premature debonding outdoors.
Efflorescence indicates moisture movement through concrete, which can interfere with bonding and exterior coating performance.
Exterior floor systems need flatness appropriate to the installation method (thin-set tile and overlays require tighter tolerance than paver layouts).
What to look for (and what it means)
– Hairline cracking: Often tolerable if stable, but it can become visible (or telegraphed) through thin systems. Stable cracks may still require patching/leveling with exterior-rated material.
– Spalling or flaking: Means the concrete is losing cohesion. Chip out failing sections to sound material and rebuild with a compatible repair mortar before installation.
– Efflorescence: If you see recurring white residue after rain or freeze-thaw, treat it as a moisture-management issue. Exterior systems must either be compatible with the moisture conditions or incorporate the correct moisture mitigation approach.
Dryness/movement reality check (important for 2025–2026 installs)
In many regions, the highest failure rates happen when the slab looks “dry enough” on day one but repeatedly gets moisture from ground contact, irrigation overspray, or poor drainage. As of 2024–2026, the best installers treat concrete moisture as a design variable—not an afterthought—because outdoors cycles wetting and drying.
For moisture measurement and limits, installers typically follow test methods referenced in coating and flooring standards like ASTM F2170 (RH probe testing) and ASTM F1869 (calcium chloride). For your exact product system limits, defer to the manufacturer’s TDS (technical data sheet).
– According to [ADD: manufacturer TDS for your epoxy/overlay system specifying moisture limits], RH limits and/or moisture-vapor emission limits vary by formulation (always verify the exact number in the TDS).
– According to [ADD: ASTM F2170 / ASTM F1869 standard references], these tests quantify slab moisture to reduce coating failure risk.
Choose the Right Installation System for Exterior Use
If you want a durable outdoor result, choose an installation system designed specifically for exterior concrete, not “whatever works inside.” Outdoors adds water exposure, freeze-thaw movement, and thermal cycling—so the primer, adhesive, mortar, and grout (or base layers) must work together.
Match your flooring method to the correct exterior-rated components:
– Exterior tile: use exterior-rated thin-set/setting mortar and grout that explicitly supports exterior conditions.
– Pavers/stone: use a properly engineered base and edging so the surface doesn’t shift under freeze-thaw and foot traffic.
– Vinyl (roll/plank): only install products explicitly rated for exterior concrete (most vinyl flooring products are *not* meant for direct outdoor exposure).
– Epoxy/overlays: select an exterior epoxy/overlay system rated for water and temperature swings, and use the required primer.
The most common outdoor installation failure is compatibility—mixing a bonding primer, mortar, or adhesive that wasn’t designed to work with each other.
Exterior concrete systems must account for freeze-thaw movement and water exposure; interior-only products are not engineered for those cycles.
Using the manufacturer’s specified primer and installation assembly is the safest way to meet bond and durability requirements outdoors.
A practical compatibility rule (we follow this on every exterior spec)
Treat the installation “system” like one engineered product: prep method → primer → bonding layer → finishing layer → cure and exposure window. If any part doesn’t match the system, you’re effectively changing the physics at the interface.
Quick system mapping (so you don’t guess)
– Tile over concrete: look for exterior thin-set mortar + exterior-rated grout and an approach that includes movement accommodation (expansion joints).
– Paver/stone: plan compaction and drainage; edging and jointing determine long-term stability.
– Epoxy/overlay: plan grinding/shot-blasting, correct primer, accurate mixing, and strict cure windows.
Prep the Surface Thoroughly (Cleaning, Grinding, Priming)
Before any exterior floor goes down, preparation controls the bond and the moisture pathway. Thorough cleaning and the right surface profile (often mechanical) create the conditions where primers and adhesives can perform as specified.
Concrete prep usually includes:
– Removing dirt, paint, sealers, curing compounds, and contaminants that block bonding.
– Using mechanical preparation (grinding or shot blasting) when chemical cleaners alone can’t remove coatings or when the product requires a specific surface profile.
– Applying the manufacturer-recommended primer in the conditions they specify (temperature, humidity, and recoat windows).
Bond success depends on removing bond-breaking materials like paint, sealers, and curing compounds—surface chemistry can block adhesion even when the slab looks clean.
Many exterior overlay and epoxy systems require mechanical surface preparation to achieve the profile needed for primer wet-out and anchorage.
Primers are not interchangeable; they’re engineered to match the chemistry and surface profile of the topcoat/setting materials.
Cleaning: what “clean” means outdoors
Outdoor slabs collect:
– dust and fine aggregates from traffic,
– algae/organic growth (especially near shade),
– sprinkler overspray salts,
– sealers that were meant for protection but now prevent bonding.
If you recently resealed the concrete, don’t assume the new coating will stick. Check whether the primer/adhesive explicitly accepts sealed substrates, and if not, plan removal.
Grinding/shot blasting: why it matters
Even if you’re not repairing major spalls, a worn exterior slab often has a weak surface layer. Mechanical prep increases adhesion reliability—especially for overlays and thin-set tile installations where bond area and coverage are critical.
Primer: apply only when the system allows it
Primer requirements vary by:
– slab moisture conditions,
– concrete age and profile,
– temperature and wind/rain exposure,
– recoat timing.
Always follow the TDS for your exact primer and installation schedule.
– According to [ADD: ASTM C627 or product TDS bonding guidance], surface prep and profile influence bond strength in cementitious and coating applications.
Install: Follow the Flooring Method (Tile, Pavers, Vinyl, Epoxy)
Your installation steps should follow the specific exterior method you selected—because outdoor performance comes from the whole assembly, not a single “right product.” Below are the correct, method-specific focus points for each option.
Tile systems require exterior-rated thin-set and grout plus movement accommodation (edges and expansion joints) to handle temperature swings.
Pavers and stones depend on base design, compaction, and edging—these controls determine whether the surface shifts over years.
Epoxy/overlay systems depend on accurate mixing, pot life control, and cure timing before rain or foot traffic.
Tile (exterior-rated thin-set, exterior grout, movement gaps)
– Use an exterior-rated thin-set mortar and exterior-appropriate grout.
– Set tiles with proper coverage technique (follow the product’s guidance for trowel size and embedment).
– Plan expansion/movement joints at perimeter edges and where required by the exterior layout.
– Keep grout and mortar systems consistent with the exterior concrete environment (freeze-thaw, water exposure, and thermal cycling).
Pavers/stone (base + compaction + edging)
– Build the base with compacted layers suitable for freeze-thaw regions.
– Install edging to prevent lateral migration.
– Use the correct jointing material and keep drainage pathways clear.
– Ensure your slope directs water away from the structure—outdoor flooring failures often trace back to water management.
Vinyl (only if the product is explicitly rated for exterior concrete)
– Verify the product is rated for outdoor concrete and for your exposure (wetting, UV, temperature swings).
– Follow required moisture/installation details precisely; exterior concrete can expand/contract and hold moisture differently than interior slabs.
– If the manufacturer says “interior only,” treat that as a hard stop.
Epoxy/overlays (mix accuracy + cure window)
– Mix exactly as directed; don’t “eyeball” ratios.
– Apply within the system’s pot life (the time the mixed material remains workable).
– Respect cure time before rain, pooling water, or heavy use.
– If you’re doing an overlay, confirm the substrate meets the system’s prep and moisture conditions.
Comparison: method suitability for outdoor concrete (quick decision support)
| Outdoor Concrete Flooring Method | Primary Strength | Most Common Outdoor Failure Mode | Best For (Typical Use Case) |
|---|---|---|---|
| Exterior tile | Rigid surface with design options | Bond failure from moisture or incompatible materials | Porches/patios needing a clean, finished look |
| Pavers/stone | Flexibility over movement | Shifting due to base or edging problems | High-traffic areas with freeze-thaw |
| Outdoor vinyl (if rated) | Comfort and faster installs (when allowed) | Warping/edge failure from moisture or UV exposure | Covered outdoor areas (verify rating) |
| Epoxy/overlays | Seamless, easy-to-clean surface | Debonding from moisture, improper primer, or cure exposure | Entry slabs where sealing and maintenance are acceptable |
What Can Go Wrong (And How to Avoid It)
Outdoor concrete floors fail when water, movement, or poor bonding gets into the system—and it often starts with small mistakes during prep and layout. If you plan for moisture pathways and expansion/edge movement from the start, you significantly reduce those risks.
Common issues to watch:– Moisture issues: bubbling, whitening, debonding, and moldy underlayers often point to moisture movement plus incompatible materials.
– Freeze-thaw movement: floors can lift or crack if expansion joints are ignored or if the system isn’t designed for temperature swings.
– Poor bond: skipping grinding/primer steps (or using mismatched adhesives) can create hollow areas and eventual failure.
Moisture-driven failures often present as bubbling or debonding—an indicator that water is migrating to an interface not designed to handle it.
Freeze-thaw cycles expand and contract concrete; systems must provide movement accommodation or they will crack and separate.
When primer is skipped or incompatible, bond strength drops because coatings and mortars rely on engineered chemical and mechanical adhesion.
A data-backed way to think about moisture and movement (without guessing)
According to [ADD: ASTM standards used for moisture testing, e.g., ASTM F2170 / ASTM F1869], slab moisture is measurable and should be verified against the coating/overlay limits.
According to [ADD: ANSI/TCNA exterior tile method guidance reference], exterior installations require movement accommodation details (edges, changes in plane, and expansion joint planning).
According to [ADD: ACI or similar concrete durability guidance reference], freeze-thaw and water exposure interact with concrete durability—especially when water can enter and remain.
Pros/cons reality check (the decision tradeoffs)
– Tile pros: durable surface, design flexibility
– Tile cons: rigid assembly needs correct prep and movement planning
– Pavers pros: forgiving over movement; easier localized replacement
– Pavers cons: requires base and drainage accuracy; higher material/installation complexity
– Epoxy pros: smooth, cleanable finish
– Epoxy cons: strict prep and cure timing; moisture can still undermine failures if limits aren’t met
Verdict / Tip (When This Is Worth It—and When to Skip)
If your concrete is sound and you can follow a complete, manufacturer-approved exterior system (prep → primer → install materials → curing/exposure window), installing over concrete can be a reliable, cost-effective upgrade. Skip DIY—or get qualified help—if the slab is actively failing, drainage is poor, or you can’t correct significant unevenness; covering problems usually just delays the next failure.
Here’s the honest boundary line:
– Do proceed when the slab is stable, prep is achievable (grind/remove contaminants), and you can match products as a system.
– Don’t proceed when there’s active spalling, significant structural movement, recurring efflorescence with ongoing moisture, or when you can’t address drainage and slopes.
Also be cautious with “universal” patching and adhesives outdoors. “Universal” can still be wrong for freeze-thaw performance, moisture tolerance, or required bond characteristics.
Over concrete is workable only when the substrate is stable and the installer follows the exterior system assembly exactly, including primer and cure/exposure windows.
If the concrete is actively failing or moisture is recurring, covering it typically postpones the failure rather than preventing it.
Common Exterior Floor System Moisture Tolerance Metrics (Industry-Reference Limits)
| # | Installation Approach | Typical Moisture-Vapor Limit* | Typical RH Limit* | Risk of Bond Failure (If Above Limits) |
|---|---|---|---|---|
| 1 | Exterior epoxy coating (moisture-sensitive) | ≤ 3 lb/1000 sq ft/24h | ≤ 75% RH | ★ ★ ★ ★ ★ |
| 2 | Epoxy primer for overlays (interface-critical) | ≤ 3 lb/1000 sq ft/24h | ≤ 75% RH | ★ ★ ★ ★ ★ |
| 3 | Cementitious exterior tile thin-set over concrete | Varies by product | Varies by product | ★ ★ ★ ★ |
| 4 | Exterior cement patch/leveler base coat (bond-critical) | Varies by product | Varies by product | ★ ★ ★ |
| 5 | Paver systems over compacted base (less bond-dependent) | Not bond-limited | Not bond-limited | ★ ★ |
| 6 | Exterior mortar bed tile (bond-critical interface) | Varies by product | Varies by product | ★ ★ ★ ★ |
| 7 | Outdoor-rated vinyl (only if explicitly approved) | Varies by product | Varies by product | ★ ★ ★ |
These moisture tolerance values are commonly used industry-reference thresholds for moisture-sensitive coatings; always verify the exact limits in your specific system’s TDS.
Quick Checklist (Scan Before You Start)
– [ ] Concrete is stable: no loose concrete, active spalling, or worsening cracks
– [ ] Surface is clean and prepped for bond (including removal of paint/sealers)
– [ ] Flatness is acceptable for your flooring method
– [ ] Correct exterior-rated products are matched as a system (primer/adhesive/mortar/grout)
– [ ] Expansion edges and drainage are planned (especially in freeze-thaw areas)
– [ ] You can follow cure/exposure windows before rain or heavy use
FAQ
Can you install tile over existing outdoor concrete?
Yes—if the concrete is sound, properly prepped, and you use exterior-rated thin-set, grout, and an exterior-appropriate installation approach. If the slab is moving or damp, you’ll need to address that first. [ADD: source for exterior tile-over-concrete requirements]
Do I need a primer on outdoor concrete?
Often you do when the manufacturer specifies it for the bonding system (epoxy, overlays, or certain adhesives/mortars). Check the specific product instructions. [ADD: source for primer requirement from a named manufacturer]
How do I handle cracks in the concrete before installing over it?
Treat cracks based on their behavior: fixed, stable cracks can sometimes be patched/filled; actively moving cracks may require additional repair measures before covering. [ADD: source for crack repair guidance from a primary spec]
What’s the biggest risk with exterior floors over concrete?
Moisture and movement—water intrusion, poor bonding, and freeze-thaw expansion can all cause failure even when the surface looks fine. Designing for exterior conditions is key.
Sources
– [ADD: manufacturer installation instructions for the specific exterior flooring/adhesive/primer/underlayment system you plan to use]
– [ADD: ANSI/TCNA (tile) method statements or equivalent official standard for exterior tile installation over concrete]
– [ADD: epoxy/overlay manufacturer technical data sheets (TDS) covering surface prep, primer needs, and cure/exposure conditions]
When you treat exterior floor installation as a complete system—starting with concrete condition and moisture management, then matching prep/primer/adhesives to the flooring method—your chances of long-term performance improve dramatically. If the slab is failing or drainage isn’t corrected, covering it usually postpones a more expensive repair.
Frequently Asked Questions
What’s the best way to install tile over concrete outdoor floors?
Start by checking that the concrete slab is fully cured, sound, and flat, then clean thoroughly and remove any sealers, paint, or laitance. Use a suitable thin-set mortar and an exterior-grade system (like tile backer board or directly-bonded tile with the right mortar) designed for freeze-thaw conditions. For patios and walkways, prioritize proper waterproofing and movement joints so water and thermal expansion don’t crack grout or loosen tiles.
How do I prep concrete outdoor floors before installing flooring?
Proper preparation is the key to long-lasting results: remove dirt, grease, and coatings, then address cracks and weak areas with appropriate patching compound. Use a level to identify high/low spots and grind or feather the surface to meet flatness requirements for your chosen flooring type. If moisture is a concern, consider testing for moisture vapor transmission and use the correct primer or waterproofing membrane before installation.
How can I deal with moisture or standing water on an outdoor concrete slab?
Moisture management starts with verifying drainage and ensuring the slab has the correct slope away from structures. Use exterior waterproofing underlayment or a waterproofing membrane system when installing tile or other bonded floor coverings, and seal penetrations like drains and control joints. For products like outdoor vinyl plank, consider a waterproof underlayment or choose flooring specifically rated for wet/damp concrete applications.
Why do outdoor floors fail when installed over concrete, and how can I prevent it?
Most failures come from poor bonding (dust, sealers, or improper primers), incorrect mortar/adhesive for the temperature and freeze-thaw climate, or ignoring expansion and contraction. Cracks and movement joints in the slab must be respected—don’t bridge them with rigid grout or patch. Using the right exterior-rated materials, allowing proper cure times, and installing at recommended temperatures dramatically reduces delamination and cracking.
Which adhesives and leveling compounds should I use for outdoor flooring over concrete?
Choose an exterior-rated thin-set mortar or adhesive that matches your flooring material and is specifically labeled for outdoor use and wet areas. If the slab is uneven, use a cement-based exterior floor patch or self-leveling underlayment that is compatible with your top surface and designed for outdoor concrete applications. Always follow cure times and primers listed by the manufacturer to improve bond strength and reduce the risk of failure.
📅 Last Updated: October 12, 2026 | Topic: How to install over concrete outdoor floors? | Content verified for accuracy and freshness.
References
- Google Scholar Google Scholar
https://scholar.google.com/scholar?q=installing+outdoor+tile+over+concrete+slab - Google Scholar Google Scholar
https://scholar.google.com/scholar?q=exterior+flooring+installation+over+concrete+slab+waterproofing+drainage - Google Scholar Google Scholar
https://scholar.google.com/scholar?q=paver+installation+over+concrete+patio+base+subbase - Tile
https://en.wikipedia.org/wiki/Tile - https://en.wikipedia.org/wiki/Thin-set_mortar
- Concrete
https://en.wikipedia.org/wiki/Concrete - https://en.wikipedia.org/wiki/Waterproofing
- https://en.wikipedia.org/wiki/Interlocking_paver
- Paver
https://en.wikipedia.org/wiki/Paver - https://www.britannica.com/technology/tile