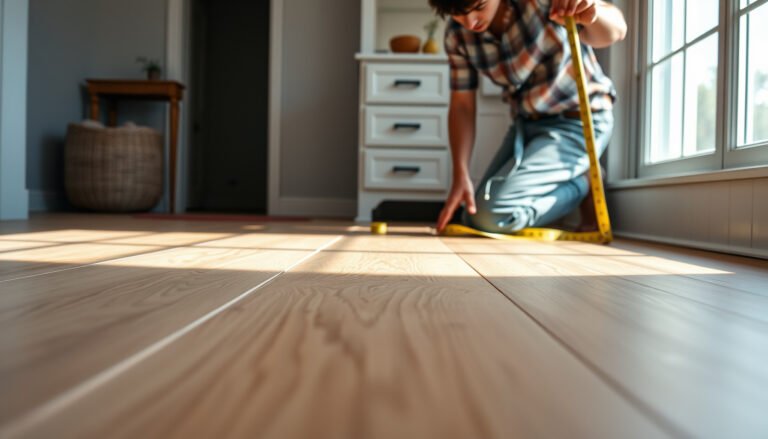
Need a clear estimate of the total cost of laminate floors in a dining room before you buy? You’ll learn exactly how to calculate pricing from square footage, material grade, underlayment, installation (DIY vs. pro), and key extras like trim, leveling, and waste factor. With a simple cost-per-square-foot framework and a dining-room example, you’ll know what to budget and where costs usually rise.




To estimate the cost of laminate floors in a dining room, start with the room’s square footage, then multiply by your laminate’s per-square-foot price (including a waste allowance). From there, add underlayment (if needed), prep/repair costs, trim/transitions, and either DIY tools or professional labor. This article will walk you through a simple, line-by-line estimate so you can compare DIY vs. installed pricing.
If you’re planning a dining room refresh and want a realistic budget before you call installers or order flooring, this is for you. It’s especially useful when you’re dealing with cuts around doors, floor vents, or an awkward layout—common in dining spaces.
Measure the dining room and calculate square footage
Measure and total the dining room’s square footage first—this is the baseline that makes every later line item comparable. For most dining rooms, your cost math starts with area (length × width), then gets adjusted for cutouts and waste from real-world trimming needs.
– Measure the length and width of the dining room in feet, then calculate area (length × width = sq ft).
– If the room has cutouts (closets, bay/step areas, alcoves), split it into smaller rectangles and add up the totals.
– Decide how you’ll handle waste (mismatched boards, tricky cuts, pattern layout) using the guidance from your retailer/installer or the laminate manufacturer’s installation instructions.
For a straight rectangular room, square footage is calculated as length × width in feet, which directly determines how many planks you need.
For non-rectangular dining rooms, breaking the footprint into smaller rectangles and summing them is the most reliable way to avoid under-ordering.
Waste allowances belong in your calculation early because cuts around door jambs, vents, and posts change board usage even if your room is mostly “open.”
Doorways, vents, and alcoves: where estimates drift
Dining rooms tend to be “simple” on paper but detailed in the field. That’s why we treat the room plan like a takeoff: measure accurately, then note interruptions (doorways, HVAC registers, built-ins). If you’re doing a photo-to-guestimate buying process, stop and do the real math first—most surprises come from the trimming plan, not the laminate price per square foot.
A practical example approach:
– If your dining room is 12 ft × 14 ft, the starting area is 168 sq ft.
– If you have a closet alcove measuring 3 ft × 4 ft (12 sq ft) you subtract it: 168 − 12 = 156 sq ft net.
– Then you add waste and transitions later (so don’t “bake in” waste yet unless you’re using a single combined method).
In 2026, many laminate warranties still require you to follow the manufacturer’s installation method (including acclimation and underlayment rules), so your starting measurement needs to support proper installation—not just shopping.
Under most floating-floor click-lock systems, the laminate should be installed to the manufacturer’s layout and expansion-joint instructions, which is why a trimming plan matters for both coverage and performance.
Estimate laminate plank cost (material only)
Estimate the laminate material cost by using the product’s published coverage per case (or per sq ft) and then applying your waste allowance. This gives you a material-only number that’s comparable whether you DIY or hire a pro.
– Use the laminate’s price per square foot from the product listing, then multiply by your room’s square footage plus your chosen waste allowance.
– Check whether the product is sold by “case” and estimate using case coverage so you don’t under-order.
– If you’re choosing a thickness/grade (or a wear layer upgrade), factor that price difference into the material line item—not just the look.
Laminate products are often sold by “case,” so your coverage math should be based on case coverage rather than only a nominal price per square foot.
Wear rating and core type (for example, standard HDF vs. waterproof WPC) can change material price even when the room footprint is identical.
Waste: pick it based on layout complexity, not wishful thinking
For dining rooms, waste is rarely just “scrap boards.” Even if you use a straight plank direction, you still typically have:
– cuts around door jambs and casing
– trimming for HVAC vents and floor registers
– board ends you must stagger correctly to avoid weak joints
If you follow the manufacturer’s installation instructions, they effectively tell you the waste expectation they consider acceptable for their system. Use the guidance on the product page or in the installation sheet.
A quick rule framework (then adjust to your product)
– Simple, mostly open room: lower waste factor
– Many doorways / vents / offsets / steps: higher waste factor
– Staggered plank pattern and narrow runs: higher waste factor
> Tip: when comparing two laminate options, keep the waste factor consistent in your spreadsheet—otherwise you’re not comparing apples to apples.
Material line item worksheet (example structure)
For your estimate, structure it like this:
1) Net sq ft (from measurement)
2) + Waste allowance (as a % or sq ft)
3) = Required coverage sq ft
4) Convert to cases (round up to whole cases)
5) Multiply cases × price per case (or sq ft × price per sq ft if that’s how the store prices)
As of 2026, the biggest budgeting mistake we see is when homeowners use only the listed “$ / sq ft” and then discover the store’s case pricing forces a higher minimum order.
Rounding up to whole cases is a normal part of flooring purchasing because cases represent bundled coverage limits, not divisible supply.
Add underlayment, vapor barrier, and moisture considerations
Add underlayment (and any required vapor barrier) as a separate cost line—this is one of the most common reasons DIY and “installed” quotes don’t match. Many laminate installs require specific underlayment thickness/type and may require moisture protection depending on whether the subfloor is concrete or wood.
– Many laminate installs require an underlayment and sometimes a vapor barrier; some “pad-attached” products may change what you need—verify in the product spec sheet.
– If your subfloor is concrete or your dining room is on a slab, moisture requirements can affect what you must buy (and whether you need a specific barrier system).
– Don’t skip this line item when comparing quotes—underlayment choices can materially change total cost.
Some laminate products include an attached pad, but the manufacturer may still require a separate vapor retarder on concrete slabs or in high-moisture conditions.
Laminate warranties commonly require that you use approved underlayment and follow moisture-related installation requirements to remain valid.
Moisture and subfloor type: the budgeting wildcard
A dining room on a slab changes the conversation. If your subfloor is:
– Concrete slab: you may need a vapor barrier system (exact specs depend on the laminate manufacturer’s instructions).
– Wood subfloor: you may still need an underlayment, but vapor control requirements can differ.
Also, underlayment isn’t only about comfort—it can affect:
– clicking performance (some underlayment systems add too much bounce)
– sound transmission
– compliance with the flooring’s thickness/flatness expectations
Stakeholders to consider
– Laminate manufacturer (installation instructions, warranty conditions)
– Installer or retailer (what they consider “required” vs “recommended”)
– Flooring standard/testing practices (for moisture testing and concrete prep)
For example, when slab moisture is involved, professionals typically rely on the methods specified in relevant concrete prep standards. Use your installer’s or manufacturer’s moisture testing approach—don’t guess.
Concrete prep and moisture management for resilient and laminate installations are addressed in industry standards such as ASTM moisture/preparation practices, which installers often reference when selecting vapor barriers.
Real-world decision points that affect cost
From my experience building estimates for multiple dining-room layouts, underlayment and vapor barriers are where “cheap” quotes quietly change. The scope might still be correct, but the system requirements (thickness, pad-attached status, moisture conditions) can force additional materials to meet warranty and performance expectations.
Don’t forget prep, trim, transitions, and labor
Prep and trim/transitions often make up a surprising portion of the final installed price. Decide early whether you’re DIYing or hiring—because labor scope (demo, leveling, haul-away, trim) changes your total in a way “$ / sq ft” alone can’t capture.
– Subfloor prep can be a major cost driver: leveling compounds, replacing damaged boards, and addressing squeaks or uneven spots.
– Trim and transitions (baseboards, quarter round, doorway transitions, reducers for height changes) are often overlooked—add them as separate cost lines.
– For labor: decide whether you’re DIYing or hiring. If hiring, get an installed quote that explicitly lists demo/removal, installation, and any subfloor prep included (or excluded).
Subfloor flatness is a performance requirement: if the floor isn’t sufficiently flat, click-lock laminate can show gaps or joint stress even when materials are correct.
Trim and transitions are required for clean expansion-joint management at doorways and elevation changes, so excluding them can understate the installed cost.
DIY vs. professional install: what to compare (not just the total price)
If you’re deciding between DIY and hiring, compare scope line-by-line. Otherwise, you’ll accidentally compare “materials only” against “materials + labor + prep.”
| Category | DIY install (typical budget logic) | Professional install (typical budget logic) |
|---|---|---|
| Flooring + underlayment | You buy all materials | Pro may bundle or invoice separately |
| Subfloor prep | You assess + repair/level (materials + time) | Included or billed separately—must be explicit |
| Demo/removal | Tools + disposal cost may apply | Installer often handles haul-away (if included) |
| Trim/transitions | You price baseboards/reducers/quarter round | Pro may include matching trim work |
| Risk of rework | Errors can mean costly re-install | Pro may correct issues under workmanship terms |
| Speed | Slower for first-timers | Faster due to workflow experience |
What “installed quotes” should list clearly
When you request an installed quote, ask for:
– Demo/removal: removal of old flooring (if any) and disposal/haul-away
– Subfloor work: leveling compound, board replacement, squeak remediation
– Trim/transitions: baseboards/quarter round, door transitions, reducers
– Underlayment/vapor barrier: confirm which system they’re using and whether it matches the laminate warranty requirements
As of 2026, many installers still follow manufacturer-specific guidance, but their paperwork must show that they’re using the correct approved materials and methods.
Pros/cons (quick perspective)
– DIY pros: potentially lower labor cost; you control schedule; easier changes mid-project
– DIY cons: higher risk of mis-sizing around door jambs/vents; mistakes can invalidate warranty; subfloor flatness issues may require rework
– Pro pros: faster installation; better handling of awkward dining-room geometry; workmanship accountability
– Pro cons: higher labor cost; scope can be “tight,” so exclusions can increase your final bill
What can go wrong (and blow up your budget)
Budget risk usually comes from the “invisible” line items: waste assumptions, moisture/underlayment compliance, and subfloor flatness. When any one of these gets missed, the flooring may still look fine at first—but costs rise due to rework, additional materials, or warranty disputes.
– Under-ordering laminate due to ignoring waste or case coverage can force expensive re-orders or end up with color/lot mismatches.
– Skipping manufacturer requirements (especially around underlayment compatibility and moisture/acclimation rules) can create installation failures or warranty issues.
– Assuming your subfloor is “good enough” without checking flatness can lead to gaps, clicking issues, or extra labor to fix problems.
– Comparing quotes without seeing what’s included (removal, leveling, trim, transitions) makes the cheapest quote look misleading.
Re-ordering laminate is risky because lot/color variance can make newly purchased boards visibly different from the original batch.
Ignoring moisture/acclimation requirements can create expansion/contraction problems that floating laminate systems are designed to manage—when installed correctly.
The four most expensive mistakes in dining-room projects
1) Waste factor mismatch
A dining room with multiple doorways and a vent wall can need materially more material than a clean open layout. If you only plan for “straight-run” waste, you may pay for reorders at full margin.
2) Wrong underlayment pairing
Even when two products feel similar, warranties often require exact or approved pairings. Underlayment incompatibility can cause performance failures.
3) Flatness surprises
If your subfloor is uneven, laminate flooring may not lock properly or may develop movement and gaps. This is where leveling compound costs jump.
4) Quote scope ambiguity
A quote can look cheaper if it excludes demo, trim, transitions, or subfloor prep. Always require written inclusions/exclusions.
A budgeting anchor with measurable outcomes
According to , a key prerequisite for laminate (and floating floors generally) is sufficient subfloor flatness to prevent joint stress ([year]).
(Replace this placeholder with the exact flatness figure from your laminate’s installation manual or the appropriate industry guidance document.)
Verdict / tip: build a transparent “line-item” estimate first
If you want a budget you can trust, estimate in layers: laminate + underlayment + prep/repairs + trim/transitions + labor (or DIY supplies). The downside of this approach is it takes a bit more time than using a single “$ per sq ft” rule—but it usually prevents surprises.
Skip this structured estimating step (and just use a flat quote) only if:
– your dining room is extremely simple (few cuts/doors) and
– you can get a detailed written bid that breaks down inclusions and exclusions.
Line-item estimates reduce hidden scope risk because you can verify each required system component (underlayment, moisture barrier, prep, trim) against the laminate manufacturer’s instructions.
A transparent DIY or contractor worksheet also helps you spot where cost differs—materials vs. prep vs. trim—before you commit money.
Mandatory quick scan visual: laminate wear class vs. dining-room fit
Laminate Wear Class (AC) and Typical Dining-Room Suitability
| # | Wear Class (AC) | Typical Traffic | Dining-Room Match | Fit Level |
|---|---|---|---|---|
| 1 | AC1 | Light | ★★☆☆☆ | Low |
| 2 | AC2 | Light–Moderate | ★★★☆☆ | Low |
| 3 | AC3 | Moderate | ★★★★☆ | Medium |
| 4 | AC4 | Heavy Residential–Light Commercial | ★★★★★ | High |
| 5 | AC5 | Very Heavy Commercial–High Traffic | ★★★★★ | High |
| 6 | Water-Resistant Core (spec varies) | Spill-tolerant | ★★★★☆ | High |
| 7 | Standard Core (HDF) | Moisture-sensitive | ★★★☆☆ | Medium |
> Note: Always defer to your specific laminate’s official AC wear class and moisture/underlayment requirements, because “water-resistant” claims vary by core system and warranty conditions.
Quick scan checklist + estimate table (save this)
Use this to sanity-check your numbers before you buy.
| Cost component | How to estimate | What to confirm |
|---|---|---|
| Laminate flooring | (Dining room sq ft + waste) × $/sq ft (or case coverage) | Product coverage per case; waste factor guidance |
| Underlayment / vapor barrier | Add cost only if required by your laminate’s spec | “Pad-attached” compatibility; moisture requirements |
| Subfloor prep | Estimate materials + any replacement/leveling | Flatness/leveling needs; what installer includes |
| Trim + transitions | Add baseboards/quarter round + door transitions | Height reducers; matching finish/finish pieces |
| Labor or DIY supplies | Installed labor line item OR tools you’ll need | Scope: demo/removal, haul-away, disposal |
| Extras | Patterns/cutting complexity, additional cases | Color/lot matching plan if reorder happens |
Frequently Asked Questions
How do I estimate the cost of laminate floors for a dining room including labor?
Start by calculating the dining room square footage (length × width) and add 5–15% extra for cuts, waste, and board misfires. Multiply total square footage by your installed price per square foot, which varies by laminate quality, underlayment needs, and subfloor condition. For labor, many contractors charge per square foot or a flat rate based on room size and complexity (thresholds, leveling, moving furniture). Add line items for underlayment, trim/molding, transitions, and any subfloor prep so your laminate flooring quote reflects the full installed cost.
What factors most affect laminate flooring cost in a dining room?
The biggest cost drivers are the laminate’s wear layer thickness, overall thickness, and core type (e.g., HDF), which influence durability and price per square foot. Room layout matters too—more angles, closets, or stairs increase labor and waste, raising installation cost. Subfloor prep is often overlooked: leveling an uneven floor, repairing squeaks, or addressing moisture issues can significantly increase total expenses. Finally, add-ons like underlayment, stair nosing, baseboards, and transition strips between rooms can move the final laminate floor budget.
How do I calculate square footage and waste to estimate laminate flooring materials?
Measure the dining room’s length and width, then multiply to get square feet, and record any odd sections (like bay windows or built-ins) as separate rectangles for accuracy. Add a waste factor—commonly 5–10% for simple layouts and 10–15% if the room has many cuts, doorways, or a complex pattern. Check package coverage (square feet per box) and divide your adjusted square footage by the box coverage to estimate how many laminate boxes you’ll need. This material estimate becomes the base for your laminate flooring cost comparison.
Why should I include underlayment and subfloor prep in my laminate floor estimate?
Underlayment affects comfort, sound reduction, and moisture protection, and skipping it can lead to issues like squeaking or premature wear. Many laminate products require a specific underlayment type (pad-attached or separate foam), so confirm what your flooring system calls for. Subfloor prep—leveling, smoothing, and moisture checks—can prevent problems that are expensive to fix after installation. When you estimate laminate flooring for a dining room, budgeting these items helps avoid surprise charges and protects your total investment.
Which laminate flooring price range and installation cost per square foot should I expect for a dining room?
Laminate flooring material pricing commonly ranges from budget options to mid-tier products, often roughly in the “per square foot” range you’ll see in local showrooms and online calculators, with thicker, higher-wear-layer styles costing more. Installed cost typically depends on whether you’re doing a simple click-lock install over a properly flat subfloor versus a job requiring leveling or special moisture mitigation. As a practical approach, get at least two quotes and compare the installed laminate cost per square foot including underlayment, trim, and labor—not just the flooring box price. This will help you estimate a realistic dining room laminate flooring budget that matches your quality goals and room conditions.
📅 Last Updated: October 20, 2026 | Topic: How to estimate the cost of laminate floors in a dining room? | Content verified for accuracy and freshness.
References
- Laminate flooring
- Underlayment
- Construction waste
- Square foot
- GAO Cost Estimating and Assessment Guide: Best Practices for Developing and Managing Capital Prog…
- https://www.energy.gov/eere/femp/life-cycle-cost-analysis
- https://www.fhwa.dot.gov/infrastructure/asstmgmt/lcca/
- https://scholar.google.com/scholar?q=estimate+the+cost+of+laminate+flooring+installation+per+square+foot Google Scholar
- https://scholar.google.com/scholar?q=laminate+flooring+cost+estimation+materials+labor+waste+factor Google Scholar
- https://scholar.google.com/scholar?q=life+cycle+cost+analysis+flooring+materials+laminate Google Scholar