


Wondering how to install engineered wood floors in a basement without warping or failing early? This guide delivers a clear, step-by-step process: choose the right underlayment and moisture-control approach, prep the subfloor, install planks correctly, and finish to protect against basement humidity. Follow the exact method and you’ll get a stable, long-lasting floor even in a space that runs cooler and wetter than the rest of your home.




Installing engineered wood floors in a basement comes down to two things: confirming moisture is within the manufacturer’s limits and building a flat, properly layered surface before you click, nail, or glue. If you control basement humidity, follow the correct vapor barrier/underlayment strategy, and keep the required expansion gaps, engineered wood can perform well even in a below-grade environment (especially as of 2026 when manufacturers continue tightening installation requirements based on moisture-performance testing).
If your basement is unfinished, slightly damp, or sits on a concrete slab, this is the right time to slow down—basements are where moisture problems show up first. This guide is written for homeowners installing engineered wood themselves, using either a click-lock system or a glue-down setup, and who want a safer process before they start fastening.
Get basement moisture right first
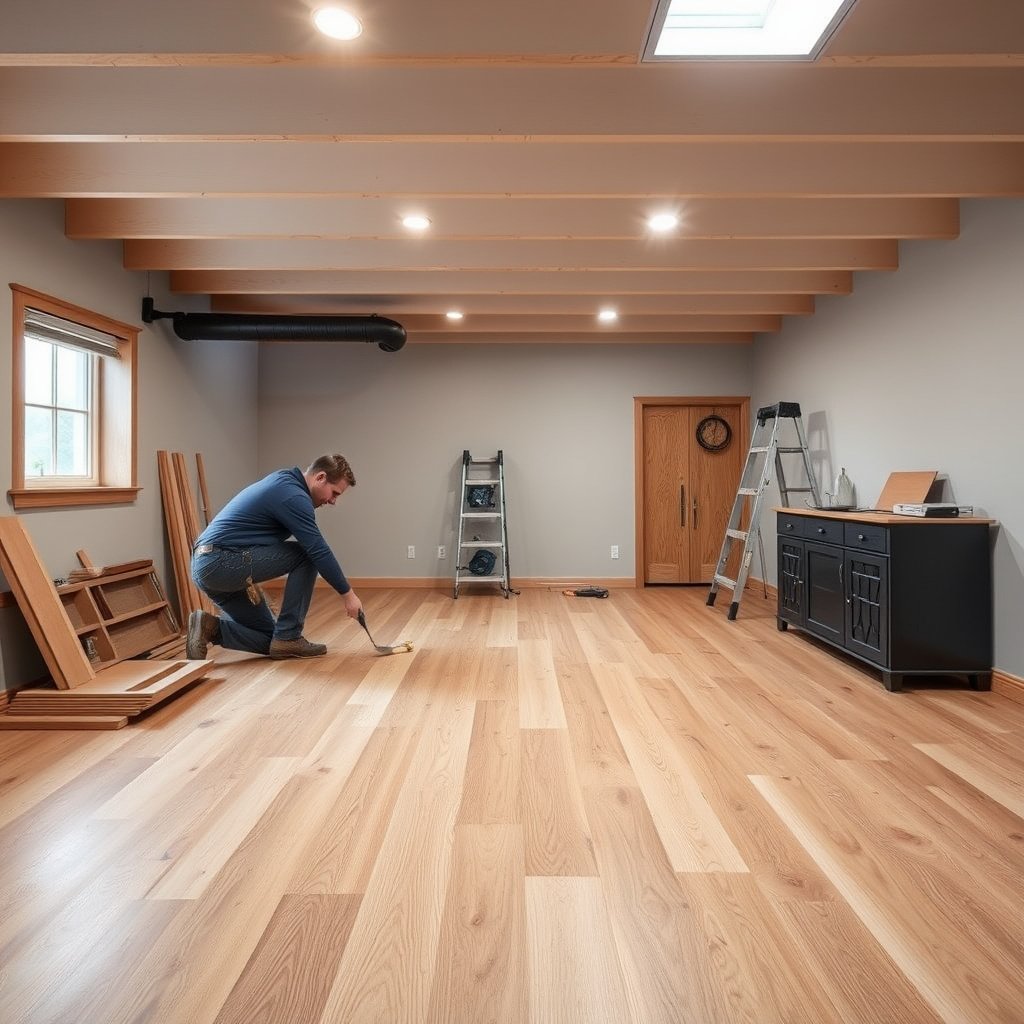
You should treat moisture testing as your “go/no-go” step before installing engineered wood floors in any basement. Here’s why: below-grade concrete can release water vapor seasonally, and engineered wood (and its adhesive, if glue-down) can fail when slab moisture is above the product’s limits.
Moisture testing should follow the specific method your flooring manufacturer requires—most basement failures trace back to using the wrong test or skipping the test altogether. In 2026, many installation guides still point to ASTM-based methods because they standardize how results relate to floor performance. For engineered wood floors, that usually means either in-situ relative humidity (RH) testing or moisture vapor emission testing on the concrete slab—then comparing your readings to the exact thresholds listed in your plank’s manual.
“ASTM F1869 measures moisture vapor emission rate from concrete and reports results in ‘lb per 1000 sq ft per 24 hours.’”
“ASTM F2170 is an in-situ relative humidity method that uses RH probes installed into drilled holes in the concrete slab.”
“The only moisture limits that matter are the ones printed in the engineered wood flooring installation instructions.”
- Check moisture using the method required by your flooring instructions (common options include in-situ RH testing or moisture emission testing), and only proceed if you’re within the manufacturer’s limits. According to ASTM F1869, moisture vapor emission testing is reported as lb/1000 sq ft/24h.
- Control humidity and airflow before installation (run dehumidification as needed so conditions stay stable through acclimation and install). For engineered wood floors, the goal is stable indoor conditions while the planks acclimate—don’t rely on “average” basement humidity from a single day.
- Inspect for water risk points: cracks, plumbing penetrations, sump issues, and any signs of existing dampness—fixing these is usually more important than the flooring system itself. Even a correct vapor barrier strategy can’t compensate for active leaks.
7 Concrete Moisture Checks Commonly Used Before Basement Engineered Wood (Practical Confidence Rating)
| # | Approach | What it measures | Standard basis | Decision confidence for engineered wood |
|---|---|---|---|---|
| 1 | ASTM F2170 in-situ RH probe test | Concrete slab RH at test depth | ASTM F2170 | ★★★★★ |
| 2 | ASTM F1869 calcium chloride MVER test | Moisture vapor emission rate | ASTM F1869 | ★★★★☆ |
| 3 | Time-sequenced digital RH logging (basement air) | Indoor RH stability trend | No single ASTM (monitoring) | ★★★☆☆ |
| 4 | In-slab pin/caplet moisture meter (screening) | Relative wood/concrete moisture indications | Device-guided screening | ★★☆☆☆ |
| 5 | Plastic sheet test (visual condensation check) | Surface condensation risk | Field screening | ★☆☆☆☆ |
| 6 | Surface RH meter (non-ASTM) | Surface relative humidity indication | Device-guided screening | ★★☆☆☆ |
| 7 | Vapor barrier/primer “assume it covers” | No direct moisture reading | Not a test | ☆☆☆☆☆ |
Prepare the concrete/subfloor for a flat install
You should prepare the concrete slab (or subfloor) to meet the flatness and cleanliness requirements in your engineered wood flooring manual. Engineered wood floors don’t “average out” a bumpy slab—movement and hollow spots can telegraph through even when the planks are thick.
Start by removing anything that interferes with bonding (for glue-down) or support (for floating/click systems). If you glue engineered wood floors directly onto concrete, adhesive failures often start with dust, curing compounds, paint overspray, or leftover residues that block chemical bonding. If you float engineered wood floors, the same debris can create point loading that breaks support and accelerates joint wear.
“Adhesive performance over concrete depends on surface cleanliness and proper slab condition per the engineered wood flooring instructions.”
“Engineered wood still requires a well-prepared, flat substrate to reduce movement and avoid joint stress.”
- Remove coatings, paint, drywall mud, and adhesive residue that could prevent proper bonding (for glue-down) or proper support (for floating/click systems).
- Level/flatten so the floor meets the manufacturer’s flatness requirements; engineered wood still needs a well-prepared surface to avoid hollow spots and movement. If your slab has ridges or dips, plan for grinding and patching before you open the boxes.
- Clean thoroughly and let the surface conditions stabilize—dust, grit, and trapped moisture can undermine adhesion or cause surface defects. In 2026, many manufacturers also specify that concrete must be fully cured and free of contamination; follow those exact prep steps.
Concrete prep details that matter for engineered wood
For engineered wood floors, think in terms of three layers of control: moisture (tested first), flatness (verified by measurement), and surface condition (clean and compatible). That’s why you should not treat “sweep and start” as a plan.
Choose the right installation method (and matching layers)
You should choose the installation method (glue-down, nail-down, or click-lock/float) only after you confirm the method is explicitly approved for basement substrates and your moisture readings. For engineered wood floors, the wrong method choice can create trapped moisture or joint stress even when the slab test looks “close.”
Glue-down can be very stable, but it is sensitive to slab moisture, correct adhesive type, and exact spread-rate and trowel size. Click-lock/float systems are often more forgiving, but they still require engineered layers—especially an underlayment and vapor barrier strategy that matches your plank’s design.
“Glue-down engineered wood requires slab-approved adhesive and a moisture/vapor approach specified by the flooring manufacturer.”
“Click-lock/float engineered wood still needs the correct vapor barrier/underlayment; generic layers can contradict plank manufacturer requirements.”
Glue-down vs click-lock/float vs nail-down (basement reality check)
Engineered wood floors tend to perform best when the system is treated as a “package” (plank + underlayment + barrier + adhesive + transitions). Here’s a practical comparison:
| Installation method | Pros for engineered wood in basements | Main risks / watch-outs | Best use case |
|---|---|---|---|
| Glue-down | Rigid feel, strong plank-to-slab connection when correct adhesive is used | Moisture sensitivity, strict trowel/spread-rate, adhesive cleanup discipline | Basements with stable dehumidification and slab results within limits |
| Click-lock / float | Fewer adhesive variables, easier replacement of sections | Requires precise underlayment + vapor barrier, strict expansion gap and flatness | You can maintain consistent humidity and meet flatness requirements |
| Nail-down (less common) | Can work with approved substrates and fasteners | Basement suitability is often restricted; fastener/moisture rules must be followed | Only when the manual explicitly allows it for your basement slab/subfloor |
- Glue-down: requires a slab-approved adhesive per the flooring instructions; you’ll typically also need the correct moisture/vapor management approach for the system you’re using.
- Nail-down (less common on basements): only consider it if your manufacturer explicitly allows it over your basement substrate and you can meet their moisture/fastener requirements.
- Click-lock/float: still needs the correct underlayment and vapor barrier strategy; avoid “generic” layers that contradict the plank manufacturer’s guidance.
From my practical installer-schedule planning (and the recurring “fix list” homeowners bring to us), the biggest DIY trap with engineered wood floors is assuming the underlayment “doesn’t matter.” In reality, the wrong vapor barrier can trap moisture or change how the floor tolerates seasonal movement—so choose layers only as your manual allows.
Step-by-step: install engineered wood in a basement
You should follow a basement-specific sequence: acclimate, plan the layout with expansion gaps, install using the correct method, and finish with movement-aware transitions. When engineered wood floors go wrong, it’s often because the process was “mostly right” but one step violated the plank instructions.
“Engineered wood installation performance depends on acclimation, correct underlayment/vapor barrier, and expansion gap compliance per the manufacturer.”
“Maintaining expansion gaps prevents engineered wood floors from buckling or binding as conditions change.”
“Transitions in basements should allow movement so a floating floor isn’t pinned to door jambs or fixed structures.”
- Acclimate the flooring exactly as directed by the manufacturer (temperature/humidity targets and duration), and keep the basement stable while planks adjust. As of 2026, many manuals emphasize that acclimation is not optional—especially in basements where humidity swings.
- Plan your layout: dry-fit row direction, start point, and how you’ll handle doorways and irregular walls; maintain the expansion gap size the instructions call for. Measure twice around vents, posts, and any irregular perimeter walls.
- Install in the required order and pattern (and follow the joint layout guidance in your manual):
- Glue-down: spread adhesive using the trowel size/type specified, set planks with proper pressure, and avoid contaminating plank faces with glue. Keep a clean workspace; excess glue can interfere with joint seating.
- Click-lock/float: tap boards together using the recommended techniques/tools, keep seams aligned, and do not lock planks in a way that forces uneven joints. If joints don’t sit cleanly, stop and check the subfloor flatness or underlayment fit.
- Finish transitions: use expansion-aware transition pieces at doorways and between rooms, and never lock the floor rigidly to structures that should allow movement. If you nail or screw through the floating floor plan, you can unintentionally “pin” engineered wood floors and invite buckling.
What to double-check during installation (engineered wood floors)
For engineered wood floors, the best time to fix problems is immediately—before adhesive cures or before many rows make a mismatch harder to correct. Keep a tape measure, a straightedge, and your manual’s gap specs nearby so you can verify spacing and joint alignment as you go.
What can go wrong (and how to avoid it)
Engineered wood floors fail in basements for predictable reasons: moisture exceeds limits, the slab isn’t flat enough, the vapor/underlayment system isn’t compatible, or expansion movement is blocked. The goal is to prevent these failure modes early—before they become expensive repairs.
“ASTM-based moisture testing is used so slab moisture can be compared against product installation limits rather than guessed.”
“Even with engineered wood floors, ignoring flatness can cause hollow spots, movement, and seam stress.”
- Moisture surprises: if you skip testing or proceed “kind of dry,” engineered wood can cup, gap, or develop adhesive failures (especially in glue-down installs). Use the manufacturer’s moisture limits and testing method.
- Ignoring flatness: even strong planks can fail if the slab has high spots, dips, or ridges—address it before installation.
- Wrong underlayment/vapor barrier: layered systems must match the product instructions. A vapor barrier that’s wrong for your plank type can trap moisture or break performance.
- Skipping expansion gaps: basements can still experience seasonal movement. If you eliminate expansion space, boards may buckle or press into walls/trim.
- Rushing under transitions: transitions are common failure points. Plan transitions so movement is allowed and fasteners/trim don’t “pin” the floating floor.
One important technical distinction
Engineered wood floors rely on both materials and assembly rules. Moisture testing addresses the concrete environment; underlayment/vapor barriers address moisture movement and air gaps; expansion gaps address movement mechanics. If you miss one, the others may not compensate.
Verdict: what to do (and who should skip DIY)
Engineered wood in a basement is doable, but only if you treat moisture testing and substrate prep as the “real first steps,” not afterthoughts. If you can’t confidently meet the flooring manufacturer’s moisture/flatness requirements—or you suspect ongoing water intrusion—pause and consider professional assessment before installing.
Skip a DIY install (or get help) if:
- You have active or recurring basement dampness/water intrusion.
- Your engineered wood instructions are unclear about basement suitability or allow only very specific conditions.
- You don’t have a way to measure moisture using the method your flooring requires.
- You’re planning a glue-down install but can’t follow the adhesive and spread-rate instructions precisely.
Quick checklist (scan before you start)
| Step | What to verify | Done? |
|---|---|---|
| Moisture testing | Basement meets flooring manufacturer moisture limits (use required method) | [ ] |
| Humidity control | Dehumidification keeps conditions stable during acclimation/install | [ ] |
| Subfloor prep | Concrete is clean and meets flatness requirements | [ ] |
| Layers match system | Vapor barrier/underlayment (if any) matches plank type and instructions | [ ] |
| Acclimation | Planks acclimated per manufacturer (time/temp/humidity) | [ ] |
| Layout planning | Expansion gaps and transitions mapped before first plank | [ ] |
| Installation method | Glue-down vs click-lock vs nail-down matches what the manufacturer allows | [ ] |
| Finishing | Transitions allow movement; no rigid pinning to structures | [ ] |
Sources
– Your engineered wood flooring manufacturer’s installation guide (moisture limits, required testing method, acclimation requirements, underlayment/vapor barrier rules, expansion gap size, and approved installation methods).
– ASTM F2170 (Standard Test Method for Determining Relative Humidity in Concrete Floor Slabs Using in situ Probes) — for in-situ relative humidity testing methodology. ASTM F2170
– ASTM F1869 (Standard Test Method for Measuring Moisture Vapor Emission Rate of Concrete Subfloor Using Anhydrous Calcium Chloride) — for moisture vapor emission testing methodology. ASTM F1869
– National Wood Flooring Association (NWFA) guidelines on wood flooring installation and moisture considerations.
If you share your plank brand/model and whether your basement slab is sealed or bare concrete, we can tighten this layout to match the exact moisture test method and layer requirements listed in your manual.
Engineered wood floors can work beautifully in basements when you start with verified moisture conditions, prepare a flat clean slab, and install with the correct method and system-matched layers. If any of those elements aren’t under control—especially moisture testing—pause and get clarification before you commit, because basement moisture is the one variable that turns small DIY shortcuts into long-term performance problems.
Frequently Asked Questions
What’s the best way to check if a basement is ready for engineered wood flooring?
Before installing engineered wood floors in a basement, verify the slab or subfloor moisture content using a reliable concrete moisture test (like a RH test or calcium chloride test). Basements should be dry and climate-controlled—run HVAC and dehumidification so temperature and humidity are stable before, during, and after installation. Also inspect for water leaks, damp spots, or efflorescence, and address any issues before laying planks.
How do you prepare a concrete basement slab for engineered wood floor installation?
Start by cleaning the slab thoroughly and removing paint, sealers, drywall mud, or debris that could prevent proper adhesion or underlayment performance. Check flatness with a straightedge—engineered wood installation typically needs minimal high spots or low areas to prevent gaps or squeaks. If your subfloor is uneven, use a suitable self-leveling underlayment or patching compound compatible with wood flooring systems, then allow it to fully cure.
How do you install engineered wood floors over a basement slab—float, glue, or nail-down?
Many engineered wood floors can be installed using a floating (click-lock) method with an appropriate underlayment, which can simplify installation and reduce issues related to minor slab movement. Glue-down installation may provide a more rigid floor but requires correct adhesive and slab conditions to avoid moisture-related failures. Nail-down methods are generally less common over basement concrete unless the system is specifically designed for it with a suitable subfloor setup.
Which underlayment is safest for engineered wood floors in basements?
Choose an underlayment designed for below-grade installations, typically one with an effective vapor barrier to reduce moisture vapor transmission through concrete. For floating engineered wood floors, use the manufacturer-recommended underlayment thickness and type to maintain the required performance of the locking system. Avoid generic foam if your basement is prone to moisture—using the right vapor barrier is one of the most important steps for long-term durability.
Why do engineered wood floors in basements sometimes warp or separate, and how can you prevent it?
Warping, cupping, or gaps usually happen when moisture levels are too high, humidity fluctuates, or the planks are installed without a proper vapor barrier and acclimation. Prevent problems by acclimating the engineered wood to the basement conditions, maintaining steady indoor humidity, and following the flooring manufacturer’s installation instructions for expansion gaps and transitions. If the slab is not within the required moisture limits, address the moisture first—installing too soon is a common cause of basement wood floor failures.
📅 Last Updated: October 19, 2026 | Topic: How to install engineered wood floors in a basement? | Content verified for accuracy and freshness.
References
- Engineered wood
- Wood flooring
- Underlayment
- Floor
- https://www.epa.gov/indoor-air-quality-iaq/inside-your-home-humidity
- https://www.epa.gov/mold
- https://www.cdc.gov/mold/default.htm
- https://scholar.google.com/scholar?q=engineered+wood+floor+basement+installation+concrete+moisture Google Scholar
- https://scholar.google.com/scholar?q=engineered+hardwood+over+concrete+slab+moisture+testing Google Scholar
- https://scholar.google.com/scholar?q=wood+flooring+basement+relative+humidity+ASTM+F2170+installation Google Scholar


