


You can repair laminate floors in a living room with reliable results by following a step-by-step plan for the most common damage—chips, scratches, loose seams, and lifting planks. This guide tells you exactly what to check first, which fix to use for each problem, and how to finish so the repair blends in and lasts through everyday traffic. If your laminate is buckling or coming apart, the correct sequence matters—get it wrong and you’ll repeat the job.




Repair laminate floors by matching the repair to the damage type—surface scratches and chips can usually be filled and blended, while lifted, swollen, or broken planks generally need replacement. Start by confirming whether your laminate is click-lock (floating) or glue-down, because the “right” repair method depends on how boards lift and how they were anchored in the first place.
If you’re seeing visible wear near a couch or walkway, or you’ve noticed a plank separating after spills or seasonal humidity changes, this guide walks you through practical options—starting with what you can fix without replacing boards.
Who this is for / when it applies
This is for homeowners and facility managers who want a durable living-room laminate fix with minimal disruption. As of 2026, click-lock products make many DIY seam repairs possible, but moisture-related swelling still requires a moisture-first approach and, in many cases, plank replacement.
Assess the damage (and identify the installation type)

The fastest path to a successful repair is to decide whether the damage is cosmetic (scratches/chips) or structural (movement, lifting, swelling). Here’s why: cosmetic damage stays on top of the laminate surface, while structural damage often signals an installation issue (or moisture intrusion) that filling alone can’t solve.
If a laminate plank is only scratched or chipped on the top layer, repair kits can often restore the look without disturbing the locking joint.
If the plank is swollen, cupped, or rocking, the repair is usually structural and requires moisture control and often full plank replacement.
Correctly identifying click-lock vs glue-down prevents you from forcing boards in ways the system can’t tolerate.
Check whether the issue is cosmetic or structural
Start by inspecting the exact symptom:
– Cosmetic (top-layer) damage: surface scuffs, shallow scratches, small chips at the wear layer.
– Structural damage: seam gaps, edges lifting, boards separating, plank movement/“rocking,” or visible swelling/warping.
Then look around the problem area. In living rooms, common structural causes include:
– Water intrusion from spills (especially if mopped and left to sit)
– Seasonal humidity swings that change plank dimensions
– Subfloor/underlayment problems that allow movement
Identify click-lock (floating) vs glue-down
Your installation type determines what “undoing” looks like:
– Click-lock (floating): planks lock together, usually without gluing the planks to the subfloor. Boards can often be re-seated or removed by working toward an edge.
– Glue-down: planks are bonded to the subfloor (or to a specific adhesive system). Forcing joints open can permanently damage locking edges or surrounding planks.
As a practical check, look near thresholds or areas where trim may have been removed in the past—click-lock systems often reveal a perimeter finish line that hides the floating nature. If you still have installation notes or packaging, use the manufacturer’s method directly.
Look for moisture signs before you touch the boards
If you suspect moisture, treat drying and diagnosis as step one. Moisture can drive failures that show up later as:
– Cupping (edges higher than the center)
– Swollen seams
– Cloudy discoloration or darkening at joints
For moisture assessment, industry standards matter. For example:
– According to ASTM F1869-22, calcium chloride testing reports results as Moisture Vapor Emission Rate (MVER) in lb/1000 sq ft/24h (ASTM F1869-22).
– According to ASTM F1869-22, the calcium chloride test typically includes a 60–72 hour exposure period before readings (ASTM F1869-22).
– According to ASTM F2170-22, relative humidity testing reports readings as %RH from in-situ probes (ASTM F2170-22).
If you find active dampness or recent spill history, don’t rush into seam filling or cosmetic patching—structural failures usually return.
Moisture Tests Used to Decide If Laminate Repairs Can Be DIY (ASTM)
| # | Standard (ASTM) | What It Measures | Typical Output Unit | DIY Confidence for Laminate Decisions |
|---|---|---|---|---|
| 1 | ASTM F1869-22 | MVER (calcium chloride) | lb/1000 sq ft/24h | ★★★★★ |
| 2 | ASTM F2170-22 | In-situ RH (%RH) | %RH | ★★★★☆ |
| 3 | ASTM F710-21 | Moisture mitigation workflow | Guidance-based | ★★★★☆ |
| 4 | ASTM D4263-83 (spot test) | Surface moisture presence check | Qualitative (pass/fail) | ★★☆☆☆ |
| 5 | RH probe (generic method) | %RH equilibrium reading | %RH | ★★★☆☆ |
| 6 | MVER test kits (non-ASTM) | Moisture vapor emission estimate | Varies by kit | ★☆☆☆☆ |
| 7 | Visual-only inspection | No quantitative moisture data | Subjective | ☆☆☆☆☆ |
Fix minor scratches and small chips (no plank replacement)
The best way to fix minor laminate scratches and chips is to clean thoroughly, then use a matching filler that’s safe for laminate finishes and apply just enough to level the surface. This approach works because most chips and scuffs are confined to the wear layer, not the locking system.
Top-layer laminate damage (scratches/scuffs/chips) can often be repaired without disturbing the joint because the locking mechanism remains intact.
Cleaning and fully drying before filling is critical so the repair paste adheres instead of lifting at the edges.
For shallow scuffs, “blending” matters more than building thickness—overfilling can create a high spot that catches dirt and shoes.
Clean, then dry—don’t skip this
Before you fill anything:
1. Vacuum the area thoroughly (dust blocks adhesion).
2. Wipe with a damp cloth using clean water (avoid soaking).
3. Dry completely—especially around seams and edges where moisture can hide.
As of 2026, most laminate repair kits still rely on surface adhesion, not chemical fusion, so prep directly impacts how long the repair stays smooth.
Use the right filler for your finish
Laminate repair kits typically include:
– Matching repair paste/putty (color-matched)
– Application tools (spatula/squeegee)
– Blending aids (sometimes wax or crayons depending on kit type)
Process:
– Fill the chip with the paste/putty.
– Level it to the surface (you want it flush, not domed).
– Remove excess from surrounding boards immediately.
– Let it cure per manufacturer directions (don’t rush foot traffic).
Blend scuffs without overbuilding
For shallow scuffs:
– Use a matching filler/wax crayon approach.
– Apply lightly, then buff gently to match surrounding sheen.
If you don’t match color perfectly, focus on texture and flushness—laminate tops often show subtle variation even when new.
Repair gaps, loose edges, and slight separation
The durable fix for seam gaps is to first correct the cause (often expansion gap or reseating), not just patch what you can see. If the boards are structurally intact, you can often re-seat click-lock seams; if the locking tongue/groove is damaged, replacement is usually the only long-term option.
A floating laminate floor needs perimeter spacing; without an expansion gap, boards can buckle and reopen seams during seasonal swings.
On intact click-lock seams, gentle pressure and proper re-seating can close the gap without damaging locking edges.
If the seam gap aligns with a damaged locking profile, filler will not hold because the mechanical connection is compromised.
Verify the expansion gap at walls
Check for an adequate expansion gap where the floor meets walls, built-ins, and door frames. If the perimeter is tight (trim pressed directly onto the planks), the floor may have nowhere to move as humidity changes.
In general, floating floors require a perimeter gap so the assembly can expand/contract without lifting. Many manufacturer instructions also require a minimum gap range and specify how to cover it with baseboards or transitions.
Reseat click-lock seams—gently
If this is a click-lock floor and the locking area looks intact:
1. Protect the surface (use a scrap piece of laminate or a protective pad).
2. Apply gentle pressure from the seam to bring the edge back into engagement.
3. Work gradually along the separation line rather than forcing one spot.
Avoid hammering directly; impacts can crack the locking lip or leave micro-damage that later reopens the seam.
Replace when the locking profile is damaged
If the gap persists after reseating or you see signs of:
– cracked tongue/groove,
– shattered edge chips at the joint,
– repeated separations after minor loads,
then plan to replace the affected plank(s). Mechanical failure at the joint can’t be corrected with filler alone.
Click-lock vs glue-down: quick comparison
| Repair step | Click-lock (floating) | Glue-down |
|---|---|---|
| Reseating seams | Often possible if locks are intact | Usually not applicable—planks are bonded |
| Board removal | Often removes by lifting/angle and unlocking | Requires careful cutting/scraping to avoid substrate damage |
| Best long-term fix for seam gaps | Reseating or replacing damaged planks | Replacing the bonded plank(s) and re-adhesive method |
Replace a damaged laminate plank (best for swelling or broken boards)
The most reliable way to fix swelling or a broken locking joint is to replace the plank(s) and restore correct fit so the floor sits flat again. Repairing swollen or mechanically broken boards usually fails because the laminate core has already changed shape.
Swollen laminate planks frequently need replacement because once the core has warped, it rarely returns fully flat.
For floating click-lock floors, you typically gain access by working from a perimeter/edge rather than prying in the middle.
For glue-down laminate, cutting and controlled removal are usually required to avoid damaging the substrate and surrounding boards.
Plan access (trim and baseboards)
If you need access to remove the damaged board:
– Remove baseboards/trim only if needed for safe extraction.
– On click-lock floors, removal is often simpler when you can work toward an exterior edge.
– On glue-down, consider the exact replacement boundary first—cutting mistakes can spread damage.
Remove the plank using the correct method
Click-lock (floating):
– Release pieces by lifting/angle and unlocking (exact method varies by locking profile).
– Work slowly so you don’t chip the edges.
Glue-down:
– You typically must cut through the board and carefully remove it without gouging the subfloor.
– Follow your adhesive/substrate guidance—adhesive residue can interfere with the next plank’s bond.
Install the replacement and verify alignment
After the replacement plank is in place:
– The seam should close without visible gaps.
– The plank should sit flat without rocking.
– Recheck perimeter spacing at walls.
Also re-check underlayment contact: a loose underlayment area can recreate a separation even after a correct board swap.
Important: if you suspect moisture caused the swelling, fix the moisture source first and allow the area and subfloor to dry to the manufacturer’s requirements.
If you’re tempted to skip moisture diagnosis, remember: a “pretty” replacement can still fail when the subfloor remains damp.
What can go wrong (common mistakes and limits)
The biggest reasons laminate repairs fail are moisture not addressed, expansion gaps ignored, or the wrong installation method forced on the wrong system. Once you avoid those three issues, DIY success rates increase significantly for single-plank and small-scratch repairs.
Filler can mask surface damage, but it can’t restore a broken locking profile or reversed core deformation caused by moisture.
Repairing a swollen plank without correcting subfloor moisture can lead to repeat warping even after the surface looks improved.
Tight-fitting floors buckle when conditions change, reopening seams even after a “successful” re-seat.
Common mistakes to avoid
– Filling deeper damage: If the core or locking area is compromised, the patch will only be cosmetic.
– Repairing over moisture: Swelling often re-warp if the subfloor remains damp.
– Skipping the expansion gap: No perimeter space can turn seasonal movement into future gaps.
– Forcing glue-down like click-lock: Methods that lift/unlock click-lock boards can permanently damage glue-down laminates.
– Color mismatch: Even correct fillers can stand out—always test in a less visible area first when possible.
Limits of DIY
From a practical standpoint, the repair scope matters:
– DIY is most realistic for small chips/scratches and single-plank replacement.
– It’s less realistic when multiple rows are affected, the damage keeps returning, or you can’t confidently identify your floor system.
If you tell me your laminate brand/model and whether it’s click-lock or glue-down, we can tailor the removal and replacement steps to the exact locking/cutting approach.
Verdict / tip (when DIY is realistic)
DIY is a strong option when damage is localized and mechanical connections remain intact. If you’re dealing with a small surface defect or a single damaged plank—and you can confirm click-lock vs glue-down—your next steps are usually straightforward and can be completed without replacing large sections of the floor.
Small scratches, minor chips, and isolated single-plank replacement are the best-fit DIY laminate repairs for most living-room scenarios.
If the floor shows widespread swelling or repeated seam failures, the durable path is moisture control and professional assessment.
If you can’t reliably identify click-lock versus glue-down, don’t force removal—using the wrong method can spread the damage.
Upside: You can often restore a clean look quickly, especially for wear near a couch or walkway.
Downside: If moisture is involved and the subfloor is still out of spec, the repair may fail regardless of how well the plank is matched.
Skip DIY / consider a pro if: multiple rows are affected, there’s evidence of active dampness, or you suspect the underlayment/subfloor needs remediation.
Quick scan checklist (save this)
| Situation | First step | Likely next step |
|---|---|---|
| Small scratch/scuff | Clean + dry the spot | Fill/level with matching repair paste or wax |
| Chip on top layer | Clean + assess depth | Fill, then buff to blend |
| Seam gap between planks | Check expansion gap at walls | Re-seat if intact; replace if locking is damaged |
| Edge lifting/board rocking | Inspect under/around plank | Replace plank(s) if it won’t sit flat |
| Swelling/cupping after spill | Stop and dry the area | Dry thoroughly; replace affected boards if warped |
| Broken tongue/groove | Don’t just fill | Replace the affected plank(s) |
Frequently Asked Questions
How do I repair a small scratch or scuff on laminate flooring in my living room?
Clean the area first with a laminate-appropriate cleaner so dust won’t get trapped in the repair. Use a laminate floor scratch repair kit or a matching color repair pencil to fill the scuff, then wipe away excess with a soft cloth. For deeper scratches, you may need to apply filler in thin layers and let it cure before lightly blending with a matching stain or touch-up wax. Avoid harsh cleaners or abrasives that can strip the laminate’s wear layer.
What’s the best way to fix a laminate plank that’s lifting or separating after water exposure?
Start by identifying the moisture source and stopping it—laminate repairs won’t last if the leak or humidity issue continues. Wipe the area dry completely, then remove baseboards or trim if needed to access the plank edges. For minor gaps, you can sometimes re-engage the click-lock joint by carefully lifting neighboring planks, while badly swollen planks often need replacement. Always let the subfloor dry fully before reinstalling to prevent future laminate floor buckling.
How do I repair a chip or dent in laminate flooring without replacing the whole floor?
For small chips, clean the damaged spot and use a laminate repair paste or wood filler designed for laminate to match the plank color. Apply the filler with a putty knife, overfill slightly, and let it set according to the product instructions. Once cured, level it gently so it’s flush with the laminate surface and blend the finish with a touch-up marker or matching floor wax. If the dent exposes foam backing or the core is crushed, replacement of that plank is usually the most durable fix.
Why do my laminate floors keep making popping or clicking sounds, and how can I fix it?
Popping or clicking often happens when laminate flooring has shifted because the expansion gap was too small, the subfloor isn’t level, or the planks weren’t installed correctly. Check that baseboards and moldings aren’t blocking the perimeter expansion space—laminate needs room to float. If the floor is already loose, you may need to remove affected planks and reinstall with proper spacing, or use manufacturer-approved underlayment for sound reduction. In severe cases with uneven subfloor, resurfacing may be required before repairs can hold.
Which repair method should I choose for a laminate floor plank that’s cracked near a doorway?
Cracks near doorways are commonly caused by heavy traffic, movement, or insufficient subfloor support, so the most reliable option is usually plank replacement rather than patching. Remove the trim carefully, take out the damaged laminate plank (and possibly adjacent pieces depending on the locking system), and replace it with an identical matching board. Ensure the subfloor is clean, dry, and level before installation, and maintain the correct expansion gap around the doorway. After reinstalling, reattach the trim using methods that allow the laminate floor to “float,” reducing the chance of repeat cracking.
📅 Last Updated: October 20, 2026 | Topic: How to repair laminate floors in a living room? | Content verified for accuracy and freshness.
References
- Laminate flooring
- https://www.pergofloors.com/en-us/support/installation-guides
- https://www.resilientfloorcovering.org/repair-and-replacement/
- https://scholar.google.com/scholar?q=how+to+repair+laminate+flooring Google Scholar
- https://scholar.google.com/scholar?q=laminate+floor+water+damage+repair+replace+plank Google Scholar
- https://scholar.google.com/scholar?q=click+lock+laminate+floor+repair+replacement+board Google Scholar

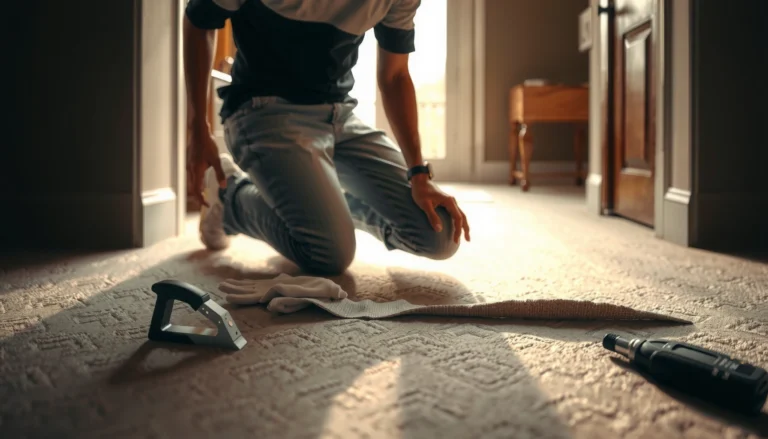
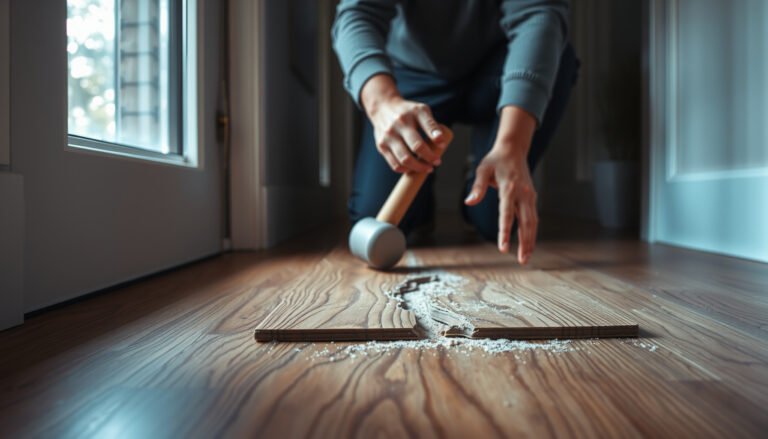
[…] laminate floors from a living room is straightforward once you identify whether the planks are click-lock (floating) or glued-down. Start at the edges, remove trim first, and lift in a way that keeps the subfloor […]
[…] two drivers of laminate damage—water dwell time and ongoing humidity—without requiring frequent plank replacement. Skip the prevention plan (or treat it as temporary) if you can’t address leaks soon, can’t […]