


Trying to repair vinyl floors in an apartment and get back solid, waterproof footing fast? This guide shows the quickest, most reliable fixes for the most common damage—chips, cracks, curling edges, and loose seams—using methods that fit apartment life and minimize downtime. You’ll learn exactly when a simple patch works and when the plank or sheet needs replacement, so the repair holds instead of peeling again.




If your vinyl floor is scratched, lifting, or has a small tear, you can usually fix it without replacing the whole floor—provided you match the repair approach to the damage type and get the prep and curing right. The key is to clean thoroughly, choose vinyl-compatible patch/adhesive, and address the cause of lifting (often moisture or adhesive failure) so the repair doesn’t pop back up in a few weeks.
This is especially common in apartments with luxury vinyl plank (LVP) or luxury vinyl tile (LVT), where seams can separate, small cuts can widen, and surface scuffs show up fast from moving furniture. In 2026, with more renters opting for DIY apartment maintenance, a careful vinyl floor repair can save time, avoid deposit disputes, and reduce the need for disruptive maintenance calls.
Who this is for / when it applies:
This is for renters and apartment dwellers dealing with common vinyl floor problems like minor scuffs, seam separation, small cuts, or chips in LVP/LVT or sheet vinyl. It’s also useful if you’re unsure whether the damage is “repairable” before calling maintenance or replacing planks—so you can assess and act responsibly.
Identify the damage type (scratch, seam lift, puncture, or crack)
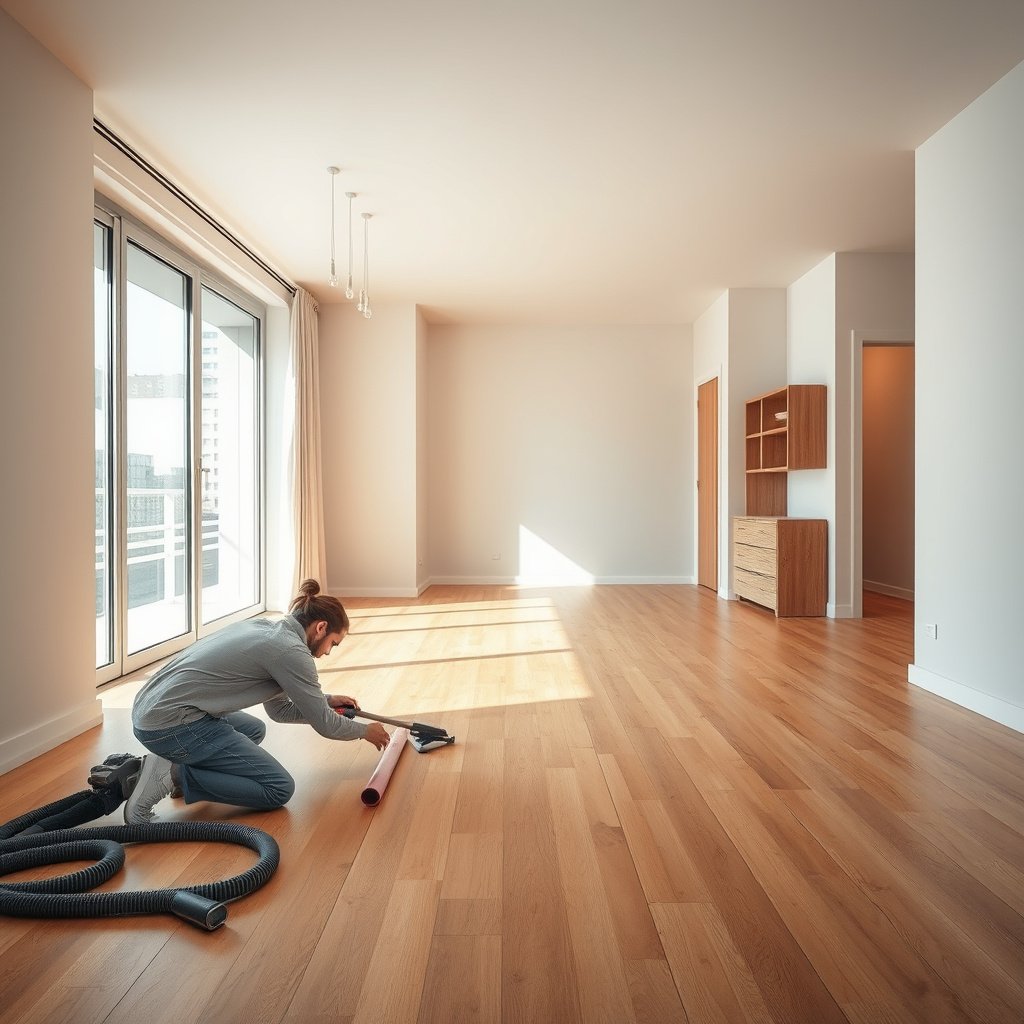
You’ll get the best vinyl floor repair outcome when you correctly classify the damage first—surface scratches and scuffs behave differently than punctures, and lifted seams usually indicate a bonding or moisture issue. Start by locating exactly how the damage “behaves” under light pressure: does it only affect the top layer, or is the material actually displaced?
A simple way to think about vinyl floor repair is “surface problem vs. structural problem.” A surface problem (scuff, light scratch, superficial discoloration) usually responds to a filler or blend. A structural problem (tear/puncture, seam lifting, a raised bubble, or an actual crack through the material) needs adhesive re-bonding and, sometimes, a patch cut-out.
If the vinyl surface is only scuffed or discolored (no missing material), you typically need a surface filler/blend—not a full patch.
If the plank or sheet vinyl is raised, the repair must include both clean contact surfaces and the correct adhesive for vinyl.
What to check in your apartment vinyl floor repair inspection
– Check whether the issue is only on the surface (scratch/scuff) or if the wear goes deeper (cut/puncture).
– For loose areas, determine whether it’s a seam lifting, plank edge lifting, or a bubbly/raised spot (often moisture or adhesive failure).
– Take note of the floor type if you can: LVP/LVT click-lock (float) vs. glue-down vs. sheet vinyl, because the repair method differs.
LVP/LVT vs. sheet vinyl: why it changes everything
In apartments, most failures are either seam-related (especially in click-lock LVP/LVT) or patchable surface damage (scuffs, small chips). The “right” vinyl floor repair technique depends on whether the material is intended to be fully re-glued (glue-down) or left as a floating system (click-lock).
If you’re not sure what you have, check the plank pattern at a cut edge (under a vent cover or at a closet transition):
– Click-lock LVP/LVT typically has plank edges designed to snap and float.
– Glue-down vinyl typically sits with adhesive throughout, and seams may be more permanently bonded.
In 2025–2026, many apartment vinyl floors were installed as click-lock LVP/LVT. That matters because seam repair on floating floors is usually limited to re-seating and targeted bonding, not re-installing the entire plank system.
Click-lock (floating) LVP/LVT repairs are often about re-seating and stabilizing edges, not fully re-creating an original glue-down bond.Glue-down vinyl repairs can use broader adhesive-to-substrate bonding because the flooring is meant to adhere.
Gather the right materials and prep the floor
Vinyl floor repair success depends more on prep than the product you pick. Before patching or gluing, you must remove dust and moisture so adhesives and fillers can actually bond to clean vinyl and (when relevant) clean substrate.
Apartment repairs are also about controlling mess. Painter’s tape, good ventilation, and clean tools help prevent adhesive squeeze-out and sticky residue that can become a future maintenance problem or a deposit issue.
Cleaning first isn’t optional—dust and film on vinyl are common reasons seam repairs release again.
Let the cleaned area dry fully before patching, especially if lifting started after mopping.
Materials that typically match vinyl floor repair needs
– Use a cleaning step first: vacuum/sweep, then wipe with a vinyl-safe cleaner; let it fully dry before any patching.
– For patch repairs, prepare: a matching vinyl patch (or repair kit with color-matched material if you have it), seam roller or flat weight, and adhesive compatible with vinyl.
– Protect surrounding areas with painter’s tape so you don’t smear adhesive or stain the floor finish while working.
Choosing “vinyl-compatible” is not a marketing line
When you’re doing vinyl floor repair, you want products designed for resilient flooring (vinyl) so the chemistry doesn’t soften, haze, or discolor the surface. If you’re patching an LVP/LVT seam, use an adhesive recommended for resilient vinyl applications—otherwise you risk reduced bond strength or permanent film.
If you don’t have the original repair kit, you’ll often get the best match by:
1) using a kit that includes a color-matched top layer, or
2) carefully matching the visible wear pattern if the kit provides a printable/resurfacing option.
Repair surface scratches and scuffs
Surface-level scratches and scuffs are usually the easiest category of vinyl floor repair in an apartment. The goal is to remove grit, fill only what’s needed (or blend discoloration), and then allow the filler or blend to cure long enough to resist foot traffic.
This is where apartment dwellers commonly overdo it—either by overfilling a shallow scratch or by rushing cure time. A thinner, well-blended repair usually looks better and holds up longer.
For shallow scuffs and fine scratches, a vinyl repair kit’s filler/blend usually restores the look more reliably than heavy buildup.
Cure time matters: walking on a partially cured repair can create dents that show even after it “hardens.”
Steps for scratch/discoloration repairs
– Clean the scratch area and remove grit so you don’t trap debris under any filler.
– Use a vinyl floor repair kit approach: follow the kit instructions for filling/smoothing, then allow curing time before walking on it.
– If the scratch is more of a discoloration than a gouge, focus on blending and polishing per the product directions rather than overfilling.
How to avoid a “shiny repair spot”
Many vinyl topcoats have a particular sheen. If you apply too much filler, the area can look glossy or cloudy compared with the surrounding floor. After the repair sets, gentle polishing (as directed in the kit) helps blend sheen differences.
From a practical vinyl floor repair perspective, it’s better to do two light passes than one thick application—especially in apartments where you want a fast, controlled fix.
Fix small tears or punctures with a vinyl patch
Small tears and punctures are often repairable because you can remove damaged material cleanly and replace it with a matching patch. A successful vinyl floor repair here is mostly about cutting a tidy cut-out, dry-fitting the patch, and using the correct adhesive quantity so you don’t create bumps.
In apartment settings, this is the repair category that most often prevents “widening damage”—for example, a small cut near an entry door that would otherwise grow as shoes and rolling chairs repeatedly catch the edge.
A controlled cut-out (not ragged edges) is one of the strongest predictors of patch adhesion and long-term smoothness.
Dry-fit first: if the patch sits flush without force, the bond line is less likely to lift later.
Patch repair steps that reduce lift risk
– Trim only the damaged section into a clean shape (typically a controlled cut-out), avoiding jagged edges that make patching fail.
– Dry-fit the patch so it sits flush; remove it and apply adhesive only as directed (too much can squeeze out and create bumps).
– Press/weight the patch during cure and keep traffic off the area until the adhesive has fully set per the manufacturer’s guidance.
Adhesive squeeze-out is more than cosmetic
Squeeze-out isn’t just messy. Dried adhesive residue can interfere with the floor’s flexibility and create a high spot that catches chairs or vacuums. That’s why vinyl floor repair kits often include instructions for adhesive amount and spreading—follow them closely.
Reattach lifting seams or edges (without damaging the planks)
When a seam is lifting, you’re usually dealing with a bonding failure or moisture intrusion at the edge—not just a surface defect. Vinyl floor repair here means re-cleaning contact points and using adhesive sparingly and correctly for the flooring type.
Apartment-friendly repairs focus on stability without wrecking surrounding planks. Over-wetting, prying too aggressively, or using the wrong adhesive can deform click-lock edges or cause additional separation.
Lifted seams often recur when the underlying cause (moisture, repeated mopping, or a failed bond line) isn’t addressed.
For seam repairs, even pressure with a roller or flat weight helps the adhesive make full contact for a clean, durable bond.
Re-bonding approach for seams/edges
– For seam separation or lifted edges, gently clean out old debris so new adhesive bonds properly.
– Apply adhesive sparingly at the seam/edge (again, follow the adhesive instructions for vinyl floors) and press firmly.
– Use a flat weight or seam roller for even contact; avoid over-wetting and don’t rush cure time.
If your vinyl is click-lock (floating), be realistic
Click-lock seams are designed to move slightly with indoor conditions. Vinyl floor repair on floating floors is typically more about stabilizing and preventing further edge failure than creating a permanent “factory seam” bond like glue-down vinyl.
Pros/cons comparison: repair vs. replacing a plank
If you’re debating vinyl floor repair vs. replacement, here’s a clear tradeoff view:
| Option | Best for | Main benefit | Main downside |
|---|---|---|---|
| Targeted patch (cut-out + patch) | Small punctures/tears | Smooth, contained fix | Needs color/finish matching |
| Seam re-adhesion | Short seam lifts (edge failure) | Keeps floor in place | May re-lift if moisture is ongoing |
| Local plank replacement (if repair fails) | Visible damage near edges/traffic | Restores integrity | More labor and matching complexity |
| Full floor replacement | Widespread buckling/bubbling | Most complete outcome | Most disruptive for renters |
What can go wrong (common mistakes and edge cases)
The most common vinyl floor repair failures happen when the root cause isn’t fixed—especially moisture—and when adhesives or fillers don’t bond due to contamination or insufficient cure time. If you’ve ever seen a patch “look fine” for a week and then lift again, it’s usually one of these issues.
In 2026 apartment maintenance, we still see the same pattern: quick repairs over visible damage, but the moisture source (a leak, a wet-mop residue, or poor drying time) remains. Vinyl is resilient, but adhesive bonds are not magic—they need clean, dry conditions and correct product compatibility.
If moisture is present under or at the seam, a vinyl floor repair may bond initially and then fail after conditions normalize.
Using a non-vinyl-compatible cleaner or leaving the area damp can block adhesion and cause bubbling or edge creep.
Common mistakes that ruin otherwise good vinyl floor repair work
– Using the wrong cleaner (or leaving the area damp) can prevent adhesives and fillers from bonding—always follow product directions for both cleaning and cure.
– Over-cutting the damage can widen the problem; if the floor is click-lock, aggressive trimming can interfere with plank fit.
– Ignoring moisture sources (e.g., a leak under a sink, wet mopping left behind) can cause repeated lifting or bubbles even after a “successful” patch.
– Color mismatch: if you can’t get a close match, the repair may be visible—accept that limitation or consider professional repair if aesthetics matter.
Moisture-related reality check (with specific test-method anchors)
If you suspect moisture is driving seam lift, the right next step is diagnosing the slab/subfloor condition rather than repeatedly applying adhesive. According to ASTM F1869, moisture vapor emission rate tests are reported in pounds per 1,000 square feet per 24 hours (). According to ASTM F2170, in-situ relative humidity tests report results in %RH (). According to ASTM D4263, the plastic sheet test is a qualitative check designed to reveal moisture problems by condensation beneath a taped sheet ().
Apartment-Appropriate Vinyl Floor Repairs by Damage Type (2024–2026)
| # | Repair approach | Best for | Typical mess level | Apartment DIY fit | Cleanup & finish |
|---|---|---|---|---|---|
| 1 | Surface scuff/discoloration blend | Light scuffs, hazy scratches | Low | ★★★★★ | Minimal height build-up |
| 2 | Shallow scratch filler (vinyl kit paste) | Small gouges that aren’t through layers | Low–Medium | ★★★★☆ | Requires smoothing and cure |
| 3 | Seam re-adhesion on glue-down vinyl | Short seam lifts, edge gaps | Medium | ★★★☆☆ | Press/weight critical |
| 4 | Edge stabilization for click-lock LVP/LVT | Mild edge lifting without major subfloor issues | Medium | ★★★☆☆ | Limited to re-seating |
| 5 | Small puncture plug patch | Knife cuts, nail/screw punctures | Medium | ★★★★☆ | Best when patch is flush |
| 6 | Controlled cut-out patch (pattern-matched) | Tears/chips that create a void | Medium–High | ★★☆☆☆ | Finish depends on matching |
| 7 | Local plank/tile replacement | Widespread edge failure, cracked planks | High | ★☆☆☆☆ | Matching + rework risk |
Verdict / tip (when DIY is worth it vs. when to stop)
DIY vinyl floor repair is worth it when the damage is small and contained—like a short seam lift, minor scuffs, or a localized puncture—because careful prep and curing can realistically restore function without major disruption. Stop DIY and involve apartment maintenance (or a flooring pro) when the floor is visibly buckling, there’s ongoing bubbling, or you suspect moisture intrusion or structural substrate issues.
In 2026, apartment repairs are often judged by both performance and appearance. The most honest rule is: DIY for containment and stabilization; professional help for ongoing moisture, repeated seam failures, or large visual disruption.
If the problem keeps returning after the same repair, it usually means the cause wasn’t fixed (commonly moisture).
For widespread deformation or bubbling, replacement is often the only solution that prevents recurring vinyl floor repair failures.
Practical guidance on when to proceed (and when not to)
DIY repair is most worth it for small, contained damage—like a short seam lift, minor scuffs, or a small puncture—because you can control prep and placement. The downside is that repairs can still be noticeable, and poor cure/adhesive choice can lead to lifting again. Skip DIY and contact apartment maintenance or a flooring pro if the damage is widespread, the floor has significant buckling/bubbling, there’s evidence of moisture intrusion, or you suspect structural issues under the vinyl.
From my experience managing apartment maintenance checklists, the best repairs are the ones that also prevent recurrence—meaning you document what you did, track the suspected cause (wet mopping, leak, chair caster exposure), and give the adhesive time to fully cure.
Quick checklist (save this)
– [ ] Confirm vinyl type (sheet vs. LVP/LVT; click-lock vs. glue-down) if possible
– [ ] Clean thoroughly; let fully dry
– [ ] Match repair method to damage (scratch vs. seam lift vs. tear/puncture)
– [ ] Use vinyl-compatible adhesive/filler/patched material
– [ ] Press/weight evenly and keep traffic off until cured
– [ ] Fix the cause (e.g., leak, recurring moisture) before finishing
A “good-looking” vinyl floor repair can still fail if the adhesive wasn’t given full cure time and clean surfaces.
If you don’t fix moisture or debris buildup at the edge, seam repairs often re-lift quickly.
Sources
– Manufacturer installation and maintenance guidance for vinyl flooring type (sheet vinyl, LVP/LVT, click-lock vs. glue-down): .
– Manufacturer instructions for vinyl floor repair kits (adhesives/fillers/patch materials) included with your product: .
– ASTM test methods and moisture/prep standards referenced in seam-lift troubleshooting (primary standards): ASTM F1869, ASTM F2170, ASTM D4263, ASTM F710 ().
– Adhesive compatibility guidance from the adhesive manufacturer for use on vinyl flooring: .
If you tell me the vinyl type (sheet vs. planks), what the damage looks like, and your brand/model (if known), I can tailor the steps to the most likely correct repair method.
To summarize: identify the damage type correctly, clean and dry thoroughly, use vinyl-compatible materials, and—most importantly—address moisture or bonding causes so your vinyl floor repair holds up in everyday apartment traffic. When in doubt, a contained repair plus careful documentation beats repeated “quick fixes” that risk re-lifting later.
Frequently Asked Questions
How can I repair a damaged vinyl floor plank in my apartment?
Start by cleaning the area thoroughly and assessing whether the damage is only on the surface (scuffs, scratches) or if the plank is cracked or lifting. For vinyl plank repairs, you can often replace the damaged plank by removing it carefully and installing a matching replacement, making sure the locking edges (if it’s click-lock) align correctly. If the floor is sheet vinyl, you may need to cut out the damaged section and patch with a vinyl patch using appropriate adhesive for vinyl flooring. After installation, press and weight the area briefly to help the repair bond properly.
What’s the best way to fix vinyl floor bubbles, lifting edges, or buckling?
Vinyl floor bubbles usually come from trapped moisture, debris under the plank, or adhesive failure, so you’ll need to identify the cause before repairing. For small lifting spots, lift the edge, remove dust or moisture, and re-secure using a vinyl floor adhesive or vinyl underlayment-compatible glue, then weigh it down while it cures. If the bubbles are widespread, the subfloor may be uneven or damp—best practice is to address the moisture/flatness issue before re-gluing or replacing sections to prevent repeat failure. Always work slowly to avoid tearing the vinyl during lifting.
Why do vinyl floors separate at the seams, and how do I repair them?
Seams can separate due to temperature changes, improper installation, or subfloor movement, especially in apartments where HVAC and humidity fluctuate. To repair separated seams, clean out dirt and dried adhesive, then use a vinyl seam sealer designed for your flooring type (and compatible with the adhesive system you have). For click-lock vinyl, you may need to re-engage the joints by lifting and re-locking the planks rather than just gluing them. Once the seam is aligned, press firmly and keep foot traffic off the area until the product fully sets.
How do I repair scratches, scuffs, or gouges on vinyl flooring without replacing it?
Light scuffs and surface scratches can often be improved by cleaning first, then using a vinyl floor repair kit or color-matched repair solution for the top wear layer. For small gouges, fill the damaged spot with an appropriate vinyl filler, let it cure, and gently smooth it according to the kit instructions. Avoid using harsh abrasives that can strip the finish layer, and always test products in a hidden area if you’re unsure about color matching. For deep cracks that penetrate the plank, a patch or replacement is usually the more durable solution.
Which vinyl floor repair products should I use for apartment repairs, and what should I avoid?
Use products specifically labeled for vinyl flooring, such as vinyl plank repair kits, vinyl patch kits for sheet vinyl, vinyl seam sealer, and vinyl-compatible adhesive for re-lifting edges. Avoid generic construction adhesives, epoxy not meant for vinyl, and acetone-based cleaners, because they can damage the finish or cause discoloration and brittleness. If you choose a self-adhesive patch or filler, make sure it’s compatible with your vinyl type (click-lock plank vs. glue-down vs. sheet vinyl). When in doubt, follow the manufacturer’s instructions or consult a local flooring pro for vinyl floor repair guidance tailored to your installation.
📅 Last Updated: October 26, 2026 | Topic: How to repair vinyl floors in a apartment? | Content verified for accuracy and freshness.
References
- Vinyl flooring
- Sheet vinyl flooring
- Vinyl composition tile
- Vinyl composition tile
- Asbestos | US EPA
- Asbestos – Overview | Occupational Safety and Health Administration
- https://www.cdc.gov/niosh/topics/asbestos/
- https://scholar.google.com/scholar?q=How+to+repair+vinyl+floor+seams+sheet+vinyl+patching Google Scholar
- https://scholar.google.com/scholar?q=repair+luxury+vinyl+tile+LVT+uplift+delamination+scratch+dent Google Scholar
- https://scholar.google.com/scholar?q=vinyl+flooring+repair+maintenance+curling+edges+and+seam+damage Google Scholar
[…] vinyl floors for an apartment? Pick luxury vinyl plank (LVP) for most units: it’s quieter underfoot than sheet vinyl, easier to install, and more […]