
Want to know how to prepare hardwood floors for a bathroom without warping and peeling? The winner is a bathroom-specific prep plan: confirm the subfloor is level, seal the wood properly, and install a waterproofing system that protects every seam and nail line. Follow these steps to lock in moisture control before the first shower ever hits the floor.




Prepare hardwood floors for a bathroom by controlling moisture first: test the subfloor moisture, use the right moisture barrier only if your flooring system allows it, and apply a bathroom-appropriate finish/coat plan. Then add the “mechanics” that protect wood—proper acclimation, correct spacing, and careful transitions—so water doesn’t get trapped and movement doesn’t split the finish.
If you’re installing new hardwood or re-finishing existing planks in/near a bathroom, this is for you—especially if you know the room gets steam-heavy, has frequent splashes, or lacks great ventilation.
Start with moisture control in the bathroom
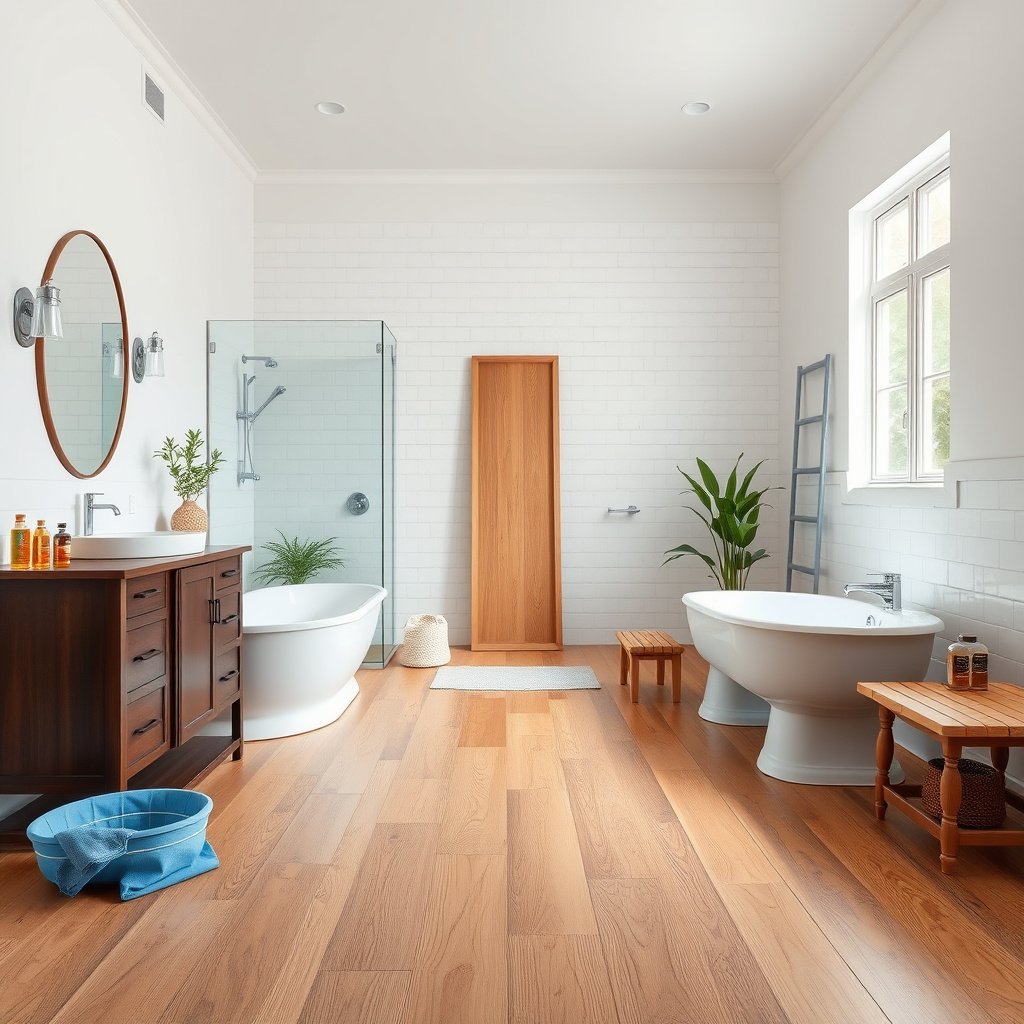
Moisture control is the make-or-break step because hardwood moves with changing humidity, even when it’s not in direct standing water. If you do one thing first, do accurate subfloor moisture testing and then match your finish system to the humidity swings typical in bathrooms.
– Confirm the bathroom can dry out: run the exhaust fan during and after showers and keep the room from staying damp for long periods.
– Check subfloor moisture before installation (use a moisture test method specified by your flooring/installation instructions, or follow a recognized standard like ASTM methods).
– Choose the right wood type for the job: engineered products are often more suitable than solid hardwood in higher-moisture environments, but you must follow the manufacturer’s limits.
According to ASTM F2170 (F2170-19), in-situ relative humidity measurements are reported as %RH and used to assess concrete moisture for flooring installation decisions (ASTM F2170-19).
According to ASTM F1869 (F1869-18), the calcium chloride test produces a moisture vapor emission rate reported as lb/1000 ft² in a 24-hour period (ASTM F1869-18).
Bathroom-Ready Moisture Checks for Hardwood Floor Prep (2026)
| # | Moisture check method | What it measures | Typical output | Installation decision value |
|---|---|---|---|---|
| 1 | In-situ RH probe test | Concrete relative humidity | %RH | High |
| 2 | Calcium chloride test | Moisture vapor emission rate | lb/1000 ft²/24h | High |
| 3 | Pin-type moisture meter | Wood moisture content | %MC (dry-basis) | High |
| 4 | Ambient RH monitoring | Bathroom air humidity | %RH | Medium |
| 5 | Infrared surface temperature mapping | Cold spots where condensation can form | Temperature (°F/°C) | Low |
| 6 | Vapor barrier/permeance evaluation | Water-vapor transmission of a membrane | Perms | Medium |
| 7 | Plastic sheet (surface condensation) check | Visible condensation/signs of moisture drive | Pass/Fail observation | Low |
Why this matters in bathrooms (not just “wet rooms”)
In 2026, bathrooms remain one of the most demanding interior environments for hardwood floors because humidity spikes can happen even if you never get puddles. Exhaust ventilation, how long the room stays warm after showers, and whether humid air leaks into the bathroom from adjacent spaces all influence whether wood finishes stay intact.
Acclimate and prep the subfloor for stability
Hardwood floors fail most often when they are installed over a moving or uneven base, not only when they’re “too wet.” The direct answer: acclimate the wood to the bathroom’s conditions, then make the subfloor flat, solid, and correctly prepared for the exact installation method you’re using.
– Acclimate the flooring according to the wood/flooring manufacturer’s instructions (don’t guess based on “room temperature” alone).
– Get the subfloor flat and solid: fix dips, ridges, and squeaks so the floor won’t flex and stress joints/finish.
– Use underlayment/vapor barriers only when they’re approved for your specific hardwood system (wrong layers can trap moisture instead of preventing it).
According to ASTM D4442 (D4442-21), moisture content for wood is determined as a percentage based on oven-dry mass, which is why acclimation targets the wood’s actual moisture—not ambient air temperature (ASTM D4442-21).
Hardwood flooring failures commonly include joint separation and finish stress when the subfloor is not sufficiently flat and stable, because wood movement concentrates stress at edges and joints (see NWFA installation guidance: National Wood Flooring Association (NWFA) installation and moisture control resources).
Acclimation is about the wood, not the thermometer
When installers treat acclimation as “leave the boxes in the room overnight,” bathroom hardwood floors can still end up wrong because wood moisture content follows indoor humidity, not just the day’s temperature. Follow the manufacturer’s specified acclimation period and target conditions, and re-check if the bathroom is unusually humid or if a renovation was recently completed.
Flatness and squeaks protect both structure and finish
Even when your moisture levels are within limits, an uneven subfloor makes hardwood joints flex more during daily humidity cycles. That flexing can:
– open micro-gaps at end joints,
– fatigue fasteners/nails (for nail-down systems),
– and create stress lines that later show through the finish.
Stabilize subfloor movement before you install—tighten subfloor boards, correct weak spots, and address squeaks. If you re-install or re-finish existing hardwood, confirm the “system” is still structurally sound before applying a new coat plan.
Condition and clean the hardwood before sealing
Sealing only works as well as the surface you prepare, so the direct answer is: clean, remove contaminants, and abrade to the exact bonding surface the finish system requires. For bathroom hardwood floors, this step matters because residues trap moisture at the interface and accelerate adhesion breakdown.
– Remove contaminants and residue: dust, oils, construction debris, and any unknown coatings can prevent adhesion.
– Sand as directed by the flooring/finish system so the sealant can properly bond (stop when you reach the finish maker’s recommended surface condition).
– Keep dust under control: vacuum thoroughly, then wipe/clean using methods compatible with the coating instructions.
ASTM coating-adhesion and surface-preparation concepts align with practical finish guidance: coatings require a clean, correctly abraded substrate to achieve reliable bond strength ().
For wood flooring re-finishing, failure modes often include peeling or soft spots when sanding doesn’t reach the finish system’s required profile or when dust/contaminants remain ().
What “clean” means for bathroom hardwood floors
A bathroom installation commonly has invisible contamination: skin oils from handling, sanding dust that isn’t fully vacuumed, and film residue from prior coatings or cleaners. If you’re re-finishing existing planks, determine whether the previous finish is compatible with the new system (for example, water-based over certain oil-modified finishes can be problematic).
Sand to the finish manufacturer’s recommended method and surface condition. Don’t “just scuff” if the product calls for a specific abrasion profile. And don’t wipe with household solvents unless the finish sheet explicitly allows it—some cleaners leave residues that behave like a release layer.
Dust control is part of moisture control
Dust is not just a cleanliness issue; it’s an adhesion-risk issue. In bathroom hardwood floors, adhesive problems show up early because humid air and temperature cycling stress the bond line.
Seal and finish the floor to handle splashes
To protect hardwood floors in and near a bathroom, the direct answer is: use the finish system your flooring manufacturer approves, then follow the exact coat schedule and cure times. In bathrooms, “water resistance” comes from the full system—product selection, application thickness, and cure—not from one single topcoat.
– Use a finish system that your flooring manufacturer approves for bathroom use (water resistance depends heavily on the exact product/coat plan).
– Apply the sealer/finish exactly as specified—thin, even coats typically perform better than heavy, uneven application.
– Respect cure times before heavy use; rushing can cause soft finish, smudging, or premature failure at high-traffic areas.
Finish performance in wood flooring is strongly influenced by cure time and film build; applying or using the floor before the coating has fully cured increases risk of soft finish and early wear (see ).
In moisture-managed installations, the finish is a water-shedding layer, but dimensional movement still occurs with humidity, so the coating system must remain flexible enough to tolerate normal wood movement while sealing the surface (see NWFA moisture control guidance).
A practical coat-plan mindset for bathroom hardwood floors
Instead of thinking “one protective coat,” think “a sealing build.” Most approved bathroom systems are built from a specific sealer + intermediate coats + abrasion-resistant topcoat plan. Follow the recoat window and apply each coat evenly.
If your bathroom has frequent splashes (not standing water), you can usually focus on perimeter and traffic areas with tighter attention to film continuity. If the room has steam-heavy cycles or poor drying, prioritize complete sealing at:
– edges,
– end joints,
– and transitions where water vapor can condense.
Cure time is where DIY schedules often break
In 2026, many finish failures still happen because the installation calendar is aggressive. If the finish technical data says the floor can’t be exposed to heavy foot traffic or cleaning until a specific cure window, treat that as non-negotiable. Soft finish is easy to mar—and bathroom hardwood floors show damage faster because the surface is cleaned more often.
Plan gaps, transitions, and traffic zones
The direct answer: even the best sealed hardwood needs controlled movement, so you must get expansion spacing, transitions, and edge treatment right. Bathrooms drive movement through humidity swings, and water vapor can also travel into transitions if they’re built incorrectly.
– Maintain expansion spacing per the flooring manufacturer—bathroom humidity swings can still move wood even with good finishing.
– Handle edges thoughtfully: baseboards/trim should be installed in a way that allows the floor system to perform as designed (avoid pinning the floor).
– Don’t treat the shower like “the floor”: avoid direct installation in places that regularly hold standing water unless the flooring system is explicitly rated for that condition.
Wood flooring installations require expansion space to allow for dimensional change, and pinning or over-securing the edges can cause stress that shows up as gapping or finish cracking (see NWFA installation guidelines).
Transitions are moisture-risk points because they interrupt the flooring plane; proper threshold and joint detailing helps prevent water and humidity from concentrating at the edges of hardwood sections (see ).
Where people accidentally trap water
Bathrooms create “micro-zones” where water vapor condenses. Typical offenders for hardwood floors include:
– thresholds where a sealant bead blocks drying,
– gaps filled incorrectly with caulk that shouldn’t be caulked,
– and transitions placed so the highest splash zone sits directly at an end joint.
If your project is near (but not inside) a shower, consider a design that keeps hardwood out of any area that can remain damp between uses. If you’re tempted to “just include the wet zone,” only do it when the product documentation explicitly rates it.
Pros/cons: hardwood vs moisture-tolerant alternatives (bathroom-adjacent)
| Option | Pros for bathroom-adjacent use | Cons / watch-outs |
|---|---|---|
| Engineered hardwood (approved system) | More dimensional stability than most solid boards in humidity swings; can be finished to match existing floors | Still requires moisture testing + correct finish plan; seams and edges need careful detailing |
| Solid hardwood (approved system only) | Traditional look and feel; can be refinished | More prone to movement in high-humidity rooms; requires strict moisture/humidity control |
| Tile / stone in wet zones | Handles splashes and frequent wetting reliably | Substrate prep and grout maintenance; not a “quick swap” if you’re converting from wood |
| LVP/LVT rated for wet areas | Very tolerant of splashes and occasional wetting | Different feel/look; transitions to hardwood must be planned for movement |
What can go wrong if you skip steps
Skipping moisture control and subfloor prep is where bathroom hardwood floors most often fail—typically with movement problems, finish breakdown, or trapped moisture. The direct answer: if you skip testing, acclimation, or approved layering, you increase the odds of cupping, gapping, peeling, or lingering odors.
– Moisture-related movement: cupping, gapping, or finish micro-cracking when subfloor moisture or humidity isn’t controlled.
– Finish adhesion failure: peeling or soft spots from incomplete sanding, dirty surfaces, or incompatible coatings.
– Trapped moisture: moldy underlayment or odor if a vapor barrier/underlayment is used when it isn’t appropriate for your subfloor type.
ASTM moisture test methods translate “how much moisture is present” into installation decisions by measuring either relative humidity or moisture vapor emission rate, which helps prevent movement and finish failures (ASTM F2170-19; ASTM F1869-18).
When vapor barriers are installed incorrectly (or without approval for the flooring system), they can reduce drying potential and increase the risk of moisture entrapment beneath finishes or underlayments (see NWFA moisture control guidance).
Typical failure patterns to look for
– Gaps that track humidity cycles: often points to subfloor moisture or inadequate acclimation.
– Peeling in localized areas: often points to dirty/contaminated surfaces or incompatible prior coatings.
– Musty odors after installation: can indicate trapped moisture under layers that don’t allow drying.
Verdict, quick checklist, and who should skip
If you can test moisture, control bathroom humidity (especially ventilation), and follow your flooring + finish manufacturer instructions closely, you can prepare hardwood floors for bathroom conditions with reasonable risk. The downside: hardwood in bathrooms is still a moisture-management project—if your bathroom stays humid, has poor fan performance, or you want “shower-level” wetness, consider a moisture-tolerant floor option instead (tile, LVP rated for wet rooms, etc.).
Who should skip this DIY approach:
– Bathrooms without reliable exhaust ventilation
– Situations with known recurring leaks or chronic dampness
– Installing hardwood in areas that regularly get standing water (unless the product is explicitly rated for it)
Verdict in one line: Prepare hardwood for bathrooms by treating moisture as the design constraint, not an afterthought.
Scan/Save Checklist (quick)
| Step | Do this before you start |
|---|---|
| Moisture test | Test subfloor moisture using the method required by your flooring instructions (or recognized standards such as ASTM methods). |
| Acclimation | Acclimate wood exactly per manufacturer directions. |
| Subfloor condition | Ensure flatness and stability; fix squeaks and uneven spots. |
| Approved layers | Use underlayment/vapor barrier only if approved for your specific flooring system. |
| Surface prep | Clean and sand to the finish system’s required surface condition. |
| Seal/finish | Use manufacturer-approved finish and apply the full coat schedule (including cure time). |
| Expansion & transitions | Keep correct spacing and use proper transition details; avoid pinning the floor. |
| Water exposure | Avoid direct standing-water zones unless explicitly rated. |
In 2026 bathroom remodeling, the most defensible approach is to align moisture testing, installation layers, and finish schedules to the specific flooring manufacturer’s documentation rather than relying on generic “waterproofing” assumptions (NWFA guidance and ASTM test-method frameworks).
Wood flooring performance depends on both moisture conditions and detailing (spacing and transitions), which is why manufacturers require expansion gaps and system-specific approved underlayments ().
Sources
– National Wood Flooring Association (NWFA) installation/moisture control guidance: .
– ASTM standards commonly used for moisture assessment in slabs/subfloors (examples include): ASTM F2170 (in-situ relative humidity probes); ASTM F1869 (calcium chloride); ASTM E96/E96M (water vapor permeance); ASTM D4442 (wood moisture content).
– Flooring manufacturer installation instructions (acclimation, allowable moisture ranges, spacing, underlayment/vapor barrier approval): .
– Finish/sealer manufacturer application and curing instructions: .
Hardwood in a bathroom can work, but only when moisture is managed up front and the floor system is built exactly to spec—test moisture, prep the subfloor, seal/finish correctly, and keep expansion + transitions in mind. If you want, tell me whether you have solid or engineered hardwood and whether it’s outside the shower or inside the wet zone, and I’ll help you tighten the prep steps to match your situation.
Frequently Asked Questions
What prep steps should I take before installing hardwood floors in a bathroom?
Start by confirming your hardwood is bathroom-suitable (ideally engineered hardwood with a stable core) and acclimating it to indoor humidity for several days. Then remove old flooring down to a clean, dry subfloor and ensure the surface is flat, because uneven spots can cause gaps and squeaks. Finally, verify moisture levels in the subfloor and select a proper underlayment and vapor barrier designed for bathrooms.
How do I test moisture levels before preparing hardwood for a bathroom?
Use a concrete moisture meter or calcium chloride test to determine whether the subfloor moisture is within the flooring manufacturer’s limits. If readings are high, address the source of moisture first (leaks, poor ventilation, or high indoor humidity) before installing hardwood flooring. For best results, also measure bathroom humidity with a hygrometer so you can plan for dehumidification and consistent air exchange.
Why is subfloor leveling so important when preparing hardwood floors for a bathroom?
Even minor subfloor dips or high spots can stress the hardwood and lead to joint separation, cupping, or squeaky areas once the bathroom gets humid. Use a straightedge to check flatness and correct issues with a suitable patch compound or leveling system rated for wet-area installations. Proper leveling helps the floor perform under temperature swings and normal bathroom moisture fluctuations.
What’s the best underlayment or vapor barrier approach for hardwood floors in bathrooms?
Choose an underlayment and vapor barrier system specifically recommended for engineered hardwood or your exact installation method (nail-down, glue-down, or floating). In many cases, you’ll want a moisture barrier to protect the wood from bathroom humidity, especially in areas near showers, tubs, and sinks. Always follow manufacturer instructions for overlap seams, tape/edge sealing, and transitions to prevent moisture pathways.
Which sealing and finishing steps should I take to protect hardwood floors in a bathroom?
Apply a high-quality bathroom-appropriate finish and ensure the product is compatible with your hardwood type and installation method. Focus on sealing end joints, gaps around fixtures, and any cuts or edges—these areas are most vulnerable to moisture intrusion. After installation, keep the bathroom well-ventilated and promptly dry water on the floor to reduce swelling and maintain your hardwood’s appearance.
📅 Last Updated: October 16, 2026 | Topic: How to prepare a hardwood floors for bathroom? | Content verified for accuracy and freshness.