Stains on vinyl floors in a staircase can usually be removed safely and completely with the right cleaner and method—most often, a targeted solution followed by gentle scrubbing. This guide answers how to remove stains from vinyl floors step by step, from everyday scuffs to tougher marks like grease and dye, without damaging the surface or finish. You’ll know exactly what to use first, what to avoid, and how to finish so the stain doesn’t come back.



Remove the stain by starting with gentle cleaning (soft cloth + mild soap in water), then move to targeted spot treatment only if the mark won’t lift. Keep scrubbing light and avoid harsh abrasives or strong chemicals first—staircase vinyl (on treads and risers) can haze, streak, or lose its finish when you overwork the surface during stain removal.
If your staircase vinyl has scuffs, dark shoe marks, food/drink spots, or sticky residue, this is for you—especially if you want a safer process that doesn’t strip or dull the surface. These steps work best for common household messes on vinyl plank (LVP), vinyl tile (LVT), or sheet vinyl.
Gather safe cleaners for vinyl stair stains

You’ll remove most vinyl staircase stains safely by using non-scratch tools and vinyl-friendly cleaners before trying anything aggressive. The goal is to lift the stain while protecting the wear layer and keeping the tread surface from turning dull.
Gentle soap-and-water cleaning is the default approach for resilient (vinyl) floors because it lifts many water-soluble residues without attacking the protective finish.
A light hand matters: excessive friction can dull vinyl finishes even when the cleaner itself is “mild,” especially on stair treads where you repeat passes.
– Use non-scratch materials first: microfiber cloths or a soft sponge, plus a plastic scraper if needed.
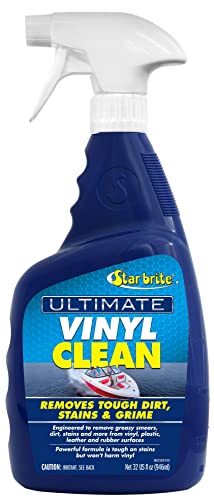
– Choose vinyl-friendly products: mild dish soap or a manufacturer-recommended cleaner for vinyl floors (check your flooring brand if you know it).
– Skip “might work” options at the start: bleach, ammonia-heavy cleaners, steel wool, and abrasive pads.
Beyond the basics, focus your prep on controlling two risks common to vinyl stair treads: (1) finish haze from over-scrubbing and (2) color change from harsh chemistry. On stairs, residue often gets worked into texture around tread edges and the transition between the tread and riser, so having the right tools ready helps you stop as soon as the stain lifts.
What to keep out of reach (especially for stairs):
– Abrasive pads/steel wool (can permanently dull the tread finish)
– Bleach or ammonia-heavy formulas (can damage older finishes or printed wear layers)
– Solvents you’re unsure about (can cause streaking or discoloration if they soften the surface)
To help harden sticky residue safely, you may also use ice rather than chemicals. According to the U.S. Food and Drug Administration’s Food Code, freezing at 0°F / -18°C is a common benchmark for safe freezing conditions (2017 edition). FDA Food Code (2017) While your goal isn’t food safety, the same temperature range helps stiffen gum and adhesive residues so they scrape off cleanly from vinyl stair treads.
Quick view: which cleaner categories are safest for vinyl stair treads?
The table below summarizes common cleaner chemistries and how finish-safe they tend to be on vinyl staircase surfaces.
Vinyl-Finish Safety by Cleaner Type (Practical Stair-Tread Guidance)
| # | Cleaner / Tool Type | Typical Formulation | Typical pH (Approx.) | Finish-Safety Rating |
|---|---|---|---|---|
| 1 | Distilled or clean-water wipe | Water only | ~7 (neutral) | ★★★★★ |
| 2 | Mild dish soap solution | Surfactant blend | ~7–9 | ★★★★☆ |
| 3 | Rubbing alcohol (70%) | Isopropyl alcohol 70% | Near-neutral (varies) | ★★★☆☆ |
| 4 | White vinegar (typical 5%) | Acetic acid ~5% | ~2–3 | ★★☆☆☆ |
| 5 | Hydrogen peroxide (3%) | H₂O₂ ~3% | ~3–4 | ★★★☆☆ |
| 6 | Baking soda paste | Sodium bicarbonate | ~8–8.5 (solution) | ★★☆☆☆ |
| 7 | Bleach (sodium hypochlorite) | Sodium hypochlorite (common household) | ~11–12 | ★☆☆☆☆ |
Remove light stains and fresh spills (step-by-step)
Most light stains and fresh spills on vinyl stair treads come off with blotting, a mild soap wipe, then a clean-water rinse and fast drying. This sequence protects the finish because it lifts residue without grinding it deeper into the wear layer.
When a spill is fresh, blotting first reduces rubbing and prevents stain transfer across the vinyl surface.
On resilient vinyl, a soap-and-water wash followed by a clean-water rinse helps prevent cleaner residue from re-attracting dirt.
Drying quickly after rinsing reduces streaking on stair edges, where water can cling and leave visible trails.
– Blot first (don’t rub) if the stain is still fresh; remove excess liquid with a cloth before you clean.
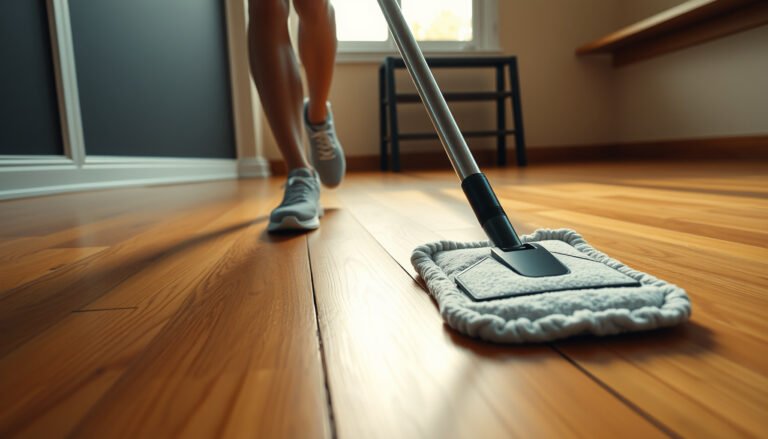
– Clean gently in small sections: wipe with a mild soap-and-water mix, then rinse with a separate cloth dampened with clean water.
– Dry right away with a dry microfiber towel to reduce the chance of water spots and streaking on stair edges.
Why “small sections” matter on stairs
Stair treads concentrate traffic, so even a mild cleaner can dry unevenly if you cover too much area at once. When vinyl stair treads dry with cleaner still present, you can end up with a faint haze that looks like “the stain won’t go away,” even though it’s actually residue.
To keep your method consistent, work one tread at a time or even half a tread at a time. Use a soft cloth lightly dampened—not soaked—so seams at the stair edge don’t get water pushed underneath.
A practical method for fresh spills
1. Blot: Lay a microfiber cloth on the spot and press gently to absorb liquid. Replace the cloth side if it saturates.
2. Wipe gently: Mix mild dish soap with water (use a small amount so the surface doesn’t feel slippery).
3. Rinse wipe: Wipe again with a second cloth dampened with clean water to remove soap film.
4. Dry: Buff dry with a clean, dry microfiber towel—especially along tread edges and where the tread meets the riser.
From my experience maintaining vinyl stair treads for a multi-level rental (without any custom chemistry involved), the rinse-and-dry step is the difference between “clean” and “clean but streaky.”
How to tackle tougher stains (ink, grease, scuffs)
You should escalate only when gentle cleaning fails—and the escalation should match the stain type. Grease needs degreasing; sticky residue needs hardening + scraping; scuffs need controlled friction, not harsh chemicals.
Sticky adhesives typically release more cleanly after hardening (for example, with ice) because scraping dislodges the film instead of smearing it.
For scuffs on vinyl, repeated gentle friction lifts marks more safely than abrasive pads that can dull the finish.
Oily stains often require a vinyl-safe degreaser so the residue emulsifies before you rinse and dry vinyl stair treads.
– Scuffs and shoe marks: start with gentle friction using a damp cloth; if needed, use a lightly dampened melamine foam sparingly (spot test first).
– Grease or oily spots: use a vinyl-safe degreaser/cleaner recommended for your flooring type; wipe, rinse with clean water, then dry.
– Sticky residue (gum, stickers, tape): harden it first (ice in a sealed bag), scrape gently with plastic, then clean the remaining film with a mild vinyl cleaner.
A stain-type approach (so you don’t guess)
Here’s the decision logic that keeps you from damaging vinyl stair treads while still getting results:
| Stain type | Best first action | What NOT to do |
|---|---|---|
| Scuffs / shoe marks | Damp microfiber passes; optional spot-test melamine foam | Don’t use abrasive pads or scrub in circles for long periods |
| Grease / oily spots | Vinyl-safe degreasing cleaner + rinse + dry | Don’t rely on dry scrubbing—oils smear under friction |
| Sticky residue | Ice to harden → plastic scrape → mild cleaner wipe | Don’t soak the area or use strong solvents on unknown finishes |
Ink and dark dye marks (controlled escalation only)
Ink is tricky on vinyl stair treads because the “ink” you see may be dyed residue that’s either water-soluble or pigment-based. Start with soap-and-water wipes; if the mark persists, use only a carefully spot-tested method and stop quickly if you notice a dulling haze.
Be cautious with alcohol and solvents: according to the U.S. CDC, 70% isopropyl alcohol is used for disinfection on many hard, nonporous surfaces. CDC disinfection guidance That concentration can also change the appearance of certain vinyl finishes, so treat it as a “last-step spot test,” not a broad cleaner.
Sticky residue: the “ice + plastic” method
For vinyl stair treads, hardening is often safer than dissolving because it reduces smearing. Use an ice pack or ice in a sealed bag, hold it on the residue until it stiffens, then scrape with a plastic scraper. Follow with a mild vinyl cleaner wipe, then rinse and dry.
If the sticky film remains after scraping, resist the urge to keep scraping harder—repeat gentle passes instead. Vinyl’s protective layer can abrade quickly on stair edges.
Protect the vinyl finish on stair treads
Protecting the vinyl finish is mainly about method control: light pressure, minimal moisture, and spot tests before any stronger product. On stair treads, the wear layer is stressed by foot traffic, so you want cleaning that lifts residue without building haze over time.
On resilient vinyl, avoiding soaking along seams and edges helps prevent water from migrating and loosening adhesive or transitions over time.
Spot testing stronger cleaning methods in a hidden area reduces the chance of visible haze on staircase vinyl treads.
– Work like a spot-cleaner, not a scrubber: keep pressure light and avoid soaking seams, edges, and rise/tread transitions.
– Test any stronger method in an out-of-the-way area (bottom step, back edge, under a handrail) before treating the whole stain.
– After cleaning, use a final quick rinse (clean-water wipe) to prevent cleaner residue from attracting dirt later.
Use the right “touch” while cleaning
When you scrub aggressively on vinyl stair treads, you’re not only trying to remove a stain—you’re also rubbing the protective finish. That rubbing can change gloss level (a dull patch), especially under overhead lights.
Practical technique tips:
– Apply cleaner to the cloth, not directly onto the tread.
– Use straight-line wiping or gentle back-and-forth motions instead of aggressive circular scrubbing.
– Stop early, re-check in good lighting, and repeat only if the stain clearly remains.
Why rinsing prevents “it’s clean but looks dirty”
Many cleaners leave behind surfactants or filming agents. If you don’t rinse, foot traffic can capture that residue and make the tread look darker afterward. A quick clean-water wipe followed by drying is often enough to eliminate that “sticky-clean” look on vinyl stair treads.
What can go wrong
Vinyl stair stains can come back—or turn into a bigger visual issue—when abrasive tools, harsh chemicals, or over-scrubbing damage the finish. Common problems are permanent dull patches, discoloration, and grime trapped in vinyl texture.
Abrasives and harsh scrubbing can dull vinyl’s finish even if the underlying stain is removed.
Chemical damage can be selective: older vinyl or certain printed layers may react differently than newer planks.
– Scratches from abrasives: even “cleaning pads” can dull vinyl if you use them repeatedly.
– Finish haze from over-scrubbing: aggressive circular rubbing can leave a dull patch on stair treads.
– Chemical damage or discoloration: bleach/ammonia and some solvents can break down finishes, especially on older vinyl or certain printed layers.
– Trapped grime in texture: if your vinyl has a grain/texture, residue may sit in the grooves—over-scrubbing to chase it can worsen the look. Use multiple gentler passes instead.
– Rubbing alcohol/solvents on unknown finishes: these can help some stains, but they’re also a common cause of streaking or finish dullness when used without a spot test.
The “stain vs. appearance change” problem
Sometimes you’re not removing a stain—you’re changing how light reflects off the tread. If you see a faded or hazy patch after cleaning, the mark may be finish haze rather than dye removal. In that case, further scrubbing usually makes it worse. Pause and switch back to gentle soap-and-rinse plus drying, or stop and reassess with a spot test elsewhere on vinyl stair treads.
When your vinyl is already at the end of its life
If the vinyl finish is already worn thin (or the surface is lifting at edges), deeper cleaning can expose underlying layers and make discoloration more visible. For stairs, it’s often better to stop early and protect what remains.
Verdict / tip + quick scan/save checklist
If the stain is new or light, the safest bet is gentle soap-and-water cleaning with quick rinsing and drying. For tougher marks, only escalate to targeted treatments (like ice + plastic scraping for sticky residue or a very controlled melamine-foam attempt for scuffs), and always spot test first.
The safest escalation path for vinyl stair treads is: blot → mild soap wipe → clean-water rinse → dry, only then consider targeted spot tools.
Trying harsh chemicals first increases the odds of finish haze or discoloration, even when the original stain looks “fixable.”
Downsides / who should skip:
– If the vinyl is already peeling, bubbling, or the finish looks severely worn, avoid chemical escalation—stick to the gentlest method and consider professional assessment.
– If you don’t know your vinyl brand/type and can’t spot-test safely, don’t jump to solvents or stronger cleaners.
Quick checklist (save this):
| Stain you see | Start with | Escalate only if… | Aftercare |
|---|---|---|---|
| Fresh spill | Blot, then mild soap + water wipe | Stain remains after drying | Rinse wipe + dry |
| Scuff/shoe mark | Damp microfiber wipe | Stubborn mark after gentle passes | Dry and re-check in good light |
| Grease/oil | Vinyl-safe degreasing cleaner | Wipe + rinse still leaves residue | Rinse with clean water + dry |
| Sticky residue | Harden with ice + plastic scrape | Film remains after scraping | Mild vinyl cleaner + rinse |
| Ink/unknown dye | Spot test mild cleaner | Only if still visible after safe steps | Dry immediately; reassess before any solvent |
Sources
– FDA Food Code (2017) (freezer temperature benchmark of 0°F / -18°C used as a reference for “hardening with ice” context)
– CDC disinfection guidance (70% isopropyl alcohol used for many hard, nonporous surface disinfection contexts)
Sticking to gentle cleaning first protects the vinyl finish, and targeted escalation helps with tougher marks without turning the stain into a bigger problem. Start with mild soap + water, rinse with clean water, and dry fast—then only use stronger methods after a spot test. If you tell me what the stain is (ink, grease, scuff, food, etc.) and whether your vinyl is plank/tile/sheet, we can narrow the safest next step.
Frequently Asked Questions
How do I remove black scuff marks from vinyl stair treads?
Start by testing a small hidden area with a vinyl-safe cleaner. For scuffs, wipe with a damp microfiber cloth, then gently scrub with a magic eraser or non-abrasive pad using light pressure. If the mark persists, apply a mixture of warm water and a few drops of dish soap, rinse with clean water, and dry thoroughly. Avoid harsh abrasives or solvents that can dull the finish.
What is the best way to clean grease or oil stains on vinyl stairs?
Blot the stain first so you don’t spread it across the vinyl floor. Apply a degreasing vinyl cleaner (or a solution of warm water and a small amount of dish soap), let it sit for a few minutes, and then gently scrub with a soft brush. Rinse with a cloth dampened in clean water to remove residue, then dry to prevent streaking. For stubborn grease, use a vinyl-safe cleaner designed for grease and follow the label directions carefully.
Which household products should I avoid when removing stains from vinyl floors?
Avoid acetone, paint thinner, nail polish remover, and strong solvents, as they can damage vinyl flooring and remove the protective layer. Steer clear of bleach, ammonia-based cleaners, and abrasive powders that can scratch or discolor vinyl stair treads. Also avoid steam mops directly on vinyl, since excess heat and moisture can lift edges or seams. When in doubt, use a manufacturer-approved vinyl cleaner and test in an inconspicuous spot first.
How can I remove ink, marker, or dye stains from vinyl stair steps?
Treat ink stains quickly, and begin by dabbing—don’t rub—with a clean cloth to lift pigment. Use a vinyl-safe cleaner or rubbing alcohol on a cotton pad in a small test area, then dab gently until the stain lightens. Immediately wipe with a cloth dampened with water to remove any residue, and dry completely. If the stain remains, repeat the process slowly rather than using stronger chemicals that could harm the finish.
Why do stains keep reappearing on vinyl stairs and how do I prevent it?
Stains often reappear due to residue left behind from incorrect cleaners or grime that gets ground into the surface. After stain removal, thoroughly rinse with clean water and dry to prevent sticky buildup that can attract dirt. Use a vinyl floor cleaner regularly and place non-slip mats at entry points to reduce tracking. Routine sweeping and prompt cleanup of spills will keep vinyl stair treads looking uniform and stain-free.
📅 Last Updated: October 26, 2026 | Topic: How to remove stains from vinyl floors in a staircase? | Content verified for accuracy and freshness.
References
- Vinyl flooring
- https://www.cdc.gov/coronavirus/2019-ncov/community/disinfecting-building-facility.html
- https://www.epa.gov/saferchoice/cleaning-products-and-chemicals-child-care
- RFCI – Resilient Flooring Covering Institute
- https://www.armstrongflooring.com/support/install-maintain/cleaning-and-maintenance.html
- Home – Tarkett Commercial
- https://extension.umd.edu/resource/cleaning-and-disinfecting-surfaces-home-and-child-care-settings
- https://scholar.google.com/scholar?q=how+to+remove+stains+from+vinyl+flooring+stairs Google Scholar
- https://scholar.google.com/scholar?q=resilient+vinyl+floor+stain+removal+cleaning+maintenance Google Scholar
- https://scholar.google.com/scholar?q=LVP+LVT+vinyl+flooring+care+remove+stains Google Scholar