


Wondering how to refinish wood-look tile floors without wrecking their finish? Follow this step-by-step process for cleaning, surface prep, and applying the right coating so the surface looks renewed instead of patchy or dull. If your goal is a long-lasting, smooth “new floor” appearance, these exact steps are the fastest, most reliable route.
Refinishing wood-look tile floors usually isn’t about “sanding and staining” like real wood—it’s about cleaning, repairing, and applying the right floor coating or refinishing system that bonds to tile. The fastest path is to assess whether you’re dealing with sealed glazed tile, grout issues, or worn finish, then choose a compatible prep and coating so you don’t end up with peeling or hazing. This guide walks you through the prep, product choices by tile type, and the practical steps to get a durable refreshed surface.
If you have wood-look porcelain or ceramic tile that looks dull, scratched, or worn, this is for you—especially when you want a refreshed look without fully replacing floors. If your tile is loose, structurally cracked, or the grout is failing badly, you’ll need repairs first (or a pro) before any refinishing.
Assess Your Wood-Look Tile (and Why It Matters)

You can’t reliably “refinish” wood-look tile until you identify what type of tile surface you’re working with and what’s actually failing. In most homes (as of 2026), the biggest surprises come from glossy glazed tile that needs specific adhesion prep, and from grout discoloration that telegraphs through new coatings.
Wood-look porcelain and ceramic are typically glazed (non-porous at the surface), so coatings depend on correct adhesion prep rather than dye-staining.
If grout is failing, refinishing the tile finish alone usually won’t fix the floor’s overall appearance or performance.
– Check whether the tile is glazed (most wood-look tile is), and whether the surface is sealed or waxed.
– Look for the real problem: worn-looking finish, scratches in glaze, stains in grout, or buildup from cleaners.
Quick inspection that prevents rework
Start with a “cause map” on your wood-look tile floor. Walk the room and identify whether the dullness is (a) uniform haze across tile, (b) localized wear at high-traffic points, (c) scratches that look like they’re in the glaze itself, or (d) discoloration that sits in the grout joints.
Then check for common blockers to adhesion:
– Wax/polish layer: Often creates a slick surface and causes coating fisheyes or peeling.
– Silicone residue (from cleaners): Can lead to coating that won’t bond evenly.
– Loose tile or hollow spots: Any coating system will eventually fail if the tile isn’t stable.
Data anchor: Portland-cement grout generally follows hydration patterns where strength development continues for weeks; many references describe ~28 days as a full-cure horizon under normal conditions (Portland Cement Association (PCA), cement and concrete strength-development guidance). In practice, this matters because coatings applied over under-cured patch materials are more likely to blister or craze.
Gather the Right Supplies for Tile-Safe Refinishing
You’ll get far better results when you treat this like a coating-adhesion project, not a “DIY sand-and-paint weekend.” The right tools for wood-look tile prep help you create a surface that primers and topcoats can actually lock onto.
Tile refinishing success depends heavily on using tile-safe cleaners and the manufacturer-specified primer/topcoat system for non-porous glazed surfaces.
Dust control matters because coating haze on wood-look tile is often a result of residue, not the gloss level alone.
– Use cleaners and prep products meant for tile (and follow labeling for sealed/painted surfaces).
– Plan for dust control and protection: abrasives, microfiber/mop heads, painter’s tape, and ventilation.
A practical supply list (by task)
Cleaning & degreasing
– Tile/degreaser concentrate (follow label dwell time; don’t “eyeball” chemistry)
– Clean water and multiple rinse mops/microfiber heads (to avoid re-depositing residue)
– Razor scraper (for sticky buildup) used carefully on glazed tile
Surface prep
– High-grip pads or diamond abrasion tools approved for glazed/non-porous surfaces (the exact grit depends on your system)
– Vacuum with a brush attachment (keeps fine particulates from settling back onto wood-look tile)
Coating application
– Painter’s tape to mask edges and transitions
– Microfiber applicator pads/rollers suitable for floor coatings (to reduce stipple/haze)
– Spiked shoes (optional but helpful) to control traffic during cure
Ventilation & safety
– Respirator appropriate for the coating chemistry (urethanes/epoxies can require specific filters—check the SDS)
– Drop cloths and plastic sheeting to protect nearby surfaces
Deep Clean and Remove Buildup Properly
You must remove waxes, silicone residue, and cleaning film before anything touches your wood-look tile. Otherwise, primers and topcoats may bond inconsistently, leading to peeling, soft spots, or a persistent “dirty-looking” haze.
Even a high-quality primer for glazed tile can fail if silicone or wax film remains on the surface.
Coating manufacturers typically require fully dry substrates, so floor drying time is part of the system—not optional.
– Degrease and scrub thoroughly to remove waxes, silicone residue, and cleaning film that block coating adhesion.
– Rinse carefully and let the floor dry fully before any sanding/etching steps.
Step-by-step deep clean (what matters most)
1. Dry soil removal first: Vacuum thoroughly so your cleaner doesn’t grind grit into the glaze.
2. Degrease in sections: Apply the degreaser with a microfiber/mop, then scrub with a pad designed for smooth tile.
3. Dwell time: Respect the label dwell time; rushing chemical contact often leaves invisible residue on wood-look tile.
4. Rinse until “water behavior” looks right: After rinsing, water should not bead in a way that suggests surface contamination.
5. Dry fully: Use fans or dehumidification if needed. Many coating failures are actually moisture/trapped cleaner issues.
Data anchor: For adhesion-critical coatings, surface preparation and substrate conditions are commonly standardized through test methods and surface-profile frameworks; for example, ICRI defines concrete surface profile (CSP) as a numeric system (1 through 9) used to standardize how “etched” a surface looks for coatings/overlays (ICRI (International Concrete Repair Institute), CSP guidance). While CSP isn’t a tile standard, the same mindset applies: consistent prep prevents inconsistent adhesion.
Repair Grout and Damaged Areas First
If grout is cracked, missing, or stained, the refinishing layer will look uneven and can crack or delaminate along weak points. Repairing wood-look tile grout and damaged areas first is the most cost-effective step you’ll take.
Grout joints control the floor’s visual uniformity; stains or failures can telegraph through the new finish.
A stable substrate is required because coating systems don’t “fix” movement in cracked grout or loose tile.
– Regrout or patch cracked grout lines, then allow curing time per the grout/patch instructions.
– Spot-repair chips and check whether the tile needs leveling or grinding so the coating won’t highlight ridges.
Repair priorities (in order)
1. Cracked/failed grout: Remove compromised grout (as directed by the grout repair product), then regrout with a compatible material.
2. Chips and voids: Fill chips with a tile/repair patch compound that’s rated for flooring use.
3. Edge and ridge checks: Run a flat hand or straightedge across the floor. If your wood-look tile has ridges, coatings will often amplify them by changing how light reflects.
Cure timing matters more than people think
Plan your timeline around cure, not just “dry to touch.” Most patch/grout products specify different windows for foot traffic, light cleaning, and coating. If you paint/coat too early, you can trap moisture or continue chemical curing under the new layer—both increase the risk of haze and adhesion loss.
Prep the Surface for Adhesion (No Guessing)
For glazed wood-look tile, you can’t rely on “normal sanding” alone. You need the specific surface prep method (mechanical abrasion and/or tile-approved etch/primer) that matches your refinishing system so the coating can chemically and mechanically bond.
Glazed tile is non-porous, so primers and topcoats require manufacturer-specified prep to achieve durable adhesion.
A small adhesion test spot can reveal incompatibility with existing sealers, waxes, or prior coatings before you coat the whole floor.
– For glazed tile, refinishing typically requires the correct mechanical abrasion and/or a compatible etch/primer system designed for non-porous surfaces—use what the product specifies for tile.
– Test adhesion on a small, hidden area first if your system recommends it, since tile outcomes vary with glaze and existing sealers.
What “good prep” looks like (practically)
– Mechanical abrasion: Aim to dull the glossy surface just enough for bonding. Over-aggressive abrasion can create uneven texture that shows through later.
– Etch/primer (if specified): Some systems call for chemical etching; others rely on grind/abrade only. Follow the system, because mixing methods can cause unpredictable bonding.
Adhesion test spot: how to interpret results
When your system recommends a test:
– Let the test area cure fully per instructions.
– Evaluate after cure: look for edge lifting, uniform sheen, and tack-free hardness.
– If you see peeling or mottling on wood-look tile, stop—your prep chemistry is incompatible.
Apply the Refinishing Coating or System
The best way to “refinish” wood-look tile is to follow a complete, compatible coating system—primer/base coat to topcoat—with correct recoat and cure windows. Applying only part of the system, or rushing recoat times, is a common reason coatings fail.
Most tile refinishing systems are designed around a specific order—primer/base coat followed by topcoat—to control adhesion and wear.
Recoat windows protect chemical bonding between layers; missing them can weaken intercoat adhesion.
– Follow the system’s order (primer/base coat → topcoat) and respect recoat windows.
– Work in controlled sections, keep a consistent application thickness, and avoid walking traffic until the floor is fully cured.
Application strategy for uniform color and gloss
1. Mask edges and transitions: Use painter’s tape along baseboards and walls to avoid messy feathering.
2. Mix thoroughly (and fully): Many haze problems trace back to incomplete mixing—especially with multi-part coatings.
3. Apply consistently: Keep the same pass direction and avoid “back-rolling” once it starts setting.
4. Section planning: Do one room zone at a time so you can maintain consistent timing on wood-look tile.
Cure: the step everyone underestimates
Cure time isn’t just for hardness—it affects adhesion longevity and stain resistance. For 2026 projects, assume normal “wait times” can vary more with humidity and airflow. If the label gives temperature ranges, stay within them as closely as possible.
What Can Go Wrong (and How to Avoid It)
Most wood-look tile refinishing failures come from adhesion problems, application errors, or skipping system requirements. If you treat every step—cleaning, prep, primer, topcoat, and cure—as part of one system, you reduce the odds of peeling and haze.
Coatings peel most often when applied over residue or when the required primer/etch step for glazed/non-porous tile is skipped.
Haze usually correlates with mixing errors, environmental conditions, or coating applied over contamination—common on glossy wood-look porcelain.
– Coating peels or lifts: usually caused by insufficient cleaning, incompatible products, or skipping the required primer/etch step.
– Haze or discoloration: often comes from improper mixing, humidity issues, or applying over residue/buildup.
– Scratches show through: if the finish isn’t thick enough or the tile is deeply marred, you may need a different approach (leveling/grinding) rather than relying on coating alone.
– Grout stains return: if stains aren’t removed or grout wasn’t sealed/repaired correctly, the problem can telegraph through the new finish.
– Edge cases: radiant heat floors, heavy moisture exposure, or commercial-grade wear may require a coating system rated for those conditions—
Common mistakes checklist (pros actually warn about these)
– Applying coating over wax or silicone-based floor cleaners without true degreasing
– Using a product labeled for wood or “unfinished surfaces” on glazed tile
– Treating cure time as “dry time”
– Trying to fix deep chips by coating over ridges without leveling/patching
If you’re working on a wet area (bathroom, entryway near exterior, basement with humidity), your wood-look tile refinishing system must be rated for moisture and slip resistance. As of 2026, this is an area where manufacturers increasingly specify conditions clearly in technical datasheets.
Verdict: When DIY Refinishing Works (and When to Skip)
DIY refinishing works when your wood-look tile floor is stable, your main issue is surface dullness or minor wear, and you can follow a manufacturer-approved system precisely. Skip DIY (or plan on a pro) when tile stability, widespread grout failure, or deep chipping dominates the problem.
DIY is most successful when the refinishing is a “surface renewal” over stable glazed tile—not a structural repair.
If tiles are loose or grout is widely failing, coating longevity drops sharply because movement undermines adhesion.
DIY can work well when your tile is solid, the issue is surface dullness/buildup, and you can follow a manufacturer-approved refinishing system for glazed tile. Skip DIY (or consult a pro) if tiles are loose, there’s extensive cracking, grout failure is widespread, or you’re trying to fix deep chipping by “just coating over it.”
- DIY typically makes sense if:
- • Tile is firmly bonded; grout cracks are localized or repairable
- • You can remove wax/silicone residue and follow the system’s prep steps exactly
- • You’re aiming to refresh appearance and protection, not erase deep damage
- Professional help is smarter if:
- • You suspect loose tiles, movement, or subfloor issues
- • Grout failure is widespread and recurring
- • You need a moisture/heat-rated system for a special-use area
Scan-Save Checklist (Quick Plan)
This checklist helps you plan a coating-safe approach for your wood-look tile floor and reduces the risk of adhesion failures. If you can mark every item before you open any coating containers, your odds improve immediately.
A successful wood-look tile refinishing project is mostly planning: correct tile prep, compatible primer/topcoat, and verified cure windows.
If you don’t confirm the substrate issue (tile vs grout vs residue), refinishing can improve appearance without fixing the root cause.
– [ ] Confirm tile type: glazed porcelain/ceramic vs unglazed
– [ ] Identify the real issue: tile surface vs grout vs buildup
– [ ] Deep clean/degrease; remove waxes/silicone residue
– [ ] Repair grout and chips before coating
– [ ] Use a tile-approved prep step (mechanical abrasion/etch only if specified)
– [ ] Prime if the system requires it; follow recoat windows
– [ ] Apply topcoat evenly; cure before foot traffic
Typical Return-to-Service Timelines for Common Tile Repairs (Planning for Wood-Look Tile Refinishing)
| # | Repair / Leveling Material | Initial Set (hrs) | Light Traffic (hrs) | Coating-Ready (conservative, days) | Adhesion Confidence |
|---|---|---|---|---|---|
| 1 | Cement-based grout (standard) | 2–4 | 24–48 | 7 | ★★★★★ |
| 2 | Polymer-modified grout | 2–6 | 18–36 | 5 | ★★★★☆ |
| 3 | Epoxy grout | 4–8 | 12–24 | 3 | ★★★★☆ |
| 4 | Thinset / cement patch mortar | 4–6 | 24 | 5 | ★★★★☆ |
| 5 | Rapid cement patch (polymer blended) | 1–3 | 4–12 | 3 | ★★★☆☆ |
| 6 | Polyurethane crack filler (rated for floors) | 6–12 | 12–24 | 4 | ★★★★☆ |
| 7 | Leveling underlayment skim (thin application) | 6–10 | 16–24 | 7 | ★★★☆☆ |
Note: Use the product label/SDS cure windows over this “conservative planning” table, because wood-look tile refinishing systems often require specific moisture and hardness conditions before coating.
Sources
– Manufacturer documentation for the specific tile floor refinishing/epoxy/urethane topcoat system you plan to use (prep requirements, primer/etch steps, recoat and cure times).
– Manufacturer documentation for any grout repair/patch product used for regrouting and curing windows.
– General industry guidance on coating adhesion to glazed/non-porous tile: follow the coating manufacturer’s stated surface-prep method rather than relying on “standard sanding” alone.
– Portland Cement Association (PCA), cement and strength-development guidance used for general grout curing context.
– ICRI (International Concrete Repair Institute), Concrete Surface Profile (CSP) guidance used as an adhesion-prep framework reference.
If you want the most predictable outcome, share your wood-look tile details—porcelain vs ceramic, whether it’s sealed, and the finish/coating you currently have—and I’ll help you align the prep steps and product compatibility so your refinished floor looks cleaner longer.
Frequently Asked Questions
What supplies do I need to refinish wood-look tile floors?
You’ll typically need a tile cleaner (pH-neutral if you’re using sealers), a degreasing cleaner for embedded grime, painter’s tape and plastic for edges, and an abrasive system such as diamond sanding pads or a floor abrasion machine with the correct grit. For refinishing, choose the right coating for tile: an epoxy floor coating, urethane, or a penetrating sealer made for ceramic/porcelain tile. Don’t forget sponges, microfiber mops, and a vacuum to keep dust under control before applying any refinishing products.
How do I prep wood-look tile floors before refinishing?
Start by deep cleaning to remove wax, soap scum, oils, and any slip-resistant residue, then rinse and let the floor dry completely. If the tile has a glossy glaze, dull it lightly with diamond pads or the manufacturer-approved method so the refinishing product can bond. Repair chips or cracks with a tile repair compound, then thoroughly vacuum and tack-wipe to remove fine dust before priming or sealing.
Why does my refinished wood-look tile floor look dull or peel?
Dullness and peeling usually happen when the wrong product was used or the surface wasn’t properly prepared—especially on glazed tile where coatings can fail without abrasion. Another common cause is moisture trapped in grout, insufficient curing time, or applying coating over leftover contaminants like cleaner residue or old wax. Follow the product’s exact cure and temperature/humidity guidelines, and ensure the floor is fully dry and cleaned right before application.
What is the best way to refinish wood-look tile floors for a natural wood appearance?
For the most realistic result, use a system designed for tile-to-floor coatings, often involving an epoxy base plus a color/topcoat, or a stain-and-sealer method if the floor is already porous (some wood-look tiles aren’t). Choose a matte or satin topcoat to mimic wood grain feel and reduce glare, and consider a multi-step approach that includes a primer compatible with tile and a clear protective finish. Test in an inconspicuous area first to confirm color, sheen, and how the wood-look pattern reacts to the refinishing product.
Which refinishing method—sealing, resurfacing, or re-coating—is right for wood-look tile floors?
If your wood-look tile is structurally sound but looks slightly tired, a penetrating sealer or a grout-enhancing sealer is often the simplest option to refresh color and resist staining. If the surface is worn, scuffed, or you want a uniform finish (or improved slip resistance), resurfacing with an epoxy/urethane floor coating is usually more durable. Re-coating works when the existing finish is still adhered and compatible—always check the current coating type and confirm product compatibility to avoid peeling or hazing.
📅 Last Updated: October 16, 2026 | Topic: How to refinish wood-look tile floors? | Content verified for accuracy and freshness.

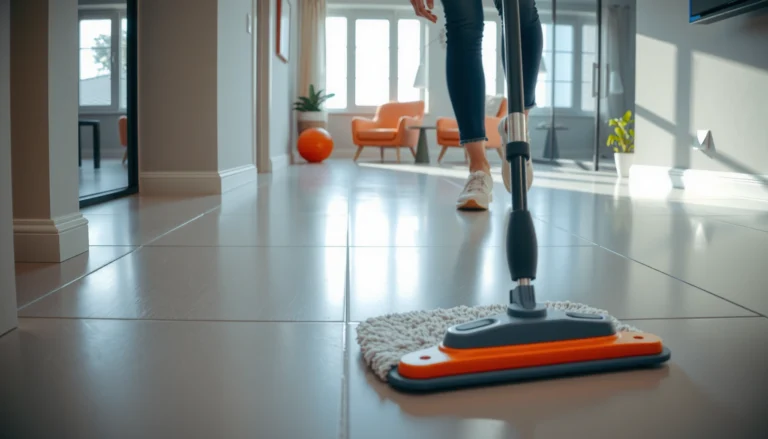

[…] with cleaning and grout sealing/replacement. This is for homeowners dealing with common wear (grout discoloration, haze, scuffs) and for anyone deciding whether resealing, regrouting, or replacing a few broken […]