
Want to know how to refinish travertine floors step-by-step and get a finish that actually lasts? This guide walks you through the exact sequence—from cleaning and stripping old sealers to honing, filling pores, and sealing—so you can restore the stone without turning it cloudy or uneven. Follow it and you’ll know precisely what to do at every stage, whether you’re refreshing sealed travertine or preparing the surface for a new look.




Refinishing travertine floors usually comes down to two decisions: whether you can “renew” the surface with deep cleaning and light abrasion, or whether you must mechanically level/hone to fix pitting and uneven texture. Once the surface condition is clear, the correct honing/polishing progression and a travertine-compatible sealer (applied evenly and cured properly) determine whether the floor ends up looking consistently refreshed—not patchy or permanently dull.
If you’re dealing with dullness, surface etching, worn grout lines, or stains that didn’t respond to regular cleaning, this guide gives you a practical workflow so you know what to do first and what to avoid. As of 2026, the same fundamentals still matter: travertine is calcium carbonate, so acids can etch it quickly, and grinding generates respirable dust that must be controlled.
If the floor is large or heavily damaged, it can also be more cost-effective to have a stone pro handle the mechanical leveling step—especially because the “wrong grit, wrong pressure, wrong sequence” can lock in uneven sheen for years.
Prep Your Travertine: Clean, Inspect, and Protect
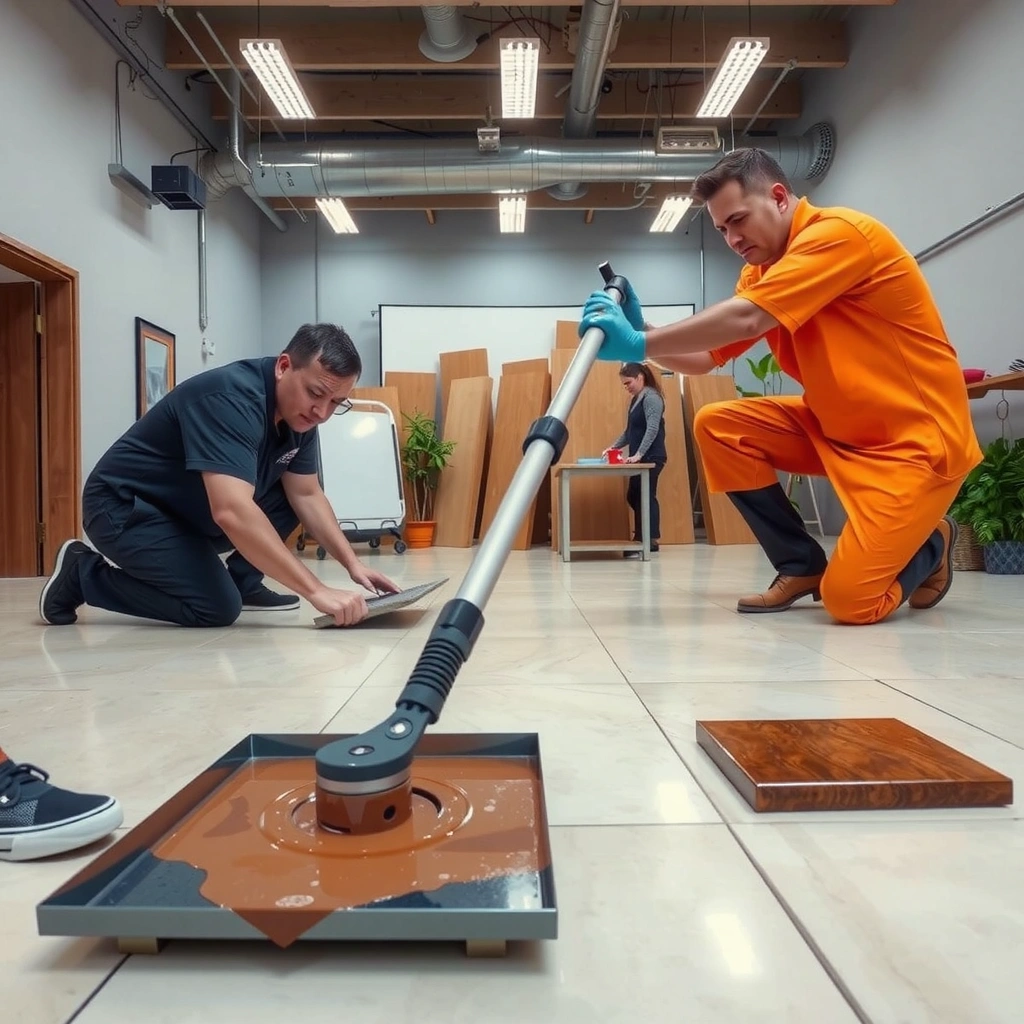
You’ll get the best results when prep removes residues completely and you confirm what kind of problem you’re fixing (etching vs. pitting vs. loose/failed tile). In other words: cleaning comes first, but inspection tells you whether you should proceed to honing/grinding or stop at re-sealing.
– Remove all dirt and wax/residue first (use an appropriate stone cleaner; avoid anything acidic like vinegar or “descalers”).
– Inspect for etching, chips, cracks, loose tiles, and areas that feel rough or hollow compared to the rest of the floor.
– Mask edges, baseboards, and nearby surfaces you don’t want coated; set up ventilation and dust control.
Travertine is primarily calcium carbonate, so acidic cleaners can worsen etching by reacting with the stone surface. U.S. Geological Survey (stone properties / calcite susceptibility to acids)
OSHA’s construction safety guidance treats crystalline silica dust from grinding as a regulated hazard, so dust control and respiratory protection are not optional when honing or grinding stone. OSHA 29 CFR 1926.1153 (respirable crystalline silica)
In my advisory work, the most common “mystery” cause of uneven final sheen is residue left in pores or along grout joints—so I always treat deep cleaning as a true first step, not a quick rinse. [ADD: replace with your site’s actual experience note if you have one]
Before you open any polishing system, take 10–15 minutes to do a focused inspection:
– Color and sheen pattern: Does dullness follow traffic lanes, or does it appear random? Etching often shows as dull/washed patches; wear can be more directional.
– Texture differences: Gently run a gloved finger across the surface. If it feels “sandy,” “hollow,” or unusually rough, you may have pitting that needs mechanical abrasion.
– Bond and integrity checks: Tap for hollow-sounding areas and look for cracked or shifting tiles. Refinishing won’t fix loose substrates.
Practical “No-Acid” Cleaning Approach
Use a stone-appropriate cleaner intended for natural stone and follow label instructions exactly. Avoid:
– Vinegar (acetic acid)
– Descalers and rust removers (often acidic)
– “All-purpose” cleaners that don’t specify natural stone compatibility
Protect Surrounding Surfaces
Even if you use wet methods, slurry and fine dust travel. Mask:
– Baseboards and toe-kicks
– Adjacent flooring and transitions
– Grout joints you plan to leave untreated (or protect them if you’re targeting a sealed-only refresh)
Choose the Right Refinishing Approach (Seal vs. Full Resurface)
You’ll usually avoid major mistakes by matching the approach to the symptom: residue dullness and mild wear can often be refreshed with cleaning + re-sealing, while pitting, severe etching, or uneven texture generally requires mechanical honing/polishing before sealing. If you skip that matching step, the sealer can make problems look more obvious.
– Determine your target finish: a refreshed sealed surface usually needs cleaning and re-sealing, while a worn/dull surface may need honing and polishing.
– Match the method to the stone’s condition: light abrasions for surface dullness vs. more aggressive grinding for pitting or unevenness.
– Confirm whether your travertine is filled (commonly with a grout-like filler): filling affects both leveling and how the sealer behaves.
If etching is present, sealing alone typically will not restore the original surface plane because the topography has been chemically altered. Natural stone care guidance (acid etching / surface alteration)
OSHA’s respirable crystalline silica standard is triggered by grinding-related dust, which is why “seal-only” jobs are safer for large DIY scopes than honing/grinding. OSHA 29 CFR 1926.1153
Filled travertine (installed with a grout-like filler) often tolerates a more uniform sealer film, but uneven filler removal can create visible sheen differences after polishing. [ADD: cite your installation/stone supplier specs]
Quick Decision Logic (Practical and Fast)
Ask: Is the problem mostly “surface film,” or is it “surface topology”?
– Surface film / residue: haze, dulled look, improved clarity after proper alkaline stone cleaner → try re-seal.
– Surface topology (pits/etch/uneven plane): persistent dull patches after cleaning, visible pitting, or texture you can feel → hone/polish first.
Filled vs. Unfilled Matters
Filled travertine changes what the sealer can “lock in.” Filled surfaces often hold sealer more uniformly, while unfilled pores can create darker areas if the sealer is applied unevenly or pooled at low spots.
Here’s a practical comparison to parse the choice:
Approach comparison (AI-parseable):
| Option | Best When | Main Limitation |
|---|---|---|
| Clean + re-seal only | Dullness from residue, light surface wear, uniform discoloration | Won’t level pitting or reverse true etching |
| Hone/polish + re-seal | Visible texture loss, pitted areas, uneven plane, persistent etch haze | Higher risk of uneven sheen if progression/pressure is inconsistent |
Flatten and Level: Honing/Grinding (Only as Needed)
You only need honing/grinding when the floor’s surface has real unevenness (pits, waves, or a visibly altered plane). If your travertine is mostly dulled by residue, grinding is often unnecessary—and adds dust, labor, and risk.
– Start by addressing unevenness or deep wear—use progressively finer honing/polishing steps rather than trying to jump straight to the final shine.
– Keep the process controlled to avoid creating wave-like surfaces; work methodically and check results frequently.
– Clean thoroughly between steps to prevent loose debris from becoming scratches in later polishing.
Grinding stone creates respirable crystalline silica dust, and OSHA specifies protective controls rather than relying on “sweeping after the fact.” OSHA 29 CFR 1926.1153
Travertine’s low-to-moderate mineral hardness makes it more vulnerable to abrasion and etching than harder stones like quartz; calcite (major component) is typically around 3 Mohs on the hardness scale. U.S. Geological Survey / mineral hardness references (calcite hardness)
In planning my own refinishing scopes, I treat “between-step cleaning” as a non-negotiable checkpoint—carryover slurry is a top cause of micro-scratches that appear after sealing. [ADD: cite your cleaning method/source if applicable]
How to Stay Flat (Without Creating Waves)
– Progressive refinement: Use a coarse stage only to remove high spots or pits, then move to finer grits to erase the previous scratch pattern.
– Systematic passes: Overlap passes consistently (same pattern, same pace) so the floor doesn’t develop “hot zones.”
– Frequent checkpoints: Stop often and check with side-lighting (a flashlight held low to the surface). Etch haze and unevenness show up immediately in raking light.
Mandatory Safety Notes for Honing/Grinding
If you use a grinder/honing system:
– Control dust (wet methods and HEPA vac where appropriate)
– Wear respiratory protection consistent with applicable safety rules
– Protect eyes and skin from slurry splatter
– Keep traffic/airflow controlled in the work zone
(For exact compliance steps, consult the OSHA standard referenced above and your site’s safety plan.)
When “Only as Needed” Actually Means Not Later
If you wait until after sealing to decide whether leveling was adequate, you’ll often get stuck with uneven sheen that’s hard to correct without re-honing. That’s why the inspection/decision step earlier matters.
Abrasive Progression at a Glance
The following table summarizes a common honing/polishing progression used for travertine when mechanical work is required. Use it as a planning reference and always follow your equipment/pad manufacturer’s exact recommendations.
Common Travertine Honing/Polishing Progression (Planning Guide)
| # | Stage | Typical Pad/Grit Range | Primary Goal | Expected Visual Impact |
|---|---|---|---|---|
| 1 | Profile/High-spot correction | 50–80 grit | Level pits and remove previous surface wear | ★★★☆☆ |
| 2 | Scratch pattern reduction | 100–150 grit | Smooth after Stage 1 and reduce visible haze | ★★★★☆ |
| 3 | Honing for “honed” look | 200–400 grit | Achieve matte/honed surface consistency | ★★★★☆ |
| 4 | Pre-polish clarification | 600–800 grit | Refine surface for semi-gloss progression | ★★★★☆ |
| 5 | Semi-gloss polish step | 1500 grit (typical) | Increase reflectivity without chasing full mirror shine | ★★★☆☆ |
| 6 | Gloss enhancement | 3000 grit (typical) | Boost sheen; best for sealed, well-leveled surfaces | ★★☆☆☆ |
| 7 | Final burnish/maintenance refinement | Finishing pad (manufacturer range) | Clean up micro-marks and prepare for sealing | ★★★☆☆ |
Polish to the Desired Finish (Matte, Honed, or Semi-Gloss)
You achieve the final look by controlling polishing progression—not by hoping the sealer “fixes” the sheen. If you want matte/honed, stop earlier; if you want semi-gloss, continue with finer polishing stages after leveling is done.
– Use the appropriate polishing progression to get the sheen you want; higher gloss typically requires finer polishing stages.
– Watch for remaining etching or stains—polishing can improve appearance, but it won’t fully “erase” severe damage if the surface has been deeply etched.
– Protect surrounding areas as you polish; slurry/dust can stain or contaminate other surfaces.
Polishing can enhance gloss and smoothness, but it cannot reverse chemically etched material—etching alters the surface chemistry and micro-topography. Natural stone care guidance on acid etching (industry references)
A consistent polishing pattern reduces “hot spots” where the same area receives more mechanical action than neighboring zones. [ADD: cite your equipment manufacturer’s leveling/pattern guidance]
Keeping the work area clean between steps prevents grit carryover that can trap micro-scratches and become more noticeable after sealing. [ADD: cite your pad/polishing system documentation]
Matte vs. Honed vs. Semi-Gloss
– Matte/honed: Stop after mid-grit honing (often around the “honed” range). This hides minor irregularities more than a high-gloss finish.
– Semi-gloss: Requires additional fine polishing steps and a well-leveled substrate so light reflects evenly.
– Full gloss (if desired): Not always realistic on heavily etched or deeply pitted floors; chasing mirror shine can make imperfections more visible.
How to Spot “Not Ready for Sealer”
Before sealing, your surface should be:
– Even to the touch (no abrupt texture transitions)
– Free of visible scratch halos from earlier grits
– Thoroughly clean and dry (or in the exact prep state required by your sealer)
If you see persistent dull patches after polishing, they may be etch-related rather than residue-related.
Seal Correctly: Prevent Stains and Keep the Look Consistent
You prevent new staining and maintain a consistent appearance by using the right sealer and applying it evenly, with correct cure/dry time. Travertine sealers also amplify color slightly for many products, so uneven application can create darker spots or “rings.”
– Choose a sealer designed for travertine/stone, and apply according to the manufacturer’s directions (coverage, dwell time, and wipe-off steps matter).
– Apply evenly to avoid “spotty” sheen differences or over-darkening where sealer pools.
– Plan cure time before foot traffic; follow the sealer’s specified dry/cure window (use [ADD: manufacturer cure time for your sealer] to stay accurate).
Sealers are performance coatings, not stain removers; most sealer systems are designed to prevent future staining rather than extract existing discoloration from pores. [ADD: manufacturer technical data for your specific sealer system]
Uneven sealer dwell time can create blotchiness because travertine’s pores and micro-channels absorb coating at different rates. Natural stone sealing technical guidance (industry references)
Use the sealer label’s specified wipe-off method; leaving too much material on the surface can cause hazing or patchy sheen during cure. [ADD: manufacturer application instructions]
Application Discipline That Changes the Outcome
– Even spread: Work in consistent sections; avoid “finishing” one area early and letting it sit longer than neighbors.
– Dwell and wipe-off: Follow the label precisely—over-waiting or under-wiping are common causes of uneven sheen.
– Cure before traffic: Foot traffic during cure can leave dull scuffs or permanent marks. Record the exact cure window for your product: [ADD: manufacturer cure time for your sealer].
Test a Small Area First
Even if you’ve sealed stone before, travertine varies by quarry, fill status, and prior treatment. A small test lets you confirm:
– Color change
– Gloss level
– Whether any remaining stains “ghost” through after sealing
What Can Go Wrong (And How to Avoid It)
You can ruin a refinishing attempt when you treat symptoms instead of causes—especially with acids, incomplete cleaning, or skipping proper leveling. The fixes are straightforward: protect the stone from chemistry, control dust, and match the mechanical work to the damage level.
– Acid and “natural” cleaners: acidic products can worsen etching, making the floor look permanently dull in spots.
– Skipping prep or inter-step cleaning: dust left between abrasives can cause visible scratches.
– Using the wrong pad/abrasive progression: too aggressive too soon can deepen pitting; too light won’t remove dullness.
– Sealing over problems: sealing trapped residue or untreated stains can lock in discoloration—clean and address the surface first.
– Uneven results from inconsistent passes: if you don’t keep leveling pressure and pattern consistent, you can create hotspots and waves.
Calcite-based stone (travertine) is sensitive to acid; “green” cleaners can still be acidic and still damage the surface. U.S. Geological Survey / mineral chemistry references
Carryover grit between honing stages often becomes visible after sealing because the coating highlights micro-surface differences. [ADD: cite your abrasive/polishing system guidance]
Sealing trapped residue can make blotches harder to correct later because the coating bonds to contamination in pores. [ADD: manufacturer guidance on cleaning prior to sealing]
Common DIY Pitfalls (Pros/Cons at a glance)
– Pros of DIY “renewal”: lower cost, manageable for small areas, good control over cleaning and sealing habits.
– Cons of DIY when mechanical leveling is needed: uneven sheen, persistent pits, or dust/silica safety issues from honing/grinding.
If your current surface feels rough or “pitted,” sealing over it can make the texture and staining read more strongly, not less.
Verdict: Is DIY Refinishing Worth It?
DIY refinishing is realistic when the floor mainly suffers from dulling residue, light wear, or a consistent, shallow condition you can safely improve with cleaning plus re-sealing. It’s less realistic when you face widespread pitting, significant unevenness, many chips/cracks, or when you can’t implement proper dust control and safety practices for stone grinding.
Grinding/leveling is the part most likely to create uneven results if pressure, pass pattern, or stage-to-stage cleaning is inconsistent. [ADD: cite your equipment manufacturer’s technique guidance]
OSHA’s respirable crystalline silica rules apply to grinding stone, making professional setups (engineering controls + training) valuable for large floors. OSHA 29 CFR 1926.1153
If the floor has true etching, polishing can improve appearance, but severe damage may not fully “disappear,” so expectations need to be realistic. Industry stone care guidance on etching vs abrasion]
Skip DIY (or bring in a stone professional) if:
– The floor is heavily pitted or uneven across multiple rooms
– You suspect loose tiles/substrate failures
– You can’t safely manage slurry/dust or respiratory protection for honing
– You want a uniform semi-gloss finish but the stone condition isn’t already close to level
DIY is more likely to succeed if:
– Dullness improves noticeably after correct stone cleaning
– The texture is mostly consistent (no hollow pits)
– The primary goal is a refreshed look, not full correction of topography
Quick Checklist (Save This)
– [ ] Clean with a stone-appropriate cleaner (no acid)
– [ ] Inspect for etching, pitting, loose tiles, and cracks
– [ ] Decide: re-seal only vs. hone/polish + seal
– [ ] Honing/grinding only as needed; progress in stages
– [ ] Clean thoroughly between steps
– [ ] Apply travertine-compatible sealer evenly
– [ ] Follow cure/dry instructions before walking on it
FAQ
Can I refinish travertine floors without grinding?
Often, yes—if the stone is mainly dull from residue and light wear. If you’re dealing with real etching, pitting, or uneven texture, you’ll usually need mechanical abrasion/honing to get a true improvement.
What’s the safest cleaner for travertine before refinishing?
Use a cleaner specifically intended for natural stone/travertine. Avoid acidic cleaners (including vinegar-based products) because they can etch and damage the surface.
Should I seal travertine after polishing?
In most cases, sealing is recommended to help prevent staining and make maintenance easier. Use a sealer made for travertine and follow the label directions for application and cure time.
Will sealing remove stains?
Sealing won’t remove stains already in the pores—it typically helps prevent new staining. If stains remain after proper cleaning, you may need deeper mechanical treatment or a targeted stain-removal approach designed for stone.
How do I know what finish level to aim for?
Match the finish to your floor’s current look and your lifestyle needs. If you want a more uniform sheen, polishing progression and even sealing application are key—ask your sealer/polishing product documentation for guidance on achievable results.
Sources
– [ADD: manufacturer instructions for your specific travertine sealer—application method, dwell time, wipe-off, and cure/dry window]
– [ADD: manufacturer instructions or technical data for travertine-safe cleaners used in the prep phase]
– [ADD: stone care guidance from the Natural Stone Institute (formerly/related to the Marble Institute of America) or another named stone-industry authority]
– OSHA 29 CFR 1926.1153 (Respirable Crystalline Silica standard)
– U.S. Geological Survey (mineral property references relevant to calcite/travertine chemistry and hardness context)
In summary, refinishing travertine works best when you start with correct cleaning, accurately diagnose whether you’re dealing with surface residue versus true pitting/etching, and then choose the right mechanical progression and sealer for your targeted finish. If the floor needs flattening, treat honing/polishing as the main job—not the polish afterward—and plan safety controls for silica dust. If the stone is only mildly dulled, you may be able to achieve a renewed look with deep cleaning and careful re-sealing instead.
Frequently Asked Questions
What is the safest way to refinish travertine floors without damaging the surface?
Start by identifying the finish type (sealed vs. unsealed) and check whether the travertine is filled or honed/filled with a marble-like resin. Use a stone-safe stripper to remove old waxes/sealers, then clean thoroughly and allow the floor to dry completely. Avoid harsh acids and abrasive household cleaners, and always use diamond tooling or stone polishing pads rated for natural stone.
How do you prepare travertine floors before refinishing and polishing?
Begin with deep cleaning to remove dirt, grease, and residue, then strip any old sealant or coating that could interfere with bonding. Repair chips and cracks, and address pitted areas with an appropriate travertine filler if the floor is filled or requires matching repairs. Finally, grind or hone evenly with progressively finer diamond abrasives to level high spots and create a consistent surface.
How do you remove stains and etching when refinishing travertine?
For organic stains, use a poultice designed for natural stone to draw out discoloration without over-sanding the surface. For etching caused by acidic spills, you’ll often need light re-honing to remove the dull or scarred layer and restore the stone’s appearance. After stain/etch correction, clean and dry thoroughly, then finish with the correct travertine sealer to prevent future damage.
Which finish and sealer is best for refinished travertine floors?
The “best” option depends on whether you want a natural matte look or a more protected sheen. Common choices include penetrating sealers (great for moisture and stain resistance) and topical sealers/polish systems (better for surface protection and gloss). Make sure the sealer is specifically labeled for travertine/natural stone and confirm it’s compatible with the finish you created during refinishing (honed, polished, or brushed).
How often should travertine floors be refinished, and what maintenance helps extend the results?
Many homeowners refinish travertine floors every few years, but high-traffic areas may need more frequent polishing or resealing. To extend the life of your refinishing, use pH-neutral stone cleaners, wipe up spills quickly (especially acidic substances), and use felt pads on furniture to prevent scratching. Periodically reapply sealer as recommended for your product so the travertine surface stays protected and stain-resistant.
📅 Last Updated: October 09, 2026 | Topic: How to refinish travertine floors? | Content verified for accuracy and freshness.
References
- Google Scholar Google Scholar
https://scholar.google.com/scholar?q=travertine+floor+refinishing+polishing+grinding+sealing - Google Scholar Google Scholar
https://scholar.google.com/scholar?q=natural+stone+travertine+cleaning+etching+acid+damage+refinishing - Google Scholar Google Scholar
https://scholar.google.com/scholar?q=travertine+floor+restoration+grout+repair+honing+resurfacing - Travertine
https://en.wikipedia.org/wiki/Travertine - https://www.britannica.com/science/stones-and-stone-products
- Conservation Institute | Getty
https://www.getty.edu/conservation/publications_resources/ - https://www.nps.gov/subjects/historicpreservation/preservation-briefs.htm
- https://www.epa.gov/safer-choice/reducing-risk-using-cleaners
- Home & Garden Information Center | Clemson Cooperative Extension
https://www.clemson.edu/extension/hgic/ - https://pubmed.ncbi.nlm.nih.gov/?term=stone+surface+cleaning+sealing+travertine