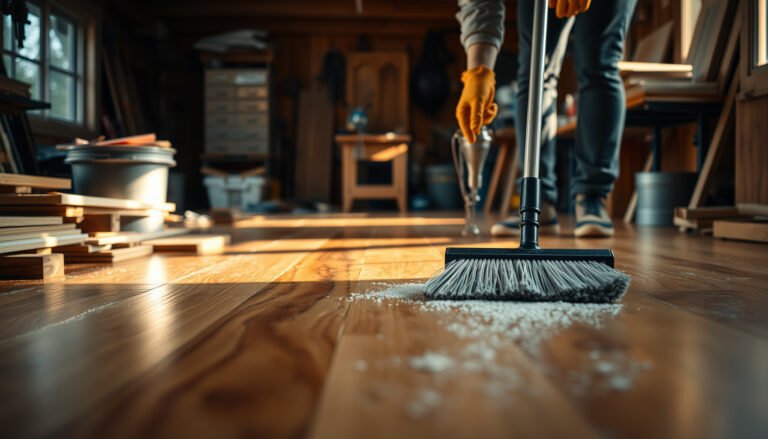
To prevent scratches on engineered wood floors in a basement, the fastest, most effective strategy is to control abrasive grit and protect high-wear zones before damage starts. Follow a proven setup—use entry mats, add felt pads under furniture, and keep basement humidity stable—then apply the right floor-protection steps for your traffic level. If you do these in the right order, you’ll significantly reduce scuffing and keep the finish looking new longer.




Prevent scratches on engineered wood floors in a basement by stopping grit at the door, using proper floor protectors anywhere items slide or roll, and maintaining a gentle cleaning routine that removes abrasive dust before it gets ground into the finish. Because basements often have more tracked debris, drier conditions in summer, and occasional moisture swings, the key is to treat “scratch prevention” as grit control plus surface protection—not just routine mopping.
If your basement traffic is higher than you think (laundry loads, tools, bikes, kids/pets), scratches usually come from tiny debris you track in—not from “normal wear” alone. This guide focuses on practical prevention steps that work with most engineered wood finishes, and it also calls out basement-specific issues that can make damage easier.
Build a “no-grit” entry zone

A basement entry setup that captures dust before it reaches the wood surface is one of the highest-impact scratch-prevention steps. The goal is simple: reduce the amount of hard, gritty particles that reach the floor finish, especially where shoes first land.
According to the U.S. EPA, PM10 particles are 10 micrometers or smaller, which is small enough to ride along shoe treads and settle on floors before sweeping happens. U.S. Environmental Protection Agency (EPA), particulate matter definitions (PM10)
Quartz (a common component of soil and mineral grit) is about Mohs hardness 7, which is hard enough to abrade many wood finishes when tiny particles are ground underfoot. U.S. Geological Survey (USGS), Mohs hardness information for quartz
Turn the doorway into a filter (not just a mat)
A true “no-grit” zone uses two stages: one outside/at the steps to catch the bulk, and one immediately inside so the second set of footprints doesn’t drag the remaining fines across your engineered wood. This is especially important in basements because laundry day, home projects, and seasonal traffic tend to increase both frequency and variety of tracked particles.
– Put a durable doormat outside/at the bottom of steps and a second mat inside (so shoes get cleaned twice).
– Rotate/clean mats regularly so they don’t become a grit source themselves.
– Encourage “no shoes on floor” at least in the areas that get most foot traffic.
Practical details that matter: Aim for mats that can be vacuumed easily or shaken out without shedding. If your inner mat “packs down” with dirt, treat that as a sign it has become abrasive—clean it more often or replace it. From a usability standpoint, placing the inner mat where people naturally step (near the first “turn” after entering) improves compliance, which improves scratch prevention.
Protect the transition points
Engineered wood scratches tend to show up first at edges and transitions—stairs landings, door swings, and the first 6–10 feet of open floor where foot traffic repeats. Make sure your entry mats extend past the main path, not just under the doormat silhouette.
Keep abrasive debris from grinding in
If you stop abrasive dust from being ground into the finish, you prevent the early-stage dulling and micro-scratching that later becomes visible wear. The best approach is frequent, soft cleaning plus fast spill response so residues don’t turn into “grit glue.”
Fine mineral dust in the PM2.5 range is 2.5 micrometers or smaller per U.S. EPA definitions, and such particles can be hard to see but still contribute to abrasive wear. U.S. Environmental Protection Agency (EPA), particulate matter definitions (PM2.5)
Sand and coarse grit grains fall well above “fine dust” sizes; ASTM grain-size scales typically treat “sand-sized” particles as roughly 0.0625 mm to 2 mm, which are capable of producing noticeable abrasion if tracked onto floors. ASTM International grain-size terminology (sand size range)
Use the right vacuum technique (and attachments)
Dry removal works best when it’s gentle and frequent. A vacuum with the wrong head can re-distribute debris instead of collecting it, turning normal footfall into an abrasive polishing action.
– Sweep/vacuum often using a soft brush attachment or a vacuum head designed for hard floors (avoid beater bars).
– Clean up spills promptly—dried residue can trap particles that later scratch during foot traffic.
– Avoid harsh scrubbers; if you’re mopping, use a damp (not wet) method recommended for your specific finish.
Why “soft” matters: Engineered wood wears at the surface layer and finish system. Abrasive particles—especially mineral grit—accelerate wear because they act like embedded sandpaper. The gentlest practice is consistent: vacuum/sweep daily in high-traffic periods (laundry/tool seasons) and then adjust based on real basement usage.
Basement-specific cleaning considerations (as of 2025)
Basements can have seasonal humidity changes that influence how dust adheres to surfaces. If your basement alternates between drier and more humid conditions, dust can be more “mobile” during dry spells and more “sticky” during humid periods, which increases the odds that particles accumulate in traffic lanes.
– If you see a dull, gritty film after foot traffic, treat it as abrasive buildup—not “finish haze”—and switch to more frequent dry removal.
– When cleaning, use the manufacturer-approved cleaner and dilution method for engineered wood. If your floor finish calls for neutral pH cleaners, stay within that guidance.
One data-backed way to prioritize what to stop
Most basement scratch events trace back to hard mineral grit. Below is a practical way to think about scratch risk based on common mineral hardness values—use it to justify your focus on mats, vacuum settings, and fast cleanup.
Abrasive basement grit risk by common tracked minerals (Mohs-based)
| # | Tracked mineral / debris type (basement common) | Typical size class that can track in | Mohs hardness | Mohs-based abrasive potential | Scratch risk (relative) |
|---|---|---|---|---|---|
| 1 | Quartz / silica soil grit | PM10 (≤10 µm) to sand (≈62.5–2000 µm) | ~7 | ★★★★★ | High |
| 2 | Feldspar dust (from masonry/concrete) | PM10 (≤10 µm) to sand (≈62.5–2000 µm) | ~6 | ★★★★☆ | High–Med |
| 3 | Iron oxides (rusty soil/metal dust) | PM2.5 (≤2.5 µm) to PM10 (≤10 µm) | ~5–6.5 (typical) | ★★★☆☆ | Medium |
| 4 | Calcite (some dusts and drywall fillers) | PM10 (≤10 µm) and fine dust | ~3 | ★★☆☆☆ | Low–Med |
| 5 | Gypsum (common in drywall compound) | PM10 (≤10 µm) and fine dust | ~2 | ★☆☆☆☆ | Low |
| 6 | Talc (some powdery dusts) | Fine dust (PM10 and below) | ~1 | ☆☆☆☆☆ | Very low |
| 7 | Dry soil organic fines (varies; abrasiveness usually comes from minerals mixed in) | Often PM2.5–PM10 (≤10 µm) | Organic matrix is soft; embedded minerals drive abrasion | ★–★★☆☆☆ | Low–Med (depends on mix) |
(This table is meant for prioritization: higher Mohs minerals are more likely to abrade finishes when they’re repeatedly ground underfoot.)
Protect furniture and anything that moves
You prevent most “mystery scratches” by eliminating sliding and impact contact from furniture, chairs, and rolling items. In basements, where people often move heavier objects (laundry baskets, tools, gym equipment), floor protectors are the difference between occasional scuffs and steady scratch marks.
Felt pads reduce micro-scratching by providing a softer interface between furniture legs and the floor finish.
For rolling traffic, using hard-floor compatible chair casters or a proper chair mat reduces the abrasion caused by dragging wheels across grit-laden surfaces.
Make “contact points” the priority
Most engineered wood scratches start at predictable locations: chair legs, table feet, the edge of a rug that catches a chair caster, or the path where tools get set down repeatedly. If you protect those contact points, you cut damage where it begins.
– Add felt pads to chair legs, table feet, stools, and any frequently moved items; replace worn pads.
– Use non-scuff glides under heavy appliances (and lift to reposition—don’t drag).
– For rolling chairs, use chair mats or hard-floor compatible casters/rolling protectors.
Replacement cadence matters: Felt compresses and can become uneven. When pads curl, crack, or become thin, they can shift and expose harder surfaces—so treat pad replacement as a maintenance task, not a one-time purchase.
Lift, don’t drag
If you want a simple rule that reliably prevents scratches: lift before you reposition. Even “soft” furniture bottoms can scratch when they drag grit along the surface. This is especially true on engineered wood because the visible top layer is still a surface finish system.
If you manage rentals, gyms, or shared basements, you can adapt this section to your actual traffic patterns.
Use rugs and floor protectors the right way
Rugs and rug pads prevent scratches when they’re chosen for non-shedding backing and when they stay put. The wrong rug pad can create micro-scraping by shifting, trapping debris, or shedding abrasive fibers.
Rug pads designed for hard surfaces help prevent shifting, which reduces frictional abrasion where rug edges meet engineered wood.
Engineered wood finish systems vary, so manufacturers typically require approved cleaning methods and may discourage soaking; following the finish care instructions reduces the risk of surface damage.
Choose rug backing and padding that won’t act like sandpaper
– Choose area rugs with a non-scratch backing (avoid rough or abrasive backing that can act like sandpaper).
– Use rug pads made for wood floors so the rug won’t shift and scrape when people walk.
– Check high-scratch zones (laundry area, stairs landing, workbench path) and add protection where contact happens most.
What to watch for in a basement: basements can be slightly cooler and may have more dust settling. Rugs that trap dust under edges can turn those edges into abrasion lines. After vacuuming the rug surface, also vacuum the wood area around the rug and the rug pad perimeter.
Pros/cons comparison: rug pad types in scratch-prone basements
Use the comparison below to decide what not to use when engineered wood is at stake.
| Rug pad approach | Pros | Cons for engineered wood | Best for |
|---|---|---|---|
| Felt / felt blend pads made for hard floors | Stays stable; softer interface | If it sheds fibers over time, it can become abrasive | Dining/living-room rugs with steady foot traffic |
| Rubber or gel pads labeled “for wood floors” | Excellent grip; reduces shifting | Adhesive residue or strong odor is possible; confirm manufacturer approval | High-traffic scratch zones where rug edges move |
| Coarse backing pads (rough texture) | Often cheap and grippy | Rough texture can scratch through debris/edge contact | Avoid on engineered wood if you can |
What can go wrong
Even with the right intent, a few common choices can reintroduce grit, increase friction, or conflict with finish care requirements. If you notice new scratch clusters, start by reviewing tool choices and cleaning technique.
– Using the wrong vacuum setting/attachment: some heads are fine on carpet but grind debris against wood.
– Over-wetting during cleaning: excess moisture can loosen deposits and make the floor more vulnerable to surface damage.
– Rug or mat backing that sheds grit: even “felt” can be abrasive if it sheds particles or shifts and drags.
– Ignoring warranty/finish limits: engineered wood maintenance can vary by finish type—when in doubt, follow the manufacturer’s care instructions for your flooring.
Vacuum + tool choices: where “safe on carpet” becomes harmful
The wrong attachment can move grit instead of removing it—especially in the first 2–3 feet from the entry mat.
| Tool choice | Pros | Cons | Recommended use |
|---|---|---|---|
| Soft brush hard-floor head | Collects debris without aggressive bristles | May miss larger debris if not overlapped | Daily/regular grit removal on engineered wood |
| Hard-floor suction-only nozzle | Lowest risk of grinding embedded particles | May require extra passes to lift dust from seams | When you’re prioritizing scratch prevention |
| Beater bar / rotating brush | Great for carpet pile | Can push and abrade grit on hard floors | Avoid on engineered wood finishes |
Moisture mistakes: the basement effect
In basements, it’s common to “try harder” during cleaning because the area feels grimy. But over-wetting can spread residue and increase the chance that trapped particles keep moving underfoot. A safer approach is dry removal first, then minimal damp cleaning only when your specific floor finish allows it.
Verdict / tip
If you do just three things, do this: (1) double up mats at entry, (2) remove grit with a soft-cleaning routine, and (3) add felt pads + rug pads in the scratch-prone areas. This approach is usually inexpensive and low-risk compared to refinishing later—especially in 2025 when DIY “deep clean” products are plentiful but not always finish-compatible.
Downsides to acknowledge: mats and pads require maintenance (cleaning, rotation, pad replacement), and skipping that step can turn the protector into a grit source. Skip this approach if your engineered wood warranty explicitly requires a different maintenance method, if your floor is not in acceptable humidity conditions per the manufacturer, or if the finish is already deeply damaged—then you may need professional assessment rather than continued prevention.
Scan-and-save checklist
| Area to protect | What to do | Quick check |
|---|---|---|
| Entry | 2-mat system (outside + inside) | Mats are clean and not crusted with dirt |
| Day-to-day debris | Soft sweep/vacuum (no beater bar) | Floor feels “clean” after sweeping, not gritty |
| Furniture legs | Felt pads / replacement pads | Pads slide smoothly; none are missing |
| Rolling traffic | Chair mats or hard-floor casters | Rolls without dragging/scraping |
| Rugs | Wood-floor rug pad + safe backing | Rug doesn’t shift or scuff edges |
Sources
– National Wood Flooring Association (NWFA) maintenance guidance for wood floors and recommended cleaning practices
– U.S. Environmental Protection Agency (EPA), particulate matter definitions (PM2.5 and PM10)
– U.S. Geological Survey (USGS), Mohs hardness and reference hardness for common minerals (e.g., quartz)
Frequently Asked Questions
What are the best ways to prevent scratches on engineered wood floors in a basement?
Start by using felt pads under furniture legs and area rugs at entry points where grit and moisture track in. Keep high-traffic paths protected with a runner or mat so abrasive particles don’t grind into the engineered wood finish. Regularly sweep or vacuum with a soft brush attachment to remove sand and debris that cause most scratches.
How can I protect engineered wood floors from grit and debris in a basement?
Use a doormat at every entry and consider a second mat inside to catch dirt before it reaches the floor. Sweep daily (or as needed) and avoid hard-bristle brooms that can scratch the surface. When vacuuming, choose a vacuum head designed for hard floors and skip anything that uses aggressive beater bars.
Which floor protectors work best on furniture to reduce scuffing and gouges?
Felt pads are usually a top choice for engineered wood floors because they cushion contact and reduce micro-scratches. For heavier items, consider thicker felt or a non-staining protector, and replace pads when they wear down. If you use rolling chairs or carts, add floor-friendly castors or wide, soft casters to prevent dragging marks.
Why is scratch prevention especially important for engineered wood in basements?
Basements often have higher humidity swings and can bring in fine dirt from shoes, both of which increase the risk of scratches and wear. If the floor surface is slightly more vulnerable due to moisture exposure, grit becomes more damaging as it moves across the finish. Proactive scratch prevention also helps maintain the engineered wood floor’s look and protects the surface layer over time.
What cleaning methods should I use to avoid scratching engineered wood floors?
Clean with a manufacturer-recommended engineered wood cleaner and a microfiber mop that won’t abrade the finish. Avoid steam mops, harsh scouring powders, and abrasive pads, which can dull or scratch the top wear layer. If you notice stuck-on debris, lightly dampen the area first and gently lift it rather than scraping with metal tools.
📅 Last Updated: October 19, 2026 | Topic: How to prevent scratches on engineered wood floors in a basement? | Content verified for accuracy and freshness.
References
- Wood flooring
- https://www.epa.gov/indoor-air-quality-iaq/moisture-and-mold-homes
- https://www.cdc.gov/mold/default.htm
- https://www.epa.gov/mold
- https://pubmed.ncbi.nlm.nih.gov/?term=wood+floor+coating+abrasion+scratch
- https://scholar.google.com/scholar?q=engineered+wood+floor+scratch+prevention Google Scholar
- https://scholar.google.com/scholar?q=basement+humidity+wood+floor+maintenance+relative+humidity Google Scholar
- https://scholar.google.com/scholar?q=felt+pad+furniture+prevent+scratches+wood+floor Google Scholar