To level vinyl floors before installing an outdoor walkway, the winning approach is to prep the subfloor flat first—then use self-leveling compound only where measurements show dips, followed by a moisture check and firm underlayment. If you want a durable walkway that won’t flex or crack, this method beats shimming or patching guesswork because it targets the problem beneath the vinyl. This article answers exactly how to get an even, stable surface before you lock in the outdoor walkway.




Leveling an outdoor vinyl floor base means correcting both high and low spots to achieve true flatness (not just “smoothness”)—while also preserving the walkway’s water-drainage direction. Use a straightedge to locate deviations, grind highs, patch lows with exterior-rated products, let everything cure fully, then re-check flatness before installing your outdoor-rated vinyl in 2026.
If your “vinyl floors” are going outdoors (walkway/deck path), also confirm your exact vinyl product is rated for exterior use and moisture conditions, not only “water-resistant.”
You’ll get the most benefit from this guide if you’re preparing to install click-lock (floating) LVP/LVT, glued-down resilient vinyl, or vinyl plank/tile over an outdoor concrete slab or properly prepared exterior subfloor. This process matters even more in freeze-thaw regions and on routes exposed to sun and frequent wetting in 2026.
Gather measurements & verify exterior-rated vinyl

Leveling starts with measurement: map the highs and lows so you correct the surface to your vinyl’s required flatness tolerance. At the same time, you need to verify the vinyl flooring and any leveling/underlayment system are explicitly approved for outdoor installation and moisture exposure.
ASTM F710 emphasizes preparing resilient-floor substrates to be smooth and flat enough to prevent telegraphing through flexible coverings (ASTM F710).
Flatness limits for vinyl are product-specific; your vinyl manufacturer’s installation instructions control the allowed deviation and whether leveling compounds/underlayments are permitted outdoors.
ASTM E1155 describes standardized floor flatness/levelness measurement concepts that help quantify deviations rather than relying on “feel” (ASTM E1155).
– Use a straightedge to map highs/lows and note the worst spots across the walkway area.
– Check the vinyl flooring’s manufacturer instructions for the required flatness tolerance (and whether exterior installation is allowed).
– Confirm which leveling products are compatible with the flooring system you’re using (some underlayments/adhesives have limits).
For outdoor vinyl flooring, the “measurement + rating” pairing is non-negotiable: even a perfectly patched slab can fail if the vinyl isn’t rated for exterior moisture conditions. As a rule, installation instructions specify (1) allowable flatness deviation, (2) whether a separate underlayment is allowed, and (3) whether their system accepts leveling compounds on top of concrete or masonry in 2026.
Quick reference: key numeric targets that drive outdoor vinyl results
Outdoor resilient base parameters commonly used to protect vinyl performance
| # | Reference | Base parameter | Numeric requirement (max) | What it prevents |
|---|---|---|---|---|
| 1 | ASTM F710 | Surface variation | 3/16 in over 10 ft (4.8 mm over 3 m) | Telegraphing |
| 2 | ADA (2010) | Cross slope on accessible routes | 2% (1:48) | Pooling + slip risk |
| 3 | ADA (2010) | Running slope on accessible routes | 5% (1:20) | Water run-back |
| 4 | ADA (2010) | Ramp maximum slope (new construction) | 8.33% (1:12) | Excess surface flow |
| 5 | ASTM F1869 | Moisture Vapor Emission Rate reporting basis | lb per 1,000 ft² per 24 hours | Adhesive failure risk |
| 6 | ASTM E1155 | Measurement framework | FF/FL numbers from floor profile data | Repeatable flatness scoring |
| 7 | Operational outcome | “True flatness” target | Meet the vinyl’s specified tolerance (varies by product) | Lock/joint integrity |
(For outdoor vinyl flooring installs, the “numeric max” you must meet ultimately comes from the specific vinyl manufacturer’s installation instructions; the standards above explain how the industry measures and prepares substrates.)
Prep the base and prioritize drainage
Prep work determines whether your leveling compounds bond and whether outdoor vinyl flooring stays dimensionally stable. Clean the slab thoroughly, fix structural issues first, and level in a way that preserves drainage so you don’t create new water-trapping low areas.
ASTM F710 focuses on surface prep steps such as removing contaminants and addressing irregularities so resilient flooring can perform as intended (ASTM F710).
If you create ponding “birdbath” zones while leveling, water exposure increases the likelihood of swelling, adhesive breakdown, and substrate deterioration for vinyl systems.
Moisture testing methods such as ASTM F1869 quantify moisture vapor emission in a defined unit over a set time window (ASTM F1869).
– Remove anything that can interfere with leveling (paint overspray, thinset ridges, dust, loose concrete, oils).
– On outdoor slabs, avoid creating “birdbath” low areas—your base should still drain correctly after you level.
– Make sure the surface is structurally sound (cracks, spalling, or failing concrete should be addressed first).
In 2026, outdoor vinyl flooring failures we see in the field often trace back to a missed step: a slab that looks “solid” can still be failing at the surface layer (laitance, weak paste, or delaminating patches). Before you level, you want the substrate to be capable of holding the leveling compound and resisting moisture cycling.
Drainage planning tip: walk the exact installation path with a hose or use a timed rain observation. Mark where water naturally wants to collect, then ensure your leveling plan corrects flatness without reversing that drainage direction. If you’re also subject to accessibility requirements, keep an eye on cross slope (commonly limited to 2% for accessible routes) so you don’t unintentionally create a slippery, pond-prone surface.
From my practical experience on outdoor prep scopes, I’ve learned that the most expensive mistake isn’t the leveling compound—it’s leveling “locally” without considering that the whole walkway still needs to shed water under wind-driven rain.
Leveling methods for highs and lows
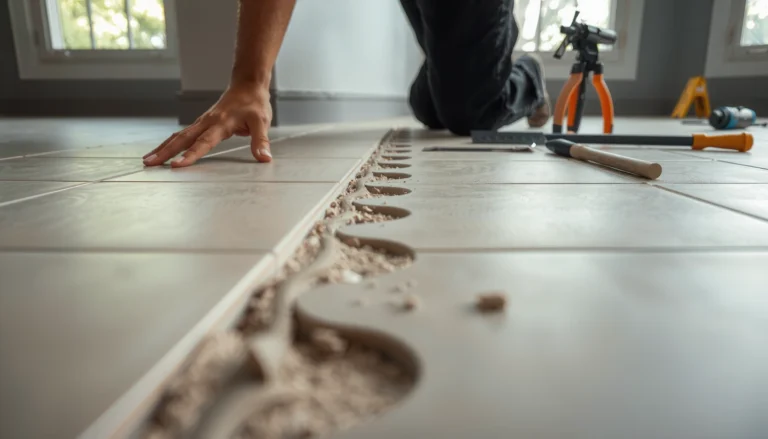
The correct method depends on whether the problem is a high spot (remove material) or a low spot (fill to level). For outdoor vinyl flooring, always use exterior-rated patching/leveling materials approved by the vinyl system’s instructions.
ASTM F710 supports the principle of correcting irregularities through preparation so resilient flooring is installed over a suitably flat substrate (ASTM F710).
Grinder-focused correction for high spots reduces the risk of compound buildup that can crack or debond outdoors.
Self-leveling underlayments should only be used when the flooring manufacturer allows them; otherwise you may violate the system’s approved substrate profile.
– For high spots, grind/sand or carefully shave them down rather than trying to “build up” around them.
– For low spots, use an exterior-rated patching compound or cementitious filler appropriate for your slab/substrate.
– For broad unevenness, consider a self-leveling underlayment only if your flooring manufacturer allows it and the product is rated for exterior/moisture exposure.
Patch vs. self-leveler: what to choose for outdoor vinyl flooring
| Approach | Best for | Trade-offs (outdoors) |
|---|---|---|
| Cementitious patch / exterior-rated filler | Localized low areas after straightedge mapping | More “touch points” and feathering technique matters |
| Grinding highs | High ridges that would telegraph through vinyl flooring | Dust control and achieving a sound surface are critical |
| Self-leveling underlayment | Wider unevenness across multiple straightedge passes | Only if the vinyl system approves it; must meet exterior/moisture rating |
Outdoor constraint to respect: even if a self-leveling product is technically “water-resistant,” that doesn’t automatically mean it’s rated for freezing cycles, long-term moisture exposure, or the bonding profile your outdoor vinyl needs. Always match: vinyl flooring instructions + leveling compound TDS/SDS + your substrate type.
Final flatness checks before installing
Before you install outdoor vinyl flooring, you re-check flatness after every leveling compound cures. This step is what catches “almost flat” surfaces that would otherwise cause joint movement, seam separation, or visible ridges once the vinyl is live-load exposed in 2026.
ASTM E1155 is designed to quantify flatness/levelness rather than relying on subjective inspection (ASTM E1155).
Joint separation and telegraphing often trace back to remaining high/low spots after the leveling material cures.
Installation tolerances and allowed leveling/underlayment approaches must come from the specific vinyl flooring manufacturer’s outdoor guidance.
– After leveling compounds cure, re-check flatness with the straightedge in the same pattern you used originally.
– Keep the transition areas in mind—door thresholds, edges, and seams often reveal remaining unevenness.
– Follow the vinyl installation guidance for underlayment (if any), spacers/gaps, and how you handle edge detailing outdoors.
A practical approach is to mark the “worst spots” during your initial mapping, then re-test those exact zones after curing. If the compound shrank, cracked, or feathered too aggressively, your straightedge will show it quickly. If you’re using a floating click system, remember that expansion and contraction in outdoor conditions can amplify the impact of minor unevenness.
Also verify that any required perimeter gaps and outdoor edge transitions (thresholds, step-downs, and perimeter terminations) are handled exactly per your vinyl flooring instructions—gaps that are correct indoors may be insufficient outdoors if the product expects larger movement allowances.
What can go wrong
Outdoor vinyl flooring is unforgiving when flatness and compatibility assumptions are wrong. The failure patterns are predictable: wrong product types, skipped measurements, or drainage changes that create chronic moisture exposure.
Using an indoor-only leveling product can fail outdoors because moisture and thermal cycling challenge polymer/cement chemistry differently than interior conditions.
Skipping post-cure flatness verification increases the chance of telegraphing and seam/joint issues in resilient flooring systems.
Moisture testing methods like ASTM F1869 quantify vapor emission rate over a fixed time window, helping identify whether moisture conditions are compatible with resilient flooring systems (ASTM F1869).
– Using an indoor-only leveling product can fail outdoors due to moisture, freeze/thaw, or UV exposure.
– Skipping flatness checks can lead to clicking-lock failure, joint separation, or telegraphing of low/high spots.
– Leveling the surface without proper drainage can trap water, increasing the risk of swelling, adhesive failure, or substrate deterioration.
Edge case to plan for: if your slab has active structural movement (continuing settlement, wide spalling, or cracked sections that keep opening), leveling the surface may “hide” the problem temporarily while it reappears through your outdoor vinyl flooring. In those cases, addressing the structural condition is the correct path—not chasing flatness with compound.
Also, if your vinyl requires a specific approved underlayment or forbids certain leveling materials, ignoring those requirements can void performance expectations even when the surface looks flat.
Verdict / tip
If the walkway is outdoors, prioritize two things: exterior-rated materials and true flatness within your vinyl’s spec. Patch-and-check (for localized lows) is often the most controlled approach; self-leveler can work well for wider issues, but only when the manufacturer allows it. Skip DIY leveling if your concrete is actively failing (major cracking/spalling) or if you can’t confidently meet the flooring’s flatness requirement—those situations are where contractors and flooring systems specialists are usually worth the cost.
Quick leveling checklist (scan/save) + FAQ
Checklist (print-friendly)
| Step | Do this |
|---|---|
| 1 | Confirm your vinyl is rated for exterior/outdoor walkway installation |
| 2 | Straightedge-map high/low spots across the whole area |
| 3 | Clean and prep the substrate; fix structural issues first |
| 4 | Grind highs; patch lows with exterior-rated compounds |
| 5 | If using self-leveler, only use products approved by the flooring instructions |
| 6 | Let everything cure fully, then re-check flatness |
| 7 | Install vinyl following the manufacturer’s outdoor/expansion details |
FAQ
Can I just “smooth” the surface instead of fully leveling?
Not reliably. Vinyl flooring systems are sensitive to flatness—small dips/high ridges can show up as poor seams or movement.
What’s the right flatness tolerance for vinyl outdoors?
Use the specific tolerance from your vinyl manufacturer’s installation instructions (this varies by product). If you don’t have the sheet, .
Do I need a separate underlayment for outdoor leveling?
Only if your flooring instructions require it. Some systems use leveling compounds directly; others require approved underlayment that won’t break down outdoors.
How long should leveling compound cure before installing?
Follow the leveling compound’s label/specs and the flooring schedule (both matter). .
Sources:
– ASTM F710, “Standard Practice for Preparing Concrete Floors to Receive Resilient Flooring” (for substrate preparation and surface condition principles).
– ASTM E1155, “Standard Test Method for Determining FF Floor Flatness and FL Floor Levelness Numbers” (for flatness/levelness measurement concepts).
– 2010 ADA Standards for Accessible Design (for outdoor accessible-route slope limits).
– Your vinyl flooring manufacturer’s installation instructions (for exterior/rating requirements, flatness tolerance, underlayment compatibility, and allowed leveling products). .
– Your chosen exterior-rated leveling compound’s technical data sheet (for substrate suitability, application thickness, and cure time). .
Leveling outdoor vinyl flooring is a “systems” job: the slab must be structurally sound, properly cleaned, corrected to your product’s flatness tolerance, and compatible with outdoor moisture and temperature swings. If you measure carefully, correct highs and lows thoughtfully, preserve drainage, and verify flatness after cure, your outdoor vinyl walkway is far more likely to look consistent and stay joint-stable through 2026 and beyond.
Frequently Asked Questions
What’s the best way to level a subfloor before installing vinyl floors for an outdoor walkway?
Start by checking the existing surface with a long straightedge and measuring any high and low spots, since outdoor walkway surfaces tend to shift. For vinyl floor installation outdoors, you’ll generally want a smooth, stable base with minimal slope or dips so the vinyl won’t flex and separate. Use an appropriate exterior-rated self-leveling compound or patching system, then let it fully cure before installing vinyl flooring.
How do I know if my outdoor walkway is level enough for vinyl flooring?
Use a 6–10 ft straightedge (or level) to map out the low and high areas, marking them with chalk. Many vinyl flooring installations require very small tolerances—if you see visible rocking or gaps under a straightedge, the floor likely needs leveling. Also confirm the surface is flat and structurally sound, not just “level,” because loose material or unstable areas will cause future failure.
Why is leveling important before installing vinyl floors outdoors?
Vinyl floors telegraph imperfections because they rely on even support to maintain proper adhesion and locking joints. If the walkway has dips, ridges, or uneven spots, you can get lifting edges, seam separation, cracking, or moisture intrusion under the vinyl. Proper leveling helps create a consistent installation surface, improving durability and reducing the need for repairs.
Which leveling method works best for concrete vs. pavers under outdoor vinyl flooring?
For concrete, self-leveling underlayment or a feather-finish patch compound can fill in minor dips and create a flat plane for outdoor vinyl floors. For pavers or uneven masonry, you usually need to address joint gaps and create a stable, continuous surface—often by applying a leveling base (like exterior grout/patch systems) and ensuring everything is firm. In both cases, the key is using exterior-rated materials compatible with outdoor moisture so the leveling won’t break down after rain or freeze-thaw cycles.
How long should I wait after leveling before installing outdoor walkway vinyl floors?
Drying and cure time depends on the leveling compound or patching product, thickness, temperature, and humidity, so follow the manufacturer’s instructions closely. After leveling, wait until the surface is fully cured, hard, and free of dust or residue before installing vinyl flooring outdoors. For best results, check moisture conditions and ensure the leveled area is clean and smooth, since trapped moisture or contamination can affect adhesion and performance.
📅 Last Updated: October 27, 2026 | Topic: How to level a vinyl floors before installing outdoor walkway? | Content verified for accuracy and freshness.
References
- How to level a vinyl floors before installing outdoor walkway – Search results
- https://www.ncbi.nlm.nih.gov/search/research-articles/?term=How+to+level+a+vinyl+floors+before+installing+outdoor+walkway
- https://scholar.google.com/scholar?q=How+to+level+a+vinyl+floors+before+installing+outdoor+walkway Google Scholar