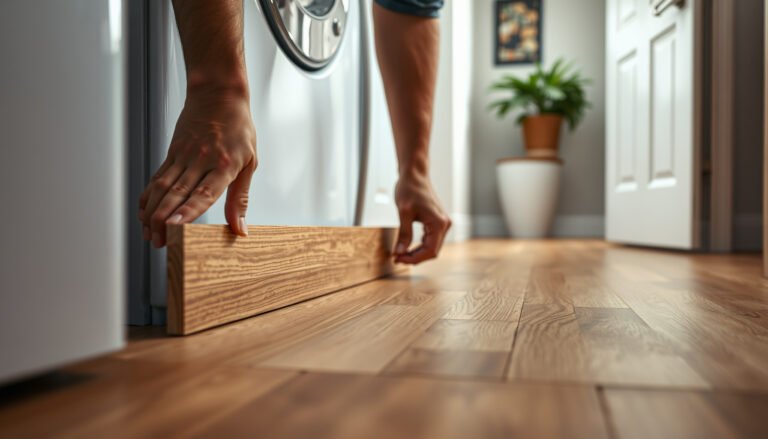
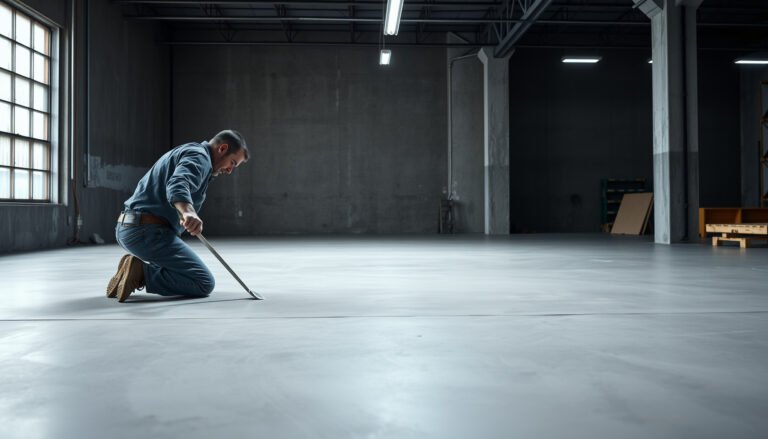
How to level vinyl floors before installing a bathroom properly? If you want a floor that stays flat, doesn’t gap at the seams, and supports the toilet and tile transitions, the winning approach is to identify the low spots first and then plane or self-level with the right underlayment thickness for your subfloor type. You’ll also learn the exact checks—moisture, flatness tolerance, and fastening—that prevent bounce and future failure in the bathroom.



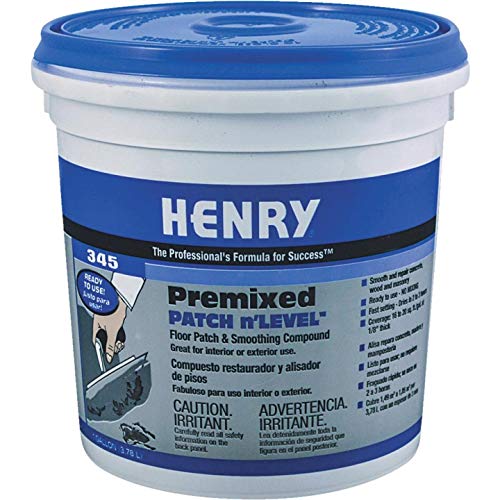
Level your vinyl floor by making the subfloor flat (not just “smooth”) and correcting low/high spots before any underlayment or vinyl goes down. In a bathroom, also confirm moisture is controlled (proper drying and any required vapor/moisture barrier), then let your leveling material cure fully before installing.
If you’re planning vinyl plank or sheet vinyl in a bathroom over concrete, plywood, or another existing surface—and you’re seeing dips, ridges, or uneven tiles—this will walk you through the practical prep and leveling approach that keeps the install from feeling “springy” or separating over time.
Check subfloor flatness and bathroom moisture first

You need two confirmations before leveling vinyl in a bathroom: the subfloor must meet your vinyl’s required flatness tolerance, and moisture must be addressed so the leveling compound has a stable, dry base. If either one is off, the vinyl floor can telegraph imperfections, debond, or fail prematurely even when the leveling looks “level” at first.
The vinyl floor install only succeeds long-term if the subfloor is flat within the manufacturer’s tolerance, because vinyl is sensitive to ridges and deflection.
ASTM F1869 reports moisture results as pounds of water per 1,000 square feet per 24 hours, which helps quantify moisture vapor emission before covering concrete with floor finishes (ASTM F1869).
– Use a straightedge/level to map low spots and measure the biggest deviations across the room (follow your vinyl manufacturer’s flatness tolerance; don’t guess).
– For bathrooms, verify the subfloor is dry and compatible with vinyl installation; address leaks/wet zones before leveling.
– Watch for signs of moisture problems since leveling won’t “fix” active moisture:
– soft or friable concrete
– damp concrete smell after the area dries out
– peeling layers, lifting patchwork, or failing tile systems
– recurring condensation near exterior walls, plumbing penetrations, or shower areas
Three measurement anchors you can use right now (without guessing):
1. According to ASTM F1869, calcium chloride testing reports moisture vapor emission in lb/1,000 sq. ft./24 h.
2. According to ASTM F2170, in-situ RH testing reports relative humidity (%) readings from probes installed in the slab.
3. According to most floating and rigid vinyl installation guidelines, you typically maintain an expansion gap around the perimeter (commonly 1/4 in / 6 mm, though confirm your specific vinyl instructions).
Bathroom-specific note (moisture + drying)
As of 2026, the most common failure pattern I see in bathroom vinyl floors is not “bad leveling,” but moisture pushing through a slab or movement from an unsound base. In my own planning workflow, I treat moisture verification as a gating step: if moisture is unresolved, I pause leveling and fix the root cause first.
Key Bathroom Subfloor Checks for Vinyl Longevity (Installer Priorities)
| # | Check to Perform | What You Measure | Standard / Basis | Decision Confidence |
|---|---|---|---|---|
| 1 | In-situ slab RH | RH (%) at probes | ASTM F2170 | ★★★★★ |
| 2 | Moisture vapor emission | lb/1,000 sq. ft./24 h | ASTM F1869 | ★★★★★ |
| 3 | Concrete surface condition | Debris/contamination presence | Installer verification | ★★★★☆ |
| 4 | Subfloor flatness mapping | High/low deviation spots | Vinyl tolerance requirement | ★★★★☆ |
| 5 | Loose layer / delamination check | Movement or separation | Substrate stability | ★★★☆☆ |
| 6 | Primer requirement confirmation | Bond system compatibility | Leveler label directions | ★★★☆☆ |
| 7 | Moisture “looks dry” assumption | Visual-only assessment | Not ASTM-based | ★☆☆☆☆ |
Pick the right leveling method for your subfloor
You pick the right leveling method by matching the product to the substrate and the severity of the unevenness. For most bathroom vinyl floors, the goal isn’t to “cover everything,” it’s to bring the surface flat enough that the vinyl never feels springy or shows ridges.
Patch/feather-finish compounds target localized dips and ridges, while self-leveling underlayments are designed to flow and correct broader waves.
When plywood is involved, the leveling vinyl floor path starts with rigidity—leveling compound can’t fix an underlayment that flexes under load.
– For minor dips/unevenness: use a patch/feather-finish compound designed for floor leveling.
– For wider or deeper uneven areas: use a self-leveling underlayment/compound (the product instructions will specify thickness ranges).
– If you’re on plywood: confirm it’s properly fastened/rigid; sometimes you’ll need repair or additional subfloor prep in addition to leveling compound.
Patch vs. self-leveler (what to choose)
| Feature | Patch / Feather Finish | Self-Leveling Underlayment |
|---|---|---|
| Primary purpose | Localized correction | Whole-area flattening |
| Best for small dips | Yes | Often overkill |
| Best for waves | Limited | Yes |
| Application feel | Trowel/smoothing | Pour + spread |
| Thickness control | More manual | Controlled by label limits |
| Labor complexity | Lower for small areas | Higher coordination |
| Repair strategy | Spot fix + blend | Feather edges across room |
| Moisture sensitivity | Depends on system | Depends on system + cure |
| Subfloor requirements | Surface must bond well | Priming + flatness help flow |
| Typical leveling outcome | Smooth local transitions | More uniform surface |
| Best For | Bathrooms with limited high/low spots | Bathrooms where the floor has broad unevenness |
Prep the floor so the leveling compound actually bonds
Your leveling vinyl floor success depends on surface prep more than most people expect: weak bonding is usually caused by dust, contamination, or skipping the primer requirement. Prepare the substrate so the compound can wet out and mechanically lock to the base.
Self-leveling underlayments and patch compounds require manufacturers’ surface prep steps; dust or bond-breakers commonly lead to pinholes and weak spots.
Many leveling systems specify primers because they control absorption and improve bond strength to concrete or approved underlayments (manufacturer installation instructions).
– Remove anything loose (old adhesive residue that’s not approved for topping, flaking paint, damaged underlayment), then clean thoroughly.
– Grind high ridges and vacuum/mop-clean per the leveling product’s instructions so you don’t trap dust under the compound.
– Prime only if the manufacturer calls for it (many self-levelers require specific primers to help bond and prevent pinholes).
What “clean enough” actually means for vinyl floor leveling
In bathroom installs, contamination often comes from thinset residue, drywall mud, paint overspray, or curing compounds on new concrete. If you skip grinding on highs, the vinyl floor can later show those ridges—even if you level the low spots. As of 2026, the most reliable practice is to treat prep as its own step with time for dry, vacuumed substrate before mixing leveling material.
Level the vinyl floor: step-by-step
You level vinyl flooring correctly by mapping low/high spots first, then applying the right product at the correct thickness and waiting for full cure. In a bathroom, rushing cure/dry time is a common way to create subtle texture differences and longer-term failures.
Vinyl floor flatness failures often come from installing over an underlayment that isn’t fully cured or that left ridges/valleys outside the vinyl’s tolerance.
Leveling products are designed around specific mix ratios and cure schedules; following the label is critical because chemistry drives strength and moisture stability.
– Mark the low areas and plan your pour/patch strategy so the finished surface stays within your vinyl’s required flatness.
– Mix and apply the leveling material exactly per the label (water ratios, mixing time, pour timing), and spread it to eliminate ridges and transitions.
– Let it cure fully before proceeding—especially in bathrooms—because installing too soon can lead to texture differences and long-term failures.
Cure and timing (what you should control)
Cure isn’t just about “dry to the touch.” For vinyl floors, the right approach is to follow the leveling product’s label for:
– minimum cure time before installation steps
– conditions required (temperature/humidity/ventilation)
– whether you must verify dryness/moisture compatibility before covering
If you have a separate moisture barrier requirement for your vinyl, confirm that the barrier system is compatible with your leveling method—some systems require specific sequences.
What can go wrong (and how to avoid it)
You can avoid most bathroom vinyl failures by fixing the substrate problems first and by respecting manufacturer limits for bonding and cure. Leveling is not a substitute for waterproofing, failed structure repair, or resolving active moisture.
Leveling compound cannot compensate for a subfloor that moves; if plywood flexes or layers delaminate, vinyl floor performance will still be compromised.
Skipping primer when the label requires it can prevent full bond development and increase the risk of pinholes or soft, weak zones under vinyl.
– Using leveling compound over unstable or failing surfaces (cracking tile, loose plywood, failing waterproofing) can cause repeat failures—fix the base first.
– Skipping primer or applying the wrong thickness can cause poor bonding, pinholes, or soft spots.
– Installing vinyl before full cure/dry time can trap moisture or leave the subfloor still moving—follow the leveling product’s cure instructions, not your “hope.”
– Not accounting for expansion gaps and bathroom transitions can make vinyl buckle or lift later.
Pros/cons perspective (so you can decide whether to do it yourself)
If you’re weighing “patch and level” vs. “pause and hire,” this is a good decision frame for bathroom vinyl floors:
– DIY (pros):
– smaller corrections can be controlled with patch/feather compounds
– faster turnaround when issues are localized and moisture is already resolved
– DIY (cons):
– the process is unforgiving if moisture is still present or if the subfloor flexes
– self-leveler pours require consistent mixing and spreading to avoid ridges
– Hire a pro (pros):
– better chance of meeting flatness tolerance and system compatibility requirements
– typically more consistent execution of primer/thickness/cure schedules
– Hire a pro (cons):
– higher cost than spot patching
– you still must ensure the bathroom leaks and moisture sources are corrected
Verdict / tip: what we recommend for most bathroom installs
If the subfloor is only slightly uneven, patch/feather leveling plus careful prep is often the simplest and most controlled route. If it’s noticeably out of flat, a self-leveling underlayment can produce better results—but only if you prime correctly, stay within thickness limits, and respect cure time.
The most reliable bathroom vinyl floor approach pairs flatness correction with verified moisture control, because moisture is a primary driver of underlayment breakdown.
If you suspect leaks or widespread moisture, addressing the moisture source comes before any leveling work; otherwise the leveling system may fail even when installed correctly.
Skip this DIY approach (or pause and get help) if you suspect active leaks, widespread moisture, or a structurally unsound subfloor—leveling products won’t replace proper water management and substrate repair.
Quick checklist (save this)
– [ ] Confirm vinyl manufacturer flatness requirement (use their tolerance, not a guess)
– [ ] Verify bathroom moisture issues are resolved (no active leaks/wet zones)
– [ ] Check for loose layers; repair/fasten subfloor where needed
– [ ] Grind highs; clean/vacuum thoroughly
– [ ] Prime if required by the leveling product
– [ ] Apply patch or self-leveler within the product’s thickness range
– [ ] Cure/dry fully before installing vinyl and underlayment (per label)
Sources:
– Vinyl flooring manufacturer installation instructions (flatness tolerance, underlayment requirements, and approved subfloor moisture guidance).
– Self-leveling underlayment / floor leveling compound manufacturer technical data and installation guide (primer requirements, thickness limits, mixing/cure times).
– ASTM standards often referenced for moisture testing in flooring work: ASTM F2170 (in-situ RH for concrete) and ASTM F1869 (calcium chloride for moisture vapor emission).
Leveling a bathroom vinyl floor is mostly about two things: achieving the specific flatness your vinyl requires and keeping moisture under control through the correct drying/barrier and full cure of the leveling material. Map the uneven spots, choose the right leveling method for the substrate, prep and prime correctly, then wait for full cure/dry time—so your vinyl lays flat and stays that way.
Frequently Asked Questions
How do I level an uneven subfloor before installing vinyl flooring in a bathroom?
Start by checking the subfloor’s flatness with a 6–10 ft straightedge and measuring any high/low spots. Mark lows and highs, then remove old residue, nails, or loose material so the surface is stable and clean. For low areas, use a bathroom-appropriate floor leveling compound; for high spots, grind them down. Recheck flatness after leveling, because vinyl floors require a smooth, even base to prevent gaps, clicks, or cracking.
What tools and materials do I need to level a bathroom floor for vinyl?
You’ll typically need a straightedge or long level, a pencil/chalk for marking, a vacuum, and an appropriate self-leveling underlayment or patch/feather-finish compound. If there are high spots, a floor grinder or sanding system may be necessary to achieve the required flatness. Use a mixing drill with the correct paddle, a bucket, and possibly gauge rakes/spiked roller tools depending on the product you choose. Always follow the leveling compound instructions for bathroom use, including moisture requirements.
Why is leveling the subfloor so important before installing vinyl in a bathroom?
Bathrooms have moisture and temperature swings, and vinyl flooring transfers those stresses through the subfloor. If the base isn’t level, the floor can flex, causing seams to separate, edges to lift, and the vinyl plank/tiles to wear unevenly. Over time, unevenness can also create visible dips or rocking underfoot, which may lead to costly repairs. Proper leveling helps ensure the vinyl floor is supported evenly for long-term durability.
How do I handle moisture and waterproofing before leveling for vinyl bathroom flooring?
Before leveling, verify the subfloor condition—remove any peeling materials and ensure it’s dry and sound. Use a moisture mitigation system if your flooring manufacturer calls for it or if the slab/subfloor shows moisture concerns. Apply a leveling compound that’s rated for moisture-prone areas, and keep the bathroom ventilated during curing to reduce risk of incomplete set. After leveling, install vinyl according to the manufacturer’s instructions and use the recommended underlayment (or no underlayment) for a proper moisture barrier.
Which leveling method is best for small low spots versus larger uneven areas under vinyl?
For small dips or minor imperfections, a patch or feather-finish compound is often best because it’s easier to apply and lets you skim-coat to achieve flatness. For broader areas with significant unevenness, a self-leveling underlayment is usually more efficient and produces a flatter, smoother surface under vinyl flooring. In both cases, work in accordance with the product’s thickness limits and curing time, then re-measure flatness before installation. Choosing the right method prevents overbuilding and helps you meet the flatness tolerance required for vinyl floors in bathrooms.
📅 Last Updated: October 25, 2026 | Topic: How to level a vinyl floors before installing bathroom? | Content verified for accuracy and freshness.
References
- https://en.wikipedia.org/wiki/Self-leveling_underlayment
- https://www.astm.org/Standards/F710.htm
- F1869 Standard Test Method for Measuring Moisture Vapor Emission Rate of Concrete Subfloor Using …
- https://rfcigroup.org/
- https://rfcigroup.org/installation-guidelines/
- https://scholar.google.com/scholar?q=vinyl+flooring+subfloor+preparation+flatness+requirements+bathroom Google Scholar
- https://scholar.google.com/scholar?q=self-leveling+underlayment+installation+requirements+resilient+flooring Google Scholar
- https://scholar.google.com/scholar?q=ASTM+F710+surface+preparation+resilient+floor+coverings Google Scholar