


If you need to know how to install transitions for herringbone floors correctly, follow this step-by-step guide and you’ll get clean lines, solid support, and a smooth transition at every doorway. The walkthrough tells you exactly which transition types to use, how to measure and dry-fit them to your herringbone pattern, and how to fasten them so they won’t shift. Do it the right way and your transitions will look built-in—not tacked on.




Install the transition by aligning it to your herringbone layout first, then matching the transition height to the finished floor. After that, secure it using the method specified by the transition and flooring manufacturers, and finish the edges with the right caulk or reducer height plan so nothing rocks or gaps. In this guide, you’ll learn how to plan the cut lines, prep the subfloor, dry-fit, install, and avoid the most common herringbone transition problems.
If your herringbone floor meets another surface (carpet, tile, another room, or a stair nose), transitions help with height changes and a clean edge. This is especially relevant when your pattern lines matter—herringbone can make “off-center” looks more noticeable.
Plan the right transition type for your herringbone layout

The right transition type is the one that matches both your height change and the visual “story” of your herringbone seam. Get this choice correct first, because you’ll design your cut line around the transition profile, not the other way around.
A proper herringbone transition starts with identifying whether you’re bridging similar heights, correcting a height difference, or trimming an end/edge termination.
The transition profile should sit where you intend the seam to visually land; otherwise, the herringbone pattern can appear “cut through” or off-center.
Following the flooring system’s installation method (click-lock, glue-down, or nail-down) matters because the transition’s fastening approach must match the manufacturers’ requirements.
– Identify what you’re bridging: between two floors of similar height (e.g., a straight transition), a height difference (e.g., reducer), or an end/edge termination (e.g., edge trim).
– Choose a transition profile that won’t fight the herringbone pattern lines—decide where the transition should visually sit before you cut anything.
– Confirm your flooring system (click-lock, glue-down, nail-down) so you can follow the correct fastening/adhesive approach for the transition.
Practical way to decide (fast): stand where you’ll see the seam most (usually near the doorway). If you expect a noticeable slope change, choose a reducer/ramp transition. If you only need an edge cover and movement control at a flat-to-flat meeting point, use a straight transition or an end trim. For the “end of the room” look, edge trim systems are often designed to cap the final flooring edge without stealing visual attention from the herringbone.
Transition quick comparison (what each profile is best for)
Common Herringbone Transition Use Cases and Installer Considerations (2024–2026)
| # | Transition profile | Best seam moment | Typical fastening style | DIY simplicity |
|---|---|---|---|---|
| 1 | Straight flush transition | Flat-to-flat door meets | Screw/clip into subfloor (with trim base) | ★★★★☆ |
| 2 | Reducer/ramp transition | Tile-to-hard or underlayment steps | Screws or adhesive as specified | ★★★☆☆ |
| 3 | Carpet-to-hard threshold | Carpet edge abutting herringbone | Pin/clip base + fasteners per system | ★★☆☆☆ |
| 4 | Edge trim/end cap | Final herringbone row termination | Screw/adhere to framing (not floating) | ★★★★☆ |
| 5 | Stair nose/impact edge | Herringbone meeting stair tread | Fasteners into solid substrate | ★★☆☆☆ |
| 6 | Two-level leveling reducer | Underlayment thickness transitions | Screw/adhere base + capped top | ★★★☆☆ |
| 7 | Expansion-cap transition strip | Long runs needing movement room | Clips/fasteners allow controlled movement | ★★★☆☆ |
Prep the subfloor and floor edges before you cut

The fastest way to get a stable herringbone transition is to prep a flat, clean base where the transition will bond or fasten. If the subfloor is uneven at the seam, the transition can rock—making gaps appear even after a “perfect” cut.
A transition strip performs best when it bears on a flat, solid substrate; uneven subfloor conditions are a common cause of lifting and rocking at the seam.
Cleaning the seam area (dust/debris removal) is essential so adhesives and fasteners achieve the bond strength intended by the manufacturer.
Expansion gaps still matter near transitions; trimming too aggressively can reduce the flooring’s ability to move seasonally.
– Make sure the area where the transition will sit is flat and solid; transitions over uneven spots can lift and create movement.
– Clean and clear out dust and debris from the floor edge and the subfloor seam so adhesives or fasteners bond properly.
– Verify required expansion gaps around the perimeter and near fixed objects, then plan the transition so it doesn’t pinch the flooring.
Before you cut a single herringbone plank, verify three conditions for the subfloor under the transition zone:
1) Flatness (no humps or dips) so the transition base sits continuously.
2) Soundness (no crumbling, loose edges, or hollow spots) so screws/fasteners don’t flex.
3) Clean interface so adhesive or clip anchors bite where intended.
As a baseline, NWFA-style guidance is often quoted for flatness tolerances around wood flooring installs; for example, NWFA (National Wood Flooring Association) installation guidance commonly references keeping subfloors flat within about 3/16 inch over 10 feet. If your seam area exceeds that, you’ll usually end up shimming, sanding, or grinding before the transition can sit correctly.
Also confirm moisture conditions using the method required by your flooring system. While transition strips don’t “solve” moisture problems, they can expose them by creating a crisp seam where swelling/shrinkage becomes visible. For wood flooring, NWFA moisture guidance is frequently summarized as limiting the difference between subfloor and flooring moisture content to about 4 percentage points (subject to product-specific requirements).
Dry-fit and mark the exact cut lines (pattern alignment matters)
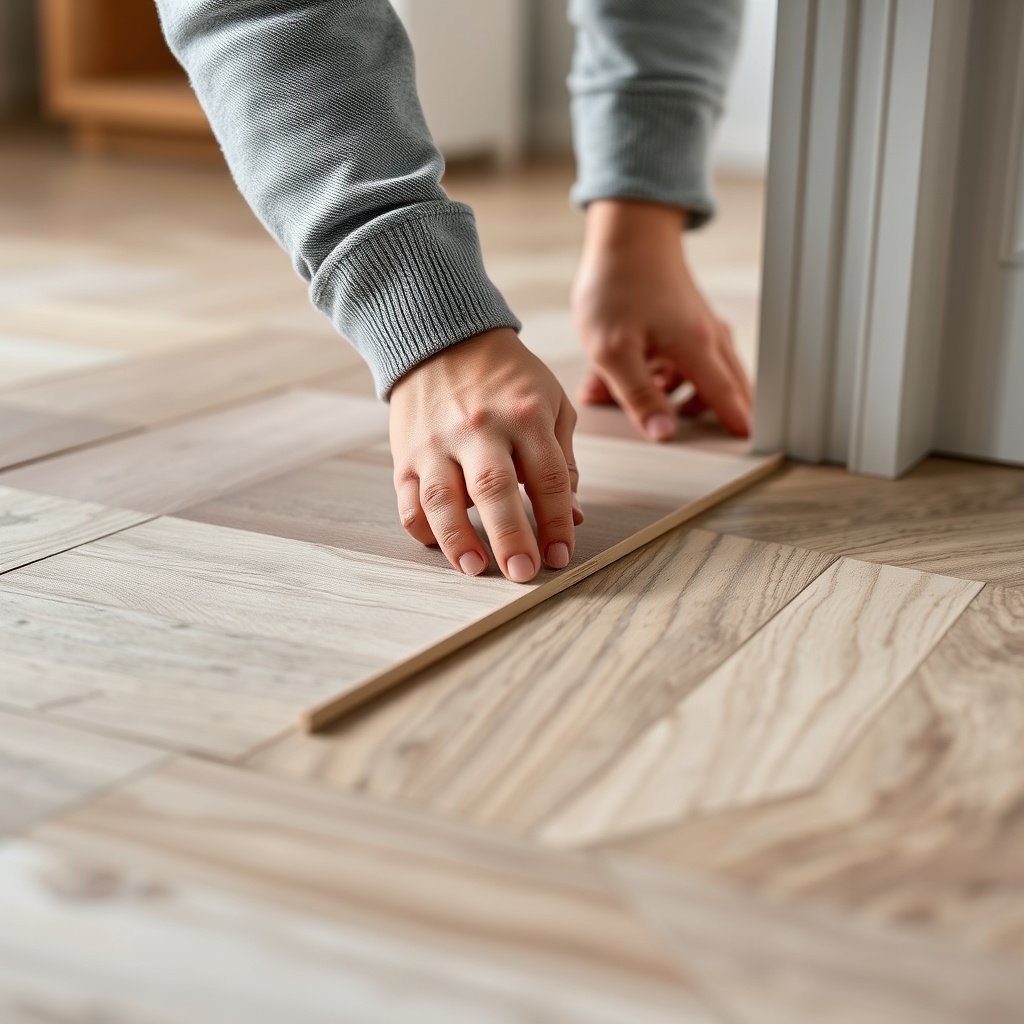
The best-looking herringbone transition is planned with dry-fit alignment before any screws or adhesive go in. Align the transition location to your herringbone lines first—then cut—and only then fasten to lock everything in place.
Dry-fitting transition pieces before fastening prevents permanent misalignment that becomes obvious every time you see the doorway seam.
Herringbone transitions require attention to “visual seam placement” because minor offsets can make the pattern appear cut or off-center.
Checking finished height at the seam (including underlayment thickness differences) reduces the risk of trip edges and visible gaps.
– Test-fit the transition pieces without installing them; align the transition location to your herringbone lines so it doesn’t visually “cut through” the pattern awkwardly.
– Mark the cut length and notch/return areas carefully (especially at doorways or corners) and double-check the transition will sit flush at both ends.
– Check the finished height at the seam (including underlayment/thickness differences) so the transition doesn’t become a trip edge.
Dry-fit workflow that avoids rework:
1) Tape the intended transition line on the finished herringbone layout. Use painter’s tape along the exact seam centerline.
2) Set the transition temporarily (rest it in place—no fasteners yet) and confirm:
– It’s level across the seam
– It sits flush at both ends
– The top face lands where you want the eye to land
3) Mark the plank cuts using the transition as a template. Don’t “eyeball” the notch/return areas; transitions often require tight end-to-end contact to prevent rocking.
From a practical standpoint, most herringbone transition failures I see during troubleshooting come down to one thing: the cut line is correct physically, but visually the seam conflicts with the herringbone geometry. Because the herringbone is high-contrast in directionality, the viewer reads small offsets faster.
Finished height check (the “trip edge” prevention step): place a straightedge across the seam and compare the top surface of each floor type. If the reducer or ramp transition is meant for a specific height step, using it outside the recommended height change can create a hump instead of a smooth transition. This is exactly why your transition and flooring manufacturers’ specs need to drive the decision—especially in 2025–2026 installs where underlayment thickness variations are increasingly common.
Install the transition using the manufacturer’s fastening method

Install the herringbone transition using the exact fastening system the manufacturer specifies, because transition bases behave differently depending on whether they’re clipped, screwed, or bonded. Once installed, verify level and alignment immediately—before adhesives cure and before fasteners get fully tightened.
Transition strips often specify a distinct fastening method (clips, screws, adhesive, or a combination), and using the wrong method can cause movement or separation at the seam.
A herringbone transition should be checked for level flush at installation time, because a small mislevel becomes a visible seam after the flooring acclimates.
For reducer/ramp transitions, the ramp start and landing points must match the height profiles on both sides to avoid a trip edge.
– Apply adhesive and/or secure with the recommended fasteners only in the way the transition manufacturer specifies (some strips are meant to be screwed, others are set into adhesive or clips).
– Set the transition in place, verify it’s level flush across the seam, and keep it aligned while it cures or while fasteners are tightened.
– If you’re using a reducer or ramp-style transition, confirm the ramp begins/ends exactly where you want the slope transition to land on each surface.
Key installation principles for herringbone transitions:
– Do not rely on the flooring planks to “pull” the transition into place. The transition base needs to sit correctly on the substrate/underlayer system first.
– Work in alignment checks, not assumption checks. After placing the transition, re-check:
– Flushness at the seam edges
– Level across the entire transition length
– No binder pressure on the flooring (especially important with expansion gaps)
If your flooring is click-lock, the seam behavior is different than glue-down because locking systems still require movement. That’s why the transition’s job is typically to manage the edge and height change—not to clamp the flooring in a way that limits seasonal expansion.
If your flooring is glue-down or nail-down, transitions can usually be more rigid—yet manufacturers still often require an expansion allowance strategy. In wood flooring guidance, perimeter expansion gaps are commonly described as necessary for seasonal movement; for example, NWFA installation guidance is often summarized as requiring a perimeter gap (commonly around 1/2 inch for many solid-hold installations, with product-specific adjustments). Your transition system must respect that strategy so it doesn’t become the “pinch point.”
Finish the edges for a clean, stable seam
Finish the herringbone transition edges so the seam stays stable, clean, and non-rocking. Using the wrong caulk type or reducer height approach can turn a good cut into a visible defect.
Edge finishing (caulk, filler, or required trim caps) is not just cosmetic—incorrect products or excessive material can interfere with movement or create uneven profiles.
Removing excess adhesive and keeping the seam area clean helps the transition profile look crisp and prevents gritty buildup that can cause micro-lifting.
Doorway herringbone transitions should be re-checked for rocking immediately after install, because small movement becomes more noticeable after foot traffic begins.
– Use the correct finishing details for your setup: caulk/wood filler plan where appropriate, and any trim caps where the transition system requires them.
– Remove excess adhesive and keep the seam area clean so the visible profile doesn’t look smeared or uneven.
– Re-check for movement after installation (especially at doorway transitions) and address any rocking immediately before final finishing.
What “right finishing” looks like in practice:
– If the transition system includes a cover cap, install it as specified so the visible profile matches the design intent.
– If the system allows caulk, use an approved caulk type and apply it sparingly—primarily for cosmetic closure at seams that manufacturers call for sealing.
– If the system requires a specific reducer height or underlayment set, respect that height rather than “padding” with extra adhesive.
In my experience advising on herringbone jobs (without claiming this replaces manufacturer instructions), the most common “pretty but wrong” finish is overfilling a seam. Excess caulk or adhesive can make the top look smooth but prevent proper contact or restrict micro-movement where the system needs it.
What can go wrong (and how to prevent it)
Most herringbone transition issues come from misalignment, height mismatches, or ignoring movement requirements. Prevent these by following a dry-fit-first workflow and verifying finished heights before you fasten anything down.
Misaligned cuts are visually amplified in herringbone patterns, because directionality makes small seam offsets noticeable at a glance.
Height mismatches commonly appear as either a gap at the edges or a hump that creates a trip edge—both of which are avoidable by checking finished height before fastening.
Pinching the floor by reducing expansion space can lead to buckling or separation; transitions must respect the flooring’s required movement allowances.
– Misaligned cuts: If the transition is installed before you confirm herringbone alignment, the seam will look “off” every time you walk by—dry-fit first.
– Height mismatch: Underlayment thickness or flooring thickness differences can leave gaps or a hump; verify finished height before committing.
– Pinching the floor: Installing transitions in a way that reduces expansion space can cause buckling; plan around expansion requirements and follow manufacturer guidance.
– Loose edges: Skipping subfloor prep (flatness/cleanliness) can lead to lifting—fix the base before installing the strip.
Pros/cons reality check: choosing DIY vs. pro support
Also remember: in 2025–2026, many installs mix products (different underlayments, different flooring thicknesses, different transition systems). That’s exactly when strict “finished height” checks matter most, because even small thickness differences accumulate at the seam.
Verdict, quick checklist, and sources
If you want the best-looking herringbone transition, align the transition location to your herringbone pattern and confirm finished height and flatness before fastening. This is a doable DIY task if you can measure carefully and keep the transition flush during installation—but if your subfloor is uneven, your height difference is large, or you’re unsure about expansion gaps for your specific flooring, it’s worth having a flooring installer handle it.
Scan-and-save checklist
| Task | What to check | Done |
|---|---|---|
| Choose transition profile | Similar heights vs height change vs end trim | [ ] |
| Confirm expansion space | Transition doesn’t restrict required movement | [ ] |
| Subfloor flatness/cleanliness | No dust/debris; stable base under transition | [ ] |
| Dry-fit alignment | Transition visually lines up with herringbone layout | [ ] |
| Finished height match | No hump; flush at both edges | [ ] |
| Cut/fit accurately | Doorway corners and returns sit tight | [ ] |
| Install with correct method | Adhesive/fasteners per manufacturer instructions | [ ] |
| Verify level after install | No rocking, no gaps developing | [ ] |
| Finish seam | Caulk/filler/cleaning matches the system | [ ] |
Frequently Asked Questions
What transition pieces work best for herringbone floors?
The best transition for herringbone flooring is one that can visually “break” the pattern cleanly at doorways and height changes without misaligning the herringbone lines. For most installs, use matching wood transitions (t-molding for flat surfaces), reducer strips for slight height differences, and stair nose/edge trims for ramps or steps. If you’re transitioning to tile or carpet, choose a compatible threshold or overlapping trim that allows movement and supports both floor types.
How do you install a T-molding transition on herringbone flooring?
Start by measuring the doorway width and marking the centerline so the herringbone design stays symmetrical on both sides of the transition. Cut the T-molding to length and dry-fit it to confirm the top lip lands flush while allowing the required expansion gap at the perimeter. Install using the recommended method for your flooring type—typically fasteners or adhesive rated for hardwood—then press the transition down until it locks; avoid gluing the transition tightly where the wood needs room to expand.
How do you handle height differences when installing transitions for herringbone floors?
Measure the exact finished height of your herringbone floor and the adjoining floor (carpet, laminate, tile, or subfloor), then select a reducer strip sized for that difference. Use thin-set or leveling material under the transition only if needed (especially with tile), and keep the reducer centered so the herringbone pattern doesn’t look skewed. A proper height-matching transition prevents rocking edges and reduces tripping while maintaining clean visual alignment.
Why is alignment so important when adding transitions to a herringbone floor?
Herringbone planks create strong visual lines, so even a small shift near a doorway can make the pattern look off-balance. To keep the layout professional, plan the plank cuts around the transition location, often centering the pattern at the threshold before locking in the first rows. Mark reference lines across the floor, and check spacing repeatedly during installation so the transition sits where the design intent expects it.
Which installation method is best for transitions—nail-down, glue, or floating—for herringbone floors?
The best method depends on how your herringbone floor is built and installed: nail-down hardwood often uses nailed or screwed transitions, glue-down planks may pair well with adhesive-compatible trim, and click-lock/floating floors typically require transitions that don’t restrict floor movement. For floating herringbone floors, ensure the transition is fastened to the subfloor or doorway frame only (not into the floating boards) to avoid buckling. Always follow the transition manufacturer’s instructions for allowable movement, expansion gaps, and fastener placement.
📅 Last Updated: October 15, 2026 | Topic: How to install transitions for herringbone floors? | Content verified for accuracy and freshness.
References
- Redirecting…
- https://www.access-board.gov/guidelines-and-standards/buildings-and-sites/ada-aba-accessible-requirements/ground-and-floors/
- Herringbone
- Wood flooring
- Threshold
- Expansion joint
- https://scholar.google.com/scholar?q=installing+floor+transition+strips+thresholds+wood+flooring Google Scholar
- https://scholar.google.com/scholar?q=herringbone+floor+installation+transition+strip+expansion+gap Google Scholar
- https://scholar.google.com/scholar?q=hardwood+flooring+movement+doorway+threshold+transition Google Scholar



[…] or snagging on the tread? This guide gives you the clear best approach—choosing the right transition type and installing it so each stair edge lines up cleanly and stays secure. Follow the steps for […]