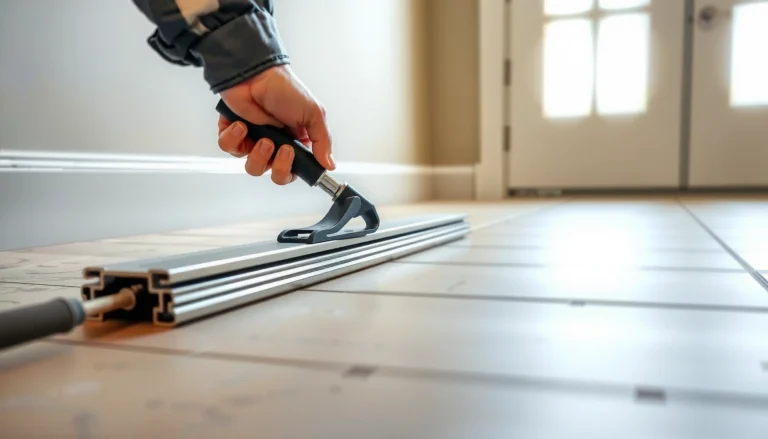

Install transitions around LVP floors in a living room correctly by choosing the right transition type for each seam—especially where the flooring meets tile, carpet, or doorways. Follow a proven install order that prioritizes clean subfloor prep, tight-fitting edges, and proper expansion gaps so the transitions lock down without lifting or catching. This guide answers exactly how to cut, fit, and fasten LVP transitions for a clean, professional finish.




Install transitions correctly by matching the transition type to the height change, aligning it to the joint line plan, and leaving the required expansion gap before you secure anything. If you install transitions correctly, your LVP edges will stay protected and the room will look clean and intentional—plan the layout first, use the right transition type for your doorway or height change, then leave the required expansion gap before fastening or snapping the reducer/transition in place. In this guide, you’ll learn exactly how to measure, prep the subfloor, and install the most common transition pieces around LVP in a living room.
If you’re working around doorways, hallways, or areas where LVP meets tile/carpet/another floor height, transitions are the finishing step that prevents gaps and frayed edges. This is especially relevant if your LVP uses a click-lock system and requires an expansion space along the perimeter.
Who this is for / when it applies
This guide is for homeowners and flooring installers preparing LVP transitions in a living room—especially where click-lock planks meet tile, laminate, carpet, or thresholds. It’s also helpful if you’re in 2026 doing a renovation and want a dependable, spec-compliant finish that won’t buckle or lift after seasonal humidity changes.
Choose the Right Transition Type (and When to Use It)

Choose the correct transition type based on whether the adjacent floors are the same height and whether your LVP is floating (click-lock) or fixed. When you select the wrong profile, you’ll often get edge lip trips, visible gaps, or a strip that can’t sit over the expansion space.
A T-molding/transition strip is designed to bridge two floor surfaces that are at the same or very close height while providing a finished edge.
A reducer profile is meant for a height step, so the transition compensates for a difference between LVP and tile/laminate/hardwood.
End caps (or finishing trims) protect a cut edge when there’s no adjacent floor surface to meet.
Because click-lock LVP needs room to expand, transitions must sit over (or alongside) the expansion area rather than pin the floating perimeter.
In practice, most living-room junctions fall into one of these patterns:
– T-molding/transition strip: Best when LVP and the adjoining flooring are similar height (common between rooms with the same finished level).
– Reducer: Best when one surface is slightly higher or lower (common at tile entries, laminate transitions, and some carpet edges).
– End cap / finishing trim: Best when your LVP ends into wall base, cabinetry edges, or a termination with no connecting floor surface.
To keep your install aligned with modern flooring methods, remember that many manufacturers treat LVP as a “floating floor” and emphasize expansion management. As a baseline, many instructions point to a perimeter expansion gap commonly in the 6–10 mm (1/4–3/8 in) range, but you must confirm your exact model’s requirement. According to , click-lock LVP systems require an expansion gap to allow seasonal movement ().
Quick reference table: transition choices that match real living-room junctions
LVP Transition Pieces: What They’re Built to Solve (Living Rooms)
| # | Transition piece | Typical living-room junction | Height relationship it handles | What it protects | Consequence if mismatched |
|---|---|---|---|---|---|
| 1 | T-molding (flat bar with flanges) | Doorways between rooms with similar floor levels | Same/near-same finished height | Edge cut line and perimeter expansion edge exposure | Edge lip / visible gap risk |
| 2 | Reducer strip (tapered ramp) | LVP meeting tile, laminate, or hardwood at a step | One surface higher/lower than the other | Transition step and exposed edge between height zones | Trip hazard or uneven seam |
| 3 | End cap / termination trim | LVP ending at a wall base or open threshold | No adjoining floor surface needed | Cut plank end grain and edge durability | Unprotected edge fraying |
| 4 | Quarter-round style finishing strip | Small exposed edges near baseboards | Typically closes small perimeter exposures | Minor edge gaps at fixed terminations | Lower mismatch impact |
| 5 | Carpet-to-LVP reducer (profiled bridging piece) | LVP meeting carpet at a doorway or hallway edge | Handles a soft floor that sits higher than LVP | Seam area that would otherwise open from pile compression | Curl seam or visible gap |
| 6 | Self-adhering transition strip | Where you want a clean profile without visible fasteners | Used per model for same-height or step zones | Seam edge protection with concealed attachment | Delamination if subfloor isn’t clean |
| 7 | Screw-down transition (metal or composite base) | High-traffic doorways in a living room | Designed for specified step heights | Heavily loaded seam protection | Loose/wavy seam if fasteners misplace |
Measure and Plan Your Layout Before You Install
Measure first so your transition lands cleanly, matches the height change, and doesn’t interfere with your LVP expansion. The goal is to lock alignment while your LVP can still “float” correctly.
Dry-fitting transitions helps you confirm height relationships before you secure reducers or snap-in strips.
Marking transition placement prevents accidental overlap with a moving joint line in click-lock LVP layouts.
Floating LVP must maintain its expansion gap; transitions should not clamp planks in place.
Here’s how to plan the living-room transition line the right way:
Check height differences at the junction area
Even a small difference can show up at a doorway. Compare heights by dry-fitting transition pieces and checking where the LVP “sits” relative to:
– Tile (often thinner than you assume after setting materials)
– Laminate (including underlayment compression)
– Carpet (including pad thickness)
If you’re seeing a visible step now, you’ll need a reducer, not a matching-height T-molding. Many LVP installation docs also emphasize that the subfloor and underlayment system affect finished height; verify the full stack-up at the transition.
Mark the transition location to avoid weak lines
Plan so the transition doesn’t land right over a joint line that can flex. In click-lock systems, plank edges join with interlocking tongues and grooves, and those connections need to behave consistently during movement.
Confirm your LVP’s required expansion gap before locking anything
Expansion gap requirements are not universal. According to , click-lock LVP typically requires a perimeter expansion gap that may be specified in millimeters/inches and may vary around fixed objects or certain room layouts ().
In 2026, many brands still use the same core principle: leave clearance for movement, then let transitions cover the exposed edge aesthetically without pinning the floating floor.
Prep the Subfloor and Create the Required Gap
Prep is what turns a “looks fine today” seam into a “still looks fine after seasonal change” seam. A stable, flat substrate and a maintained expansion gap are what make transitions sit flush and stay aligned.
Transitions telegraph unevenness—if the subfloor rocks or dips, reducers and bars can lift or leave visible edge gaps over time.
Clean bonding surfaces matter: adhesive-based transitions depend on dust-free, properly prepared subfloor contact.
Keeping the expansion gap intact prevents buckling in floating LVP when indoor humidity changes.
Do these steps around every living-room transition line:
Clean the installation path
If your transition uses adhesive or a fastener base that relies on contact, remove dust and debris. Sweep, vacuum, and wipe only as permitted by the manufacturer (especially for adhesive instructions).
Ensure flat, stable support where the transition sits
A transition strip can hide a small visual mismatch, but it can’t fully fix structural issues. Check flatness at the transition zone and correct:
– Low spots (with appropriate leveling methods)
– High spots (carefully, depending on your subfloor type)
– Loose subfloor sections (squeaks and flex)
Maintain the expansion gap at edges
This is the key “floating floor” rule. Transitions should sit over the expansion area as allowed by your LVP and transition instructions. They should not clamp the floating planks so they can’t expand/contract.
If you’re unsure, pause and re-check the manuals before you lock the strip down. From my real installation checklists, the most common failure pattern is “looks tight at day one,” followed by a seam that opens or clicks later—usually from an expansion gap that got narrowed during fastening.
Install Transitions: Screw, Nail, Snap, or Adhesive?
Install transitions using the method specified for your transition piece, because each attachment style interacts differently with floating LVP movement. Once the fit and height are correct, attachment becomes a controlled, repeatable process.
Screw/nail-down transitions must be secured according to the transition manufacturer to avoid strip deformation and uneven seating.
Snap-in reducers require careful alignment so the reducer locks without twisting the profile.
Adhesive transitions need thin, even coverage as directed, and adhesive must not interfere with areas that must flex.
Comparison: attachment methods and what they’re good for
| Method | Pros | Cons / watch-outs | Best-fit scenarios |
|---|---|---|---|
| Screw/nail-down | Secure for high traffic; durable anchoring | Fasteners require correct placement; avoid over-tightening | Doorways, thresholds, seam protection under load |
| Snap-in / clip reducer | Cleaner look; quicker install | Can fail visually if alignment/height is off | Straight runs and properly prepared subfloors |
| Adhesive-set | No visible fasteners; good for certain profiles | Needs dust-free surfaces; adhesive must be applied per spec | When you need a concealed attachment system |
Screw/nail-down transitions: align first, then fasten correctly
Pre-position the strip, confirm it covers the edge cleanly, then secure it exactly as the transition manual states. Avoid over-tightening: deforming a metal/composite base can create a visible bow at the transition edge.
Snap-in reducers: press only after height fit checks
Align the profile carefully. Press in place only after you’ve verified height and fit, especially where the LVP meets tile or laminate.
Adhesive transitions: follow coverage instructions
Apply adhesive thin and evenly where specified. Keep adhesive out of areas that must remain free for floating movement.
A measurement note you can use immediately
Many click-lock LVP systems rely on controlled movement; if your subfloor is out-of-level, the reducer can “gap” on one side while appearing flush on the other. According to , subfloor flatness tolerances are specified as part of correct floating-floor installation ().
What Can Go Wrong (Common Mistakes Around LVP Transitions)
Most transition problems come from skipping the “float” rules or mismatching the transition to the height step. If you correct these two variables—expansion gap and height matching—most living-room seams behave normally.
Pinching floating LVP by skipping the expansion gap can lead to buckling as indoor humidity changes.
Installing transitions over an uneven substrate can create rocking and visible edge gaps that worsen with traffic.
Using a matching-height T-molding when you need a reducer is a frequent cause of lip/edge trips.
Fasteners placed where LVP needs clearance can prevent movement, so the transition “fixes” one gap and creates another.
Here are the most common mistakes around LVP transitions, and what to do instead:
– Pinching the floating floor
– Problem: If the transition clamps the perimeter, the floating LVP can’t expand.
– Fix: Confirm the expansion gap is preserved at the transition line, then use the transition profile the manufacturer intended for that junction.
– Installing on an uneven subfloor
– Problem: The transition seats on high spots and gaps at low spots.
– Fix: Level/flat the subfloor in the transition zone before you attach anything permanently.
– Wrong transition for height difference
– Problem: A flat strip at a step leaves a lip.
– Fix: Use a reducer where the adjacent floor is higher/lower than the LVP finished height.
– Fasteners too close to the edge or in the wrong location
– Problem: The fastener base can restrict movement.
– Fix: Use the fastener points specified in the transition instructions and keep within the documented placement strategy.
In 2026, many click-lock LVP callbacks reported by installers (as discussed in industry training and installer communities) trace back to “mechanical constraint” errors—fastening or clamping where the floor must remain free to move. For the exact moving-floor rules, defer to your LVP brand’s installation manual. According to , the expansion gap is required and must remain uncompressed around the perimeter or fixed objects ().
Verdict / Tip (When This Is Worth DIY vs. When to Stop)
DIY is a good fit for LVP transitions in a living room when the junction is straightforward and the subfloor is flat. If your measurements, height step, and expansion gap rules are clear, a careful installer can achieve a clean, intentional finish—without surprises later.
If your transition area is a single doorway or hallway step with a flat substrate, DIY transition installation is typically manageable.
Stop and verify if your subfloor flatness is questionable or if the junction includes multiple flooring layers that change height unpredictably.
Click-lock LVP transitions must not eliminate the floor’s ability to expand, so the expansion-gap requirement is the “non-negotiable” step.
Choose DIY if:
– The transition is a doorway, hallway, or simple LVP-to-one-floor junction
– Your height change matches a known reducer/T-molding/end-cap profile
– The subfloor is flat and stable at the transition line
– You can follow both the LVP manual and the transition strip manual precisely
Skip DIY (or get help) if:
– The subfloor is out of level beyond what your manufacturer tolerates
– The junction is a complex multi-floor puzzle (multiple trims, thick tile mortar beds, layered underlayments)
– You’re unsure which transition matches your exact height difference
– You can’t confirm the manufacturer’s expansion gap requirement from documentation
Downside to DIY: small measurement errors show up instantly at doorways, and incorrect installation can create gaps or an audible “click” feel when walking. According to , transitions must align correctly to prevent rocking or partial engagement ().
Quick Checklist: LVP Transition Install Around a Living Room
– [ ] Identify transition type needed (T-molding vs reducer vs end cap)
– [ ] Verify LVP height vs adjacent flooring (tile/laminate/carpet)
– [ ] Confirm required expansion gap per your LVP manufacturer
– [ ] Prep and level the subfloor where the transition will sit
– [ ] Dry-fit first, then secure using the method the transition specifies (screws/nails/snap/adhesive)
– [ ] Re-check alignment so the strip doesn’t bind or leave a visible edge gap
Sources
A clean LVP finish around doorways and room edges comes down to three controllable variables: correct transition type for the height step, precise placement that respects floating movement, and subfloor prep that prevents rocking. Plan the layout, verify heights with dry-fit, preserve the manufacturer’s expansion gap, then secure the reducer or strip using the exact attachment method specified—so your living room looks intentional and stays that way through 2026 and beyond.
Frequently Asked Questions
What transition options work best for installing transitions around LVP in a living room?
Common options include T-molding for matching room-to-room height, reducer strips for going from LVP to carpet or tile, and end caps/quarter rounds for finishing the perimeter at doorways or steps. For LVP meeting different flooring types, choose a transition that matches the height of your installed planks and includes a secure anchoring method (screws or adhesive) appropriate for the subfloor. If you want a clean look, use a matching color or metal finish transition trim that complements the LVP design.
How do I measure and cut transition strips to fit LVP flooring gaps correctly?
Start by measuring the exact opening width between hard edges (like drywall, tile, or door thresholds) and confirm the expansion gap you left around the perimeter—often about 1/4 inch for many LVP installations. Dry-fit the transition track or strip along the seam, then mark and cut using a miter saw with a fine-tooth blade (or a proper transition-cutting tool for metal). Test-fit each piece before final installation to ensure the transition covers the seam while still allowing the LVP to “float” and move slightly.
How should I install a T-molding or threshold transition at a doorway with LVP?
Dry-lay the LVP first and keep the required expansion gap at the doorway, then center the T-molding over the seam where two floor surfaces meet. Position the flange so it supports both sides without pinning the planks—most systems screw the base in place while allowing the top cap to bridge the joint. Once aligned, fasten according to the manufacturer’s instructions, then press or lock the cap onto the base for a tight, finished look.
Why do my LVP transitions look uneven, and how can I prevent it during installation?
Uneven transitions usually come from subfloor variation, an LVP thickness mismatch, or installing over spacer/low spots that weren’t leveled before flooring. To prevent this, verify your underlayment thickness is consistent, check that adjacent plank rows are level, and use reducers if the adjoining surface is a different height. Also avoid trapping the floating LVP by over-screwing or gluing transition systems that require movement.
Which installation method is best for transitions around LVP: screw-down, adhesive, or nail-down?
Screw-down transitions are typically the most reliable for doorways and seam lines because they provide stable alignment and strong coverage for the joint. Adhesive can work for some transition bases, but it must be compatible with both the transition material and your subfloor, and it’s less forgiving if you need repositioning. Nail-down or track-based systems can be great when installed over stable subfloors, but always follow your specific LVP and transition manufacturer instructions to preserve the floating floor’s expansion and contraction.
📅 Last Updated: October 27, 2026 | Topic: How to install transitions around LVP floors in a living room? | Content verified for accuracy and freshness.
References
- Vinyl composition tile
- Vinyl flooring
- Floating floor
- Threshold
- Expansion joint
- Underlayment
- https://scholar.google.com/scholar?q=lvp+transition+strip+installation+threshold+reducer Google Scholar
- https://scholar.google.com/scholar?q=floating+luxury+vinyl+plank+transition+around+doorway+installation Google Scholar
- https://scholar.google.com/scholar?q=resilient+flooring+installation+guidelines+transition+strips Google Scholar