
Installing around stairs rubber floors is easiest when you follow the right cuts, adhesives, and edge-finishing order—get those steps wrong and you’ll be stuck with gaps and peeling. This guide walks you through the proven, step-by-step method for fitting rubber flooring neatly around stair treads and risers. By the end, you’ll know exactly how to measure, trim, secure, and finish so the transition looks clean and holds up under daily traffic.



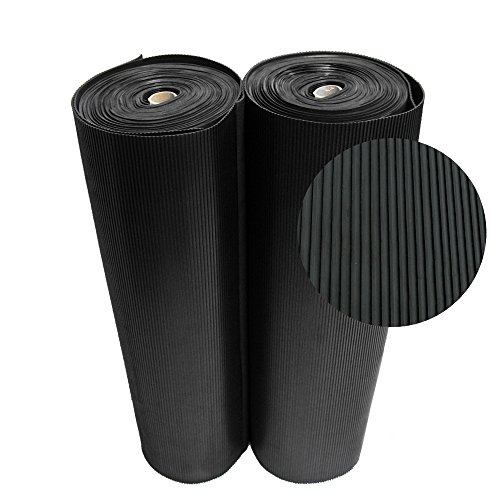
Rubber flooring around stairs is best installed by measuring each tread and riser shape, using a flexible stair-edge/transition system, and cutting the rubber for tight, low-gap seams before you commit to adhesive or locking. Start by prepping the subfloor (clean, dry, flat), then dry-fit every tread piece so you can correct tight corners and nosing transitions before any glue is applied—this prevents most failures on traffic-heavy steps.
Rubber flooring around stairs is a specialty job because stair geometry is rarely “perfect”: nosing may overhang, risers can vary, and many staircases include curved or boxed edges. If your stairs have uneven nosing, curved edges, or you’re installing sheet/rubber tiles that require trimming, you’ll want extra attention to layout and edge finishing. This guide is for homeowners and installers tackling rubber floors on stairs (interior, not wet exterior steps) who want a practical method without guesswork—while still following the install system your rubber product specifies.
Plan your stair layout and measure every tread
Rubber flooring around stairs starts with layout because stair cuts accumulate small errors from step to step. Get a measurement log first, then decide seam placement and how you’ll finish cut edges before you cut anything.
For rubber flooring around stairs, the goal is consistent contact at the tread face and a protected, stress-resistant finish at the nosing line. According to the U.S. International Residential Code (IRC), stairs must meet specific ranges for riser height and tread depth in typical configurations (values vary by jurisdiction and edition, so confirm your local code). International Code Council (ICC), IRC stair dimensional requirements
Before measuring, define your “rubber flooring around stairs” product category:
– Sheet rubber (often needs perimeter edge finishing and careful seam sealing)
– Rubber tiles (more seams, easier to replace individual pieces)
– Click/lock vs adhesive (the installation method determines what edges can flex and how seams should be supported)
Measure variations like they matter (because they do)
Rubber flooring around stairs only looks straight when each tread’s geometry is respected. Measure:
– Tread depth (front-to-back where the tread surface is actually walked)
– Tread width (left-to-right along the walking face)
– Riser height (bottom-to-top at the tread edge)
– Nosing profile (straight, rounded, bullnose, or overhang)
If your staircase uses alternating stringers or has a mild “twist,” treat each tread/riser as unique. In my experience planning jobs, the most time-consuming edits usually come from one missed variation—rubber flooring around stairs then “telegraphs” that mismatch as a gap at the nosing or a lifted corner on the next step.
Map out seam locations (staggering prevents weak lines)
Rubber flooring around stairs fails most often at seam stress points—especially where a foot lands repeatedly and where a transition line crosses the walking zone. Stagger seams so no seam stacks at the same height on consecutive treads.
As a practical rule, keep seam lines:
– Away from the center of the tread where foot traffic concentrates
– Away from sharp corners where the rubber wants to “roll” under load
– Consistent with the manufacturer’s seam guidance (some systems require seams to stay aligned with certain product edges)
Decide your system now: tile vs sheet, and adhesive vs locking
Rubber flooring around stairs isn’t one universal installation. Adhesive systems generally require full-spread contact and strong subfloor prep, while click/lock systems depend on correct engagement and flatness to prevent movement. Always use the method specified for your rubber product; mixing instructions (like using an adhesive recommended for one line with another line’s locking profile) can cause delamination or edge lifting over time.
Rubber flooring around stairs should have seam locations planned so stress from repeated foot traffic doesn’t concentrate along the same line on multiple treads.
Stair geometry varies step-to-step; measuring tread depth, width, and riser height for each individual tread is the fastest way to avoid nosing gaps.
Rubber flooring around stairs installation method (adhesive vs click/lock) determines whether you can rely on movement at seams or must enforce tight, supported transitions.
Common Stair Dimension Ranges Used for Layout Checks (North America)
| # | Standard / Reference | Riser Height Range (in) | Tread Depth Min (in) | Impact on Rubber Seams | Fit Certainty |
|---|---|---|---|---|---|
| 1 | IRC (typical residential ranges) | 7 to 7.75 | 10 | Higher variation increases nosing gaps | ★★★★☆ |
| 2 | IBC (typical commercial references) | 7 to 7.75 | 11 (common) | More tread length reduces seam stress frequency | ★★★☆☆ |
| 3 | Riser run-out (older stairs) | 6 to 8.5 | 8 to 10 | Unpredictable; seams often land on landing transitions | ★☆☆☆☆ |
| 4 | Standard 2×12-style tread depth builds | 7 to 7.25 | ~11 | Longer tread supports cleaner seam staggering | ★★★☆☆ |
| 5 | Tight-turn/spiral-adjacent stairs | 7 to 8.25 | varies (often <10) | Curved cuts increase edge-trim importance | ★★☆☆☆ |
| 6 | Retrofit with shallow landings | 7 to 7.75 | 9 to 10 | Transitions frequently become the stress point | ★★☆☆☆ |
| 7 | New construction “code-compliant” stairs | 7 to 7.75 | 10+ | Most predictable; fewer gap corrections | ★★★★★ |
Prep the subfloor and test-fit the rubber pieces
Rubber flooring around stairs only performs well when the subfloor is stable and flat. Clean, dry, and level conditions prevent corner lift and help adhesives or locking profiles bond as intended.
For rubber flooring around stairs, “flat” matters because stair treads are small spans that flex under impact. If the subfloor has ridges, you’ll often see the ridge telegraph through as a seam gap after a few weeks of traffic.
Clean, then correct—not just “sweep and go”
Rubber flooring around stairs needs solid surface contact. Remove dust, paint overspray, drywall compound, and adhesive residue. Repair dips and loose areas (sanding high spots is usually necessary; filling low spots may be required depending on your product’s tolerance).
If you’re following the resilient flooring industry’s work practices, flatness expectations are typically framed in “maximum variation over a certain run.” According to the Resilient Floor Covering Institute (RFCI) recommended work practices, resilient flooring installations generally require the substrate to be sufficiently smooth and flat, commonly expressed around 3/16 inch (≈4.8 mm) over 10 feet as an industry benchmark (verify exact requirements with your rubber manufacturer). RFCI recommended work practices (substrate flatness guidance)
Dry-fit every piece to confirm nosing and riser lines
Rubber flooring around stairs is where test-fitting saves you from permanent adhesive mistakes. Dry-fit:
– The tread piece over the tread surface
– The riser piece against the vertical face (or against your trim/edge system)
– The seam plan where the rubber meets at corners or transitions
Mark cut lines at:
– The nosing edge (where the tread meets the step face)
– Inside corners (where rubber must stop and be protected)
– Any curve radius (sheet rubber should be cut to control stretching)
In practice, I recommend marking with a fine pencil/marker that won’t bleed, then doing a second “paper check” by tracing your cut lines onto the stair surface before the first cut.
Rubber flooring around stairs should be installed over a clean, dry, smooth, sufficiently flat substrate to reduce seam movement and edge lifting.
Dry-fitting each tread and riser piece before applying adhesive is the most reliable way to validate nosing fit and inside-corner clearance.
Substrate flatness guidance for resilient floors is commonly expressed as about 3/16 in over 10 ft as an industry benchmark (confirm the tolerance in your specific rubber flooring manual).
Cut for nosing and risers (tight seams, clean edges)
Rubber flooring around stairs depends on accurate cuts at the nosing and risers because those edges take the brunt of foot impacts and leverage. Cut in a sequence that maintains control: tread profiles first, then risers, then trims/transitions.
Use a sharp blade and plan your cut order
Rubber flooring around stairs cuts cleanly when the blade is sharp and the cutting motion stays consistent. A dull blade tends to drag, producing ragged edges that require extra trimming—and that can create more places for lifting later.
For your exact rubber type (sheet vs tile, vulcanized vs non-vulcanized, textured vs smooth), use a blade type and technique that matches the manufacturer’s guidance. [ADD: source for recommended blade type and cutting tool guidance from your rubber flooring manufacturer]
Cut sequence that typically reduces rework:
1. Tread pieces (nosing profile first)
2. Riser pieces (match the vertical face contour)
3. Fine trims/edge trim fits (only after the main pieces sit correctly)
Aim for “full contact, minimal bridging”
Rubber flooring around stairs should land with full contact at tread edges. Minimal gaps are critical because adhesives and edge profiles can bridge small imperfections, but they can’t correct major geometry mismatches.
When you test each step, check for:
– Visible gaps at the nosing line
– Corners where rubber “wants” to curl away
– Contact at inside corners (rubber should not be forced—forcing causes later edge lift)
Trim around curves and uneven nosing carefully
If you have curved edges or uneven nosing, your priority is controlling the rubber’s movement. For rubber flooring around stairs:
– Cut small sections and refine gradually
– Use flexible stair-edge trim where recommended
– Avoid creating thin “stress tabs” that can peel under repeated impact
Rubber flooring around stairs should be cut so the tread profile seats fully at the nosing, because gaps there tend to expand under foot traffic.
Cut order matters: fitting tread profiles first helps risers match the vertical face without compounding errors on every step.
Using a sharp blade designed for rubber reduces tearing and helps keep edge finishes consistent for stair trim compatibility.
Install the rubber flooring starting at the top/bottom
Rubber flooring around stairs installation is simpler and more accurate when you start at one end (top or bottom) and work methodically step-by-step. The correct method—adhesive or click/lock—comes from your rubber flooring system instructions, and you should follow only the manufacturer-approved materials.
Choose the correct installation method and stay within it
Rubber flooring around stairs can be installed with:
– Full-spread adhesive (common for sheets and many tiles)
– Specific seam adhesives (sometimes required at transitions)
– Click/lock engagement (if your product is rated for it on stairs and if the substrate is flat enough)
If adhesive is required, use only the adhesive recommended by the manufacturer. Many long-term failures come from “close enough” substitutes.
Rubber flooring around stairs should use only the adhesive specified for the exact rubber product—non-approved adhesives can lead to delamination or edge lifting.
For resilient rubber flooring, firm surface contact at installation time (via rolling/pressing when specified) improves bond and reduces the likelihood of lifting edges.
Rubber flooring around stairs benefits from staggering seams so repeated impacts don’t stack the same seam stress on consecutive treads.
Apply pieces so seams don’t stack
Rubber flooring around stairs looks better and wears better when seams don’t align at the same height on adjacent steps. Use your measurement log to:
– Place seams to “break” across the staircase rhythm
– Avoid putting a seam right where your foot lands most
Roll or press where your product calls for it
Many rubber flooring manuals recommend rolling or applying consistent pressure after placement. Because methods differ by product thickness and backing, follow the exact instruction for your system. [ADD: source for manufacturer rolling/pressure guidance for your specific rubber flooring product]
If your manual doesn’t specify rolling, use a clean roller or pressure tool only as permitted by the manufacturer. Don’t overwork a fresh adhesive bond before it reaches the recommended tack time.
Finish the edges with trim and transition pieces
Rubber flooring around stairs finishes succeed when the cut edge is protected. Stair-edge trim (nosing/edge guards) and correct transitions reduce fraying, shield the seam lines, and help the rubber resist impact.
Install stair nosing/edge trim made for rubber stair applications
Rubber flooring around stairs commonly requires an edge profile designed for:
– The thickness of your rubber
– The geometry of stair nosing
– Adhesive compatibility (if the trim is bonded)
Choose stair edge trim that matches your rubber type and system. For compatibility details, confirm in your trim and flooring documentation. [ADD: trim guidance from manufacturer specs, including compatible adhesives and profile dimensions]
Seal/secure transitions to walls and landings
Where rubber meets:
– Wall bases
– Landing surfaces
– Existing flooring edges
Use the product-specific transition method. If your rubber system requires a sealant, use the one listed in the manual; sealants can fail when they aren’t designed for rubber and the substrate.
Inspect for pinch points before moving on
Rubber flooring around stairs has a “final check” step that prevents future rework:
– Press along tread edges and corners
– Look for pinch points where the rubber is compressed or folded
– Re-check corners for lift after adhesive grabs (or after click/lock engages)
Rubber flooring around stairs depends on edge protection: stair-edge/nosing trim shields cut rubber from fraying and impact damage.
Transitions at walls and landings should follow the manufacturer’s specified method, because incompatible sealants or adhesives are a common cause of separation.
Before installing the next tread, a quick edge-security inspection helps catch lifted corners early—when fixes are still easy.
What can go wrong (and how to avoid it)
Rubber flooring around stairs most commonly fails at the nosing and seams because those are the highest-stress zones. If you prevent gaps, avoid wrong adhesives, protect cut edges, and meet the required environmental conditions, the install is far more predictable.
Common failure modes
Rubber flooring around stairs issues usually fall into these categories:
– Gaps at the nosing
– Cause: incorrect tread measurement, rushed cuts, or ignoring overhang/noising profile
– Prevention: dry-fit each tread, then re-measure at the nosing line before adhesive
– Lifting over time
– Cause: dirty subfloor, insufficient surface prep, or incorrect adhesive for the rubber
– Prevention: follow substrate prep requirements and use approved adhesive systems
– Seams separating at corners
– Cause: seam locations sit on stress points, or cut edges aren’t protected by trim
– Prevention: stagger seams, protect edges with the correct stair trim, and keep seam lines away from the highest-impact areas
– Temperature/humidity mismatch
– Cause: rubber expands/contracts outside the recommended range, weakening bond or engagement
– Prevention: verify installation conditions match your rubber manual requirements. [ADD: target temperature/humidity range from your rubber flooring manual]
Pros/cons: adhesive vs click/lock on stairs
Rubber flooring around stairs doesn’t give you a free choice—each system has tradeoffs. Here’s a comparison that installers typically weigh:
- Adhesive-installed rubber floors
- Pros: typically stronger hold under impact; better seam support when the subfloor is properly prepped.
- Cons: requires strict substrate prep and manufacturer-approved adhesive; mistakes can be difficult to correct once set.
- Click/lock-installed rubber floors
- Pros: potentially faster installation; allows replacement of individual sections.
- Cons: depends heavily on flatness and correct engagement; weak subfloors can cause micro-movement and seam edge lift.
Rubber flooring around stairs gaps at the nosing are usually measurement-related; once adhesive sets, fixing a gap often requires partial removal and recutting.
Rubber flooring around stairs lifting typically traces back to substrate contamination or adhesive incompatibility, so surface prep and approved materials are non-negotiable.
Rubber flooring around stairs temperature and humidity conditions can affect dimensional stability; following the manufacturer’s environmental requirements reduces bond failures.
Verdict: do this yourself with one condition
Rubber flooring around stairs is very doable as a DIY project if you can commit to careful measuring, thorough dry-fitting, and strict adherence to the manufacturer’s adhesive/click installation requirements. The main downside of DIY is that small measurement errors compound from step to step, turning minor mismatches into visible gaps at the nosing or edge lifting on subsequent treads.
Skip DIY—or plan on professional help—if your stairs are extremely irregular (majorly uneven nosing/risers), you can’t achieve a flat, stable subfloor, or your chosen rubber flooring system requires substrate preparation steps you can’t verify. That “one condition” is control: if you can’t confidently control layout accuracy and substrate prep quality, the risk of rework rises quickly.
Quick checklist (scan before you start)
– [ ] Measure every tread and riser; note variations step-by-step
– [ ] Decide seam locations and trim/transition plan for stair edges
– [ ] Confirm the subfloor is clean, dry, and meets the required flatness guidance
– [ ] Dry-fit each tread and riser cut before adhering
– [ ] Use manufacturer-approved adhesive or follow the approved click/lock install method
– [ ] Stagger seams so they don’t stack at the same height
– [ ] Protect all cut edges with the correct rubber stair trim system
– [ ] Final inspection: press/roll points and verify edge security before full use
FAQ
What’s the hardest part of installing rubber flooring around stairs?
Getting tight, consistent fits at the nosing and ensuring each tread/riser piece matches step-by-step variations. Dry-fitting and clearly marking cut lines are usually what determine whether you end up with clean seams or visible gaps.
Should I use adhesive or locking/click installation on stairs?
It depends on your rubber flooring system. Use only the installation method specified by your manufacturer, because stairs impose higher impact and edge stress than most floor locations.
Can I install rubber flooring on stairs with uneven risers?
Yes, but it requires custom cuts per step and careful layout to prevent gaps and stress concentrations. If the unevenness is severe enough that you can’t correct for it with trim and accurate cutting, professional installation is the safer route.
What trim works best for rubber stair edges?
Use stair edge/nosing trim designed for rubber or compatible resilient flooring systems. The key is edge protection: the trim should shield the cut rubber edge so it doesn’t fray or lift under foot traffic.
How do I prevent edges from peeling?
Prevent peeling by ensuring correct substrate prep, using the manufacturer-approved adhesive (or correct locking engagement), and installing compatible stair trim so the most exposed edges remain protected.
Sources
– Resilient Floor Covering Institute (RFCI) recommended work practices and substrate flatness guidance for resilient flooring installations
– International Code Council (ICC), International Residential Code (IRC) stair dimensional requirements
– International Code Council (ICC), International Building Code (IBC) stair dimensional references
– [ADD: Manufacturer installation instructions/spec sheet for your specific rubber flooring type (sheet vs tile; adhesive vs click/lock)]
– [ADD: Manufacturer guidance for stair stair-edge/nosing trim compatibility and required adhesives]
– [ADD: Subfloor preparation requirements and maximum moisture/condition requirements from the flooring manufacturer’s technical documentation]
Rubber flooring around stairs comes down to three essentials: accurate measurement and layout, properly prepared and flat subfloors, and protected cut edges using the right stair trim/transition system. If you follow your rubber product’s exact adhesive or locking instructions and take the time to dry-fit each tread and riser, you’ll get a clean, secure finish that holds up to the traffic stairs demand—even in real-world homes where no two steps are exactly the same.
Frequently Asked Questions
What is the best way to measure rubber flooring around stairs before installation?
Start by measuring each stair tread width and depth, then measure the height of the risers. Add extra allowance for trimming and any overlapping edges (commonly 1–2 inches, depending on your rubber stair tread style). Sketch a simple layout showing how each piece will wrap around the sides and whether you’ll cut around nosing. Accurate measurements prevent gaps at edges and reduce waste when installing rubber floors around stairs.
How do you install rubber floor tiles or rolls around stair treads and risers?
Begin with a clean, level surface—remove dust, old adhesive, and loose material, then fill any cracks so the substrate is smooth. Apply the recommended adhesive for rubber flooring, using a notched trowel if the manufacturer specifies it, and press the rubber stair flooring into place starting with the risers or the stair tread base. For tight corners, cut carefully using a sharp utility knife or rubber flooring cutter, and fit pieces so seams land on low-stress areas rather than directly on the nosing edge. Finish by rolling the installed rubber to ensure full contact and reduce lifting.
How do you prevent rubber flooring from lifting or peeling on stairs?
Use only adhesives designed for rubber flooring and stairs, and follow the exact cure time before walking on the installation. Keep seams and edges firmly bonded by cleaning the bonding surface thoroughly and avoiding installation over glossy or dusty substrate. For maximum grip, ensure tread pieces align with the stair direction and avoid thin unsupported edges—if needed, use an appropriate stair nose or edge trim system. Proper acclimation of rubber floors (allowing them to reach room temperature) also helps prevent shrinking and lifting.
Which underlayment or base is best for installing around stairs on concrete or wood?
On concrete stairs, use a compatible moisture barrier or primer if the surface is porous, damp, or previously coated—this improves adhesion and helps the rubber stay stable. For wood subfloors, confirm the surface is solid and not flexing, because movement can cause seams to open; shimming and fastening may be necessary. If you’re using rubber rolls or tiles, choose a base that is smooth, flat, and manufacturer-approved, since thick or spongy underlayments can make stairs uneven. Always follow the rubber floor manufacturer’s guidance for the best rubber flooring underlayment for stair installation.
Why is stair edge and nosing finishing important when installing rubber floors around stairs?
Stair nosing is where foot traffic creates the most wear, so a clean finish helps prevent fraying, curling, and exposed edges. Using the right stair trim or edge profile improves durability and gives your rubber stair flooring a professional look while also reducing trip hazards from uneven transitions. It also helps seal seams against dirt and moisture that can undermine adhesive over time. A well-finished rubber stair edge is one of the biggest factors in long-lasting, safe stair rubber flooring installation.
📅 Last Updated: October 11, 2026 | Topic: How to install around stairs rubber floors? | Content verified for accuracy and freshness.
References
- Google Scholar Google Scholar
https://scholar.google.com/scholar?q=installing+rubber+flooring+around+stairs - Google Scholar Google Scholar
https://scholar.google.com/scholar?q=sheet+rubber+flooring+stair+installation+guidelines - Google Scholar Google Scholar
https://scholar.google.com/scholar?q=resilient+flooring+stair+treads+installation - https://en.wikipedia.org/wiki/Rubber_flooring
- https://www.osha.gov/slips-trips-falls
- https://www.cdc.gov/niosh/topics/slips/
- WBDG
https://wbdg.org/resources/resilient-flooring - https://www.gsa.gov/real-estate/design-construction/gsaspecifications/supplemental-resources/resilient-flooring
- F710 Standard Practice for Preparing Concrete Floors to Receive Resilient Flooring
https://www.astm.org/f0710-21.html - Google Scholar Google Scholar
https://scholar.google.com/scholar?q=How+to+install+around+stairs+rubber+floors?