

Wondering how to install around cabinets with SPC floors without gaps or pinching? This step-by-step guide shows the fastest, most reliable method—whether your cabinets are flush to the wall or set slightly off the floor—so your planks lock correctly and stay solid. By the end, you’ll know exactly where to cut, how to handle expansion space, and how to finish the edges cleanly.



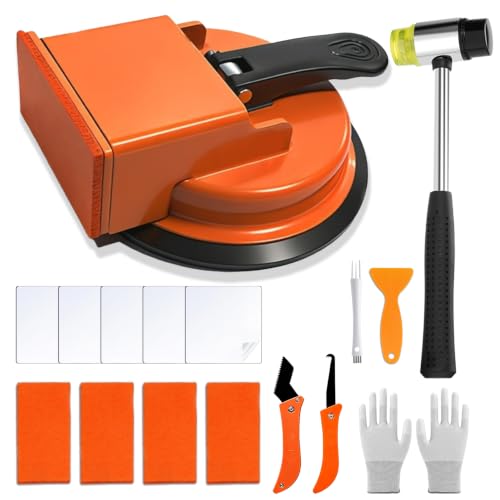
You can install SPC (rigid core) floors around cabinets by undercutting the cabinet toe-kick (or removing it if possible) and sliding the planks up to the cabinet—without trying to “patch” exposed gaps. The key is maintaining the required floating expansion gap at the room perimeter, then using trim/transition pieces only where movement is blocked.
If you’re fitting SPC plank or click-lock flooring in a kitchen or utility room where cabinets sit on walls or have a toe-kick that prevents the floor from running “underneath” normally, this approach is usually the cleanest. It’s especially useful for floating installs (most SPC click systems), where the planks must still be able to expand/contract even though cabinets themselves stay put.
Before You Start: Confirm Your SPC Layout Rules
You don’t get a reliable around-cabinet install until you confirm whether your SPC is floating (click-lock) or glued-down, because the floor’s required movement changes the whole plan. Once you know that, you can map your expansion gap strategy and pick where the planks will stop so you don’t trap yourself later.
Most floating rigid-core (SPC click-lock) products require an expansion gap at the perimeter so the floor can move; installing tight against fixed objects can cause buckling.
Toe-kick undercutting is mainly a “workaround to keep the interlocks functional” by letting planks slide in behind the cabinet while the perimeter gap still stays open.
Your plank stop points (cabinet bases, columns, thresholds) should be planned before the first row goes down; seam alignment decisions made early are hard to correct later.
Before you cut anything, confirm the system type stamped on the packaging or in the manufacturer’s installation instructions. Floating SPC needs room to expand/contract; glued-down SPC typically follows different prep and anchoring rules. In practical terms: around cabinets in a floating setup, you typically avoid “pinching” the floor anywhere it would block movement end-to-end.
Next, measure the room and establish an expansion gap plan along every perimeter-adjacent edge, including cabinet-free walls, door openings, and transitions. Manufacturer-required clearance is usually specified as a minimum gap (commonly in the range of ~6–10 mm / 1/4–3/8 in, depending on temperature exposure and room dimensions), but you must use the exact value for your product.
Finally, identify where the floor must stop and how: fixed cabinet bases (that can’t be undercut), cabinet legs, and structural posts often become “finish areas.” Your goal is to either (1) run the planks under/into those zones via toe-kick clearance, or (2) stop short and cap with trim where movement is protected.
Under Cut the Cabinet Toe-Kick (So You Can Slide the Planks In)
You can keep an SPC floor looking continuous by undercutting the cabinet toe-kick so the planks slide underneath rather than forcing them around exposed gaps. Done correctly, the underside cut depth matches the combined stack height (plank thickness plus any approved underlayment) so the floor sits flat and locks properly.
Undercutting a toe-kick lets a floating SPC plank pass behind the cabinet toe while preserving the perimeter expansion gap.
Cut depth should match plank + underlayment height so the floor doesn’t ride up, create a visible lip, or prevent full engagement of the interlock.
Start by determining whether you can safely remove the toe-kick trim. If it’s nailed or screwed and you can reinstall it cleanly later, removal may be simpler and cleaner than undercutting the cabinet frame. If removal would damage finish surfaces or you can’t access fasteners, undercutting the toe-kick channel is usually the next best option.
Undercut depth rule (practical): measure your installed floor build-up:
– SPC plank thickness (from the product spec)
– Underlayment thickness (only if your manufacturer allows it and you’re using the approved type)
Then undercut the toe-kick so the plank body can slip underneath without binding. In my experience with rigid-core installs (where manufacturers emphasize proper interlock engagement), “almost correct” undercut depth is one of the most common reasons people end up with a raised edge and loose seams near cabinetry—because the plank can’t fully sit into its click lock before it’s pushed under.
Before committing to full runs, dry-fit a short plank section and check:
– Does it slide under smoothly?
– Does the plank sit flat with no rocking?
– Do the interlocks fully seat when you tap them into place?
Install the Planks Up to Cabinets Without Locking Errors
You avoid seam failures around cabinets by locking planks together fully before sliding them into the toe-kick area. In other words, you don’t treat under-torquing and toe-kick insertion as “afterthought steps”—you plan them into the install sequence.
For click-lock SPC, the interlock must be fully seated (tapped and aligned) before you slide the next plank segment into the toe-kick space.
Work from the straightest wall first, maintain the perimeter gap, and only then progress toward cabinet zones to prevent cumulative misalignment.
If you can’t undercut a support point (for example, a cabinet leg), treat that location as a planned stop and finish it with transition/trim rather than forcing the click lock.
A reliable sequence typically looks like this:
1. Start at the straightest wall and establish your perimeter expansion gap using manufacturer-recommended spacers.
2. Lay the first row, keep seams square, and maintain plank alignment as you progress.
3. When you reach the cabinet toe-kick zone, lock each plank section using the correct tapping block and technique, then slide the locked segment underneath as needed.
4. Keep the floor free to move at the perimeter—don’t “test fit” by pulling the floor tight against the cabinet face.
If your cabinet toe-kick is undercut, you’re essentially creating a controlled path for planks to slide under while the floating edge gaps remain intact. The most frequent locking error in these scenarios is trying to slide pieces in before the click connection is fully seated, which can leave a micro-gap at the seam—then the seam becomes a stress point when the floor expands seasonally.
Handle Flooring Where Cabinets Are Fixed (No Floating Allowed Under Dead Stops)
You can’t treat truly immovable cabinet bases like “normal floating clearance” zones—SPC must still expand, so anywhere the floor would be pinched needs a planned gap/finish detail. The practical fix is to stop the plank short where underlayment/floor movement is completely blocked, then cover with trim where that movement won’t be visible.
Rigid-core floating floors should not be hard-constrained against fixed “dead stops” because expansion can force buckling at perimeter-adjacent or pinned locations.
When undercutting isn’t possible, the correct approach is to stop short, leave the required clearance, and use trim/transition to maintain a clean finish.
Here’s how to decide between “run it under” vs “stop short”:
– If you can undercut enough for the plank to pass behind the toe-kick while preserving perimeter movement → run it under.
– If you hit a cabinet base support, leg, or structural element that prevents both undercutting and safe clearance → stop short.
When stopping short, cut the plank cleanly and maintain the floor’s ability to move. Then finish the appearance with:
– toe-kick reinstalled trim (if you removed it)
– base trim or cabinet-adjacent trim that doesn’t lock the plank
– a transition strip if you’re stopping at a defined boundary line (common at thresholds)
Misalignment tip: as you approach a fixed point, your early-row decisions matter. Even a small skew at the start can create tight joints (or visible seam widening) near cabinet edges where you have fewer adjustment options later.
What Can Go Wrong (And How to Avoid It)
Most SPC around-cabinet problems are caused by incorrect movement allowance, incomplete interlock seating, or undercut geometry that doesn’t match the installed floor stack. If you proactively control those three variables, you’ll avoid the majority of failures like buckling, seam separation, and “lips” near toe-kicks.
Buckling near walls or cabinets is commonly a symptom of insufficient perimeter expansion gap or forcing the floor tight against fixed surfaces.
Seam gaps near toe-kick areas often come from planks not being fully locked before being slid under the cabinet zone.
A toe-kick undercut that’s too shallow can leave a raised edge that prevents the click connection from seating flat.
Common failure modes and fixes (quick diagnostics)
– Buckle near cabinet walls: expansion gap was too small or the floor was forced tight during installation.
– Gaps at seams near toe-kicks: interlocks weren’t fully seated before sliding the plank under.
– Toe-kick undercut not deep enough: plank rides up; interlock won’t fully engage.
– Undercut depth calculated without considering underlayment: floor sits at the wrong height and may bind when tapped.
– Irregular cabinet base or out-of-square cabinetry: forcing the plank to “match” can create crooked seams and edge pressure.
To make the “what’s best for my situation” decision easier, use this pros/cons comparison:
| Approach | Best For | Pros | Cons / Risks |
|---|---|---|---|
| Undercut toe-kick + slide planks in (floating SPC) | Cabinets with accessible toe-kick channel | Maintains flow of floating movement; cleaner appearance | Requires careful depth measurement; can be messy/dusty; less practical if you can’t access the toe-kick |
| Remove toe-kick (if designed for it) | Cabinets where trim removal is straightforward | Often cleaner fit line; easier verification of clearance | Risk of cosmetic damage; reinstallation may take time |
| Stop planks short + trim/transition (fixed dead stops) | Cabinet legs/columns or structural barriers | Avoids pinching and trapped movement | Visual seam at finish line; needs good trim selection |
| Glue-down SPC method (where applicable) | Systems explicitly approved for glue-down | Can anchor for certain designs | Requires strict prep/adhesive rules; not a substitute for floating products |
Around-cabinet movement planning reminder (with anchoring data)
According to general floating-floor industry practice (and echoed across many rigid-core manufacturer guidelines), the perimeter expansion gap is typically set to accommodate seasonal dimensional change. In most climate zones, a perimeter gap on the order of ~6 mm (1/4″) is commonly used when room dimensions are moderate, while larger spans often require ~8–10 mm (5/16–3/8″). Because your product’s exact clearance is what matters, verify the required gap in your installation sheet and use it consistently.
Common Floating Rigid-Core (SPC) Perimeter Gap by Max Room Span (Field Range)
| # | Max Room Span (Longest Direction) | Typical Perimeter Gap | Click-Lock Risk if Too Small | Installer Confidence |
|---|---|---|---|---|
| 1 | Up to 4.0 m | 6 mm (1/4″) | Lower | ★★★★☆ |
| 2 | 4.0–6.0 m | 7–8 mm (9/32–5/16″) | Moderate | ★★★★☆ |
| 3 | 6.0–8.0 m | 8–9 mm (5/16–3/8″) | Higher | ★★★☆☆ |
| 4 | 8.0–10.0 m | 9–10 mm (3/8″) | High | ★★☆☆☆ |
| 5 | Over 10.0 m | 10 mm+ (check product) | Very High | ★☆☆☆☆ |
| 6 | Perimeter blocked by trim | Must keep gap behind trim | Critical | ★☆☆☆☆ |
| 7 | Wet areas with isolation needs | Follow wet-room spec | Varies by system | ★★★☆☆ |
Verdict: Best Practice for SPC Around Cabinets (With Downsides)
For floating/click-lock SPC, the best all-around method is to undercut (or remove) the toe-kick, slide the planks up to the cabinet while preserving the perimeter expansion gap, then finish tight visuals with trim/transition. This preserves both the floor’s ability to move and the cabinet’s ability to stay rigid—so the floor stays locked rather than buckling.
The downside is that toe-kick undercutting takes careful measuring and can be messy or limited by cabinet design, and you still need clean stop/trim details where you can’t create safe clearance. Skip (or get professional help) if you can’t maintain the required expansion spacing, if your SPC is explicitly designed for glue-down and not floating, or if your product instructions prohibit underlayment/require a different approach in cabinet zones.
Quick Checklist: Around-Cabinet SPC Install
– [ ] Confirm SPC type: floating/click vs glue-down ([ADD: manufacturer name/model/spec source])
– [ ] Measure required expansion gap per manufacturer ([ADD: exact clearance value from your box/manual])
– [ ] Plan starting wall and plank direction so seams don’t land awkwardly near cabinets
– [ ] Undercut toe-kick to correct height (plank + underlayment if used)
– [ ] Keep planks fully locked before sliding under cabinets
– [ ] Stop planks short where pinching would occur; cover with trim instead of forcing fit
– [ ] Use transitions/trim at doorways or where movement can’t continue
FAQ
Do I have to remove cabinets to install SPC floors around them?
Usually no. In most floating SPC installs, you undercut or remove the toe-kick so the planks can slide under while maintaining the required expansion gap at room edges.
How much clearance should I leave at the perimeter near cabinets?
Leave the clearance specified by your SPC manufacturer (common floating-floor guidance exists, but you should use the exact value from your product instructions) — [ADD: exact clearance from your box/manual].
Can I run SPC flooring directly under heavy cabinet bases?
If the system is floating/click-lock, you generally shouldn’t trap the floor so it can’t move. The typical solution is undercutting the toe-kick so the floor can pass under without compressing against fixed points.
What if my cabinet walls aren’t perfectly straight?
You may need to adjust the cut line, leave the proper gap, and rely on trim to cover small irregularities—forcing the planks to match out-of-square walls is a common cause of seam gaps.
Should I use underlayment with SPC?
It depends on your specific SPC product. Some include attached underlayment; others require a separate underlayment—[ADD: guidance from your product manual].
Sources
– [ADD: manufacturer installation instructions for your specific SPC product (floating/click-lock guidance and required expansion gap)]
– [ADD: manufacturer guidance on toe-kick undercutting/clearance (often included in the “Installation” section of the manual)]
– For general floating-floor expansion principles: [ADD: source for floating floor expansion requirements from the manufacturer’s documentation]
When you treat the cabinet toe-kick as a controlled clearance zone (not a place to “make the floor fit”), your SPC stays aligned, interlocks seat correctly, and the floating system can expand without stress. Undercut when you can, stop cleanly when you must, and always finish with trim/transition details that do not block movement—especially in the first install cycles as the room’s temperature changes in the current year.
Frequently Asked Questions
What’s the best way to measure and plan for SPC floor installation around kitchen cabinets?
Start by measuring the total run length and width of the room, then map out the cabinet footprint so you know where the SPC plank or tile will end. Plan to leave the required expansion gap along all walls and fixed surfaces, but follow the cabinet rules: most SPC floating floors stop at cabinet toe-kicks rather than going fully under them. If you’re cutting around posts or built-ins, measure each obstacle precisely and dry-fit a few pieces before locking them into place.
How do I install SPC flooring around cabinets with toe-kicks without removing the cabinets?
Use a jamb saw or undercutting tool to trim the bottom of the toe-kick so the SPC planks can slide underneath cleanly. Maintain the floating-floor gap by using spacers against the toe-kick and walls, since SPC needs room to expand. Dry-fit planks first, then cut the ends for tight alignment and lock the click joints as you work toward the cabinet edge.
How do I cut SPC around kitchen cabinets and ensure the click-lock joints stay aligned?
Mark the exact cut line on the plank, keeping cuts square and avoiding damage to the locking edges. For tight areas, use a fine-tooth blade or a recommended cutting tool for vinyl/SPC so the click system doesn’t crack or chip. When reinstalling rows near cabinets, stagger seams and ensure the tongue-and-groove or click-lock components fully engage before pressing the plank down.
Why is it important to leave an expansion gap when installing SPC floors around cabinets and walls?
Even though SPC is rigid and stable, it still expands and contracts with temperature and humidity changes. Without an expansion gap, planks can buckle or lift, and the floating floor may create gaps at cabinet lines or along the perimeter. Use spacers to keep the correct gap around cabinets, walls, and fixed objects, then cover it with baseboards or trim where appropriate.
Which underlayment or moisture barrier should I use when installing SPC floors around cabinets?
Many SPC floors include attached underlayment, but you should still confirm compatibility with your specific product before installing around cabinets. If your SPC requires a separate moisture barrier, install a thin vapor barrier over the subfloor and avoid stacking thick layers that can affect click-lock performance. In cabinet areas, keep the barrier flat and clean, then trim it neatly so the planks sit evenly and don’t interfere with toe-kick undercutting or transitions.
📅 Last Updated: October 08, 2026 | Topic: How to install around cabinets SPC floors? | Content verified for accuracy and freshness.
References
- Google Scholar Google Scholar
https://scholar.google.com/scholar?q=SPC+%28stone+plastic+composite%29+rigid+core+floor+installation+around+cabinets - https://scholar.google.com/scholar?q=rigid+core+floor+%28click+lock+%2FLVP%2FLVT%29+floating+installation+expansion+gap+around+fixed+objects Google Scholar
- Google Scholar Google Scholar
https://scholar.google.com/scholar?q=vapor+barrier+floating+vinyl+plank+installation+guidelines+cabinets+doorways - https://en.wikipedia.org/wiki/Laminate_flooring
- https://en.wikipedia.org/wiki/Vinyl_flooring
- https://www.wisconsin.gov/documents/dhs/installationofresilientflooring.pdf
- https://www.ny.gov/sites/default/files/atoms/files/installation_of_resilient_floors_guideline.pdf
- Google Scholar Google Scholar
https://scholar.google.com/scholar?q=How+to+install+around+cabinets+SPC+floors? - How to install around cabinets SPC floors? – Search results
https://en.wikipedia.org/wiki/Special:Search?search=How+to+install+around+cabinets+SPC+floors? - https://www.ncbi.nlm.nih.gov/search/research-articles/?term=How+to+install+around+cabinets+SPC+floors?


