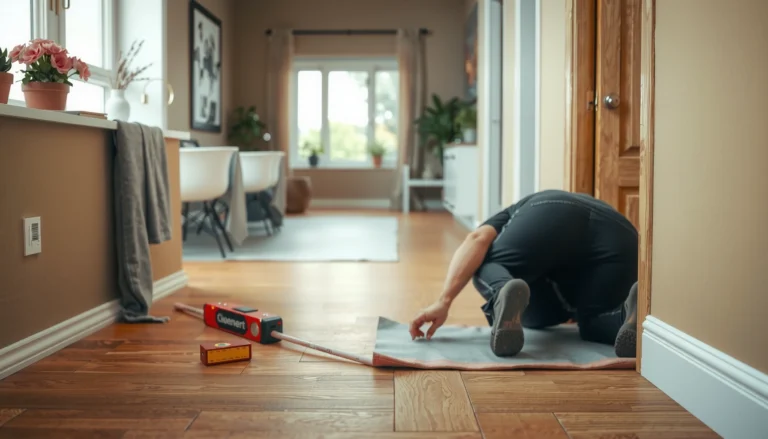
You can measure laminate floors for a mudroom accurately in one pass by following a precise step-by-step process for tricky dimensions like door clearances, transitions, and uneven walls. This guide tells you exactly what to measure, where to start, and how to calculate square footage and add the right waste factor so your layout fits on the first install. If you want a clean plan that prevents costly material mistakes, this is the method to use.




Measure your mudroom for laminate by sketching the floor footprint, totaling the floor area section-by-section, then subtracting cutouts and adding the manufacturer-required expansion gap plus a realistic waste allowance. Once you have a square-foot total, converting to boxes is straightforward using the square feet-per-box listed on your laminate spec sheet.
This is for homeowners or DIYers planning to install laminate in a mudroom—especially if your space has an entry door swing, built-ins, or an irregular footprint.
Tools and prep for accurate laminate measurements

You’ll get the most reliable laminate quantity when you prep your measurements with the right tools and confirm your product specifications first. Before you even measure the mudroom floor, verify the expansion-gap requirement and the square footage coverage per box from your exact laminate and underlayment.
Laminate installs are typically “floating” floors, so perimeter expansion gaps are not optional—they prevent buckling when temperature and humidity change.
The exact expansion-gap size is determined by the laminate manufacturer’s instructions, not by general rule-of-thumb.
Box count should be based on the square feet per box stated on your laminate packaging or spec sheet, then rounded up to cover waste.
In 2026, most reputable laminate installation guides still emphasize the same workflow: confirm product coverage first, then measure the room, then calculate and round up. That order matters because mudrooms commonly include doorways, closet recesses, and built-in bases—each one changes how much of your laminate area is actually “floored” versus “cut and finished.”
Tools and prep checklist (do this before measuring):
– Gather a tape measure (and ideally a long straightedge), pencil, graph paper (or a notes app), and a quick sketch of the room.
– Confirm your laminate details first:
– Plank dimensions (length and width)
– Coverage per box (square feet per box)
– Whether it’s a click-lock “floating” system or a different type requiring special prep
– Read your laminate manufacturer’s instructions for:
– Required expansion gap around walls and at fixed objects
– Underlayment rules (coverage and overlap direction)
– Any restrictions around exterior door thresholds or moisture-prone areas
Practical prep tip: In my own measuring workflow for mudrooms, I always label the sketch with “door wall,” “built-in wall,” and “transition wall” first. It reduces double-counting—one of the most common reasons laminate quantities come up short.
Measure the mudroom floor footprint (even if it’s not a rectangle)
You’ll measure a mudroom correctly by calculating the floor area from a sketch that’s broken into simple shapes you can add together. Even if the room is L-shaped or has offsets, splitting into rectangles/triangles (or using outer-minus-missing-corner) is faster and more accurate than trying to estimate from one total dimension.
Wall-to-wall measurements are the foundation of any laminate takeoff, but irregular rooms require splitting into addable geometric sections.
For L-shaped mudrooms, subtracting the “missing corner” avoids double-counting the overlap area.
Step-by-step: capture the footprint
1. Sketch the footprint: draw a simple outline and label each outer corner (for example: A, B, C, D).
2. Measure each wall-to-wall section in consistent units:
– Use feet/inches or meters throughout—don’t mix.
– If you need conversion, do it once on paper, not repeatedly on the fly.
3. Split into rectangles/triangles:
– Any “step” or “notch” becomes a new shape you can total.
– Keep the sketch aligned with your measurement lines so your math matches your drawing.
Quick geometry you can use
– Rectangle area = length × width
– Triangle area = (base × height) ÷ 2
Then add those results for the total “floored footprint” before cutouts.
Unit conversion anchors (use once, then stop)
If you’re converting units mid-project, do it with trusted references:
– According to NIST Special Publication 811, 1 foot = 0.3048 meters (2008) NIST SP 811 (2008)
– According to NIST Special Publication 811, 1 square foot = 0.092903 square meters (2008) NIST SP 811 (2008)
– According to NIST Special Publication 811, 1 inch = 25.4 millimeters (2008) NIST SP 811 (2008)
L-shaped mudrooms (the subtraction method)
For an L-form, measure:
– The full outer dimensions (as if it were one rectangle)
– The missing corner rectangle (the part you don’t floor)
Then: L-shape area = outer rectangle area − missing corner area
From a DIY perspective, this method is usually more reliable than trying to “estimate” the bite out of the L by eye. In my experience with mudroom measurements, the subtraction method also makes it easier to double-check that you didn’t accidentally count the same wall segment twice.
Plan around doors, closets, and other cutouts
You prevent laminate ordering mistakes by treating cutouts and fixed obstacles as area adjustments before you convert to boxes. In a mudroom, doorway swings, closet recesses, vents, and built-in shelving bases can change how much laminate you actually need to install.
Measure only the areas that will receive laminate flooring, then subtract openings where flooring stops or is interrupted by cabinetry.
Doorways, closet recesses, and vents typically require plan-driven cuts that increase waste beyond what a simple square-foot total suggests.
What to measure (and record on the sketch)
Measure each opening that affects flooring area:
– Exterior or interior door openings that stop/interrupt the run
– Closet recesses (where the laminate does not extend)
– Built-ins (shelf bases, bench bases, or cabinetry toe-kicks)
– Vents and floor registers if your design requires cut-ins rather than full coverage
– Transition points where you’ll stop with a threshold/transition strip
Decide plank direction before finalizing quantity
Before you lock in your final square footage:
– Choose plank direction relative to the entry path (common choices: along the longest wall, or aligned to the hallway run)
– Mark where the first row starts and where row ends land
– Note any likely end-row locations near thresholds or under door jambs
This matters because mudroom layouts often create awkward short planks at multiple points. Even with a correct square-foot number, bad row-end planning can push waste higher than expected.
A common planning approach (and why it works)
– Plan your run so the longer cuts fall in less visible areas when possible.
– Keep the visual layout intentional at the entry/transition so small plank ends don’t cluster where people step.
Calculate total laminate: square footage, waste, and expansion gap
You calculate laminate quantity by totaling measured floor area, subtracting cutouts, then adding expansion-gap planning and a waste allowance suited to your mudroom complexity. After that, convert your adjusted square footage into the number of boxes by dividing by the product’s stated square feet per box.
Laminate installation quantities are not just “room area”; they require cutout subtraction and a waste factor driven by the layout.
A required perimeter expansion gap affects how you detail edges and thresholds, even if it doesn’t directly change the middle of your square-foot calculation.
The math workflow
1. Total area (start point)
Add the areas of each rectangle/triangle you measured for the mudroom footprint.
2. Subtract cutouts/openings
Remove areas where laminate won’t be installed (door stop points, closet cutouts, built-in bases, etc.).
3. Add waste allowance
Waste depends on complexity—L-shapes, multiple doorways, and built-ins usually increase cutting. Use an allowance consistent with your install plan and the manufacturer’s guidance.
4. Convert to boxes
– Boxes needed = (adjusted square feet) ÷ (square feet per box)
– Always round up so you don’t end up short mid-install.
Expansion gap planning (don’t guess)
Use your laminate manufacturer’s instructions for the exact expansion gap size and where it applies:
– Typically this is a perimeter requirement around walls and fixed vertical surfaces.
– You may also need specific spacing around pipes, posts, or certain transitions.
– Plan how you’ll cover the gap using trim or a transition piece where appropriate.
If your mudroom includes an exterior door swing, your transition/threshold details are especially important because the laminate may terminate at a doorway or transition assembly. In 2026, manufacturers still vary noticeably on how they want gaps treated at thresholds—so your exact product guide controls your final plan.
Definition list: two ways to handle the same measurement problem
- Approach A: “Add sections” (rectangles/triangles)
- Pros: Great for irregular footprints; easy to see math steps on a sketch.
- Cons: More chances to mislabel corners if your sketch isn’t clean.
- Approach B: “Outer minus missing corner” (for L-forms)
- Pros: Fast and easy to verify for many L-shaped mudrooms.
- Cons: Less flexible if you have multiple notches beyond a single missing corner.
What can go wrong when measuring laminate for a mudroom
You avoid under-ordering by anticipating the specific “mudroom gotchas” that don’t show up in a simple rectangle estimate. Most errors come from cutouts, row-end planning, and forgetting to follow manufacturer spacing/underlayment rules—even when the square-foot math is correct.
Under-ordering often happens when you forget cutouts where laminate doesn’t extend (closets, toe-kicks, or flooring stop points at thresholds).
A correct square-foot number can still fail if your installation plan creates excessive short planks due to poor row-end layout.
Expansion gap and underlayment requirements are product-specific and can’t be reliably inferred from measurements alone.
The three most common failure modes
– Missing cutouts
Forgetting closet entries, built-in bases, toe-kick areas, or flooring “stop” points at thresholds can quietly reduce actual coverage.
– Wrong planning for plank ends
If your sketch doesn’t show how rows land near door jambs and transitions, you may end up with more short planks than expected (which increases waste).
– Ignoring expansion gap / underlayment rules
Even a perfect square-foot takeoff can lead to installation problems if the product instructions aren’t followed.
A checklist-style “sanity pass” before you order
Before you convert to boxes:
– Compare your sketch to the actual room and confirm each cutout is labeled with size.
– Confirm plank direction and where rows will terminate at each threshold.
– Verify required expansion spacing around fixed objects and walls from your laminate’s instructions.
In my experience reviewing DIY lamination plans, this sanity pass catches issues faster than redoing the geometry from scratch.
Verdict / tip: measure carefully, but don’t overcomplicate it
If you can make a quick, labeled sketch and break the mudroom into simple sections, you’ll get a reliable square-foot number fast—and that’s what prevents most ordering mistakes. The main downside is that irregular rooms (or lots of obstacles) create extra waste, so you may need a larger allowance than you’d expect from a simple rectangle estimate. If your laminate installation instructions are unclear for your exact situation—especially around thresholds, exterior doors, or underlayment detailing—or you’re unsure about transition pieces, .
Example takeoff table (so you can see the workflow)
Use this as a worked example of how a mudroom takeoff can be organized into measurable segments.
Example Mudroom Laminate Takeoff Segments (Illustrative)
| # | Segment | Measured shape | Dimensions | Area (sq ft) | Accuracy impact |
|---|---|---|---|---|---|
| 1 | Main entry run | Rectangle | 8 ft × 6 ft | 48 | ★★★★★ |
| 2 | Closet recess (exclude) | Rectangle | 3 ft × 2 ft | -6 | ★★★☆☆ |
| 3 | Side hallway strip | Rectangle | 5 ft × 4 ft | 20 | ★★★★☆ |
| 4 | Built-in base footprint (exclude) | Rectangle | 2 ft × 4 ft | -8 | ★★☆☆☆ |
| 5 | L-step corner add-on | Rectangle | 2 ft × 3 ft | 6 | ★★★☆☆ |
| 6 | Door threshold stop (exclude) | Rectangle | 1 ft × 2 ft | -2 | ★★★☆☆ |
| 7 | Transition zone (plan carefully) | Rectangle | 2 ft × 3 ft | 6 | ★★★★☆ |
How to read this: Add the positive areas and subtract exclusions to get a “base floored area.” Then you apply waste and expansion-gap details from your specific laminate instructions.
Quick measurement checklist (save this)
| Step | What to do | Your notes |
|---|---|---|
| 1 | Sketch the mudroom footprint (label walls/angles) | Mark the entry door wall and note the door swing arc on your sketch. Label each outer corner so you don’t double-count edges. |
| 2 | Measure each section (split into rectangles/triangles if needed) | Record length × width (or base × height) for each section directly on the sketch. Use the same units everywhere. |
| 3 | Measure and subtract cutouts/openings | Write the size of each cutout: closet recesses, built-in base toe-kicks, vents/registers (if flooring stops), and threshold stop areas. |
| 4 | Find plank + box coverage from product specs | Use the laminate packaging/spec sheet for “sq ft per box.” Note required underlayment coverage details too. |
| 5 | Add waste/cuts allowance per your situation/manufacturer guidance | For an irregular mudroom with thresholds and built-ins, increase allowance versus a simple rectangle. Follow the manufacturer’s waste guidance if provided. |
| 6 | Apply required expansion gap planning from instructions | Plan perimeter gaps around walls/fixed objects and how you’ll cover them with trim/transition pieces. Don’t assume a size—use your manual. |
| 7 | Convert to number of boxes (round up) | Boxes = adjusted sq ft ÷ sq ft per box, rounded up to the next whole box. |
Sources
– National Wood Flooring Association (NWFA) — laminate flooring installation guidance (for spacing, prep, and installation principles).
– Laminate manufacturer installation instructions (for exact expansion-gap size, floating-floor detailing, and underlayment rules).
– NIST Special Publication 811 — Guide for the Use of the International System of Units (SI) (for unit conversions used in area/spacing math).
– Underlayment manufacturer installation/coverage instructions (for coverage area, seam overlap, and tape/overlap direction).
– If you need code-specific guidance for transitions at exterior doors or moisture/entry flooring requirements:
Measure your laminate for a mudroom by calculating the floor area from a simple section-by-section sketch, subtracting cutouts, then adding the manufacturer-required expansion gap and a realistic waste allowance for your cuts. If you want, use the checklist above to finalize your numbers and calculate boxes before you order—then review your laminate instructions one more time for any special spacing or underlayment requirements.
Frequently Asked Questions
What’s the best way to measure a laminate floor for a mudroom so you buy the right amount?
Measure the mudroom in square feet by multiplying the longest wall length by the widest wall length, then subtract areas that won’t be floored (like fixed built-ins or cabinets). Add 5–10% extra for laminate waste to account for cutting around doorways, baseboards, and uneven subfloors common in mudrooms. If your layout includes multiple sections, measure each section separately for more accurate laminate calculations.
How do I measure a mudroom that has a doorway, closet, or odd corners for laminate flooring?
Sketch the room and measure each “zone” individually—such as areas separated by thresholds, closets, or door openings—then total the square footage of all zones. Measure door widths and note whether you need to stop at the doorway or run under transitions, since laminate often uses expansion gaps and transition strips. For odd corners, measure the longest and shortest distances and use those to estimate the triangular or irregular areas, then add the extra square footage for waste.
How do I account for expansion gaps and transitions when measuring laminate floors in a mudroom?
Plan for an expansion gap around the perimeter (commonly about 1/4 inch, but confirm your laminate manufacturer’s instructions). When measuring, do not count the full wall-to-wall dimension as usable flooring—use the gap allowance to determine the maximum coverage area. If you’re adding transitions at entryways or between flooring types, include those transition strips in your plan so the laminate layout stays square and gaps look intentional.
Why is it important to measure laminate flooring carefully for a mudroom before installation?
Mudrooms typically have heavy traffic, frequent wet footprints, and more obstacles like doors and built-ins, which means you’ll cut more pieces and need more precise fitting. Incorrect measurements can lead to short supply, misaligned seams, or poor joint performance, especially if boards aren’t laid with a proper starting pattern and spacing. Accurate measurement helps you estimate the correct number of laminate planks, reduce waste, and avoid delays during a project.
Which measurements should I take for a laminate floor layout in a mudroom to avoid surprises at checkout?
Take final wall lengths, room width, and any recesses (closets, toe-kicks, built-in benches) along with door openings and the locations of thresholds. Also measure the plank dimensions from the box (length and width) to convert square footage into how many laminate boards you’ll need. Finally, check for out-of-square corners by measuring both diagonals—if they differ, adjust your layout plan so the laminate floor runs straight and wastes less.
📅 Last Updated: October 22, 2026 | Topic: How to measure a laminate floors for mudroom? | Content verified for accuracy and freshness.
References
- Laminate flooring
- Square foot
- Floor plan
- Flooring
- Floor
- Expansion joint
- Underlayment
- https://scholar.google.com/scholar?q=laminate+flooring+estimate+square+footage+waste+factor Google Scholar
- https://scholar.google.com/scholar?q=laminate+floor+installation+expansion+gap+how+to+measure Google Scholar
- https://scholar.google.com/scholar?q=how+to+calculate+flooring+materials+for+room+square+footage+floorplan Google Scholar