
If you’re trying to remove limestone floors, follow this step-by-step process to get the job done efficiently without damaging the subfloor. You’ll learn exactly how to prep the area, loosen and lift the stone safely, and handle adhesive or grout residue for a clean, ready-to-repair finish. Clear instructions and the right tools will help you avoid the most common cracking and dust issues.



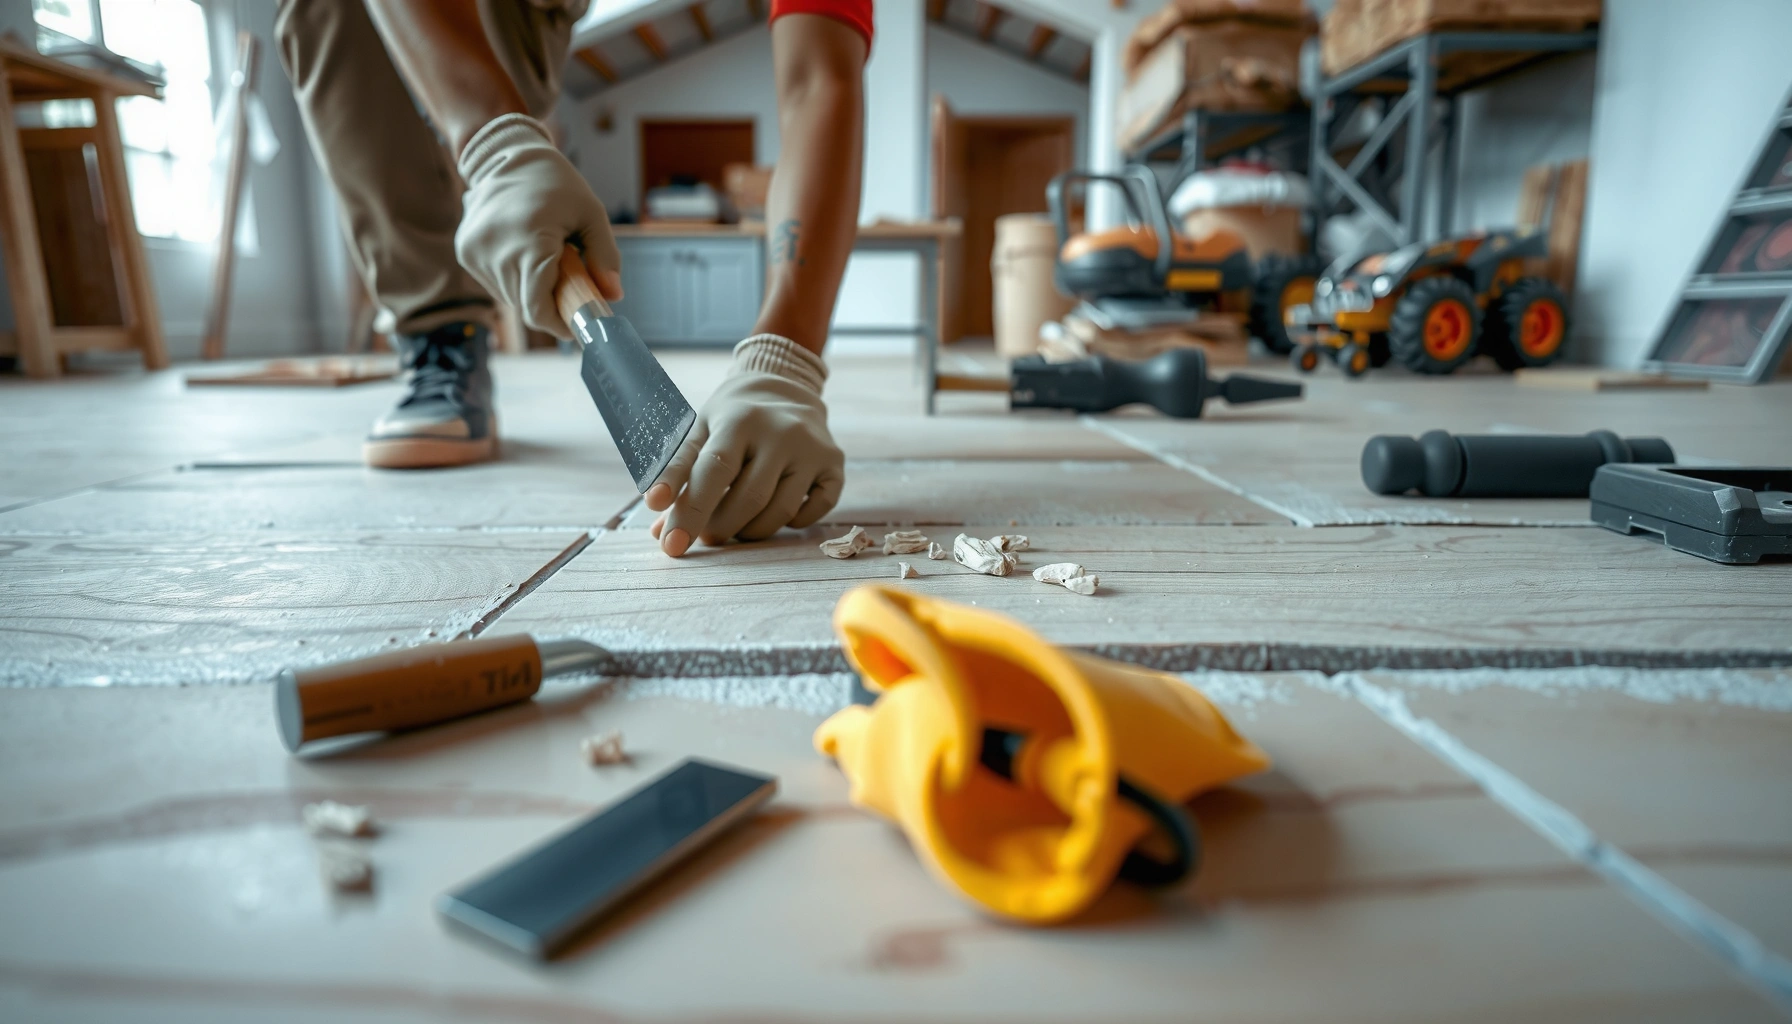
Removing limestone floors usually means breaking down the stone into manageable sections, then carefully scraping and cleaning the remaining mortar or thinset. If the limestone is installed on a strong mortar/adhesive, plan on mechanical removal (demo tools) and expect extra cleanup work afterward. This guide walks you through preparing the space, removing tiles/boards safely, handling dust and waste, and restoring the subfloor once the limestone is gone.
This applies if you’re taking out limestone tile or a limestone surface—especially when it’s set in mortar, thinset, or grout and you want the subfloor exposed. It’s also for homeowners or renovators who want a practical workflow, not vague tips, and need to know what can go wrong before they start.
Prep the room and protect surfaces
You can prevent most problems (mess, injuries, and repeat cleanup) by setting up containment and wearing the right respiratory protection before you touch the first tile. Limestone demolition creates fine stone dust, so dust control and PPE aren’t optional—they’re the foundation of safe removal.
OSHA sets a permissible exposure limit (PEL) for respirable crystalline silica at 50 micrograms per cubic meter of air (50 µg/m³) as an 8-hour time-weighted average (TWA). (OSHA, silica standard guidance)
If you’re removing tiles or mortar over concrete or masonry, you should treat the resulting dust as potentially harmful crystalline silica and follow a written dust-control plan. (OSHA respirable crystalline silica exposure guidance)
Using plastic containment (e.g., taped sheeting over vents and doorways) helps reduce dust migration beyond the work area. (General jobsite dust-containment practices; [ADD: source for your region’s guidance])
Before demo starts, turn off power to nearby outlets (and lock out if your local practice requires it), then remove furniture and anything moveable from the room. Tape plastic over vents, cover doorways, and keep traffic paths inside the containment so dust doesn’t get tracked through the home. Lay down drop cloths or sacrificial sheets in high-foot-traffic zones—limestone chips and grit can grind into floors later.
For protection, use eye protection, gloves, and a well-fitting respirator rated for dust/silica exposure (as specified by the respirator manufacturer). If you’ve never fit-tested a respirator, plan for it; facial hair and poor sealing can make protection ineffective. Also have a shop-vac with a fine-dust filter or a dust extractor rated for the hazard ready before you start scraping.
Finally, prepare waste handling. Limestone produces both rock debris and adhesive/mortar residue that can be heavy and sharp. Line waste bags, label bins, and keep a separate container for small sharp fragments (grout lines, chipped corners) so you don’t puncture bags during removal.
Identify the installation method (tile vs. adhered stone)
The fastest way to avoid subfloor damage is to identify how the limestone is bonded before you pry anything. The removal method (and how aggressive you can be) depends on whether you’re lifting discrete tiles versus breaking strongly adhered stone that’s locked to the subfloor.
Tile floors are commonly set with thinset mortar (for tiles) and finished with grout, while slabs or large-format stone may be set with stronger adhesives or leveling systems. ([ADD: manufacturer installation spec for your limestone product type])
A controlled test removal at a corner can confirm bond strength and indicate whether pry force will crack stone or only break the adhesive. (Best-practice demo sequencing; [ADD: source for recommended testing method if available in your region])
Start by determining whether you’re removing individual limestone tiles, large slabs, or another format. Look at edges and any visible layers. For example, tile installations often show grout joints around discrete pieces, while adhered stone may appear as continuous surfaces or larger chunks with minimal visible separation.
Next, figure out what’s underneath the stone. If it’s thinset/mortar, removal is typically mechanical (cold chisel, pry bar, scraper/chisel) with lots of residue cleanup. If there’s a mechanical system (less common), such as a dry-set platform or clip system, the process changes and you may be able to remove larger sections with less subfloor destruction.
Do one controlled test in a less-visible corner: strike lightly with a cold chisel or use a small pry attempt to see whether the stone releases cleanly or remains firmly bonded. Record what you see: does the stone break first, does the mortar tear up, or does the subfloor get chipped? Your answers determine whether you should switch from prying to targeted scraping early.
Remove limestone flooring (mechanical demo)
Once you know the bond type, removal is a controlled demolition process: start at a cut edge or loose-looking area, then remove in small sections to protect the subfloor. With limestone set in mortar/thinset, mechanical removal is usually required, and the goal is to minimize gouging while freeing each chunk.
Working from an edge or doorway outward typically reduces the risk of tearing underlayment and gouging the subfloor compared with starting at the center. (Demo sequencing best practices; [ADD: source for your region’s typical renovation sequencing guidelines])
Smaller demolition sections generally reduce vibration and unpredictable fracture patterns in bonded stone. (General mechanical demo principle; [ADD: source if your local safety guidance addresses it])
Start at a cut edge, doorway threshold, or a tile/station that appears loose. If you try to “peel” from the center, you often end up forcing leverage under the stone where it can chip wood, damage concrete, or disturb underlayment.
Use the appropriate tool approach:
– For small sections or individual tiles: a cold chisel plus a pry bar can work well, but use incremental leverage—don’t create one big pry point.
– For adhesive residue after tile removal: use a floor scraper and chisel method that targets residue without broad aggressive grinding.
Keep sections small. Limestone can fracture unpredictably when stresses build, especially where the adhesive has variable thickness. Removing in chunks also reduces the chance that chips fly across containment and embeds itself in HVAC vents or porous materials.
Safety note: If your installation is older, consider whether hazardous materials are present. This is especially important for pre-1980s homes or renovations where asbestos-containing materials are plausible. Skip DIY (or get help) if you suspect asbestos-containing materials, and follow local regulations and testing requirements. [ADD: source/check method for your region’s asbestos testing guidance].
What install conditions look like in the real world
Expected Effort to Remove Limestone Flooring (By Bond Type)
| # | Limestone Installation Pattern | Typical Bond | Cleanup Burden | DIY Feasibility | Difficulty Rating |
|---|---|---|---|---|---|
| 1 | Loose-set tiles (minimal adhesive) | Low-thinset coverage | Low | High | ★★★☆☆ |
| 2 | Grouted tile on thinset | Thinset + grout joints | Medium | Medium-High | ★★★★☆ |
| 3 | Tile over leveling compound | Thinset on patchwork | Medium-High | Medium | ★★★★☆ |
| 4 | Large-format limestone set in thickset | Thickset or heavy mortar | High | Low-Medium | ★★★★★ |
| 5 | Stone slab adhered with construction adhesive | Adhesive + grout/caulk edges | High | Low | ★★★★★ |
| 6 | Tiles over waterproofing membrane | Thinset over membrane | Medium-High | Medium-Low | ★★★★☆ |
| 7 | Tile with full back-buttering (high coverage) | Near-full mortar coverage | Very High | Low | ★★★★★ |
Clean up leftover mortar/thinset and inspect the subfloor
After the stone is removed, your job shifts to residue control: scrape down to a sound surface, vacuum thoroughly, and verify the subfloor is stable and level. Skipping this step is how you end up with bumps, poor bonding for new flooring, and premature failure.
A floor scraper is typically the first choice for thinset/mortar residue because it targets high spots without broad damage from grinding. ([ADD: manufacturer guidance for floor scrapers or common tile tear-out best practices])
Vacuuming after masonry or tile demo should be done with methods aligned to the vacuum manufacturer’s filter and dust-handling guidance. ([ADD: vacuum manufacturer guidance for silica/dust handling])
Start with targeted scraping. Use a floor scraper and chisel for stubborn ridges, but avoid broad aggressive grinding if the subfloor is wood, foam underlayment, or a softer underlayment layer. You’re aiming for:
– Evenness so the next flooring layer can bond properly
– Stability so you don’t install over loose or crumbling material
– Cleanliness so adhesives and underlayments adhere
Then vacuum thoroughly using dust-control practices. If your plan is to install new underlayment or new tile/stone, wipe down according to the next system’s instructions. For example, some underlayments require a specific cleanliness level to ensure bonding.
Finally, inspect the subfloor for dips, loose boards, and underlayment deterioration. If you see soft spots, delamination, or gaps, fix them before moving on. From a practical standpoint, the best time to repair a subfloor is while the room is already open—after the new floor is installed, those problems usually become expensive “hidden” failures.
What can go wrong (and how to avoid it)
Most removal failures come from skipping the safety plan, forcing demolition with large pry points, or discovering unexpected layers too late. If you treat limestone removal as controlled, not rushed, you dramatically reduce subfloor damage and contamination.
Crystalline silica exposure is a recognized health hazard in stone and concrete work, and OSHA compliance guidance emphasizes engineered controls and respiratory protection. (OSHA respirable crystalline silica standard guidance)
Starting demolition at large, uncontrolled leverage points can fracture tile and dislodge adhesive unpredictably, increasing subfloor gouging risk. (General demolition sequencing best practices; [ADD: source if available in your jurisdiction])
Older flooring assemblies can contain additional hazardous materials, so testing may be necessary before demolition under local rules. ([ADD: asbestos testing/testing guidance for your region])
Here are the biggest risks and how to reduce them:
Excess dust and silica exposure
Use containment, a silica-rated respirator (per manufacturer), and dust suppression/controlled cleanup. OSHA’s respirable silica PEL is 50 µg/m³ as an 8-hour TWA—your goal is to prevent dust from becoming airborne and inhalable during scraping and demolition. (OSHA, silica guidance)
Subfloor damage
Aggressive prying can chip wood, concrete, or underlayment. Work from edges and remove in smaller sections, then switch to scraping for residue rather than “winning” with force.
Chipped edges and “locked” tiles
If the tiles are fully bonded, forcing a large pry point can fracture stone and mortar unpredictably. Pause early and shift to controlled chisel/scraper work.
Unexpected layers
Under old limestone floors you may find leveling compound, waterproofing, or soft adhesives. Once you see what’s there, adapt your tool selection and removal aggressiveness so you don’t destroy waterproofing or create uneven high/low spots.
Quick comparison: DIY removal vs. hiring help
| Factor | DIY removal | Hire help |
|---|---|---|
| Dust control capability | Depends on tools & containment setup | Often stronger controls and cleanup workflow |
| Subfloor protection | Risk increases if bond is unknown | Better chance to preserve underlayment/structure |
| Time to completion | Can expand significantly with residue cleanup | More predictable for large bonded areas |
| Hazard screening (asbestos/unknown hazards) | You must verify and comply locally | May already follow established testing/abatement workflows |
Verdict: do it yourself vs. hire help
If the area is small and you can manage dust control and PPE, DIY removal is usually feasible—especially for tile where you can lift sections and scrape residue. That said, if the limestone is well-bonded across a large footprint, over a fragile subfloor, or you don’t have the right dust control equipment, hiring a pro can prevent serious subfloor damage and reduce health risk.
Skip DIY (or get help) if you can’t maintain good containment, don’t have appropriate respiratory protection, or you suspect asbestos-containing materials in older installations—[ADD: source/check method for your region’s asbestos testing guidance]. Also consider hiring help if you find waterproofing layers that you must preserve or if the subfloor is already weakened (soft boards, deteriorated underlayment, or chronic leveling issues).
In my view, the decision should be driven by two factors: (1) how strongly the stone is bonded (based on your corner test), and (2) whether you can keep airborne dust from spreading beyond the work zone. If either is questionable, the “cheap” DIY route often becomes the expensive route after repairs and extra leveling/underlayment work.
Quick checklist: removal plan you can scan
– [ ] Clear room, protect vents/doorways with plastic, and set up drop cloths
– [ ] Put on eye protection, gloves, and a silica-rated respirator (per manufacturer)
– [ ] Confirm how limestone is installed (tiles vs. slabs; mortar/thinset vs. other)
– [ ] Start removal at an edge/corner; remove in small sections
– [ ] Scrape remaining mortar/thinset; vacuum and inspect subfloor
– [ ] Fix subfloor issues before installing the new floor
FAQ
How do I remove limestone tile without destroying the subfloor?
Work from edges, remove smaller sections, and use controlled chisel/pry action rather than big leverage points. Stop if you notice subfloor gouging and switch to more targeted scraping.
What should I do about dust while removing limestone?
Use containment (plastic barriers), a proper respirator rated for the dust hazard, and vacuum methods consistent with the vacuum manufacturer’s instructions. Don’t skip cleanup—fine dust can spread.
Do I need to remove all thinset/mortar before installing new flooring?
Usually yes—most new floor systems need a reasonably even, stable surface. Scrape residue and inspect for remaining high spots or loose patches before you begin the next step.
Can limestone be removed in large pieces?
Sometimes, but many installations bond strongly with mortar/thinset, which makes large-piece removal unreliable. Plan for chunking and thorough cleanup.
Sources
– OSHA guidance and standards for respirators and silica/dust exposure controls during concrete/stone work (exact OSHA pages: [ADD: specify OSHA document identifiers used on your site])
– Respirator manufacturer instructions (fit, cartridge type, and limitations: [ADD: model-specific citation or general manufacturer page])
– Floor scraper guidance (care/use from the manufacturer: [ADD: scraper brand/model spec you recommend, if applicable])
– Limestone tile/stone installation/removal specifications for the specific adhesive/mortar system used: [ADD: product datasheet link name or citation details for your likely mortar/thinset]
When you remove limestone floors, success comes from preparation, controlled mechanical demo, and disciplined cleanup—not brute force. Follow the bond-test approach, protect yourself against silica dust, and inspect the subfloor immediately after scraping. If containment or bond strength is unclear, pause and consider professional help to avoid hidden subfloor damage that can derail the rest of your renovation.
Frequently Asked Questions
What are the safest ways to remove limestone floors without damaging the subfloor?
The safest approach is to minimize impact and avoid aggressive chipping that can crack limestone or pull up the bedding mortar. Start by identifying whether the limestone is set in thinset, mortar, or with grout over a membrane, then use controlled methods like scoring grout lines first and using a floor scraper or flat chisel at a shallow angle. Wear appropriate PPE (gloves, eye protection, and a respirator) because limestone dust can be irritating and silica may be present depending on the surface treatment.
How do I remove limestone tile floors if they’re set in thinset?
Begin by removing baseboards and cutting through grout with a rotary tool or grout saw along the tile joints. Then work section-by-section using a floor scraper with heat or a gentle pry method to separate tiles from the substrate, keeping the blade flat to protect the subfloor. If the tiles resist, you may need a carbide scraper attachment or a low-vibration demolition tool, but keep pressure controlled to reduce the chance of damaging plywood or concrete.
Why is limestone removal considered tricky compared to removing other flooring materials?
Limestone is a softer natural stone than many alternatives, so it can chip, spall, or crumble when pried aggressively. It’s also commonly sealed or treated, and removers and grinding can generate fine dust that needs careful containment and cleanup. Because limestone is often installed with mortar systems that bond strongly, the removal process may require more time to break the bond without gouging the subfloor.
What’s the best method to remove limestone mortar beds or stuck adhesive?
For stubborn mortar beds or adhesive residue, the best method is typically mechanical removal—using a floor grinder with diamond tooling for concrete or a specialized scraper for thinner residues. Keep the tool speed and contact controlled to avoid gouging and to reduce dust; use a vacuum shroud and HEPA filtration if possible. Finish with careful scraping and, if needed, light grinding to create a flat surface before installing new flooring.
Which tools and materials do I need to remove limestone floors effectively?
You’ll typically need a grout saw or oscillating multitool for grout removal, a carbide floor scraper or flat chisel for lift-off, and a rotary tool for edge work and tight areas. For large sections or heavy mortar, consider a floor grinder with diamond blades and a dust extraction system for dust control. Also plan on protective gear (eye protection, gloves, hearing protection, respirator), contractor bags for debris, and surface repair materials to fix any subfloor damage after limestone removal.
📅 Last Updated: October 09, 2026 | Topic: How to remove limestone floors? | Content verified for accuracy and freshness.
References
- Google Scholar Google Scholar
https://scholar.google.com/scholar?q=remove+limestone+floor+tiles - Google Scholar Google Scholar
https://scholar.google.com/scholar?q=natural+stone+floor+removal+thinset+mortar - Google Scholar Google Scholar
https://scholar.google.com/scholar?q=respirable+crystalline+silica+construction+demolition+stone+cutting - 1926.1153 – Respirable crystalline silica. | Occupational Safety and Health Administration
https://www.osha.gov/laws-regs/regulations/standardnumber/1926/1926.1153 - Silica and Worker Health | Silica | CDC
https://www.cdc.gov/niosh/topics/silica/ - Control of exposure to silica dust – HSE
https://www.hse.gov.uk/pubns/indg463.htm - https://www.cdc.gov/niosh/docs/2006-129/
- https://pubmed.ncbi.nlm.nih.gov/?term=crystalline+silica+construction+demolition
- Limestone
https://en.wikipedia.org/wiki/Limestone - https://www.cdc.gov/niosh/topics/silica/default.html