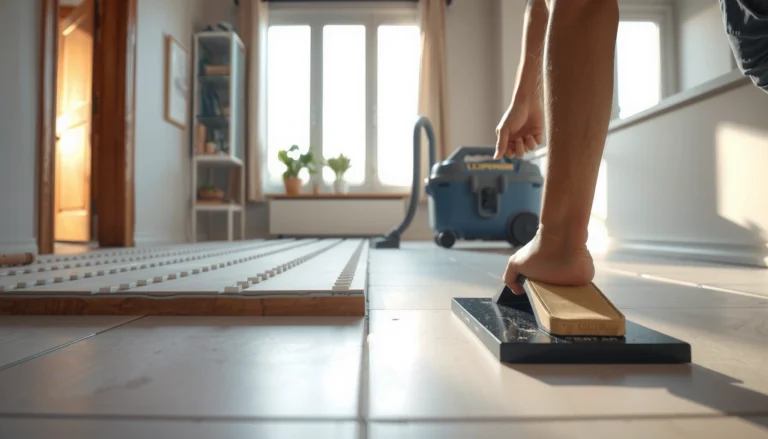
If your porcelain tile floor is lifting, the fastest reliable fix is to remove the loose tiles, scrape back to solid thinset, and reset them with the correct adhesive and proper coverage. This approach stops recurring lift caused by failed bond and trapped debris better than caulking, patching, or trying to “glue over” the problem. You’ll also need to identify why it lifted in the first place—bad prep, wrong mortar, or movement—so the new installation holds.




Porcelain tile lifting is usually caused by poor subfloor preparation, insufficient mortar coverage/adhesion, or moisture/contamination—not a “quick glue” problem. The durable fix starts by removing the loose tiles back to sound substrate and re-setting them with the correct thinset (mortar) and surface prep, then curing and grouting properly so the bond doesn’t fail again.
If you’re seeing edges pop up, tiles rock when you step on them, or grout cracks expand near the lift area, you’re not alone. This is especially common in bathrooms, entryways, and any floor exposed to moisture, cleaning chemicals, or temperature swings—conditions that stress the mortar bond over time.
1) Confirm it’s tile lifting (and not something else)
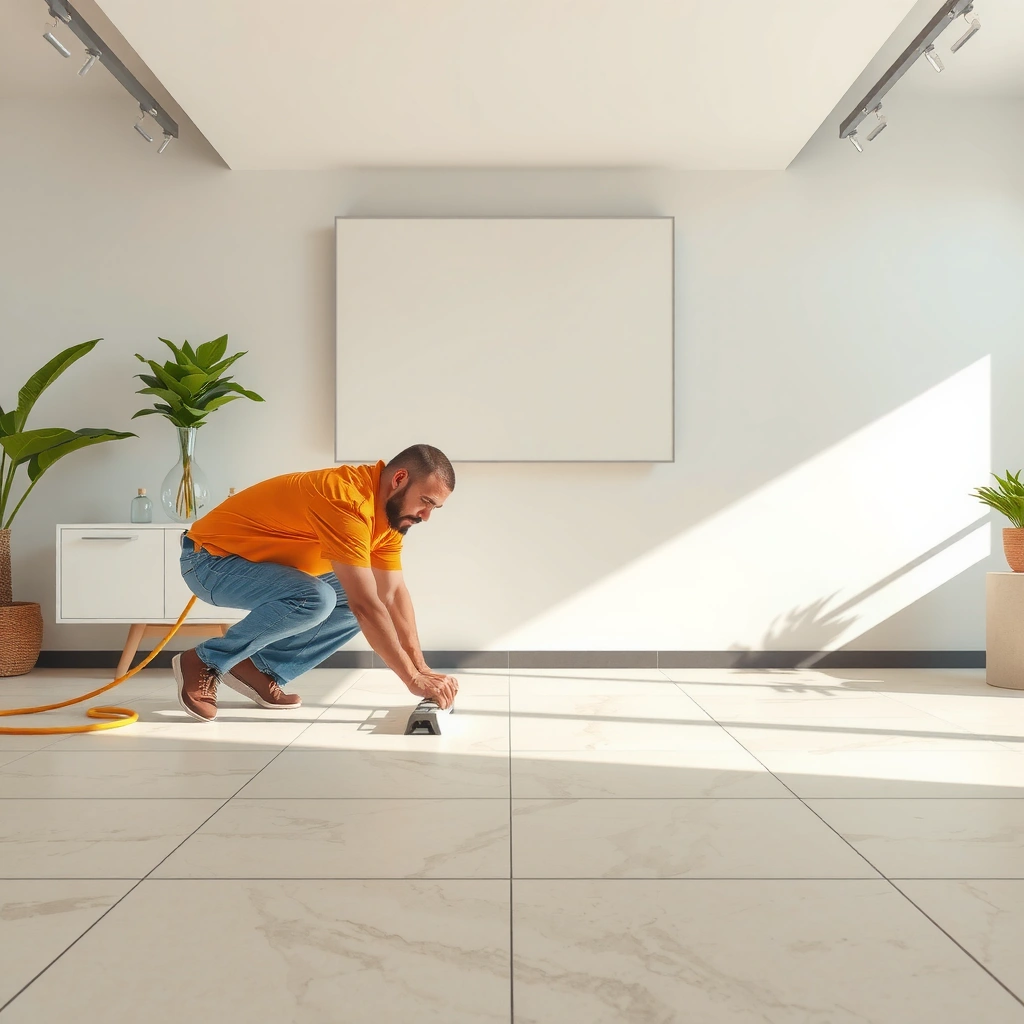
Tile “lifting” is typically loose porcelain tiles moving because the mortar bond failed under the tile. Before you remove anything, confirm that the movement is coming from the tile/setting bed rather than from a loose underlayment, subfloor framing issue, or tile cracking from impact.
Porcelain tile that “clicks” when pressed is a strong indicator of a failed mortar bond or hollow voids beneath the tile.
If grout cracks widen only near the affected area and the tile sounds hollow, the setting bed adhesion is likely compromised.
When multiple adjacent tiles move, you should treat the problem as an installation or subfloor issue, not an isolated tile defect.
Press and walk test (quick field checks)
– Press and walk test: press directly over the tile corners and center; look for flex, clicking, or a hollow sound when tapped with a knuckle or handle.
– Check for rocking: if the tile rocks (not just slight flex), the bond is often broken under at least part of the tile.
– Assess the spread: one tile can fail from localized contamination or a bad trowel batch, but a cluster usually signals broader flatness, coverage, or moisture issues.
Check grout lines and adjacent tiles
– Grout tells the story: if surrounding tiles are stable but one tile lifts, focus on localized re-setting.
– If adjacent tiles also sound hollow or move, treat it like a system problem: adhesion, moisture migration, or subfloor movement/flatness.
Inspect for visible failure clues
Look for:
– Cracked or missing thinset lines at tile edges
– Edges that sit above the surrounding tile plane
– Signs of pumping/voids: tile corners that look slightly “lifted” even before you press them
2) Identify the likely cause before you remove anything
The best way to prevent re-lifting is to fix the reason the tile bond failed in the first place. In most porcelain floor lift cases, the root cause is one (or a combination) of subfloor flatness/rigidity, moisture/contamination, or wrong mortar + inadequate prep.
ANSI installation methods emphasize achieving mortar coverage and good bond contact; inadequate coverage is a common pathway to tile hollow-sounding failure.
Porcelain’s low porosity doesn’t “forgive” contaminated or dusty bonding surfaces the way some tile types can.
Moisture intrusion behind tile can weaken mortar adhesion and/or create conditions where grout and setting materials lose performance.
Subfloor flatness and rigidity (porcelain needs a stable plane)
Porcelain tile is relatively rigid; if the subfloor is out of flatness, the tile can’t bed evenly, leaving voids that grow when someone steps on the area. The result is a lift that often starts at edges or corners.
Key standards to know:
– According to ANSI A108/A108.01 installation requirements referenced within industry practice, mortar contact/coverage goals must be met across the tile bed.
– According to TCNA Handbook guidance commonly used in tile spec practice, floor plane tolerances are typically on the order of 1/8 in over 10 ft (≈3 mm over 3 m) for stone/tile floors, depending on the tile system.
(Exact flatness acceptance depends on your tile system, underlayment, and the assembly details—verify against your thinset and manufacturer instructions.)
Moisture or contamination (including what’s on the substrate)
Porcelain lifting is frequently linked to “bond-breaking” surfaces:
– Water intrusion (leaks, wet-area seepage, plumbing failures, or chronic condensation)
– Dusty, painted, sealed, or contaminated subfloors
– Efflorescence (white salts), persistent dampness, or discoloration near the lift
– Residue from old adhesives, curing compounds, drywall joint compounds, or floor patch materials that weren’t compatible
If moisture is present, re-setting the tile without fixing the water source is the fastest path to repeat failure.
Wrong installation materials (thinset + conditions matter)
Using an incompatible mortar is a frequent cause of lifting on porcelain:
– Not all thinsets bond the same way to porcelain, especially in wet areas
– Some mortars are approved for interior dry use but not for continuous moisture exposure
– Skipping required prep (scarification, priming, moisture-control steps) can prevent chemical and mechanical bond
A simple example: if a floor was originally set with an unapproved mortar for the environment, it may fail sooner—particularly where water wicks into the assembly during cleaning or humidity cycles.
3) Remove the lifted tile(s) correctly
Tile lifting repairs fail when people rush removal and damage adjacent good tile—or when they leave contaminated or hollow setting material behind. Removal should expose clean, sound substrate so the new thinset can form full, reliable contact.
Removing grout along tile joints first reduces the risk of cracking adjacent tiles during tile removal.
To re-bond reliably, you must remove all loose thinset so the new mortar can bond to sound substrate—not “top over” failure.
Controlled removal helps preserve nearby tile and underlayment, which is crucial when a problem spreads across a zone.
Carefully remove grout first
– Cut along the grout joints around the lifted tile(s) using a grout saw or oscillating tool with a grout blade.
– Go deep enough to separate the grout from the tile edges, minimizing collateral damage.
Use controlled removal techniques
– Remove the lifted tile(s) by breaking the tile into manageable pieces so you don’t pry up bonded neighbors.
– Protect the substrate: if you gouge or delaminate your underlayment, you may create a new failure point.
Clean down to the substrate (no “top-over”)
This step is non-negotiable for a long-lasting fix:
– Remove all loose thinset and any friable (crumbly) material.
– Mechanically clean to expose sound bonding surfaces.
– Ensure you can install new thinset with proper thickness and coverage.
Common DIY trap: scraping only the center of the old thinset and leaving a thin “skin” over voids. That skin can prevent bonding and can create a new hollow pocket.
4) Prep the floor and re-set with proper bonding steps
The tile won’t stay down if the substrate isn’t ready and the mortar application doesn’t achieve full contact. Proper prep + correct mortar selection + correct trowel technique is the heart of preventing re-lifting.
A dry, clean, mechanically prepared substrate is required for thinset to achieve bond; dust, paint, and curing residues can break adhesion.
Porcelain installation depends on using a mortar approved for porcelain and for the floor’s specific exposure conditions (interior vs. wet areas).
Full back-butter contact (when required by the tile/mortar system) reduces voids that cause clicking and rocking.
Dry, clean, and mechanically prepared surface
– Vacuum thoroughly; wipe only if your mortar/system specifically allows it (some mortars require clean, uncontaminated surfaces).
– Remove ridges, high spots, or any remnants that will create uneven contact.
Use the correct mortar for porcelain and the installation conditions
Verify two things before mixing:
1. Porcelain approval: the thinset should be rated for porcelain tile.
2. Environment rating: wet areas typically require mortars designed/approved for that exposure.
Also follow manufacturer mixing instructions exactly—water ratio and mix time matter for bond performance.
Set, bed, and back-butter if needed
For re-sets in lift zones, full contact is critical:
– Apply thinset with the correct trowel notch size (match the system guidance and tile thickness/format).
– Comb in one direction.
– Back-butter (spread a thin layer on the back of the tile) when the system calls for it, or when tile size/format makes full contact difficult.
Why this matters: inadequate coverage leaves voids that act like springs—tile rocks, grout cracks expand, and the lift returns.
Quick “adhesion coverage” reality check (use it when deciding scope)
– ANSI A108 guidance commonly used in tile installation practice calls for minimum mortar coverage targets (often expressed as ~80% interior and ~95% exterior/wet areas, depending on conditions and tile system).
If the original tile didn’t meet coverage targets—especially in a wet-area zone—you may see multiple tiles fail around the same region.
5) Cure, grout, and verify the repair holds
Even with perfect setting, rushed curing can sabotage the bond and grout performance. You should cure based on the thinset and grout manufacturer instructions, then verify that the repaired tiles no longer sound hollow or rock.
Thinset and grout curing schedules set by manufacturers are critical for bond development and for grout strength and shrink control.
After set, a tap-test should show a solid, uniform sound across the repaired tile and the surrounding area.
Grout should be compatible with porcelain tile floors and the room’s moisture exposure conditions.
Respect cure times
Follow:
– Thinset cure time before grout (and before light foot traffic)
– Grout cure time before wet use or heavy exposure
Because these vary by brand and formulation, check your specific product labels and technical data sheets ([ADD: cite your specific thinset/grout manufacturer TDS once selected]).
Grout after tile is fully set
– Use grout appropriate for porcelain floors and expected moisture exposure.
– Maintain consistent joint thickness and keep joints clean during grouting.
Perform a final check
– Tap-test the repaired tile.
– Press-check for rocking.
– Inspect for grout cracks that re-open at the edges of the repaired area after curing.
If the repaired tile still rocks, it usually means there’s still a void under a portion of the tile—or the substrate is not stable/flat enough.
6) What can go wrong (common mistakes and edge cases)
If the repair fails, it’s usually because the underlying problem wasn’t fixed—only the symptom was. Below are the most common ways porcelain re-lifting happens after a “successful-looking” tile reset.
Re-gluing over loose mortar often fails because new thinset can’t bond reliably to hollow or contaminated bonding surfaces.
Skipping flatness checks can create stress points that re-lift tiles even when the correct thinset is used.
Wet-area failures are frequently tied to moisture pathways in the assembly; tile-level repairs can’t compensate for unresolved water intrusion.
Re-gluing over failure
– “Patch-on” thinset or construction adhesive often fails because it doesn’t remove the voids and doesn’t rebuild the correct mortar bond to sound substrate.
– Result: the tile stays stuck briefly, then pops again under load.
Skipping flatness checks
If the floor plane was out before repair, the new tile can’t achieve full contact under walking loads. Use a straightedge/flatness measurement appropriate to your tile system and standards ([ADD: cite which flatness method your installation spec uses]).
Using the wrong thinset or mix
Even small deviations can cause failure:
– Wrong mortar type for porcelain
– Wrong water ratio
– Mixed inconsistently (too thin, too thick, or mixed/aged beyond instructions)
Spot repair when the problem is larger
If the area is patterned—multiple hollow tiles, repeating lift zones, or broad grout cracking—you may need:
– More tile removal to reach sound substrate
– Potential underlayment/subfloor repair
– A full system reset if moisture or plane correction is required
If you’re not confident whether the scope is limited, it’s usually cheaper to remove a bit more now than to re-do the same perimeter later.
Comparison: When DIY removal/reset is likely to work vs. when to pause
| Scenario | DIY likely works when… | Call for help when… |
|---|---|---|
| 1–2 loose tiles | Adjacent tiles are solid and flat; no recurring moisture signs. | Cracking/grout widening spreads beyond the removed zone. |
| Cluster lift area | You find sound substrate after removal and can correct flatness. | You discover membrane/underlayment failure or persistent dampness. |
| Wet-area flooring | You confirm the water source is fixed and you follow a compatible system. | Moisture is active, odors persist, or efflorescence returns after drying. |
7) Verdict / tip: do this repair yourself—or call for help
If the lifting is limited to a few tiles and the surrounding floor is solid (no widespread hollow sounds, no broad cracking, and no active moisture), a removal-and-reset with correct mortar and substrate prep is the most reliable DIY path. Skip DIY and bring in a pro if you find widespread lifting, subfloor damage, chronic moisture, or you can’t verify flatness/adhesion conditions—those issues are hard to “patch away.”
A successful porcelain repair depends on bonding to sound substrate and achieving the required mortar contact/coverage, not just reattaching edges.
When moisture is involved, fixing the water source is the critical step before re-setting tile to prevent repeat failure.
If multiple tiles are hollow or movement is patterned, you likely need a larger removal zone to reach reliable bonding surfaces.
Common Porcelain Tile Floor Lift Causes and What to Measure (Industry Ranges)
| # | Likely Cause | Typical Field Symptom | What to Check | Repair Durability Score |
|---|---|---|---|---|
| 1 | Insufficient mortar coverage/voids | Hollow sound + clicking under pressure | Back-butter contact & trowel notch compatibility | ★★★★☆ |
| 2 | Subfloor out of flatness | Edge lifts first; rocking after loading | Straightedge/plane measurement across area | ★★★☆☆ |
| 3 | Moisture intrusion or condensation | Return lifting after drying; damp odors | Source tracing + moisture control steps | ★☆☆☆☆ |
| 4 | Contaminated substrate (dust/paint/sealants) | Bond failure localized to edges/corners | Mechanical cleaning + surface acceptance | ★★★★☆ |
| 5 | Wrong thinset/mortar for porcelain & exposure | Widespread lift in wet-swept zones | Mortar approval for porcelain + wet rating | ★★☆☆☆ |
| 6 | Underlayment/subfloor movement | Grout cracking + repeated hollow sounds | Framing/underlayment stiffness evaluation | ★☆☆☆☆ |
| 7 | Rushed cure/traffic before set | Localized failures shortly after installation | Follow cure times from thinset/grout labels | ★★★☆☆ |
Quick checklist (scan before you start)
– [ ] Tap test: only a few tiles hollow, or many?
– [ ] Confirm movement: tile rocks/clicks when pressed?
– [ ] Remove grout carefully around the failed tile
– [ ] Remove all loose thinset; don’t leave contaminated bonding areas
– [ ] Clean and prep substrate to manufacturer requirements
– [ ] Use mortar approved for porcelain and your floor conditions
– [ ] Allow full cure before grouting and traffic
FAQ
Why do porcelain tiles lift even if the floor looks fine?
Some porcelain failures start under the tile: a hollow void or partial bond loss can be hard to see from the surface until you step on that spot. If tiles sound hollow and grout cracks expand near the lift zone, the setting bed bond is likely compromised.
Should I use construction adhesive to reattach lifted porcelain tile?
Usually no. Construction adhesives can’t reliably replace a properly mixed thinset mortar bond to sound substrate, and they may not be compatible with wet-area requirements and the assembly’s movement rules. Re-setting with the correct mortar system is the durable approach.
How do I know if moisture is causing the lifting?
Look for recurring dampness, damp odors, efflorescence (white deposits), discoloration, or lifting that returns after drying. If moisture is active, you must locate and fix the water pathway before re-installing porcelain tile.
Do I have to remove all lifted tiles in the same area?
If multiple tiles are hollow or lifting in a pattern, you typically need to remove more than the visibly loose pieces to reach sound substrate with reliable bonding. Otherwise, the repair can “float” over residual voids.
Can I just patch the edge of a lifted tile?
Edge-only patching often fails because the bond is already broken under portions of the tile. A proper re-set requires removing the failed material and rebuilding full contact under the tile.
Sources
– TCNA Handbook for Ceramic Tile Installation (current edition): recommended floor flatness/plane guidance and installation system concepts.
– ANSI A108/A108.01 (as referenced in industry practice): mortar selection/use concepts and coverage/contact requirements for tile installations.
– [ADD: cite your specific thinset/mortar manufacturer technical data sheet (TDS) for porcelain setting conditions, mix ratios, open time, and cure times]
– [ADD: cite your specific grout manufacturer installation instructions for cure times and wet-area application guidance]
– [ADD: cite the porcelain tile manufacturer’s installation instructions, especially flatness and mortar compatibility requirements]
A lasting porcelain tile lifting repair comes down to one principle: you don’t “patch” a failed bond—you rebuild the installation system (substrate prep, mortar selection, mortar application, and cure) so the tile can’t move under load. If you confirm hollow sounds, remove down to sound substrate, use mortar approved for porcelain and your room’s exposure, and follow curing guidance, you give the repair the best chance to stay tight for years. If moisture or widespread hollow areas are present, treat it as a root-cause problem first—then the tile reset can actually hold.
Frequently Asked Questions
What causes porcelain tile to lift or debond from the floor?
Porcelain tile can lift due to poor mortar coverage, using the wrong thinset for porcelain, or not following the correct mixing and curing times. Movement from an uneven subfloor, moisture issues, or foot traffic before the thinset fully cures can also weaken the bond. If only a few tiles are loose, the problem is often incomplete bedding; if many tiles are lifting, suspect subfloor flatness or installation method.
How do I fix lifting porcelain tile without replacing the entire floor?
Start by removing the loose tile(s) carefully, then scrape off old thinset until you reach a clean, sound surface. Check the subfloor flatness and repair any dips or high spots, because porcelain tile won’t stay bonded on a wavy base. Reinstall the tile using the correct thinset mortar for porcelain, apply proper coverage (often “full coverage” with thinset combed and back-buttered), set it in place, and grout only after the thinset cures fully.
How can I tell whether the subfloor or the thinset is the real problem?
If the tile pops off but the mortar still has strong transfer to the tile and subfloor, the issue may be thinset failure, improper mortar choice, or premature traffic. If the thinset breaks apart easily or you see little to no mortar coverage, the bond likely failed during installation. Also check for movement, cracking, or moisture—any of these can cause repeated lifting even after reinstalling individual tiles.
Which thinset and tools are best for re-laying lifted porcelain tiles?
For porcelain tile, use a modified thinset mortar rated for porcelain and follow the manufacturer’s mix ratio and cure times closely. A notched trowel size that matches the tile size and your flatness needs helps achieve full coverage; back-buttering larger tiles is often necessary. Use a margin trowel for edges, a grout saw or carbide scraper for cleanup, and a level to verify the surface is ready before you install the new thinset.
Why does my porcelain tile keep lifting even after I re-set a few tiles?
Re-lifting usually points to an underlying installation or substrate issue—like an unflattened subfloor, insufficient mortar coverage, or moisture vapor pressure. If the subfloor is not properly prepared (for example, loose plywood, cracked concrete, or weak mortar beds), the bond will fail again. Prevent recurrence by addressing subfloor flatness and stability first, using the correct thinset for porcelain, and allowing full cure before exposing the floor to loads.
📅 Last Updated: October 08, 2026 | Topic: How to fix lifting on porcelain tile floors? | Content verified for accuracy and freshness.
References
- Google Scholar Google Scholar
https://scholar.google.com/scholar?q=fixing+lifting+porcelain+tile+floor+debonding - Google Scholar Google Scholar
https://scholar.google.com/scholar?q=porcelain+tile+lifting+thinset+failure+causes+repair - Google Scholar Google Scholar
https://scholar.google.com/scholar?q=ceramic+tile+debonding+assessment+and+repair+methods - Porcelain tile
https://en.wikipedia.org/wiki/Porcelain_tile - Tile
https://en.wikipedia.org/wiki/Ceramic_tile - Thinset
https://en.wikipedia.org/wiki/Thinset_mortar - Grout
https://en.wikipedia.org/wiki/Grout - https://en.wikipedia.org/wiki/Mortar
- https://en.wikipedia.org/wiki/Floor_screed
- Underlayment
https://en.wikipedia.org/wiki/Underlayment