

Trying to install around doors on stained concrete floors? Choose to use a precision-cut epoxy or urethane door jamb seal to get the cleanest, most water-resistant fit without cracking the stain at the edges. This guide shows the exact steps and materials that prevent gaps and finish-line lifting—so your door transitions look finished and hold up under daily use.




If you want flooring that still looks “purpose-built” at a door opening, the key is to control two things: (1) clearance so the door operates without rubbing and (2) the edge/transition where stained concrete meets the new flooring. Plan the transition, protect the stained slab during prep and cutting, then finish with a threshold/reducer that bridges height cleanly while maintaining the flooring system’s required movement gaps.
If you’re installing entry doors, interior doorways, or threshold areas over existing stained concrete, this approach helps you keep the stained finish intact while creating a neat, durable line at the door opening. It’s also a practical solution when door clearance is tight and you can’t afford a “too-thick” build-up that will interfere with the door sweep or latch.
Map the door area first (clearance + transition points)
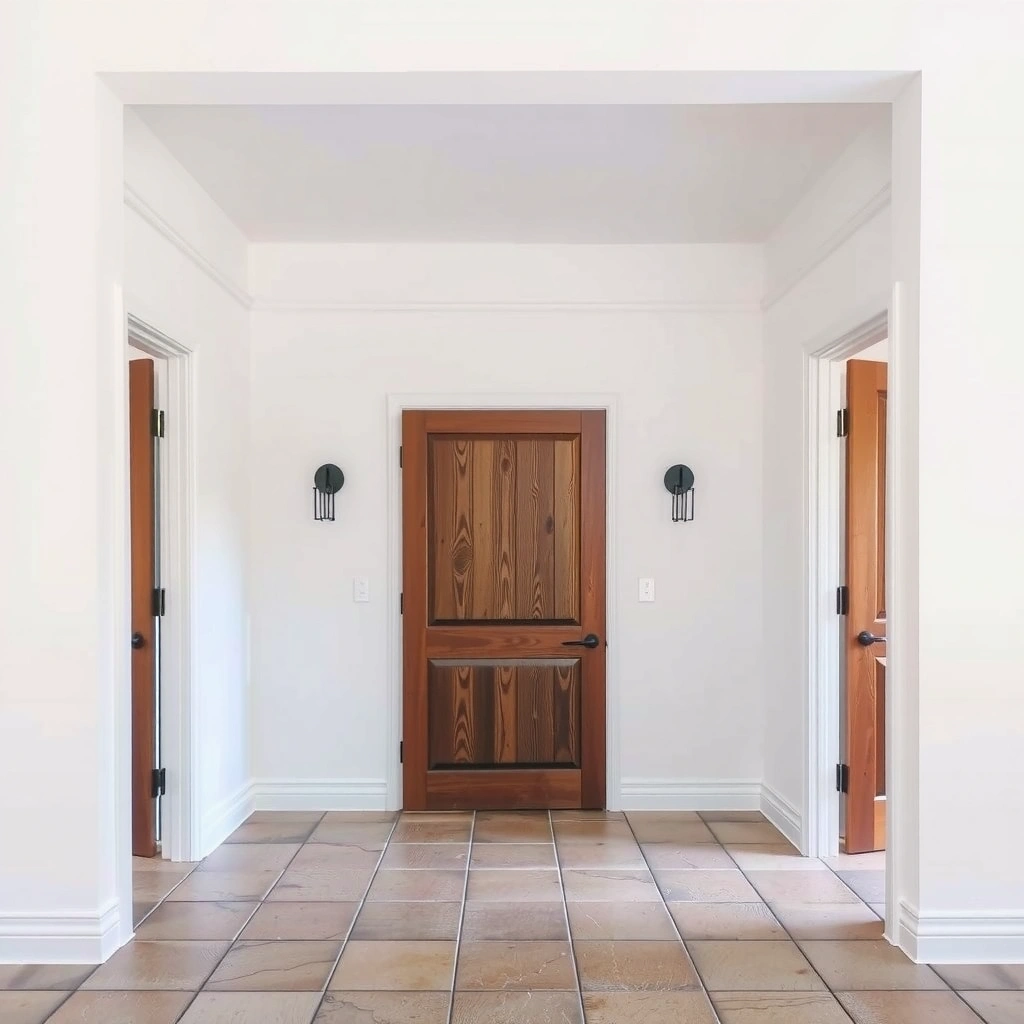
Installing around doors starts with layout decisions, because the floor edge you cut today determines whether the door functions correctly tomorrow. Measure the door swing arc, confirm the clearance you need for the specific door hardware, and select a transition method that matches your build-up height and movement requirements.
A door can bind even if your floor looks level—door binding typically comes from inadequate clearance or a threshold/trim step that pushes the door edge upward into the sweep.
The most reliable way to avoid “mystery gaps” at door openings is to decide the transition type (threshold, reducer, or tight-edge finish) before you cut planks/boards.
Floating flooring systems require a perimeter treatment plan; fixed objects near doorways must be treated according to the flooring manufacturer’s expansion and locking guidance.
Measure clearance and movement space
Start by measuring:
– Door height and swing arc: Measure the height of the door and the sweep position relative to the floor (especially if weatherstripping or a sweep strip is installed).
– Minimum clearance to the floor surface: Use the current opening as your reference point, then estimate how much added height your new build-up will add (existing concrete + underlayment + flooring + any trim/transition).
– Perimeter movement needs: Many floating systems specify a consistent expansion gap along fixed edges. Even glue-down systems may require specific perimeter detailing depending on the manufacturer’s system design.
Choose the transition style: threshold vs. reducer vs. tight edge
A clean doorway line usually comes down to which product category you’re using and whether you can hide the cut edge at a reputable “wear point”:
– Threshold (doorway track or fixed threshold): Best when you need to bridge height changes and protect the edge from traffic and cleaning impacts.
– Reducer: Useful when two flooring heights are close but not identical, and you want a smooth visual ramp.
– Tight-edge finish: Sometimes possible with certain systems, but you must still respect expansion gaps and avoid locking planks too tightly at fixed objects.
Check build-up thickness before you cut
Before you cut any flooring:
1. Measure existing slab thickness/flatness (as best as you can).
2. Measure underlayment thickness (if required).
3. Measure flooring thickness.
4. Measure transition/threshold height you plan to install.
This prevents the common failure mode: building a beautiful floor that looks correct everywhere—except at the doorway, where the door sweep suddenly won’t clear the new surface.
Prep the stained concrete and protect the finish
Prep is where most “doorway edge” problems start, because stains can discolor, bleed, or get contaminated by dust and adhesives during cutting. Clean, degrease, and protect the stained surface so primer/adhesive work stays localized and doesn’t create a darker ring at the doorway.
Concrete profiling should follow the flooring system’s instructions—over-grinding stained concrete can change the surface chemistry and appearance, and may exceed what the adhesive/primer was designed for.
Dust contamination can lead to weak bond and visual discoloration at the edge—masking and controlled cleanup reduce both risk factors.
Moisture testing matters because stained concrete can still emit moisture; flooring manufacturers typically require moisture limits verified with a standard test method.
Clean, degrease, and verify dryness
– Clean and degrease thoroughly (removing oils, sealers, and construction residue).
– Let the slab fully dry before applying primers, patch/leveling compounds, or adhesives.
– If you suspect sealers or penetrating densifiers are present, confirm that the flooring system’s primer/adhesive is compatible (many manufacturers will specify acceptable substrate conditions).
Profile only where the system calls for it
Some flooring systems require abrasion/profiling to create mechanical profile for primer/adhesive, but that doesn’t mean you should grind the entire doorway area indiscriminately.
– Profile only the locations the system specifies.
– Keep your work contained; stained concrete tends to show color variation near aggressive abrasion.
Mask the stained surface to prevent “ringing”
During cutting and priming:
– Mask stained areas with painter’s tape and/or plastic sheeting.
– Protect edges so dust doesn’t migrate under tape lines.
– Use clean tools and a controlled vacuum approach immediately after cutting.
In my experience working through tight-threshold repairs, the doorway “halo” effect is rarely about the flooring itself—it’s usually about contamination or uncontrolled cleanup around the stained slab edge. [ADD: if your site has a common staining/primer problem, insert the specific failure you’ve observed with the protective method that prevented it.]
Moisture test basics (what to follow, not guess)
You’re not choosing a moisture method arbitrarily—you’re following the flooring system’s required standard:
– ASTM F2170 measures Relative Humidity (RH) in concrete (expressed as %RH).
– ASTM F1869 measures Moisture Vapor Emission Rate (MVER) (commonly in lb/1000 sq ft/24 h).
– ASTM F710 covers installation/working requirements and related moisture considerations.
According to ASTM F2170, results are reported as concrete RH values from in-situ probes.
According to ASTM F1869, the test reports moisture vapor emission in specific area/time units (lb/1000 sq ft/24 h).
According to ASTM F710, moisture-related installation concerns are addressed through standardized flooring system requirements.
[ADD: source for your flooring manufacturer’s moisture limit thresholds and the required test method for stained concrete.]
Typical Doorway Expansion Gap Targets by Common Flooring System (Rules of Thumb)
| # | Flooring system | Target perimeter gap* | Where it matters most | Fit vs. door trim |
|---|---|---|---|---|
| 1 | Floating laminate | 6 mm (1/4 in) | Door jambs & threshold edges | Best ★★★★☆ |
| 2 | Floating LVP/LVT (click) | 3–6 mm (1/8–1/4 in) | Perimeters near doors | Good ★★★★☆ |
| 3 | Engineered wood (floating) | 6 mm (1/4 in) | Fixed transitions at doors | Trim-sensitive ★★★☆☆ |
| 4 | Glue-down wood/LVP | System-defined (often smaller) | Perimeter detailing | Depends ★★☆☆☆ |
| 5 | Carpet tile (direct glue/optional tack) | Variable by system | Threshold lines | Stable ★★★★☆ |
| 6 | Porcelain tile (thinset set) | Movement joints per TCNA* | Joints at openings | Engineering-first ★★★★☆ |
| 7 | Rigid core (click/float) | ~6 mm (1/4 in) | Door perimeter edges | Predictable ★★★★☆ |
*These are common field targets; always follow your flooring manufacturer’s specific doorway/perimeter requirements. For TCNA movement-joint guidance, see the TCNA Handbook (source reference needed).
Build the floor edge correctly near the threshold
Your doorway edge has one job: it must look straight and it must move correctly (if it’s a floating system). Use consistent expansion gaps, avoid “pinning” the floor at the door line, and plan cuts to prevent tiny slivers that weaken the edge.
Floating floors should not be locked tight into fixed points; door areas must follow the system’s perimeter and expansion guidance to prevent buckling and squeaks.
Keeping the expansion gap consistent across the door opening helps your threshold/reducer land evenly and reduces visible gaps after foot traffic compacts the area.
Cut planning that avoids slivers is not just aesthetic—small-edge pieces can crack or gap sooner under door traffic and cleaning cycles.
Maintain expansion gaps (and make them intentional)
– Keep the gap consistent from one jamb side to the other.
– At the door opening, treat the perimeter as a line that the floor is allowed to “breathe” around.
– If the threshold covers the gap, the gap still matters—thresholds usually bridge over gaps, but they don’t eliminate movement issues if the flooring is constrained.
Avoid tight locking at the door line
If you’re using a floating system (click-laminate, click LVP, rigid core, or similar):
– Follow the manufacturer’s rule on whether you should leave the tongue/groove un-engaged near doors or release/fit planks differently near transitions.
– Don’t “force-fit” planks so the joint closes at the threshold—this is a frequent cause of door-area ridges and later binding.
Plan your cut layout so the edge stays strong
A doorway is unforgiving because everything is visible. Dry-fit:
– Mark where your flooring meets stained concrete.
– Test your board layout so the cut near the door opening is not an impractical sliver.
– If you need to adjust, shift your starting row—small changes in the overall layout can create a dramatically cleaner edge at the threshold.
Install underlayment/adhesive and keep the seam tight
Now you install with the method that matches your flooring type—because “almost the right method” is a real failure cause at door lines. Whether you’re floating, glue-down, or nail/glue down, the door transition area should be level, square, and free of build-up that makes the door scrape.
Doorway edges fail when the transition is not level and square—misalignment creates a step that can catch the door sweep or make thresholds visibly uneven.
Adhesive systems depend on correct primers and label-required application; using the wrong chemistry or over-wetting the slab can compromise bond and discoloration around the edge.
Seams near doorways experience concentrated movement and impact; dry-fit first, then commit—especially where planks meet a threshold or reducer.
Follow the correct install category
– Floating/Click systems: Underlayment placement and perimeter treatment matter. Ensure the underlayment doesn’t interfere with expansion gaps at the door line.
– Glue-down systems: Use manufacturer-approved primers and adhesives, and apply only the amounts and coverage rates specified.
– Nail/glue down or hybrid systems: Follow the fastening and adhesive specs designed for concrete substrate conditions.
Keep the transition area level
Level matters more here than in open-field areas because the door sweep amplifies small height differences.
– Check transitions with a straightedge.
– Shim or level only as permitted by your flooring system documentation.
Avoid adhesive contamination on stained concrete
Stained concrete can show discoloration where primer/adhesive/cleaners land. Masking helps, but you should also:
– Use controlled application tools (trowel width and bead thickness per label).
– Keep adhesive off the stained surface beyond what’s required by the system.
Finish with threshold/trim so it looks intentional
The final look and performance are controlled by the transition piece and the trim height. Install a threshold/reducer at the opening, seal only where the system calls for sealing, and confirm the door closes without rubbing or creating a new “catch point.”
A properly installed threshold bridges height differences and protects the cut edge from wear, moisture, and repeated cleaning at door openings.
For exterior or high-traffic doorways, sealing gaps helps reduce dirt and water intrusion—use the sealant chemistry recommended by the flooring/transition manufacturer.
Even when the floor is correct, final trim can still cause problems if it pushes the floor up into the door sweep—confirm clearance after trim installation.
Install the right threshold/reducer
– Choose a transition piece compatible with your flooring thickness.
– Set it so the visible seam is straight and the walking surface is smooth.
– Ensure fasteners (if any) don’t interfere with moisture barriers or create rocking points.
Seal only where your system calls for it
– For exterior doors, sealing may be appropriate—but use what your system recommends. Some systems discourage sealants on floating edges because they can restrict movement.
– For interior doors, sealing is often minimal or targeted to specific gaps.
Verify door operation after everything is installed
– Close the door slowly and watch for rub points.
– Confirm any threshold fasteners/edges don’t interfere with the door swing or latch alignment.
– Re-check clearance if you adjust trim or add weatherstripping.
What can go wrong (and how to avoid it)
Doorway installs are where small planning errors show up fastest—binding, discoloration rings, ugly gaps, and moisture-related failures are common. The fixes are mostly preventative: re-check thickness, respect expansion gaps, and keep prep/adhesive work contained on stained concrete.
Door rubbing is commonly caused by build-up thickness miscalculation or a threshold/trim step that was installed too high relative to the door sweep.
Stain discoloration near cuts usually comes from primer/adhesive contact, dust migration, or sanding/profiling that changes the stained concrete’s surface character.
Gaps look messy when the cut line doesn’t match the threshold geometry—dry-fitting and marking transition lines before fastening prevents this.
Common issues and practical prevention
– Door rubbing or binding: Re-check build-up thickness and ensure required expansion gaps weren’t accidentally eliminated at the door line.
– Stain damage/discoloration: Mask stained areas before primer/adhesive work; control dust during cutting.
– Visible gaps at the edge: Dry-fit planks and confirm threshold geometry before final installation.
– Moisture-related failures: Follow your flooring system’s moisture requirements using ASTM methods (commonly ASTM F2170 or ASTM F1869), not guesswork.
Pros/cons: threshold choice for stained concrete door openings
| Transition approach | Pros | Cons |
|---|---|---|
| Threshold (recommended for most doorways) | Protects the cut edge; bridges height differences; hides the “controlled edge” line | Adds component height—must match door sweep clearance |
| Reducer | Smooth visual transition; good for close-height changes | Can still expose edge details if misaligned |
| Tight-edge finish (system-dependent) | Minimal visual hardware | Requires very precise fitting; may be risky if you can’t maintain movement gaps |
Verdict / tip (when this DIY approach works—and when to stop)
This workflow is a strong DIY path when you can measure accurately, protect the stained surface during prep, and install using the exact method your flooring system specifies—especially around door thresholds. The biggest downsides are precision demands (door clearance and square edges) and limited repair options if your transition line or threshold height is off after trimming.
If your door opening is extremely tight, your concrete needs significant leveling, or you can’t confirm how your flooring system handles movement at doorways, consider using a local installer for the threshold edge and final fit. For best results, treat doorway work like an engineered detail, not “just another cut line.”
Quick checklist (scan/save)
– [ ] Measure door clearance + swing arc
– [ ] Decide transition method (threshold/reducer/tight edge finish)
– [ ] Clean/degrease stained concrete; confirm fully dry
– [ ] Mask stained areas before primer/adhesive/cutting
– [ ] Verify moisture testing method and limits per flooring system (ASTM F2170 / ASTM F1869 commonly)
– [ ] Maintain required expansion gaps at the door line
– [ ] Keep seam/edge square and level near the threshold
– [ ] Install threshold/trim; verify door closes freely
– [ ] Seal only where your flooring system calls for it
FAQ
Do I need to remove the stain where the flooring meets the door threshold?
Usually not. Prep should follow your flooring manufacturer’s requirements (often cleaning, localized profiling, or priming). Avoid grinding off the stain unless the system explicitly requires bare concrete.
How do I prevent gaps near the door opening?
Measure twice, dry-fit the cuts, and use the recommended transition piece. Don’t force planks into contact if your system requires expansion space—use the threshold/reducer to create a consistent, intentional line.
Can I use the same installation method at the door as the rest of the floor?
Not always. Doorways often require special handling for expansion/movement, transitions, and clearance. Follow your flooring system’s doorway/threshold instructions.
What if the door sweep already barely clears the stained concrete?
Plan for how much the new build-up adds before installing anything. If clearance is too tight after installation, adjust trim/threshold height and consider a different floor underlayment or transition profile.
Sources
– ASTM F2170 (Standard Test Method for Determining Relative Humidity in Concrete Using in-situ Probes)
– ASTM F1869 (Standard Test Method for Measuring Moisture Vapor Emission Rate of Concrete Subfloor Using Anhydrous Calcium Chloride)
– ASTM F710 (Standard Practice for Preparing Concrete Floors to Receive Resilient Flooring)
– [ADD: Manufacturer instructions/spec sheets for your specific flooring type regarding doorway/perimeter expansion gaps, underlayment use, and threshold/reducer installation.]
– [ADD: TCNA Handbook reference for movement-joint guidance if your doorway transition uses tile or mortar systems.]
– [ADD: Threshold/reducer manufacturer installation and sealing recommendations compatible with your flooring system.]
In the end, clean results around doors on stained concrete come from disciplined planning: confirm clearance first, protect the stained slab during prep, maintain the correct movement space, and finish with a properly sized threshold/reducer installed level and square. Do those steps carefully and you’ll get a doorway edge that stays neat under traffic—without sacrificing smooth door operation.
Frequently Asked Questions
What’s the best way to install baseboards or trim around stained concrete floors without damaging the finish?
Use a gap/transition method so the wood trim or baseboard doesn’t scrape the stained concrete. Start by cleaning the concrete surface and applying painter’s tape along the wall line to protect the stain and reduce chipping. If you’re using caulk, choose a paintable concrete-safe acrylic or polyurethane sealant to fill small gaps while keeping a clean line. For a crisp finish, consider a backer rod plus caulk at the joint so the sealant doesn’t adhere to both surfaces and crack later.
How do I measure and cut trim for corners and uneven walls when installing around stained concrete?
Measure the length of each wall section at multiple points because stained concrete floors can be slightly out of level. Dry-fit the trim pieces first and use a miter saw for corners, then adjust with sanding blocks or filler where needed. For uneven gaps, use a flexible caulk line rather than trying to force tight contact—this looks professional and prevents stress on the trim. If the wall is very irregular, consider using an oscillating multi-tool to fine-tune the fit and maintain consistent spacing above the stained concrete floor.
How do I prevent staining, chipping, or dust when drilling or nailing near stained concrete floors?
Protect the stained concrete with plastic sheeting and painter’s tape, and vacuum or use a shop vac with a dust shroud while drilling. Use the correct masonry bit size for the fasteners and keep the drill speed controlled to reduce blowout at the edge. If you need anchors, mark locations carefully and pre-drill slowly, then blow out dust before inserting anchors. After installation, wipe away any residual dust and spot-clean using a pH-neutral cleaner suitable for stained concrete so the floor finish stays uniform.
Which fasteners and installation method work best for trim or shoe molding on stained concrete?
For concrete, mechanical fastening is often more reliable—use masonry screws with appropriate concrete anchors for baseboards, or install a ledger/rail and then attach trim to that. Alternatively, for small trim like shoe molding, you can use a construction adhesive made for concrete plus finish nails for extra grip, but always test a small area first. Avoid nailing directly through sensitive areas of stain without planning for patching, and keep fasteners away from the most fragile edges. Use a sealant or caulk at the joint to accommodate minor movement and improve the look of the stained concrete transition.
Why should I use caulk or sealant along the base of trim when installing around stained concrete floors?
Caulk creates a smooth transition between trim and the stained concrete floor, hiding small gaps caused by uneven concrete or wall irregularities. It also helps prevent moisture and debris buildup at the base of the wall, which can lead to deterioration and discoloration. Choose a stain-safe, paintable product labeled for masonry/trim joints so it bonds well and stays flexible as the concrete expands and contracts. Apply it in a consistent bead, tool it neatly, and allow full cure time before painting or cleaning the area.
📅 Last Updated: October 10, 2026 | Topic: How to install around doors stained concrete floors? | Content verified for accuracy and freshness.
References
- Google Scholar Google Scholar
https://scholar.google.com/scholar?q=stained+concrete+floor+installation+doorway+trim+threshold - Google Scholar Google Scholar
https://scholar.google.com/scholar?q=install+baseboard+around+concrete+slab+floor+expansion+gap+best+practice - Google Scholar Google Scholar
https://scholar.google.com/scholar?q=concrete+floor+stain+sealer+application+edges+and+seams+around+doorways - Concrete
https://en.wikipedia.org/wiki/Concrete - Glass ceiling
https://en.wikipedia.org/wiki/Concrete_floor - https://en.wikipedia.org/wiki/Baseboard
- https://en.wikipedia.org/wiki/Threshold_(door
- Silica, Crystalline – Overview | Occupational Safety and Health Administration
https://www.osha.gov/silica - Technical Preservation Services (U.S. National Park Service)
https://www.nps.gov/tps/how-to-preserve.htm - Lead Renovation, Repair and Painting Program | US EPA
https://www.epa.gov/lead/renovation-repair-and-painting-program