


Learn how to install herringbone floors in a bedroom with a step-by-step process you can follow from subfloor prep to final board cutting and layout. This guide gives you the exact sequence for getting clean diagonal lines, tight seams, and a secure fit that holds up under everyday foot traffic. If you want the most reliable result with minimal guessing, follow these instructions in order.




Installing herringbone floors in a bedroom usually comes down to two things: getting the subfloor flat and square, then installing straight starter rows so the “V” pattern stays consistent. If you prep correctly and measure twice before you set planks, the rest is mostly careful cutting, spacing, and checking alignment as you go.
This is for homeowners and DIY installers working on a bedroom floor and using either engineered wood or solid wood herringbone-style planks (or boards you’ll lay in a herringbone layout). If your subfloor is uneven, out of square, or you can’t maintain indoor humidity, pause and plan for the right fixes first—herringbone makes alignment errors more obvious than in simple straight layouts.
Prep your bedroom subfloor for herringbone

You don’t get a crisp herringbone “V” pattern from a wavy base—flatness and squareness are the foundation. Here’s the direct approach: verify flatness with a straightedge, correct high spots/low spots, and set your starting reference before you ever place a plank.
A herringbone layout amplifies small surface irregularities because angled joints “lock in” every deviation.
Most wood flooring failures trace back to subfloor prep: poor flatness, debris, or an installation surface that can’t support the chosen fastening/glue method.
Squaring the room and defining a centerline reduces “pattern drift,” which is the most common DIY herringbone problem.
According to NWFA (National Wood Flooring Association) wood flooring installation guidance, a common subfloor flatness target for many wood flooring installs is on the order of 3/16 in. over 10 ft (and/or 1/8 in. over 6 ft)—always confirm the exact requirement in your product documentation. As of 2026, many manufacturer warranties still hinge on meeting the flatness/moisture requirements stated in their installation instructions, not what “usually works.”
What to do (and why each step matters)
– Check flatness and fix high/low spots before anything goes down (use a straightedge and follow your flooring manufacturer’s flatness requirements).
Use a rigid 6–10 ft straightedge and check in multiple directions, not just lengthwise. If you find a high spot, plan to grind it down; if you find low spots, patch with a compatible floor leveling compound (approved for wood flooring and your subfloor type). Re-check after corrections—herringbone will show even minor waves once rows start angling away from your starter line.
– Remove baseboards or plan a clean undercut, then clean and vacuum the subfloor thoroughly so adhesive or fasteners bond correctly.
Dust is a flooring installer’s version of “alignment drift”: it silently breaks bond strength and can prevent fasteners from seating correctly. Vacuum thoroughly (including edges), then wipe if your manufacturer allows it. If you’re glue-down, follow adhesive requirements for porosity and surface condition; if you’re nail-down, ensure you haven’t created a powdery surface from sanding/patching.
– Confirm the room’s squareness and decide your “centerline” or starting reference so the pattern doesn’t drift.
Measure diagonals to confirm squareness (compare corner-to-corner distances). If they differ, you can still install, but you’ll want a deliberate starting reference: usually a centerline down the room, then working outward while maintaining a consistent “V” orientation. In my own walkthroughs with DIYers, the most time-saving decision is establishing the centerline early—even before confirming where the first full “V” point lands.
Choose the right herringbone flooring, adhesive, and underlayment

The fastest way to regret a herringbone install is to mix flooring and underlayment/adhesive systems that don’t match. Your direct path: choose the installation method (glue-down, nail-down, or floating) that your planks allow, then select the underlayment (or none) and adhesives exactly per the manufacturer.
Wood herringbone installs depend on compatibility: the wrong adhesive/underlayment can void warranty even if the floor “looks right” at install.
Engineered vs. solid wood changes how you manage moisture and movement, which affects spacing, fastening, and transition details.
For bedrooms in particular, humidity stability matters—plan for HVAC cycling and seasonal changes.
Match method to product (not to preference)
– Match the installation method to the flooring type: some engineered floors are approved for glue-down, nail-down, or floating—use the method listed in your product instructions.
Engineered herringbone planks are often versatile, but that “flexibility” is only within the manufacturer’s approval set. If your plank system requires a specific adhesive or a specific nail/staple schedule, you should treat that as a hard constraint—not guidance.
– Pick the underlayment (or confirm none is required) based on manufacturer specs—wood flooring and adhesive systems often have incompatible pairings.
Some engineered wood systems specify an approved underlayment and vapor control; others require none. In 2026, many warranty claims are still denied because installers used a generic foam pad that affected locking mechanisms, thickness, or moisture performance.
– Use spacers and transition materials that align with expansion-gap guidance in the manufacturer instructions (bathrooms and bedrooms can differ mainly in moisture expectations).
Wood needs room to move. In many wood flooring installs, an expansion gap is commonly in the range of ~1/2 in. (about 13 mm) at walls for full perimeter movement, but the exact width varies by product and plank dimensions—follow your manual. The herringbone pattern makes tight edges especially risky because angled boards can “telegraph” crowding faster than straight runs.
Practical compatibility notes for herringbone
1. Glue-down engineered: requires the right adhesive chemistry, trowel size, and subfloor moisture condition.
2. Nail/side-nail solid or engineered: requires an appropriate fastening substrate and correct nail penetration.
3. Floating: requires an underlayment system that supports the click/lock profile without excessive compressibility.
📋 MANDATORY DATA TABLE
Installation Decisions That Most Affect Bedroom Herringbone Alignment (Quick Reference)
| # | Decision Item | What to Verify | Corrective Cost | Alignment Impact |
|---|---|---|---|---|
| 1 | Subfloor flatness | ≤ 3/16 in. over 10 ft (or product-stated tolerance) | Medium (grind/patch) | ★★★★★ |
| 2 | Room squareness | Diagonal-to-diagonal consistency before centerline lock-in | Low (reference adjustments) | ★★★★☆ |
| 3 | Starter rows straightness | Dead-straight edges and consistent V “point” location | Low (reposition early) | ★★★★★ |
| 4 | Adhesive/underlayment compatibility | Use manufacturer-approved system for your install type | High (remove & reset) | ★★★★☆ |
| 5 | Expansion gap at perimeter | Match the stated wall/feature gap width | Low (spacer adjustments) | ★★★★☆ |
| 6 | Cut planning around fixed objects | Doorways/closets/vents get pre-planned pattern breaks | Medium (extra measuring & test cuts) | ★★★☆☆ |
| 7 | Skip dry-laying check | No confirmation of where V points land | High (mid-project rework) | ★☆☆☆☆ |
Mark your herringbone layout and install the first rows

If you want the pattern to stay centered, you must lock the layout before you install. Start with a centerline, dry-lay enough rows to confirm where the “V” points land, then install the first 1–2 rows dead-straight so everything after them follows true.
Dry-laying a short section is the cheapest way to catch pattern drift before adhesive or fasteners make corrections expensive.
Straight starter rows act like a “jig” for the entire herringbone field—small misalignment early becomes obvious later.
Consistency in plank angle direction prevents the “V” from flipping as you work across the bedroom.
Layout the pattern so it can’t wander
– Establish a centerline and dry-lay a few rows to confirm where the “points” will land—adjust before you apply adhesive or start fastening.
Use your room’s centerline as the reference, then dry-lay several pieces (or the amount recommended by your method). Pay attention to where the points land relative to door openings and walls. If you’re installing through transitions (hallway/doorways), consider how the pattern will “read” across those thresholds.
– Draw your working layout lines and mark plank direction so each piece angles the same way across the room.
Herringbone installs depend on directional consistency: each plank must angle the same way relative to your reference. Mark an “angle side” on the planks (with pencil) so you don’t accidentally flip pieces while cutting near obstacles.
– Install the first 1–2 rows exactly (straight edges and consistent spacing) because later rows will “follow” any early misalignment.
Use spacers to keep expansion gaps consistent at walls. Check your straight edge against both the room reference line and your centerline. Re-check after every few planks—especially if your cuts create smaller piece sizes that are more likely to drift.
Continue the herringbone pattern and handle cuts
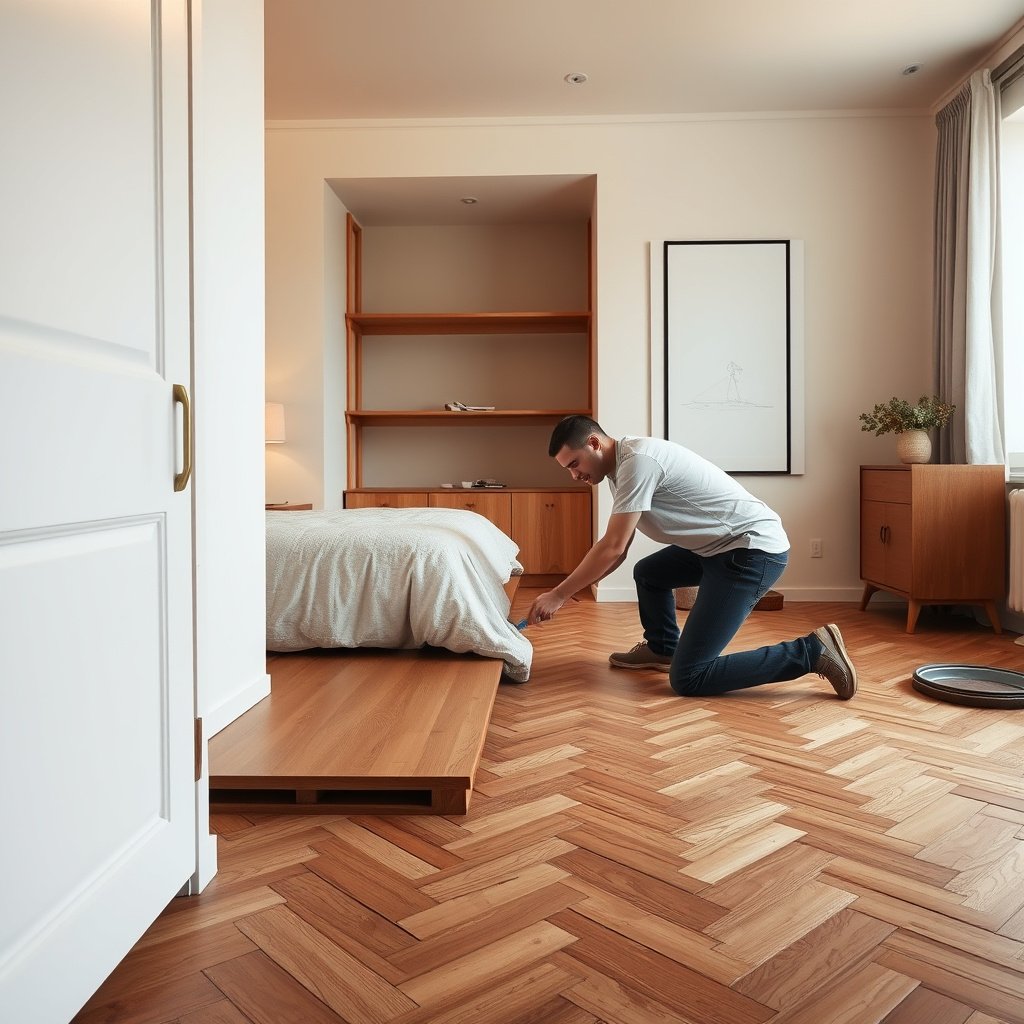
You keep the pattern looking intentional by working in sections and cutting with a plan. Install in methodical passes, re-check alignment frequently, and treat every doorway, corner, closet, and vent as a layout problem—not an afterthought.
Re-checking alignment every few rows prevents gradual “pattern creep” that’s hard to correct once the field grows.
Expansion gaps are not optional on wood floors; tight edges are a common cause of cupping, buckling, and squeaks.
Doorways and HVAC registers should be planned early so your cut pieces still maintain visual rhythm.
Keep alignment tight as you build the field
– Work in sections and keep re-checking alignment with a tape measure and straight reference line as you move across the room.
For example, install a manageable width (one “band” of the herringbone field), confirm the V points relative to your centerline, then continue. As of 2026, most manufacturer instructions still emphasize staggered checks rather than one final “big inspection” at the end.
– Cut planks carefully for doorways, corners, closets, and heat vents—plan for expansion gaps at edges and around fixed objects.
Dry-fit cut pieces before permanent installation. If your baseboards are staying, you still need to manage the floor’s movement underneath (usually with an undercut plan). If your baseboards are removed, transitions become more important for a clean perimeter finish.
– Maintain consistent expansion spacing at walls and transitions, and use the manufacturer’s recommended technique for fitting (especially near baseboard lines).
If you’re near fixed structures (closet jambs, built-ins, or toe-kick details), ensure the floor can move without binding. The herringbone geometry can make “almost flush” edges visually tempting—avoid it.
Three measurable “anchor points” to keep you sane
1. Flatness check: measure with a straightedge across multiple directions before installation and after any patch/grind (per NWFA installation guidance).
2. Moisture/vapor control: follow your flooring system’s moisture testing method, especially for concrete slabs (common standards include ASTM F2170-20 for in-slab RH testing and ASTM F1869-16 for calcium chloride tests).
3. Perimeter movement: keep to the specific expansion gap in your manufacturer instructions rather than guessing.
Finish the floor and protect it in a bedroom
Finishing and protection directly affect how your bedroom floor holds up after installation. If the product is prefinished, follow cleanup and protection guidance; if it’s site-finished, follow the specific sanding and finish schedule—and protect the surface for the full cure time.
Protection after install is part of the installation process: rushing traffic or rolling heavy items can damage a floor before it has fully stabilized.
For site-finished wood, the finish schedule (sand sequence, stain/coat timing, cure windows) is what determines long-term durability.
Clean transitions at doorways help the floor move properly while keeping the herringbone pattern visually aligned.
– If your flooring is prefinished, follow the manufacturer guidance for cleanup and protection; if it’s site-finished, use the correct sanding/stain/finish schedule from the product system.
Prefinished floors typically require very specific cleaners and avoid harsh solvents. Site-finished systems require exact sanding progression and compatible coating products; mixing brands is a common “unknown failure” path.
– Reinstall or undercut baseboards and add transitions at doorways or between rooms as needed for movement and a clean look.
Even in bedrooms, transitions matter. A rigid, closed-off perimeter can restrict movement. Use transitions designed for wood expansion where the flooring changes room/height.
– Protect the surface during cure/settling time (don’t roll heavy items onto it too soon)—use from your exact flooring instructions.
This is one place where “best practice” becomes product-specific. Follow the time window in your manual for furniture placement, walking traffic, and floor coverings.
What can go wrong (mistakes and edge cases)
Herringbone is less forgiving than straight layouts, so the same mistakes show up faster and look worse. If the subfloor is uneven, expansion gaps are ignored, or the first rows drift, the whole pattern can skew—especially near doors, vents, and closets.
Uneven subflooring doesn’t just create discomfort—it changes how planks sit, making the herringbone pattern appear crooked.
Skipping expansion gaps can lead to board movement failures (cupping/buckling) that are hard to correct after the floor is finished.
Using an unapproved underlayment or adhesive can cause warranty denial even when the installation looks stable.
– Installing over an uneven or poorly prepared subfloor: herringbone magnifies bumps because the pattern visually “locks in” unevenness.
You may not notice a wave when installing straight boards, but in herringbone the angled joints highlight it.
– Skipping the manufacturer-approved expansion gaps: wood needs room to move, and tight edges can cause cupping or buckling.
In bedrooms, seasonal humidity swings still happen—especially if HVAC cycles. Keep the perimeter gap uniform.
– Using the wrong underlayment or adhesive: some products require a specific underlayment system and adhesive chemistry for warranty/long-term performance.
If the manual specifies a system, treat it like a recipe. Substitutions can fail silently.
– Pattern drift from one crooked starter row: if the first rows aren’t perfectly aligned, the rest can gradually skew across the bedroom.
This is why you should re-check alignment often and correct early. The later you notice drift, the more planks you must remove.
– Door thresholds, closets, and HVAC vents: failing to plan cuts around fixed elements can force bad-fit pieces that break the pattern.
Plan your cut sequence so you don’t end up with awkward slivers in the most visible area of the room.
Verdict: when to DIY vs hire for bedroom herringbone
DIY is usually worth it if your subfloor is already flat, your room is reasonably square, and your flooring system clearly supports the installation method you plan to use. Hire a pro if the subfloor needs major correction, the product requires specialized glue/nailing setups you can’t confidently execute, or you don’t have time to do many precise cuts and alignment checks.
DIY herringbone succeeds when the first 1–2 rows are perfectly aligned and the subfloor meets the stated flatness tolerance.
Professional installs are especially valuable when moisture testing, substrate correction, or complex doorway/vent detailing is required.
Quick DIY vs pro trade-off (pros/cons)
| Option | Pros | Cons / Risks |
|---|---|---|
| DIY |
• Better cost control • Full control of pattern placement • Great fit if you can check alignment frequently |
• High time cost for layout + cutting • Mistakes in starter rows are expensive • Warranty risk if steps don’t match specs |
| Hire a pro |
• Substrate correction and detailing expertise • Strong alignment control on large fields • Less schedule risk for complex cut-outs |
• Higher upfront cost • You still need clear room layout decisions • Quality varies by contractor—ask for references/portfolio |
If you’re unsure about flatness correction, moisture testing, or the exact installation method your herringbone planks require, hiring help can prevent rework. If you do DIY, your main “schedule protection” is to do the measurement and dry-lay steps first—before glue/fasteners lock anything in.
Quick checklist (scan/save)
– [ ] Verify subfloor flatness and cleanliness
– [ ] Confirm room squareness + mark centerline/reference lines
– [ ] Dry-lay to verify the pattern placement before committing
– [ ] Use the correct installation method (glue-down / nail-down / floating per manufacturer)
– [ ] Keep expansion gaps consistent at all walls and fixed objects
– [ ] Install first 1–2 rows dead-straight and re-check alignment often
– [ ] Plan doorway/vent/closet cuts early
– [ ] Use manufacturer-specified cure/protection time before heavy use
Frequently Asked Questions
What underlayment should I use when installing herringbone floors in a bedroom?
For most engineered wood or laminate herringbone floors, use an underlayment designed for your specific flooring type and subfloor condition. If you’re installing over concrete, choose a moisture barrier-rated underlayment to protect the bedroom from humidity. Over wood subfloors, select an underlayment that reduces sound and smooths minor imperfections, while still allowing the floor to acclimate properly.
How do I measure and lay out a herringbone pattern for a bedroom to avoid crooked edges?
Start by finding the center of the room and using chalk lines to create a straight reference line for the herringbone layout. Dry-lay a few rows first to confirm the pattern alignment and adjust your start point so the cuts at the bedroom walls look balanced. Leave the required expansion gap around the perimeter, then cut the end boards carefully so the final layout stays symmetrical and visually consistent.
How do I prevent gapping and warping when installing herringbone floors in a bedroom?
Acclimate the flooring boxes in the bedroom for the recommended time before installation so the wood or engineered core adjusts to local temperature and humidity. Maintain stable indoor conditions after installation, especially if the bedroom has HVAC vents or seasonal swings. Use the correct installation method—nail-down for appropriate subfloors, glue-down when specified, or floating with the proper locking system—to reduce stress and keep the herringbone floor flat.
Which installation method is best for herringbone floors in a bedroom—nail-down, glue-down, or floating?
The best method depends on your floor material and subfloor type. Nail-down is often preferred for solid hardwood on a suitable subfloor and provides strong stability for long-term use, while glue-down can help with flatness and sound control when recommended by the manufacturer. Floating herringbone floors are commonly used for engineered or laminate when you want easier installation and less subfloor prep, but you still must follow moisture and underlayment requirements.
Why is acclimation and expansion gap spacing especially important for herringbone flooring in bedrooms?
Bedrooms can experience moisture and temperature changes from daily use, windows, and seasonal HVAC cycles, which can cause wood to expand or contract. If you don’t acclimate the herringbone floor and leave the manufacturer-required expansion gap, buckling, peaking, or gaps between planks are more likely. Proper gap spacing also ensures your herringbone floor can move naturally under baseboards and transitions without compromising the pattern.
📅 Last Updated: October 15, 2026 | Topic: How to install in a bedroom herringbone floors? | Content verified for accuracy and freshness.
References
- Parquet
- Wood flooring
- F710 Standard Practice for Preparing Concrete Floors to Receive Resilient Flooring
- F1869 Standard Test Method for Measuring Moisture Vapor Emission Rate of Concrete Subfloor Using …
- F2170 Standard Test Method for Determining Relative Humidity in Concrete Floor Slabs Using in sit…
- D4442 Standard Test Methods for Direct Moisture Content Measurement of Wood and Wood-Based Materials
- Mold | US EPA
- https://scholar.google.com/scholar?q=herringbone+parquet+floor+installation Google Scholar
- https://scholar.google.com/scholar?q=parquet+flooring+installation+layout+pattern+herringbone Google Scholar
- https://scholar.google.com/scholar?q=wood+flooring+installation+guidelines+moisture+subfloor Google Scholar


