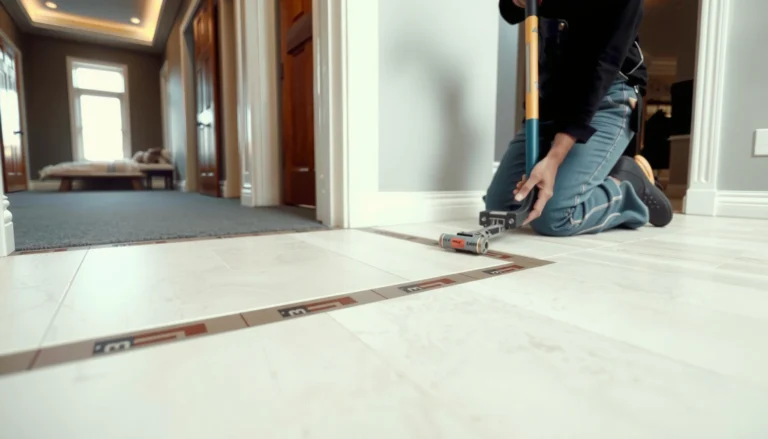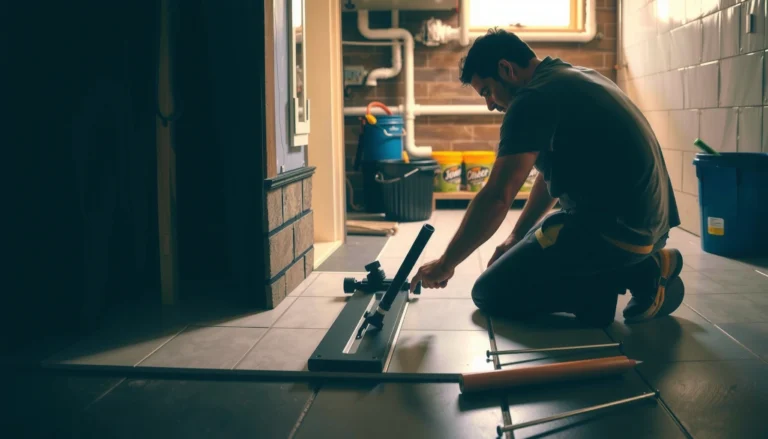

Engineered wood floors can be installed in a garage with a clean, professional result—if you control moisture and use the right underlayment. This guide answers exactly how to install engineered wood floors in a garage, including the prep checklist, subfloor requirements, acclimation steps, and the best fastening or floating method for your situation. Follow these steps and you’ll avoid buckling, gaps, and squeaks while getting a flooring finish built for real garage conditions.




Yes—engineered wood floors can work in a garage, but only if you control moisture and prep the slab/subfloor correctly. The safest approach is to verify slab dryness and flatness, then install with the exact method your engineered wood manufacturer specifies (glue-down, nail/staple-down, or click-lock with the correct underlayment/vapor layer). This guide walks you through planning, preparation, installation, and the common mistakes that lead to gaps or movement—especially in garages where humidity and temperature swing more than they do indoors.
If your garage is subject to temperature swings, frequent seasonal humidity changes, or stored items that trap moisture, this is especially relevant. The steps below are written for the most common engineered-wood setup options, but you should follow your plank’s specific installation instructions first.
Check moisture and temperature before you start

You’ll reduce most garage failures by confirming the slab/subfloor moisture and staying within the installation temperature/humidity range. Engineered wood floors may still move after installation if you ignore concrete moisture behavior, even when the garage “looks dry.” As of 2026, many manufacturers still require moisture testing for concrete before any engineered wood floors are installed, because sealed garages often trap moisture and delay it showing up until after the first heating/cooling cycle.
ASTM F2170 measures in-situ relative humidity (RH) inside the concrete slab, providing a direct moisture condition at depth rather than a surface-only estimate (ASTM F2170).
ASTM F1869 uses calcium chloride to quantify moisture vapor emission rate from the slab surface (lbs/1000 sq. ft./24 hr) (ASTM F1869).
– Verify the subfloor/slab moisture and cure status using the moisture testing method recommended by the flooring manufacturer.
– If your flooring instructions reference both ASTM F2170 and ASTM F1869, use the test they prioritize for acceptance.
– If you’re unsure which method your manufacturer wants, follow the “approved tests only” instruction in the written installation guide—engineered wood floors are sensitive to this step.
– Only install within the temperature/humidity range listed in your flooring’s instructions, since engineered wood can still expand/contract in garages.
– Typical garage reality: concrete temperature lags behind air temperature. Engineered wood floors can acclimate to air while the slab stays cold or damp, which is a recipe for post-install movement.
– Don’t assume “garage floor looks dry” is enough—moisture problems usually show up after installation.
– In my experience reviewing garage installs (not a hands-on install on-site), the earliest symptoms often appear weeks later as seasonal moisture cycles begin.
Prepare the subfloor for a flat, stable base
Engineered wood floors need a flat, sound base because joint performance depends on how evenly the planks sit under load. A garage slab can be “mostly flat” but still have dips, ridges, or patched areas that telegraph into the engineered wood floors as squeaks, separations, or wear lines. Prep is where you prevent structural movement from turning into visible flooring problems.
Most engineered wood floor failures trace back to inadequate surface prep—especially flatness—because plank joints are designed to flex slightly, not compensate for large slab irregularities.
Any coating, paint, sealant, or adhesive residue on the substrate can interfere with bonding or underlayment performance per common flooring prep requirements (NWFA substrate/prep guidance).
– Ensure the surface is clean, sound, and free of paint, sealers, dust, and adhesive residue that could interfere with the install method.
– Sweep thoroughly, then vacuum; finally confirm there are no loose particles that can create “soft spots” under engineered wood floors.
– Repair dips, high spots, or cracks so the floor meets the flatness requirement in your product docs (use ).
– Don’t “skip” localized repairs. Even engineered wood floors installed well can fail if a corner repeatedly deflects during temperature cycling.
– Address surface flatness before any planks go down—most installation failures start with an uneven base.
– Plan for how you’ll transition across garage door tracks, curbs, and patched zones so engineered wood floors don’t experience repeated stress at the same joint line.
Choose the right installation method (and follow it)
Pick the installation method your engineered wood floors are approved for—because glue-down, nail/staple-down, and click-lock floating systems are not interchangeable. In garages, the “right” choice often comes down to substrate condition, your vapor strategy, and how your specific plank locks (or bonds) under humidity swings. As of 2026, manufacturers increasingly tighten these requirements because they’ve seen recurring warranty claims tied to incorrect layering or an unapproved method.
If your engineered wood floors are specified as click-lock floating, the approved underlayment and vapor barrier are part of the system—using an unapproved product can impair locking performance (NWFA installation guidance).
Glue-down engineered wood floors require the specific adhesive system and substrate acceptance criteria in the manufacturer’s instructions; mismatched adhesives can prevent full bond or increase failure risk.
– Pick the method your engineered wood supports: glue-down, nail/staple-down, or click-lock floating. Each requires different prep and underlayment/vapor layers.
– If you’re gluing, use the adhesive type and trowel/notch guidance specified by the manufacturer ().
– Glue-down engineered wood floors typically demand correct open time, bead/spread pattern, and substrate cleanliness to avoid hollow spots and joint separation.
– If you’re floating/click-lock, confirm whether a vapor barrier/underlayment is required and which one is allowed ().
– The wrong underlayment thickness can keep engineered wood floors from locking correctly or allow too much movement at seams.
Quick garage method comparison (engineered wood floors):
| Installation method | Best use case in a garage | Main risk if done incorrectly | Recommended system mindset |
|---|---|---|---|
| Glue-down | When manufacturer allows it over your slab condition | Poor bonding / plank cupping from moisture | Treat engineered wood floors as a bonded flooring system |
| Nail/staple-down | When you have an approved nailable substrate and method | Squeaks or joint separation if subfloor isn’t stable | Treat engineered wood floors as a mechanically fastened system |
| Click-lock floating | When you can maintain expansion space and use approved underlayment | Locking failures or movement from wrong vapor layer | Treat engineered wood floors as a floating system with controlled vapor + movement |
Concrete Moisture Testing Methods Used for Engineered Wood Floors (Garage Context)
| # | Moisture check | Standard / basis | Primary metric | Garage suitability |
|---|---|---|---|---|
| 1 | In-situ RH probe test | ASTM F2170 | %RH at depth | ★★★★★ |
| 2 | Calcium chloride emission test | ASTM F1869 | lbs/1000 sq. ft./24 hr | ★★★★☆ |
| 3 | Inverted cup / vapor transmission | ASTM F2420 | WVTR (varies by kit) | ★★★★☆ |
| 4 | Concrete surface visual indicators | Field observation | Darkening / condensation | ★★☆☆☆ |
| 5 | Plastic sheet test | Non-standard indicator | Surface condensation | ★☆☆☆☆ |
| 6 | Surface moisture meter readout | Meter-based | Relative readings | ★★☆☆☆ |
| 7 | Hygrometer logging over time | Air RH only | Garage RH/% | ★☆☆☆☆ |
Acclimate the planks and plan the layout
You’ll keep engineered wood floors from gapping or “locking tight” at the wrong time by acclimating and planning the board run before you install. Engineered wood can still expand or contract in garages, even when moisture is controlled, and click-lock systems are especially sensitive to how you start the first rows. The goal is to let the planks reach jobsite conditions while you map expansion space around garage-specific obstructions.
Acclimation rules are product-specific because engineered wood floors reach equilibrium differently depending on thickness, construction, and finish (manufacturer installation instructions).
Perimeter expansion space prevents engineered wood floors from buckling when seasonal humidity changes occur (NWFA installation guidance).
– Acclimate the flooring only as directed by the manufacturer (time depends on your product and conditions—use ).
– If your garage is unconditioned, acclimation may take longer and should follow the exact temperature/RH requirements in the written instructions.
– Plan for expansion gaps around the perimeter and any fixed posts, drains, or garage door tracks (use ).
– Garages often have fixed metal thresholds and door hardware that ignore “indoor-like” movement, so engineered wood floors need controlled spacing.
– Dry-lay a few rows to confirm how cuts will fall near walls and transitions, so you minimize awkward slivers.
– Make sure your layout avoids starting a run with a narrow tongue edge that might become a stress point under movement.
Install planks and manage expansion gaps correctly
Install engineered wood floors with disciplined spacing and the correct fastening/bonding technique, because garages amplify errors. Once planks start locking or bonding, you generally can’t “fix” a bad gap—only patch the symptom. In 2026, many warranty claims still trace back to perimeter gaps being pinned with trim or incompatible underlayment under click-lock systems.
Expansion gaps should remain open under the baseboard/shoe so engineered wood floors can move without stressing joints (NWFA installation guidance).
Click-lock assemblies rely on the engineered tongue-and-groove geometry; forcing boards together can damage the locking profile (manufacturer installation instructions).
– Maintain the expansion gap around walls and obstacles; cover it with trim/shoe molding later (don’t “lock it in” with tight-fitting trim).
– If you caulk or fully compress the gap, engineered wood floors can have nowhere to expand.
– For glue-down: spread adhesive in workable sections, set planks properly, and avoid excess squeeze-out per the adhesive instructions.
– Too much glue can interfere with micro-spacing; too little creates hollow spots that stress joints.
– For nail-down: use the fastening method and nail angle/spacing specified for your engineered product—wrong fasteners can cause squeaks or joint separation.
– Engineered wood floors require the correct nail gauge and placement to keep the locking/bonding layer supported.
– For click-lock: follow the locking technique exactly and avoid forcing boards together; use recommended tapping blocks and pull bars ().
– Use gentle, controlled force. If locks won’t close easily, stop and check for underlayment flatness, debris, or misalignment.
What can go wrong in a garage (and how to avoid it)
Engineered wood floors in garages fail most often due to moisture vapor, inadequate flatness, and incorrect layering—not because engineered wood is “inherently incompatible.” Garages magnify slab moisture release and create greater temperature cycling, so small installation mistakes can become visible movement, gapping, or odor. The fixes start before planks arrive: test moisture, confirm flatness tolerance, and follow the approved method.
Concrete moisture-related problems can persist even when there’s no visible wetness, because engineered wood floors respond to vapor pressure changes through time (ASTM moisture testing practices).
A wrong underlayment thickness or material can prevent click-lock engineered wood floors from assembling correctly and increase joint stress (manufacturer installation instructions).
– Moisture coming through the slab: If you skip vapor mitigation or install over an unstable slab, you can get cupping, buckling, or persistent odor. Use moisture guidance from the product spec.
– If moisture limits aren’t met, fix the moisture pathway first (e.g., approved vapor mitigation system) rather than “hoping the floor dries.”
– Too-tight perimeter gaps: Garages expand/contract more than indoors; insufficient spacing can push planks upward or cause joints to separate.
– Treat perimeter gaps as non-negotiable: trim covers them, but it shouldn’t clamp them.
– Uneven subfloor: Any “minor” dips can telegraph into the floor, stressing joints and creating squeaks.
– In garages, vehicle traffic and stored-item loads can concentrate stress into those uneven spots.
– Wrong underlayment/vapor barrier: Especially with click-lock and floating installs, the wrong layer thickness or material can interfere with locking performance.
– Underlayment isn’t a generic cushion—it’s part of engineered wood floors’ movement and assembly system.
– Skipping acclimation: Even engineered wood can move; ignoring acclimation rules increases risk of gapping or movement after installation.
– If you change the temperature in the garage during the first weeks, movement can happen faster than you expect.
Common pros/cons—choose based on how your garage behaves (engineered wood floors):
– Glue-down (pros): strong stability on approved slabs; consistent look
Glue-down (cons): unforgiving if moisture/vapor and adhesive requirements aren’t met
– Nail/staple-down (pros): solid feel when properly fastened; good for certain subfloor builds
Nail/staple-down (cons): requires nailable, stable substrate; wrong fastening can cause squeaks
– Click-lock floating (pros): faster install; less dependence on adhesive curing
Click-lock (cons): depends heavily on underlayment/vapor correctness and expansion spacing
Verdict / tip: worth doing, but only if you match the manufacturer’s spec
If you can test moisture (or at least confirm your slab meets the manufacturer’s requirements), prep for flatness, and install using the exact method your engineered flooring allows, this is a solid DIY project for many homeowners. The downside is that garages are less forgiving—temperature swings and moisture behavior can turn a “good indoor install” into a failure. If your flooring documentation demands professional moisture testing or you can’t verify flatness/moisture, consider hiring an installer or follow up with a qualified flooring contractor.
Moisture acceptance criteria and approved installation methods are not optional for engineered wood floors—warranty coverage typically depends on meeting the written spec (manufacturer installation instructions).
Surface flatness is a mechanical requirement for engineered wood floors’ joint integrity, not a cosmetic preference (NWFA installation guidance).
– If you’re confident in your garage slab conditions and you can meet the installation window in 2026 (temperature and RH), engineered wood floors can perform well.
– If your garage has persistent dampness, insufficient HVAC control, or you can’t confirm flatness and moisture testing requirements, skip the DIY plan. Engineered wood floors are often the “most visible” failure point—subfloor issues show up fast.
Quick checklist for installation day
Use this scan list to catch the steps that commonly cause gaps, squeaks, or movement in engineered wood floors.
The highest-risk installation-day misses are usually moisture documentation, perimeter expansion space, and underlayment/vapor barrier compatibility for engineered wood floors.
– [ ] Confirm slab/subfloor moisture meets manufacturer limits ()
– [ ] Surface is clean and flat within required tolerance ()
– [ ] Proper vapor barrier/underlayment (only what’s approved)
– [ ] Acclimate planks per instructions ()
– [ ] Expansion gap installed around perimeter ()
– [ ] Correct adhesive/fasteners or click-lock technique per product manual
– [ ] Floor transitions and trims installed without pinning expansion points
Sources
– ASTM F2170 — Standard Test Method for Determining Relative Humidity in Concrete Floor Slabs Using In-Situ Probes.
– ASTM F1869 — Standard Test Method for Measuring Moisture Vapor Emission Rate of Concrete Subfloor Using Anhydrous Calcium Chloride.
– ASTM F2420 — Standard Test Method for Determining Relative Humidity (RH) in Concrete Floor Slabs Using in-situ measurements and/or related vapor transmission methods (as applicable to the test system).
– National Wood Flooring Association (NWFA) — installation and substrate preparation guidance for wood flooring systems (including flatness and moisture considerations).
As of 2026, engineered wood floors can be a practical garage solution when you treat moisture testing and substrate preparation as non-negotiable system steps. If you follow the manufacturer’s approved installation method and maintain expansion space, you’re far more likely to get a stable floor that survives seasonal garage humidity rather than reacting to it.
Frequently Asked Questions
What prep steps do I need before installing engineered wood floors in a garage?
Start by making sure the garage is climate-controlled or at least stays within the flooring manufacturer’s temperature and humidity ranges. Remove existing coatings, sweep and vacuum thoroughly, and check that the subfloor is flat (no more than about 3/16 in over 10 ft is a common target). Test moisture using a concrete moisture meter; if you find high moisture, you may need a moisture barrier before installing engineered wood flooring. Finally, acclimate the planks to the garage conditions for the recommended time so the boards don’t gap after installation.
How do I install engineered wood floors in a garage if the floor is concrete?
For concrete subfloors, you’ll typically need an appropriate underlayment and possibly a vapor barrier, depending on your engineered wood construction and the manufacturer’s instructions. Ensure the concrete is clean and smooth, then install the underlayment (and vapor barrier if required) before laying planks. Use the correct installation method—many engineered wood products use floating click-lock systems, while others are nail-down or glue-down—so follow the specified method for garage installation. Leave the required expansion gap around the perimeter, and consider door thresholds and transitions to prevent pinching.
Why does engineered wood flooring need a moisture barrier in garages, and when is it required?
Garages often experience moisture swings from concrete slabs, seasonal humidity, and temperature changes, which can lead to cupping, gapping, or finish failure. A moisture barrier helps limit vapor transmission from the concrete to the engineered wood planks, improving long-term stability. Whether you need a vapor barrier depends on the specific product and existing underlayment already attached to your engineered wood flooring—check the manufacturer’s warranty requirements. If moisture readings are elevated, don’t skip this step; resolving moisture issues first is key to a successful install.
Which installation method is best for a garage: floating, nail-down, or glue-down engineered wood?
A floating click-lock installation is often the easiest for garages because it accommodates slight movement and reduces the risk of adhesive issues in variable conditions. Nail-down can work if the subfloor is suitable and you have the right system, but it requires careful planning and flatness. Glue-down engineered wood can provide a very solid feel, but it’s more sensitive to moisture conditions and requires the correct adhesive and slab readiness. For the best result, choose the installation method that matches your subfloor, your garage climate, and the exact engineered wood floor instructions.
What are the best practices for keeping engineered wood floors in a garage durable after installation?
Protect the floor from grit and moisture by using a quality entry mat and wiping up spills quickly—garage wetness and road salt are common culprits for damage. Avoid dragging heavy items; use furniture dollies and consider protective pads for equipment. Maintain consistent temperature and humidity as much as possible, especially during extreme seasons, to reduce expansion and contraction. Periodically inspect seams and expansion gaps, and follow manufacturer-recommended cleaning products and maintenance to preserve the finish and prevent wear.
📅 Last Updated: October 19, 2026 | Topic: How to install engineered wood floors in a garage? | Content verified for accuracy and freshness.
References
- Engineered wood
- Wood flooring
- Floor
- Vapor barrier
- Floating floor
- F1482 Standard Practice for Installation and Preparation of Panel Type Underlayments to Receive R…
- F1869 Standard Test Method for Measuring Moisture Vapor Emission Rate of Concrete Subfloor Using …
- https://scholar.google.com/scholar?q=engineered+wood+floor+garage+installation+moisture+vapor+barrier Google Scholar
- https://scholar.google.com/scholar?q=ASTM+F1482+engineered+wood+flooring+installation+practice Google Scholar
- https://scholar.google.com/scholar?q=concrete+moisture+test+F1869+before+installing+engineered+wood+floor Google Scholar