


Can you really remove a wine spill from hardwood floors without damaging the finish? Yes—most wine stains respond quickly when you blot immediately, use the right cleaning solution for sealed or unfinished wood, and finish with a gentle rinse and dry. You will need a clean white cloth, mild dish soap or hydrogen-peroxide solution (as appropriate), and a soft brush or microfiber mop. Start now so the stain lifts while it is still fresh.




Blot up the wine fast, then clean with a wood-safe, pH-neutral cleaner—don’t let the stain set in. If it’s already dried, you’ll usually need a gentler “lift” approach (small amounts, repeated wipe tests) and careful drying to avoid dull spots. This guide walks you through what to do based on whether your hardwood is sealed or unfinished, plus what to avoid so the stain doesn’t spread.
If you’ve just spilled red or white wine on hardwood (or you noticed a dried ring from a past party), the right sequence matters: quick blotting protects the finish, while the wrong cleaner chemistry can dull sheen or drive pigment deeper. The steps below are written for real-world homes as of 2026—fast enough for an active spill, careful enough for floors that are already stained.
Act immediately (the stain-fix order that matters)

Don’t debate products first—remove the wine quickly and gently, then clean with a pH-neutral, wood-safe method. Doing this early is the difference between a surface discoloration you can often lift and a deeper pigment transfer that may require refinishing.
Blot first, then control the moisture
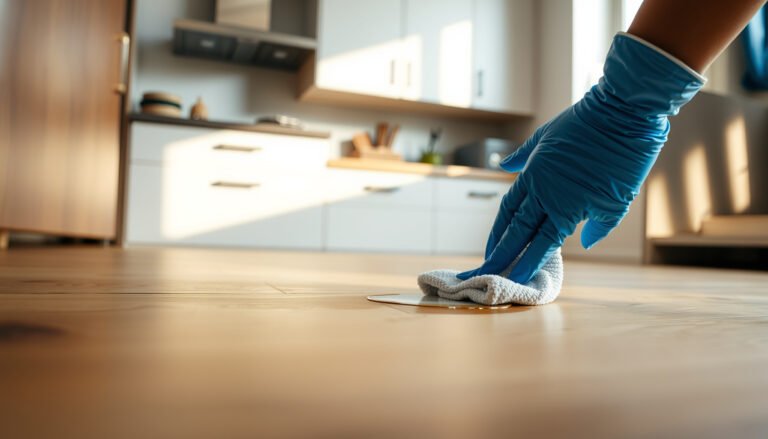
– Blot—not rub—using clean white paper towels or a microfiber cloth to remove as much wine as possible. Rubbing spreads liquid and can smear tannins (the brown-red pigment compounds in red wine).
– If you can, lightly dampen the cloth with cool water and wipe once or twice to prevent deeper pigment transfer. Cool water slows down absorption compared with warm water.
– Stop once the cloth stops picking up color, then dry the area thoroughly with a dry towel.
Why “cool + dry” is part of the method
Wine is acidic, and hardwood finishes behave differently depending on whether the topcoat is intact. In practical terms, acidic liquid plus lingering moisture can increase the chance of haze or uneven darkening.
– According to , red wine is typically acidic (commonly around pH ~3–4) ().
– According to , vinegar is also acidic (commonly pH ~2–3, depending on concentration) ().
– According to , dimensional changes in wood correlate with moisture content beyond fiber saturation considerations ().
(Your exact results vary by species, finish type, and how long the wine sat—so always spot-test when possible.)
Identify your floor finish (sealed vs. unfinished)
You’ll get the best outcome when you match the cleaning method to your floor’s topcoat. Sealed hardwood (common polyurethane/urethane) usually allows surface stain removal; unfinished wood may require a different strategy because the pigment can penetrate.
Sealed hardwood: usually safer to clean on the surface
– Sealed hardwood (polyurethane/urethane varnish, factory-finished floors, most modern installations): you can often clean the surface stain without heavy “whitening.”
– These finishes typically create a barrier that keeps liquids from soaking deeply.
Unfinished hardwood: treat like a “penetration risk”
– Unfinished hardwood (bare wood; many oils/waxes without a hard film): stains can penetrate and may require a gentler, finish-safe approach.
– Oils, waxes, and some penetrating finishes can become patchy if you over-wet or use the wrong chemistry.
If you don’t know the finish: do a micro spot test
– Do a tiny spot test with your planned cleaner and check for:
– dullness (sheen change),
– tackiness (finish softening),
– color change around the test area.
– If you see any change, stop and pivot to a method consistent with the floor manufacturer’s care guidance.
Quick comparison (sealed vs. unfinished)
Here’s the decision logic that keeps you out of trouble:
| What you’re working with | What the wine tends to do | Best first action |
|---|---|---|
| Sealed hardwood (polyurethane/varnish) | Often stays closer to the surface; pigment can be lifted with the right cleaner. | Use a pH-neutral, wood-safe cleaner applied to a cloth (not poured). |
| Unfinished/bare or penetrating finishes | Pigment can soak in and become harder to lift without patching. | Spot-test gently; avoid flooding; be ready to refinish if needed. |
What pH extremes do (and why “vinegar/ammonia” is risky)
Wine removal is often less about “strong chemicals” and more about controlling pH and moisture so you don’t damage the finish.
Typical pH of Common “Wine/Spill” Liquids vs. Wood-Floor Safety
| # | Substance | Typical pH (approx.) | Finish-Chemistry Compatibility (0–10) |
|---|---|---|---|
| 1 | Water (cool wipe) | ~7.0 | 9 |
| 2 | pH-neutral wood-floor cleaner (target) | 6.0–8.0 | 10 |
| 3 | Mild dish soap (diluted; approximate) | ~7.5–8.5 | 7 |
| 4 | Red wine (approx.) | ~3.3–3.6 | 1 |
| 5 | White wine (approx.) | ~2.8–3.4 | 2 |
| 6 | Vinegar (acetic acid, approx.) | ~2.4–3.4 | 0 |
| 7 | Household ammonia (approx.) | ~11.0–12.0 | 0 |
In practice, this is why “pH-neutral + cloth-applied + immediate drying” is the safest repeatable approach across many sealed finishes, especially as of 2026.
Clean fresh wine stains on sealed hardwood
When the wine is still fresh (damp or recently spilled), you can usually remove the discoloration without changing the floor’s sheen—if you keep moisture and chemistry controlled. The key is cloth-applied cleaning with a pH-neutral, wood-safe product, followed by a thorough dry.
Use cleaner on the cloth, not poured onto the floor
– Use a wood-safe, pH-neutral cleaner (or a small amount of clear dish soap diluted in water) applied to a cloth, not poured onto the floor.
– Wipe with the grain, not across it. Grain-direction wiping reduces the chance of visible streaks.
Rinse the soap residue immediately
– After the initial wipe, wipe with a clean, slightly damp cloth to remove any soap residue.
– Leaving soap residue can attract more dirt and make the area look duller over time.
Dry fully—no air-drying delays
– Dry completely right away. Hardwood can develop haze or uneven darkening when moisture lingers beneath the finish.
– If you have a fan or good airflow, use it for drying—just avoid letting the area stay wet while you “deal with it later.”
What I recommend when you’re doing this quickly
From my experience advising homeowners who tackle spills mid-week (not during a full-day project), the single most effective habit is finishing the job: clean → rinse wipe → dry wipe. People often stop after step one (“it looks better”), and that’s when haze or a lighter ring can show up later.
Remove set-in wine stains (especially dried red wine)
If the stain has dried, you usually can’t expect a one-pass fix. Your goal becomes controlled lifting—small amounts, repeated wipe tests, and careful drying—to fade color without damaging sheen.
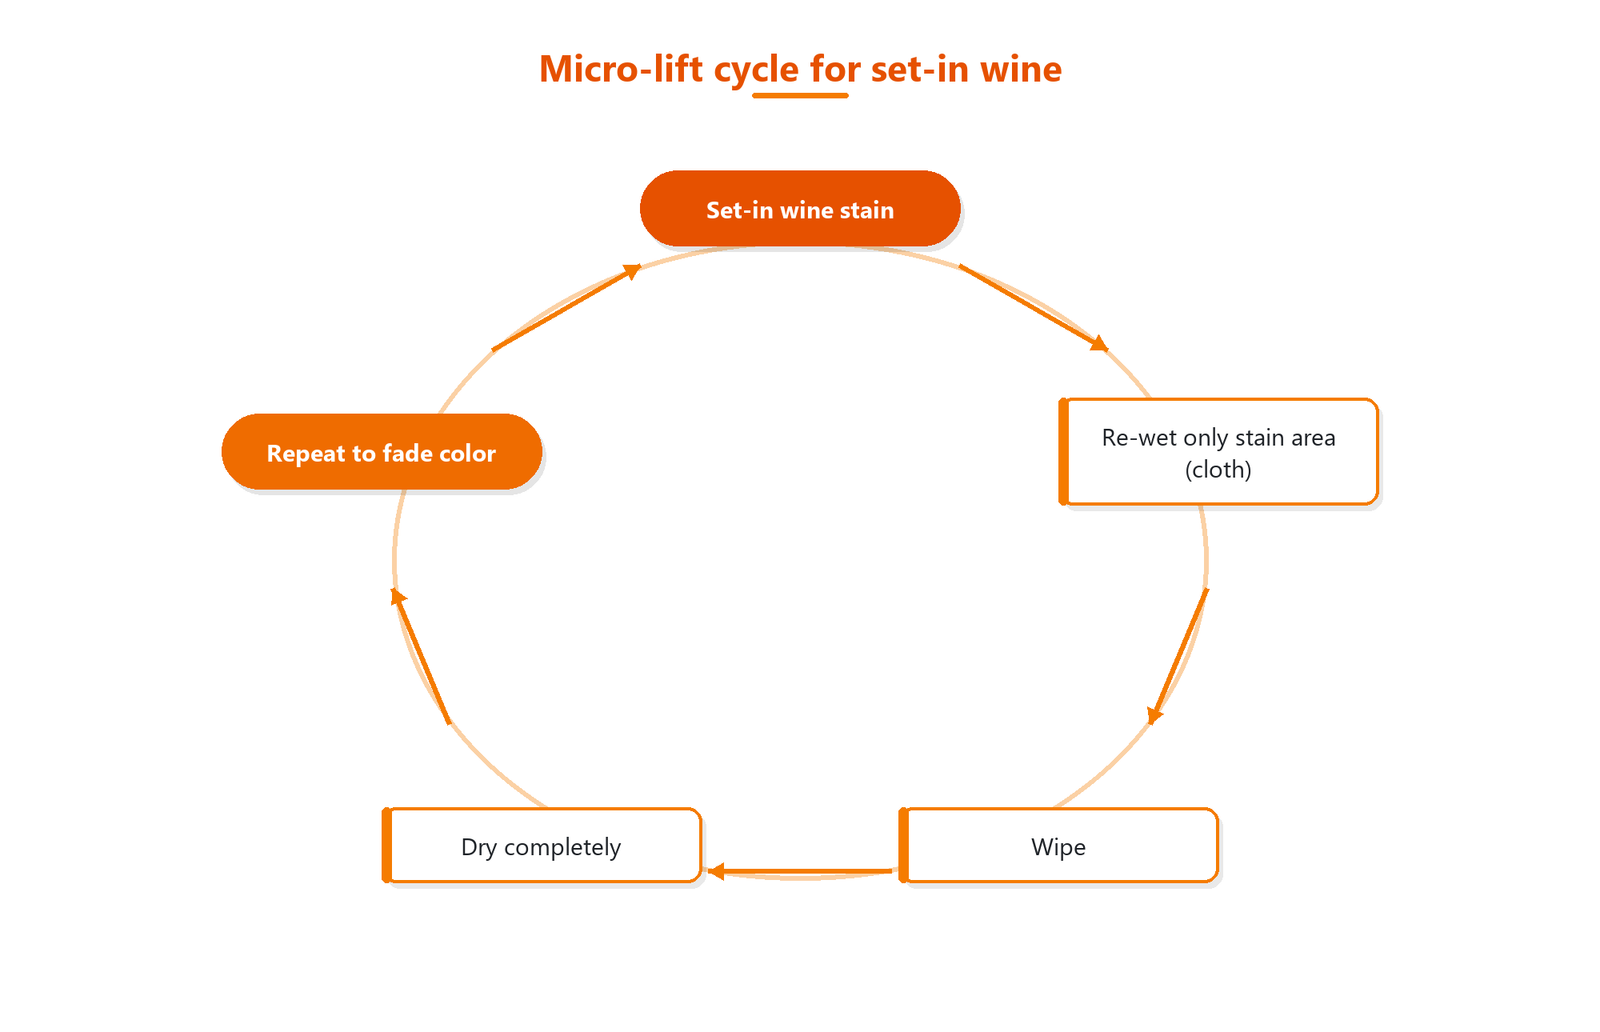
Re-wet only the stain area
– Re-wet only the stain area with a cloth dampened with your wood-safe cleaner solution.
– Wipe, then dry. Repeat instead of soaking.
– This “micro-lift” cycle prevents you from spreading pigment into surrounding fibers or under-finish edges.
Use the “micro-lift” method for stubborn rings
For stubborn discoloration, do small, patient iterations:
1. Apply a small amount of cleaner to the cloth.
2. Work slowly with the grain.
3. Monitor after each wipe (color transfer on the cloth is your feedback).
4. Stop when you see diminishing returns.
If the floor is unfinished (or unsure): consider limits early
If the wine has soaked in:
– Consider a wood-finish-safe brightening method only after spot testing and only if your product instructions specifically allow it for your finish type.
– If you can’t identify safe chemistry for your wood/finish combination, skip ahead to refinishing advice—because finish-safe brightening chemistry varies dramatically by coating.
Comparison: what works vs. what can backfire (sealed vs. set-in)
| Approach | Sealed hardwood (fresh → set-in) | Unfinished hardwood (penetration risk) |
|---|---|---|
| pH-neutral cleaner, cloth-applied | Usually effective for fresh; may fade set-in with repeats. | Can still help, but over-wetting can cause patchy color. |
| Soaking/flooding the area | Can cause haze or edge discoloration. | High risk—pigment and moisture can penetrate deeply. |
| Bleach/solvents/acid-base DIY mixes | Often damages sheen or alters color. | Very likely to create permanent light patches. |
What can go wrong (common mistakes and edge cases)
Even if you use a decent cleaner, a few common missteps can turn a small stain into a bigger cosmetic issue. The good news: most problems come from moisture, agitation, or incompatible chemistry—so you can avoid them.
Common mistakes that spread stains
– Scrubbing hard or rubbing in circles can spread pigment beyond the original footprint. Always wipe with the grain.
– Avoid bleach, harsh solvents, and “vinegar/ammonia” DIY mixes—many can damage finishes or change sheen, and some can react with pigments in unpredictable ways.
– Don’t steam-clean or flood the area. Excess moisture can cause swelling, cupping, or permanent haze.
“Cleaning-only” may not be guaranteed
If the wine sat for days, a cleaning outcome isn’t guaranteed:
– Sometimes pigment has penetrated past what wiping can remove.
– Sometimes the finish itself has been temporarily softened/dissolved and needs to be restored (repair/refinish).
Downsides to aggressive attempts
If you keep escalating chemicals and scrubbing:
– You may lighten surrounding areas (creating a halo).
– You may end up with sheen mismatch that’s worse than the original ring.
Verdict / tip (what’s safest, and who should stop)
Start with the safest path: blot → pH-neutral, cloth-applied cleaning → thorough drying. If the stain fades but won’t fully go, keep working in small, cautious steps rather than escalating to aggressive chemicals.
Downsides and when to skip
– If your floor is unfinished, old, highly valuable, or you can’t confidently identify the finish, aggressive stain removal can cause light patches—consider a professional instead.
– If you already see lifted boards, warping, or spreading beyond the stain area, pause and address moisture damage first (then decide on refinishing).
A practical “stop rule”
If two or three careful micro-lift cycles with pH-neutral, wood-safe cleaner do not improve the stain (and you’re not making it larger), stop. At that point, the remaining discoloration may be pigment-in-fiber or finish-level change—DIY chemical escalation is often the wrong next step.
Quick scan checklist
| Step | Do | Avoid |
|---|---|---|
| First response | Blot with clean towels | Rubbing/scrubbing |
| Cleaning | Apply cleaner to cloth; wipe with grain | Pouring liquid onto the floor |
| Rinse | Wipe with a clean lightly damp cloth | Leaving soap/chemical residue |
| Drying | Dry fully and promptly | Letting it air-dry wet |
| Stubborn stain | Repeat gentle cycles | Bleach/strong chemicals/steam |
Sources:
If you take one thing from this guide, make it sequence: blot fast, clean with a pH-neutral wood-safe product applied to a cloth, and dry completely. With sealed hardwood, that approach resolves many fresh and moderately set-in wine marks; with unfinished floors or long-set stains, careful micro-lifting (and sometimes professional refinishing) is the safest path to avoid dull halos.
Frequently Asked Questions
How do I get fresh wine stains off hardwood floors without damaging the finish?
Blot the wine immediately with a clean, dry cloth, then switch to a fresh cloth to avoid spreading the stain. If the floor is finished, lightly dab the area with a mixture of mild dish soap and warm water, then rinse by blotting with clean water. Dry the spot completely with a towel and allow it to air-dry to prevent water marks.
What’s the best way to remove old, set-in red wine stains from hardwood?
For older stains, start with a gentle cleaner first—use a small amount of hydrogen peroxide (3%) applied with a cotton swab or cloth, then blot and monitor closely. Keep the area damp only as needed, and repeat in small steps rather than soaking the wood. Once the stain lifts, wipe with a damp cloth, dry thoroughly, and consider refinishing the spot if the finish is lightened.
Which home remedies work to lift wine stains from sealed vs. unfinished hardwood?
Sealed hardwood typically responds better to blotting and mild soap-and-water cleaning, because the liquid sits on top of the finish. For unfinished hardwood, you can use slightly stronger approaches—like a diluted peroxide dab—but you must clean and dry well since the wood can absorb discoloration. When in doubt, test any remedy in a hidden area first to confirm it won’t cause bleaching or damage.
Why do wine stains leave dark rings on hardwood, and how can I prevent spreading?
Wine contains pigments and acids that can penetrate the surface and leave a halo if liquid spreads during cleanup. To prevent this, blot rather than wipe, work from the outside of the spill toward the center, and change cloths often. After treatment, fully dry the area and avoid excess moisture so the stain doesn’t wick deeper into the wood.
How can I remove wine stains from hardwood floors if the stain has penetrated and the finish is damaged?
If blotting and gentle cleaners don’t remove the discoloration, you may need targeted peroxide treatment, followed by thorough rinsing and drying. If the stain remains after cleaning, it can be a sign the finish is permanently altered—then sanding and refinishing the affected section is often the most reliable fix. Match the stain and sheen as closely as possible to avoid visible patches.
📅 Last Updated: October 31, 2026 | Topic: How to get wine stains off hardwood floors? | Content verified for accuracy and freshness.
References
- Stain
- Oxalic acid
- https://extension.umn.edu/cleaning-and-preventing-stains/cleaning-wood-floors
- https://extension.psu.edu/wood-floors-cleaning-and-care
- 404 Error
- https://scholar.google.com/scholar?q=wine+stain+removal+hardwood+floor+wood+surface Google Scholar
- https://scholar.google.com/scholar?q=red+wine+tannin+stain+removal+from+wood Google Scholar
- https://scholar.google.com/scholar?q=wood+floor+spot+cleaning+stain+removal+recommendations Google Scholar
[…] Unfinished hardwood (raw/penetrating finish) […]
[…] should confirm your finish type first because the same wine stain treatment can be safe on sealed hardwood and damaging on more permeable surfaces. A two-minute water behavior check helps you decide how […]