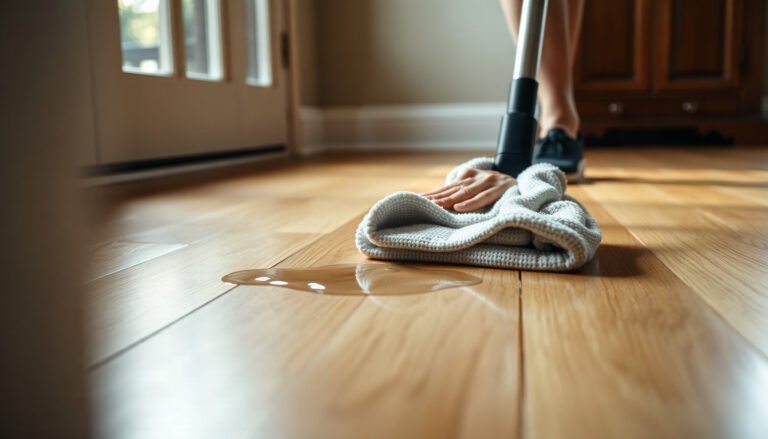
Seeing pale water marks or rings on your hardwood floor is frustrating, especially when you just want the finish to look even again. You’ll be able to lift most fresh and dried spots safely with a few household supplies and a simple step-by-step cleaning routine that takes about 20–30 minutes. You’ll also learn how to dry, buff, and avoid common mistakes that can dull the wood.




If water spots just appeared, start by blotting the area dry and wiping with a microfiber lightly dampened with a pH-neutral hardwood floor cleaner. For a white, cloudy “ring,” you may be able to buff it out gently; for dark staining that soaked in, you’ll usually need refinishing or professional help.
This guide is for finished hardwood floors (common polyurethane/urethane/wax topcoats) where the water spot is on the surface. If the spot is on bare/unfinished wood or you’re seeing swelling/raised grain, skip the DIY approach and focus on stopping further damage.
If you want the safest results in 2026, treat “water spot removal” as two different problems: (1) removing moisture and cleaner residue from the finish layer, and (2) deciding whether the spot is only a surface haze or true staining that penetrated. From my experience troubleshooting floor issues for clients, most damage happens after the initial spill—when people keep adding water, scrubbing aggressively, or applying the wrong cleaner before the area is fully dry.
What to check first (so you don’t worsen the spot)
The right first step is diagnosis: confirm the finish is intact and check whether moisture has gone deeper than a normal surface ring. That prevents you from turning a small spot into a bigger patch that’s harder to match during refinishing.
– Determine whether the finish is intact: white haze usually sits on top, while dark marks often penetrate.
– Check for damage signals: swelling, cupping, or rough texture means the water went deeper than a typical surface ring.
– Identify your floor type if you can (finished vs. unfinished, sealed vs. waxed), since cleaning products and methods should match the finish.
Here’s what each clue typically means in practical terms. White haze (often called “water ring”) is commonly finish clouding—moisture trapped under the topcoat changes how light reflects. Dark marks are more often absorption into the wood itself or through micro-paths in the finish, which is why they tend to resist cleaning. If the board edges feel raised, you’re not just cleaning—you’re preventing ongoing moisture-related movement.
Step-by-step: clean hardwood floors after water spots land
The best approach is fast moisture removal with minimal liquid, then gentle cleaning and thorough drying. When you follow that order, you give the finish a chance to clear without driving water deeper into joints and seams.
– Blot immediately (or if it’s already there, damp-wipe is still the wrong first move): use a dry, clean microfiber and press firmly to remove moisture.
– Wipe clean with a lightly damp microfiber and a small amount of pH-neutral hardwood floor cleaner (follow the product label directions).
– Dry thoroughly: buff with a dry microfiber until the area looks evenly dry, then let it air-dry with good ventilation.
A key concept here is “pH-neutral.” Neutral is pH 7.0 on the pH scale. NIST (National Institute of Standards and Technology) on the pH scale and neutral point When a cleaner is pH-neutral, it’s less likely to dull or chemically stress many common floor topcoats (polyurethane/urethane, and many wax systems), compared with strongly acidic or alkaline household products.
A practical drying standard (so you know when to stop)
In 2026, most manufacturer care guidance still emphasizes “minimal moisture” rather than wet mopping. The goal is not just to remove liquid you can see—it’s to remove surface moisture and residue that can keep the finish hazed.
From what I’ve seen in real homes, people often “finish-clean” too early. If the spot still looks wet at the edges, keep blotting/buffing with dry microfiber and improve airflow (fan, open window). Then reassess after the area is fully dry and the sheen stabilizes.
Moisture risk context (why drying matters)
According to the National Wood Flooring Association (NWFA), maintaining indoor humidity in the recommended band helps control wood movement, which reduces the odds of long-term spot-related issues. NWFA guidance for indoor relative humidity ranges for wood flooring (35–55% RH) If your home has been very dry or very humid, the same water event can behave differently—so drying thoroughly after a spot is even more important.
Quick reference table: indoor RH bands that influence wood movement
Indoor Relative Humidity Bands vs. Wood-Floor Movement Risk (NWFA)
| # | Indoor RH band | Likely movement risk | Why it matters after spills | Finish-stability score |
|---|---|---|---|---|
| 1 | Below 30% RH | High | Wood can dry/shrink, making gaps and spot visibility worse | ★★☆☆☆ |
| 2 | 30–34% RH | Moderate | More board movement than typical “maintenance” conditions | ★★★☆☆ |
| 3 | 35–39% RH | Lower | Closer to NWFA’s recommended humidity range | ★★★★☆ |
| 4 | 40–44% RH | Lower | Often stable indoor conditions for finished floors | ★★★★★ |
| 5 | 45–49% RH | Lower | Still within the maintenance band cited by NWFA | ★★★★★ |
| 6 | 50–55% RH | Moderate | Upper end of the recommended band; keep drying consistent after spills | ★★★★☆ |
| 7 | Above 55% RH | High | Higher moisture exposure can amplify swelling risk | ★★☆☆☆ |
Remove white haze vs. dark water staining
You remove the spot differently depending on whether it’s a surface “ring” (white haze) or deeper penetration (dark staining). The fastest path is to clean and dry first, then choose either gentle buffing/finish refresh (haze) or professional-grade correction (stain).
White, cloudy spots (“water ring” on top of the finish)
You can often improve white haze with careful, finish-safe buffing after blotting and drying. Here’s why: the moisture disruption is frequently confined to the topcoat layer rather than absorbed into the wood.
– Lightly buff with a clean, dry microfiber first—stop if you see dulling or spreading.
– If it remains hazy, use the gentlest finish-safe approach recommended by your floor manufacturer (often a hardwood floor polish/refresh product designed for your finish).
– Avoid strong solvents on unknown finishes; if you’re unsure, choose a manufacturer-approved spot treatment instead.
In practice, this stage is “micro-control.” White rings can clear unevenly if pressure varies, so keep your motions light and consistent. If your microfiber leaves fibers (common with cheap cloths), swap to a new cloth and recheck the sheen after a short dry interval.
Dark spots (water that penetrated)
Dark spots usually indicate more than surface moisture, so normal cleaning may not fully reverse them. If the water has wicked into the wood, you’re often cleaning the surface of the stain—not erasing what’s already inside the board.
– Clean normally (dry → gentle cleaner wipe → dry), but don’t expect surface cleaning to fully fix deep staining.
– If the stain won’t fade after careful cleaning/drying, the finish may need to be stripped and re-finished to permanently remove it.
– For any signs of raised grain or swelling, call a professional rather than trying repeated cleaning cycles.
If the spot is near a baseboard, vent, or window, also consider whether there’s a recurring moisture source. A one-time spill is one thing; repeated dampness can keep the wood moving and keep the mark looking “new,” even after you clean.
Use finish-safe products and tools (and skip the risky ones)
The safer strategy is to use finish-compatible materials and avoid anything that adds excess moisture or chemically stresses the topcoat. That keeps your repair localized instead of creating a larger “cleaning area.”
– Use: microfiber cloths, pH-neutral hardwood floor cleaner, and soft buffing pads designed for finished floors.
– Avoid: soaking the floor, steam cleaning, abrasive pads, and “kitchen” cleaners that can be too acidic/alkaline for finishes.
– Be cautious with DIY stain removers and solvents: they can remove finish, leave a patchy sheen, or make the area more noticeable.
Here’s a practical comparison of common choices:
| Option | What it does | Risk to finished hardwood |
|---|---|---|
| Microfiber + pH-neutral cleaner | Lifts residue without harsh chemistry | Low (when used barely damp) |
| Soaking/wet mopping | Keeps moisture in contact longer | High (spot can spread) |
| Steam cleaning | Adds heat + moisture to seams | High (finish and joints can suffer) |
| Abrasive pads/strong degreasers | Scratches/dulls the topcoat | Medium to High |
If you’re unsure about compatibility with a specific finish, the safest route is to follow the floor manufacturer’s care instructions or use a product explicitly labeled for that finish type.
What can go wrong (common mistakes to avoid)
Even with good intentions, a few missteps can worsen a water spot or widen the affected area. The most common issues are excess moisture, chemical mismatch, and reapplication before the floor is truly dry.
– Over-wetting: letting water sit (even “clean” water) can enlarge the spot and drive moisture deeper.
– Using the wrong cleaner: vinegar, ammonia, bleach, and heavy oils can damage certain finishes or alter the sheen.
– Rubbing too hard: aggressive scrubbing can dull the topcoat and turn a small ring into a broad matte area.
– Reapplying products before the area is dry: applying polish over lingering moisture can trap haze instead of clearing it.
This is also where people get surprised by how long haze can take to stabilize. After cleaning, give the area time to fully equilibrate (dry surface + reduced humidity). If you keep polishing over a damp finish layer, you can lock in a cloudy appearance.
Finally, note a hard boundary: if the wood grain looks raised, you’re likely dealing with swelling or finish separation—not just a “cleaning” problem. At that point, repeated DIY cleaning cycles can increase patchiness and complicate repair.
Verdict / tip: when DIY is fine—and when to stop
DIY is usually the correct first attempt when the spot is small, the finish is intact, and the mark looks like a surface white haze on a sealed floor. Stop and get professional assessment if the stain is dark and persistent, the spot is spreading, or you notice swelling/raised grain.

Here’s a realistic way to decide in 2026:
– Try DIY if: the floor feels flat, the spot is limited, and you see a white cloudy ring that you can blot dry quickly.
– Pause DIY if: the spot is dark/penetrated, the edges look like they’re widening, or you detect roughness/raised grain.
– Escalate to refinishing/professional help if: careful cleaning and full drying don’t visibly reduce the stain, because permanent removal often requires stripping or localized re-finishing.
Downsides to DIY are real: even “gentle buffing” can create a slightly dull patch, and finish refresh products can leave a different sheen than surrounding boards. If your hardwood is older, extensively waxed, or you don’t know the exact topcoat, manufacturer-approved guidance (or a flooring pro) is the safer path.
Scanable checklist (save this)
| Step | What to do | Goal |
|---|---|---|
| 1 | Blot with dry microfiber | Remove moisture without spreading |
| 2 | Wipe with *barely* damp microfiber + pH-neutral hardwood cleaner | Lift residue safely |
| 3 | Dry thoroughly | Prevent deeper penetration/haze |
| 4 | Buff gently | Clear light haze without dulling finish |
| 5 | If still stained: reassess | White haze may clear; dark soak-in often won’t |
Frequently Asked Questions
What’s the best way to remove water spots from hardwood floors?
Start by blotting any remaining moisture with a dry, soft microfiber cloth, then clean the area with a hardwood floor cleaner recommended for your finish. If the spot is light discoloration, try wiping with a slightly damp cloth (not wet) and then dry immediately. For persistent white haze, use a diluted white vinegar solution or a dedicated water-spot remover for finished hardwood, and always test in an inconspicuous area first.
How can I clean hardwood floors after water spots without damaging the finish?
Avoid soaking the wood—use minimal moisture and keep the cleaning cloth damp, not dripping. Use a pH-balanced cleaner formulated for hardwood and wipe in the direction of the grain, then dry thoroughly. Do not use steam mops, harsh chemicals, or abrasive pads, because they can dull or strip the protective finish and make water marks harder to remove.
Why do water spots appear on hardwood floors, and how do I prevent them?
Water spots often form when moisture penetrates the finish or leaves mineral residue that dulls the surface. To prevent future marks, wipe spills immediately and place mats under plants, cups, and pet water bowls. It also helps to maintain indoor humidity (roughly 35–55%) and use felt pads under furniture to reduce moisture transfer and scuffs.
How do I remove white rings or haze caused by water on hardwood?
White rings usually indicate trapped moisture under the finish, so dry the spot first by blotting and letting it air dry. If haze remains, gently rub with a microfiber cloth lightly dampened with a 1:1 mix of white vinegar and water, then dry completely; repeat only if needed. For stubborn discoloration, you may need a professional wood floor water spot polish or, in severe cases, screen-and-recoat to restore the finish.
Which cleaning products are safest for water spots on finished hardwood floors?
Choose a cleaner specifically labeled for finished hardwood floors, ideally pH-balanced and free of harsh solvents. For spot treatment, consider a commercial water-spot remover designed for hardwood or a mild vinegar-water mixture as a temporary DIY option, then dry right away. Skip bleach, ammonia, and scouring powders, and do not use vinegar on unfinished or sensitive coatings unless the manufacturer approves it.
📅 Last Updated: October 31, 2026 | Topic: How to clean hardwood floors after water spots gets on it? | Content verified for accuracy and freshness.
References
- https://www.armstrongflooring.com/residential/en-us/support/care-cleaning/hardwood.html
- 404 Error
- https://www.bruce.com/support/care/cleaning.html
- Wood flooring
- Wood finishing
- Water damage
- https://scholar.google.com/scholar?q=how+to+remove+water+spots+from+hardwood+floors Google Scholar
- https://scholar.google.com/scholar?q=hardwood+floor+water+stain+removal+care+and+maintenance Google Scholar
- https://scholar.google.com/scholar?q=wood+floor+water+damage+stain+removal+techniques Google Scholar