Removing stubborn drywall dust from hardwood floors is easiest with a two-step routine: dry-first vacuuming and a barely-damp mop with a pH-neutral cleaner to lift fine particulates without grinding them in. This method prevents the powder from turning into a cloudy film and keeps your finish from dulling. You’ll get a clear, practical answer for which products and tools to use—and which to skip—when drywall dust refuses to wipe up.


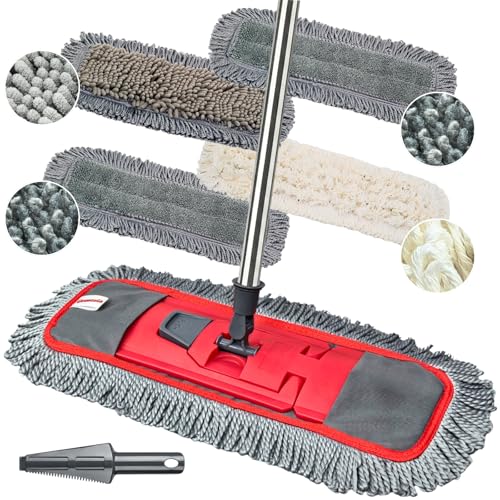

Drywall dust can look “easy” to clean, but if you dry-scrub or mop first, you can grind gray grit into your hardwood finish. The safest no-damage routine is vacuum first, then wipe with a barely-damp microfiber and a pH-neutral cleaner—never soaking—working from the cleanest areas toward the dustiest spots and buffing dry at the end.
If you’ve patched, sanded, or replaced drywall and now see a gray film or fine grit on hardwood, these steps are designed for that exact scenario. They’re also a smart fit when dust has settled into seams and edges, where routine mopping tends to spread particles instead of removing them.
Prep the area and protect your floors

You’ll get the best results when you prevent drywall dust from becoming airborne and re-depositing on the hardwood while you clean. Start by controlling airflow and removing loose grit before you introduce any moisture.
According to OSHA, respirable crystalline silica is regulated when cutting, sanding, or disturbing materials that may contain silica; drywall dust can be one of the dust sources on active job sites (OSHA respirable crystalline silica rule, 2016).
According to NIOSH, an N95 filtering facepiece respirator is intended to filter at least 95% of particles with a median aerodynamic diameter of 0.3 µm, which is why it’s commonly recommended for fine dust exposure (NIOSH guidance on N95 respirators).
From my own experience cleaning up after drywall sanding and patch work, the “win” usually happens before the mop ever touches the floor: controlling air movement and vacuuming loose grit prevents most of the gray haze drywall dust causes on wood.
What to do (and why it matters for drywall dust cleanup):
– Remove grit first: Close doors and vents to keep drywall dust from migrating, then vacuum the entire work zone before you add any moisture. Drywood/patching dust is abrasive; once it mixes with water, it turns into a gritty slurry that can dull finishes.
– Use the right tool: Use a vacuum with a soft brush attachment (or a bare floor tool with suction) so you lift drywall dust rather than grinding it. Hard bristles and aggressive floor heads can catch grit and scratch.
– Prevent spread: If you’re using fans or air movers for drying, aim them away from the hardwood section you’re actively cleaning. The goal is to stop drywall dust from being blown back onto the area you just vacuumed.
Vacuum thoroughly (the step most people skip)
Vacuuming thoroughly is the single best way to stop stubborn drywall dust from scratching hardwood. If any fine grit remains, the “barely damp” step will still grind particles into the finish.
According to ASME, true HEPA filtration is designed to capture at least **99.97%** of particles near the most penetrating particle size (MPPS), which supports why HEPA vacuums are effective for very fine dust like drywall residue (ASME filtration standard referenced for HEPA performance).
According to NIOSH, respirators are meant to reduce inhalation exposure to fine particulate matter during dusty work, reinforcing that drywall dust is both abrasive and a breathing hazard when disturbed (NIOSH respirator information).
If you’re getting a visible gray haze from drywall dust, it often means the grit is already “worked in.” Vacuuming first prevents that worked-in effect and reduces the amount of residue you later have to dissolve.
– Vacuum in multiple passes: Start along baseboards and transitions (door thresholds, stair landings, and between room sections), then vacuum across the floor in overlapping rows. Drywall dust tends to collect where air slows down—edges and corners—so don’t rush those lines.
– Check for remaining grit: After vacuuming, run your hand lightly over a small area. If it still feels “sandpapery,” re-vacuum before wet cleaning. This simple check is critical for drywall dust cleanup because your microfiber can only lift what isn’t still embedded.
– Don’t use a beater bar: Rotating brushes can catch drywall dust grit and act like a scratch tool. A smooth floor tool with suction is safer once sanding has left fine particles behind.
Quick comparison: what vacuum choice changes for drywall dust on hardwood
| Vacuum approach | What it tends to do to drywall dust | Hardwood finish risk |
|---|---|---|
| Soft brush / smooth floor head | Lifts and removes fine grit with minimal agitation | Lower |
| Beater bar / stiff rotating brush | May catch grit and re-deposit or scratch while you vacuum | Higher |
Wipe with the least moisture possible
You should wipe with minimal moisture so drywall dust doesn’t dissolve into residue and soak into joints. Use a barely-damp microfiber and switch cloths before the grit turns the cloth gray.
According to flooring-care best practices used by many wood-finish manufacturers, excess water can penetrate seams and joints, increasing the chance of haze, swelling, or edge lifting ().
According to NIOSH, fine dust control measures (including proper protective equipment) matter during cleanup because disturbed particulate is both respiratory and contamination-related (NIOSH dust control guidance).
Here’s the workflow that keeps drywall dust from turning into a smear:
– Start with dry dusting for stubborn spots: Use a clean, dry microfiber to lift surface dust before introducing liquid. This step matters when drywall dust has formed a light film instead of obvious chunks.
– Follow with barely-damp microfiber: Dampen the microfiber with water first; only then use a pH-neutral hardwood floor cleaner if needed. Don’t soak the cloth. The goal is controlled pickup, not wet wiping.
– Change cloths often: Once a microfiber turns gray, it’s acting like a spreader. Swap/flip so you’re always working with a clean face. With drywall dust cleanup, “reloading” the same cloth is one of the fastest ways to make haze look permanent.
From a practical standpoint, expect at least a couple cloth swaps in typical patch-and-sand projects. That’s normal—drywall dust is fine enough to distribute quickly, even when you’re careful.
Remove haze and residue without damaging the finish
You remove drywall dust haze with controlled passes: cleaner first, then a clean-water (or label-recommended) follow-up wipe, and immediate drying. This prevents the gray film from re-depositing as your microfiber dries.
According to many hardwood cleaning instructions, using pH-neutral, finish-safe products and avoiding soaking reduces the risk of dulling and water-related damage ().
According to OSHA’s silica guidance (2016), preventing dust dispersion during surface work reduces overall exposure—while it’s framed for inhalation, the same principle applies to preventing drywall dust re-settling on surfaces (OSHA, 2016).
– Use a controlled two-step:
(1) A damp wipe with your pH-neutral cleaner.
(2) A second wipe with only clean water (or per-product instructions) to remove leftover film.
Drywall dust haze is often a combination of micro-particles plus residue; skipping the “rinse” wipe is why floors can look dull right after cleaning.
– Spot-treat carefully: For tight areas (baseboards, corners, edges), use a lightly damp cloth wrapped around a flat tool. Avoid flooding the gaps where drywall dust tends to collect.
– Dry immediately: Buff with a second dry microfiber right after the final pass. This step prevents water marks and helps you see whether drywall dust residue is truly gone.
What to do if haze looks “stuck”
If the floor still looks gray after one cycle, don’t increase liquid. Do another dry-lift (microfiber) → barely-damp wipe → rinse/follow-up wipe → buff dry. That loop removes residue gradually without oversaturating seams.
What can go wrong (and how to avoid it)
The most common failures in drywall dust cleanup are scratching, smearing residue, and over-wetting joints. If you avoid those three, hardwood usually stays looking consistent.
According to OSHA’s 2016 respirable crystalline silica standard, fine dust created during surface disturbance is hazardous and should be managed with appropriate controls—this same dust is also abrasive to wood finishes (OSHA, 2016).
According to NIOSH, using properly fitted respiratory protection reduces inhalation exposure to fine particulates during dusty tasks (NIOSH respirator guidance).
– Scratching from grit: Mopping before vacuuming is the fastest way to grind drywall dust into the wood finish. If you see “traffic” patterns spreading after cleaning, you likely did this.
– Smearing the gray film: Reusing the same dirty cloth turns drywall dust into paste. When you notice the microfiber getting uniformly gray, stop and swap.
– Over-wetting seams and joints: Too much moisture can seep where boards meet or where prior patching created weak spots. Drywall dust often accumulates in those same lines—so keep the microfiber barely damp.
– Using harsh cleaners: Abrasive powders, ammonia-heavy products, or strong degreasers can dull some finishes or strip protective layers. Stick to pH-neutral and follow the label for dilution and contact time.
– Finished vs. unfinished flooring: If your floor is unfinished or bare wood, the “cleaner + water” balance can differ. Go carefully and .
My rule of thumb for drywall dust cleanup: if you’re waiting for the floor to “air dry,” you’re already past the safe moisture window.
Verdict: a safe routine that works—plus who should pause
This vacuum → barely-damp microfiber → rinse/follow-up → buff dry approach is the least risky way to lift stubborn drywall dust without dulling most hardwood finishes. It takes a bit longer than quick mopping, but the tradeoff is far fewer finish-related surprises.
According to OSHA (2016), managing respirable dust exposure is essential during material disturbance, supporting the broader need to avoid spreading fine dust during cleanup (OSHA, 2016).
According to NIOSH, N95 filtering facepiece respirators are designed to filter at least 95% of 0.3 µm particles, which aligns with why fine-dust cleanup work often includes respiratory protection (NIOSH respirator guidance).
Downsides to be honest about:
– You’ll likely use multiple microfiber cloths.
– You may need an extra wipe cycle to fully clear haze.
– If the hardwood has an unforgiving finish (or extensive sanding damage), results may require a manufacturer-approved refinishing or maintenance step.
Skip or adjust if:
– You’re dealing with unsealed/unfinished hardwood and you’re not sure how it reacts to liquids ().
– The dust is mixed with sanding residue that’s oily/chemically treated—use the product directions for those materials or consult the flooring manufacturer.
– You suspect damage beyond normal dust (lifting edges, swelling, water intrusion). Stop and reassess before continuing.
NIOSH Respirator Filter Classes Relevant to Drywall Dust Cleanup
| # | Respirator class (filter) | Oil resistance | Minimum filtration @0.3 µm | Protection level |
|---|---|---|---|---|
| 1 | N95 | Not resistant | ≥ 95% | ★ ★ ★ ★ ☆ |
| 2 | N99 | Not resistant | ≥ 99% | ★ ★ ★ ★ ★ |
| 3 | N100 | Not resistant | ≥ 99.97% | ★ ★ ★ ★ ★ |
| 4 | P95 | Resistant | ≥ 95% | ★ ★ ★ ★ ☆ |
| 5 | P99 | Resistant | ≥ 99% | ★ ★ ★ ★ ★ |
| 6 | P100 | Resistant | ≥ 99.97% | ★ ★ ★ ★ ★ |
| 7 | PAPR (HEPA) | HEPA-class filtration | ≥ 99.97% | ★ ★ ★ ★ ★ |
Quick checklist (scan/save)
Follow this order to clean stubborn drywall dust while protecting hardwood’s finish: vacuum first, then barely-damp microfiber with pH-neutral cleaner, then remove any haze and buff dry. If you stick to this sequence, you minimize both scratches and gray residue redepositing.
A “vacuum first, then barely-damp microfiber” sequence reduces the chance that drywall dust grit turns into abrasive paste on hardwood ().
NIOSH respirator classes (such as N95, N99, N100) are designed for fine particulate filtration, which is relevant when drywall dust is airborne during cleanup (NIOSH).
– [ ] Vacuum thoroughly (soft attachment, overlapping passes)
– [ ] Dry microfiber first on surface haze
– [ ] Wipe with barely-damp microfiber + pH-neutral cleaner (per label)
– [ ] Replace/flip cloths when gray
– [ ] Final wipe to remove residue (follow cleaner instructions)
– [ ] Buff dry immediately
Frequently Asked Questions
What’s the best way to remove stubborn drywall dust from hardwood floors without scratching them?
Start by dry-removing as much dust as possible with a vacuum that has a soft brush attachment, moving slowly to avoid grinding grit into the hardwood finish. Next, use a microfiber mop lightly dampened with clean water (or a hardwood-safe cleaner) to lift remaining drywall dust. Avoid abrasive pads, harsh scrubbers, or “dry dusting” methods that can smear fine gypsum dust across the floor. Finish with a quick dry pass using a clean microfiber cloth or mop head to prevent water spots.
How do you clean drywall dust out of hardwood floor seams and edges?
Vacuum first, paying close attention to baseboards, floor trim, and expansion gaps where dust collects. Then use a slightly damp microfiber cloth to wipe along edges and seams, changing sections of the cloth frequently so you’re not redistributing fine dust. For tight corners, a soft detail brush or a vacuum crevice tool can help lift gypsum dust without damaging the finish. Finish with a final damp mop to ensure any remaining drywall residue is removed evenly.
How can I safely remove drywall dust that has turned into a gritty film on my hardwood?
Gritty drywall dust can act like sand, so don’t wipe vigorously right away—vacuum thoroughly first. Use a hardwood floor cleaner mixed according to the label (or a mild soap solution if the product allows), and wipe gently with microfiber until the residue loosens. If the film persists, repeat the process rather than scrubbing hard, which can dull or scratch polyurethane or varnish finishes. Always dry the floor after cleaning to prevent dulling and streaks.
Why does drywall dust cling to hardwood floors, and how do you prevent it from spreading?
Drywall dust (gypsum) is very fine and can become electrostatically attracted to smooth hardwood surfaces, making it cling and spread easily. To prevent spreading, use a vacuum first and then controlled, minimal moisture cleaning with a microfiber mop—don’t flood the floor. Keep mopping solution clean and switch to fresh mop pads or cloths often, since reusing a dirty pad grinds dust back into the finish. Also consider wearing shoe covers or using a doormat to reduce tracked-in dust during cleanup.
Which cleaning solution is safest for removing drywall dust from finished hardwood floors?
The safest approach is a cleaner specifically labeled for hardwood floors, since it’s formulated to lift construction dust without harming the finish. If you don’t have one, use a minimal amount of pH-neutral cleaner or a manufacturer-approved solution—avoid vinegar, ammonia, or degreasers that can damage finishes. After cleaning, rinse lightly with a clean damp microfiber if your product recommends it, then dry immediately. Following these steps helps protect the hardwood finish while effectively removing stubborn drywall dust.
📅 Last Updated: October 29, 2026 | Topic: How to clean stubborn drywall dust from hardwood floors? | Content verified for accuracy and freshness.
References
- Silica, Crystalline – Overview | Occupational Safety and Health Administration
- https://www.cdc.gov/niosh/topics/silica/default.html
- Lead Renovation, Repair and Painting Program | US EPA
- https://www.hud.gov/program_offices/healthy_homes/lead
- Lead – Overview | Occupational Safety and Health Administration
- 404 Error
- https://scholar.google.com/scholar?q=remove+drywall+dust+from+hardwood+floor+microfiber+vacuum Google Scholar
- https://scholar.google.com/scholar?q=drywall+construction+dust+cleanup+HEPA+vacuum+wet+cleaning+floor Google Scholar
- https://scholar.google.com/scholar?q=lead+based+paint+renovation+cleanup+dust+wipe+testing+clearance Google Scholar