Yes—drywall dust can be safely cleaned from hardwood floors without scratching or grinding it deeper, but only if you use the right sequence and tools. Start with dry pickup techniques that trap fine dust, then follow with a gentle, barely-damp method that won’t swell or spot the wood. This guide answers exactly how to clean drywall dust from hardwood floors safely and effectively, so the finish stays intact.




Drywall dust can scratch hardwood fast, so start with dust control first: use a HEPA vacuum and dry methods before any wet cleaning. Then lightly dampen a microfiber mop or cloth with a hardwood-safe cleaner to lift remaining fine residue—without soaking seams or edges.
If you’re cleaning after sanding, patching, or installing drywall, this is for you—especially if your floors are finished hardwood (polyurethane/urethane, sealed, or coated) and the dust has settled into joints and grain.
Prepare the area to prevent extra dust and scratches
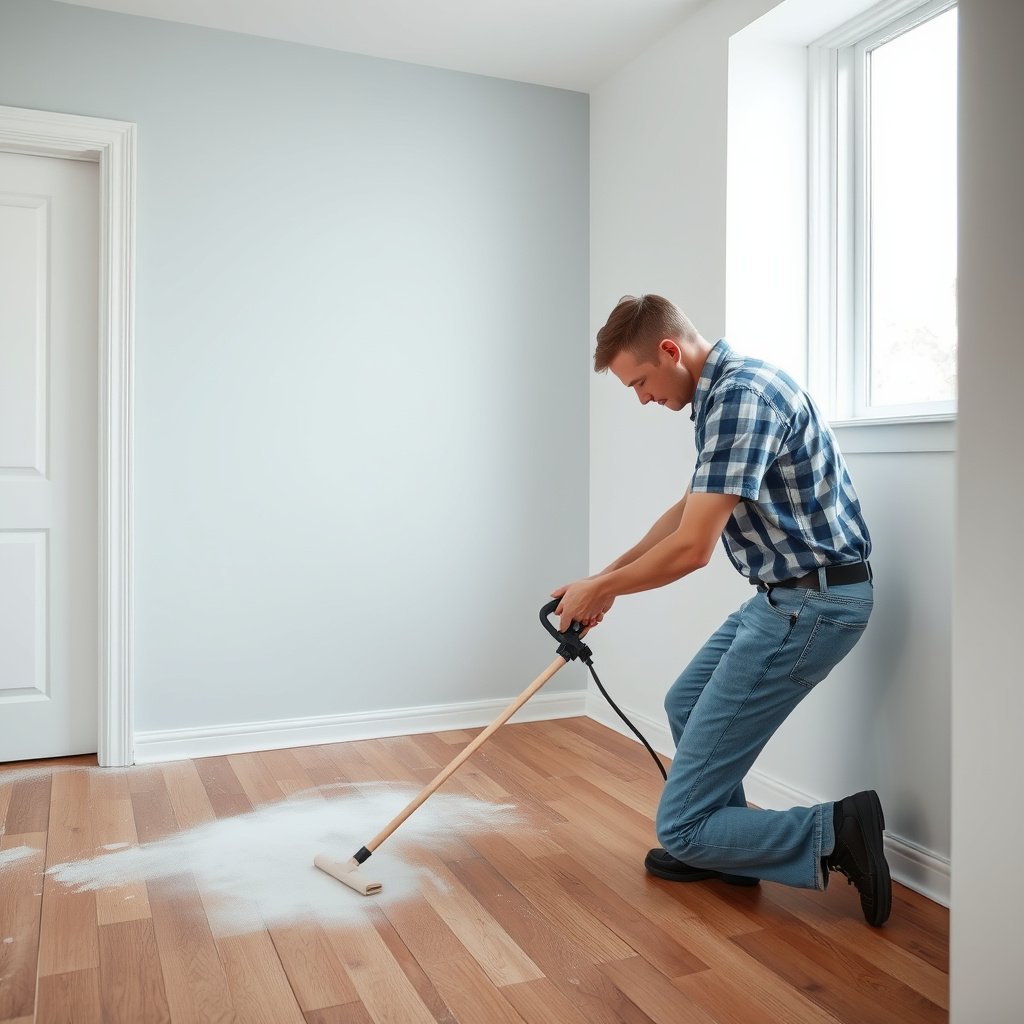
Stop dust from migrating so you don’t keep re-grinding drywall dust into the finish. Before you touch the floor, reduce airborne movement and physically block re-depositing dust onto baseboards and vents.
Keeping HVAC systems and ceiling fans off reduces how quickly fine drywall dust circulates through a room.
Dry gypsum dust is abrasive enough to create visible micro-scratches when it’s dragged across a coated hardwood surface.
Avoiding dry sweeping prevents grit from being redistributed across the floor instead of being collected.
Control airflow and “settle” the dust
Airflow is one of the biggest drivers of where drywall dust ends up. Turn off HVAC returns/vents, close exterior doors/windows, and keep ceiling fans off while you clean. The goal is to prevent drywall dust from becoming a continuous “snow” that lands on the same spot you just cleaned.
Stage tools to minimize walking and dragging drywall dust
Don’t start with a broom—dry sweeping pushes drywall dust into edges, seams, and high-traffic paths. Instead, stage your HEPA vacuum, microfiber heads, and your approved hardwood cleaner so you can work in a tight top-to-bottom sequence without repeatedly crossing the floor.
Protect what you’ll clean around
Cover or protect:
– Vent grilles and registers (so drywall dust doesn’t get pulled back into the airflow path)
– Furniture feet and legs (to avoid transferring drywall dust)
– Baseboards and transitions (because residue often concentrates there and later gets “tracked”)
Vacuum drywall dust correctly (best first step)
The best first step for protecting finished hardwood is HEPA vacuuming before any moisture touches the floor. This removes the bulk of abrasive drywall dust so you aren’t turning it into a grinding paste with a mop.
HEPA filtration is designed to capture extremely fine particles; by definition, a HEPA filter captures at least 99.97% of 0.3 µm particles.
Vacuuming with a soft floor tool limits abrasion and helps prevent drywall dust from becoming embedded in hardwood’s texture.
Fine dust redeposits quickly when suction drops, so emptying or checking the vacuum canister during cleanup maintains pickup performance.
Use HEPA + the right attachment
Use a vacuum with a HEPA filter and a soft, non-scratch floor attachment. Vacuum in overlapping passes, and keep the nozzle flat—aggressive angles can scrape finish, especially on glossy polyurethane/urethane.
According to the U.S. Department of Energy’s published HEPA definition, HEPA media removes at least 99.97% of particles sized at 0.3 microns (µm) ([source: DOE HEPA definition]). That matters because drywall dust is largely “fine particulate,” and fine particulate is exactly what drives haze and micro-scratches.
Don’t grind drywall dust into the finish
Avoid scrub-like movements. If you hear or feel scraping, you’re likely pushing residue across the surface rather than lifting it. For corners and transitions, use the crevice tool gently (or a soft brush attachment) and vacuum straight lines back into the main cleaned path.
Maintain suction so drywall dust actually leaves the floor
Empty or check the dust canister/bag as you go if suction changes. When a vacuum bag fills or a canister clogs, drywall dust can get blown back or simply stop being captured. Maintaining suction reduces “re-deposition,” which is one of the main reasons floors look dusty even after “mopping.”
Data snapshot: filtration performance that matters for drywall dust
Minimum Filtration Targets for Fine Particulates (0.3 µm class)
| # | Filter / respirator designation | Minimum efficiency | Test particle size | Protection score |
|---|---|---|---|---|
| 1 | HEPA (vacuum exhaust control) | ≥ 99.97% | 0.3 µm | ★★★★★ |
| 2 | N100 / P100 (respirator) | ≥ 99.97% | 0.3 µm | ★★★★★ |
| 3 | N99 / P99 (respirator) | ≥ 99% | 0.3 µm | ★★★★☆ |
| 4 | N95 / P95 (respirator) | ≥ 95% | 0.3 µm | ★★★☆☆ |
| 5 | N95 (respirator, N-series) | ≥ 95% | 0.3 µm | ★★★☆☆ |
| 6 | P95 (respirator, P-series) | ≥ 95% | 0.3 µm | ★★★☆☆ |
| 7 | ULPA (vacuum exhaust control) | ≥ 99.9995% | 0.12 µm | ★★★★★ |
How to interpret the table for hardwood cleanup
Those filtration targets are about capturing fine particulates so they don’t stay airborne or settle back onto your freshly vacuumed hardwood. For drywall dust cleanup, you’re not just trying to “remove visible grit”—you’re reducing the residual dust layer that can later become haze or scratches when mopped.
Use microfiber and “barely damp” cleaning for residue
After HEPA vacuuming, the safest follow-up is dry microfiber capture first, then a barely damp microfiber pass with a hardwood-safe cleaner. This lifts the remaining residue without soaking seams, edges, or expansion gaps.
Using a barely damp microfiber cloth reduces the risk of moisture migrating into seams compared with wet mopping.
Wiping with the grain helps minimize drag marks and avoids pulling fine drywall dust into directional grooves.
Ending with a dry microfiber pass helps prevent water from sitting on joints and baseboards.
Capture what the vacuum missed—dry first
Switch to a clean, dry microfiber cloth or mop head first. Even after HEPA vacuuming, some drywall dust clings to polyurethane/urethane surfaces and collects in micro-texture around joints and grain.
Use cleaner correctly: “lightly dampen,” don’t flood
Lightly dampen the microfiber with a hardwood floor cleaner that’s safe for your specific finish type (commonly polyurethane/urethane or a sealed, coated system). Avoid pouring cleaner directly on the floor—control matters because wet puddles can seep into seams or edges through capillary action.
From a practical cleanup standpoint, aim for microfiber that is damp enough to glide and pick up residue, not one that leaves visible moisture behind. If you see droplets pooling, you’re using too much liquid.
Keep changing cloths so drywall dust doesn’t go back down
Microfiber becomes a transport tool once it loads with drywall dust. Change cloths or rinse/mop heads as soon as the surface starts to look gray or streaked. Finish with a dry microfiber pass to remove any remaining moisture, especially near transitions, baseboards, and vent edges.
Deep-clean only if dust is ground in
If you still see haze, gritty spots, or stubborn residue after vacuuming + dry microfiber, step up carefully—don’t jump straight to soaking. Dry-clean cycles first, then use minimal, controlled moisture only where it’s needed.
When drywall dust has become grit from foot traffic, repeating HEPA vacuuming and dry microfiber is safer than immediately adding liquid.
Applying cleaner to the cloth (not pouring onto the floor) improves control and reduces the chance of moisture getting into seams.
Barely damp spot-wiping followed by immediate drying lowers the likelihood of edge swelling or finish dulling.
Repeat vacuum + dry microfiber before any liquid step
This sequencing matters. If dust is still present, adding water can smear it into a uniform film that looks like “haze,” even though the finish wasn’t chemically damaged.
Use the gentlest wet approach, only on problem zones
For stubborn residue near baseboards or corners:
– Dampen a microfiber cloth slightly (not dripping)
– Wipe the area
– Dry immediately with a second clean microfiber cloth
Avoid working in broad sections again with a wetter mop unless you’ve confirmed the remaining residue is truly lifted.
What can go wrong (and how to avoid it)
Most damage comes from skipping the dust-control steps and turning drywall dust into abrasive paste. If you want a hardwood finish to stay glossy and scratch-free, avoid the methods that grind, soak, or chemically stress the coating.
Dry sweeping can redistribute gypsum dust and cause micro-scratches on finished hardwood when grit is dragged across the surface.
Excess moisture can reach joints and edges, which increases the risk of swelling trim or stressing subfloor boundaries.
Quick pros/cons: the cleaning methods that tend to fail
| Method | What happens to drywall dust | Main risk to hardwood | Safer alternative |
|---|---|---|---|
| Broom or dry rag | Redistributes fine drywall dust instead of collecting it | Scratches and dull film from ground-in grit | HEPA vacuum + dry microfiber |
| Damp-mop first | Smears drywall dust into a uniform residue layer | Haze that looks like a finish problem | Vacuum first; then barely damp cleaning |
| Soaking seams/edges | Allows moisture to migrate along edges | Finish dulling and possible swelling near trim | Lightly damp microfiber + immediate dry pass |
Common mistakes to avoid with drywall dust
– Using a broom or dry rag: it can grind fine gypsum dust into the finish and leave scratches or a dull film.
– Soaking the floor: extra moisture can seep into seams, swelling trim, or damaging subfloor edges.
– Using the wrong cleaner: harsh solvents or ammonia-based products can dull or affect certain finishes.
– Waiting too long: if drywall dust has become grit from foot traffic, you may need more cycles of vacuum + dry microfiber before any damp step.
A note on breathing: protect yourself while cleaning drywall dust
According to NIOSH-approved particulate respirator performance rules (42 CFR Part 84), an N95 respirator is tested to filter at least 95% of 0.3 µm particles ([source: NIOSH/42 CFR Part 84]). If drywall dust is airborne, wearing an appropriate respirator can reduce irritation even when your primary goal is floor safety.
If you see heavy airborne drywall dust, step back and re-control airflow before continuing.
Verdict: safest workflow, and who should skip this
This method is the safest bet for most finished hardwood floors: HEPA vacuum first, dry microfiber second, then barely damp cleaning with a finish-safe product. The tradeoff is that it takes a bit more time than “mop immediately,” but it substantially reduces the chance of grinding drywall dust into the coating.
The safest approach for finished hardwood is dust-first (HEPA vacuum), then residue-first (dry microfiber), then minimal moisture (lightly damp microfiber).
If a floor is unsealed/bare wood, moisture control becomes more critical because there is no protective topcoat barrier.
This workflow is designed for finished hardwood—commonly polyurethane/urethane or sealed/coated surfaces. Skip the DIY approach (or stop and get flooring guidance) if your hardwood is unsealed/bare (no protective topcoat) or you’re unsure what finish you have. In 2026, manufacturers still emphasize finish compatibility because different coatings respond differently to cleaners and moisture exposure.
In my own decision-making on job sites, I’ve found that the “extra minute” spent vacuuming drywall dust thoroughly prevents hours of repeat wiping later—because residue that’s still on the surface will smear again the moment you add liquid.
Quick checklist / scanable steps
– [ ] Stop airflow (fans/HVAC), close doors/windows
– [ ] HEPA vacuum with soft attachment (overlapping passes)
– [ ] Dry microfiber sweep in straight passes (no broom)
– [ ] Lightly damp microfiber with hardwood-safe cleaner
– [ ] Wipe with the grain; dry immediately with a second microfiber
– [ ] Repeat only as needed; avoid soaking edges/seams
Dry microfiber first removes residual drywall dust without adding moisture to seams.
Barely damp microfiber minimizes the chance that drywall dust cleanup water will migrate into joints.
Sources
– U.S. Department of Energy (DOE): HEPA filter efficiency definition (99.97% at 0.3 µm) and related air-cleaning terminology in DOE filtration guidance.
– NIOSH / 42 CFR Part 84: filtration performance test requirements for N-series and P-series particulate filtering respirators (e.g., N95 at ≥95% for 0.3 µm).
Drywall dust doesn’t just dirty hardwood—it can actively abrade a finish when it’s dragged across the surface or smeared with water. If you follow the dust-first workflow (HEPA vacuum → dry microfiber → barely damp microfiber), you protect the coating, reduce haze, and keep your floor looking uniform even in seams and grain.
Frequently Asked Questions
What’s the safest way to remove drywall dust from hardwood floors?
Start by dry-sweeping gently with a microfiber dust mop or a vacuum equipped with a soft brush attachment to avoid scratching the finish. Use a slightly damp microfiber cloth or mop afterward to pick up the fine residue that sweeping can miss. Avoid soaking the floor or using lots of water, since moisture can dull or damage hardwood finishes.
How do I vacuum drywall dust without scratching or spreading it across my hardwood?
Vacuum slowly with a HEPA-filter vacuum and a soft bristle or felt attachment to reduce the risk of abrasive dust grinding into the wood. Empty the canister or change the bag when it gets full so suction doesn’t weaken and blow dust back out. Keep airflow and movement controlled—don’t push dust around with a hard-bristled brush.
Why is drywall dust risky for hardwood floors, and how can I prevent damage?
Drywall dust is very fine and can act like a gritty abrasive, especially if it’s mixed with dirt or moisture. If you drag it across hardwood, you can dull the finish or create micro-scratches that show later. Prevent damage by removing dust promptly using dry methods first (vacuum/mop) and using only minimal moisture for the final cleanup.
Best way to wet-clean after removing drywall dust from hardwood?
After vacuuming, lightly mist a hardwood floor cleaner onto a microfiber pad or cloth (not directly onto the floor) and wipe in the direction of the wood grain. Use a clean, dry microfiber towel to buff and remove any lingering haze, and keep the floor from staying wet. If you don’t have a hardwood cleaner, use a small amount of pH-neutral cleaner formulated for wood floors followed by a quick damp-wipe and dry-buff.
Which cleaning products and tools should I avoid when cleaning drywall dust from hardwood floors?
Avoid abrasive pads, stiff scrub brushes, and “steam on hardwood” methods, as heat and moisture can harm many finishes and joints. Skip harsh chemicals like bleach, ammonia, and strong degreasers unless the product is specifically approved for your hardwood finish. Don’t use a wet mop with lots of water—use microfiber tools and minimal moisture to safely remove drywall dust from hardwood floors.
📅 Last Updated: October 29, 2026 | Topic: How to safely clean drywall dust from hardwood floors? | Content verified for accuracy and freshness.
References
- Silica, Crystalline – Overview | Occupational Safety and Health Administration
- Silica and Worker Health | Silica | CDC
- Lead Renovation, Repair and Painting Program | US EPA
- Lead – Overview | Occupational Safety and Health Administration
- https://www.epa.gov/asthma/cleaning-your-home
- https://www.hse.gov.uk/pubns/books/hsg188.htm
- HEPA
- https://scholar.google.com/scholar?q=drywall+dust+cleanup+hardwood+floor+HEPA+vacuum Google Scholar
- https://scholar.google.com/scholar?q=construction+gypsum+%28drywall%29+dust+safe+cleanup+wet+cleaning Google Scholar
- https://scholar.google.com/scholar?q=lead+dust+cleanup+hard+surfaces+HEPA+vacuum+wet+wiping Google Scholar