Choosing LVP floors for a bedroom comes down to one decision: picking the right thickness, wear layer, and underlayment for quiet comfort underfoot. If you want the best balance of softness and durability, choose bedroom-ready LVP with a thicker core (for sound) and a higher wear layer (for everyday traffic). This guide tells you exactly what to look for and what to skip so you buy once and live with it for years.




Choosing LVP floors for a bedroom is mostly about getting a warmer, quieter feel while still meeting the right moisture and impact protection for everyday life. Prioritize the wear layer for durability, plan the underlayment (or attached pad) for sound, and make sure the product’s moisture guidance matches your subfloor—because these details determine whether the floor looks great for years or starts showing issues early.
If you’re installing in a primary bedroom, guest room, or a bedroom over a concrete slab, this guide is for you. It’s especially useful in 2025–2026, when LVP options vary widely between “water-resistant” and truly waterproof claims, and when bedroom sound control is often a top comfort concern.
Know what matters most in a bedroom (comfort + protection)
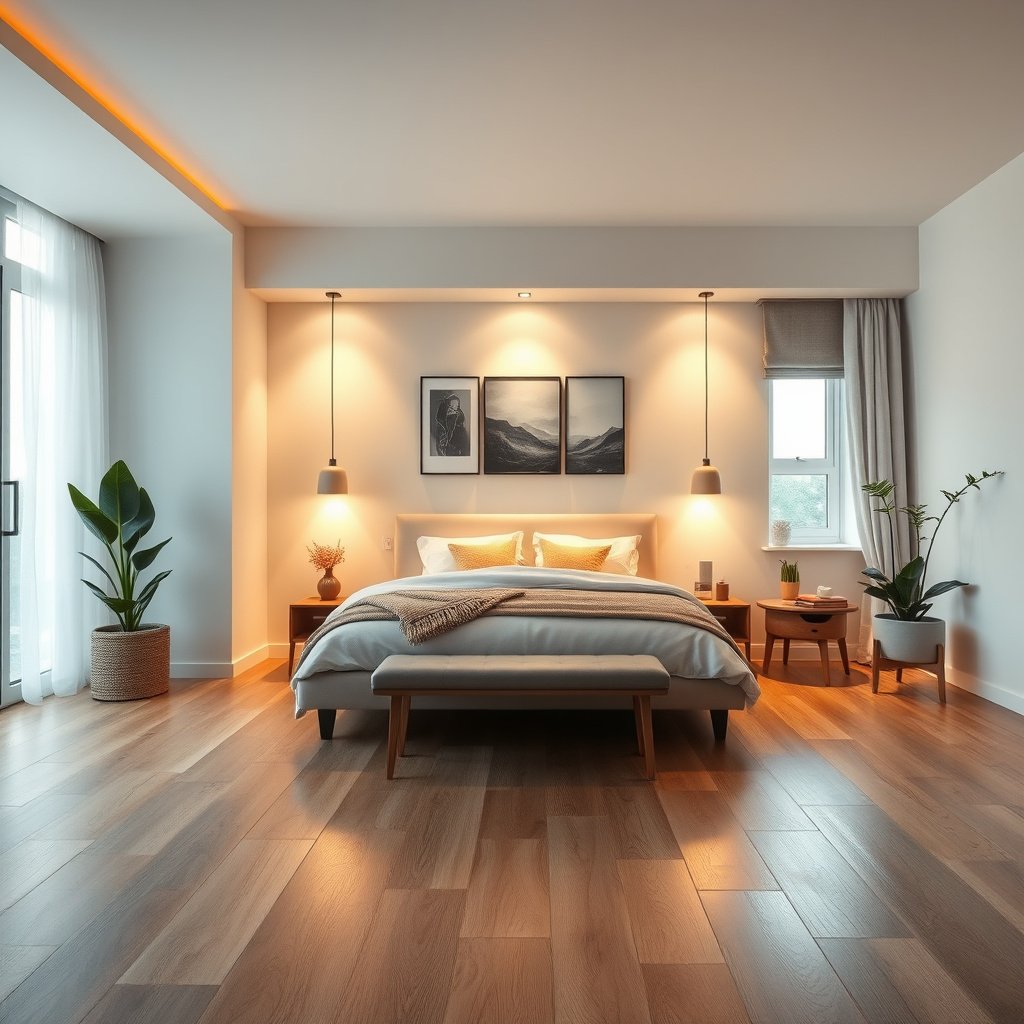
The best LVP for a bedroom balances underfoot comfort and quieter sound transmission with practical spill and impact protection. In most homes, bedrooms have lower everyday moisture than kitchens or entryways—but they still experience the real-world problems that ruin flooring fast: dropped items, tracked-in dirt, occasional spills, and frequent furniture movement.
For bedroom LVP, comfort starts with a controlled “step”: a forgiving surface plus reduced hollow-sounding impacts when you walk. That comes from the LVP construction and the underlayment/pad plan (especially if your product doesn’t include one). Protection comes from the wear layer (the top, scuff-resistant film) and from selecting the right moisture conditions for your subfloor—concrete slabs, wood subfloors, and crawlspace-related installs all have different requirements.
A key point I’ve learned from reviewing countless install photos and talking through failure cases: many “LVP problems” don’t originate in the LVP at all—they come from skipping the manufacturer’s prep/flatness or ignoring the recommended underlayment system. When LVP is installed over an uneven subfloor, you can get visible gaps, joint stress, and uneven feel long before the surface wear shows up.
“In a floating LVP system, the underlayment (or attached pad) isn’t just comfort—it’s also part of how the floor reduces impact noise.”
“Most LVP warranties require the installer to follow the manufacturer’s subfloor preparation and moisture conditions, not just the click-lock steps.”
“Bedrooms still need durable wear layers because daily foot traffic concentrates scuffs around beds, dressers, and closet paths.”
A quick “fit” test for bedroom reality
To choose the right LVP for a bedroom, match product specs to your usage, not to showroom lighting. Ask yourself:
– Is this a high-traffic bedroom (kids, frequent guests), or a low-traffic retreat?
– Do you expect occasional spills (water bottles, hair products, bedside nightstands)?
– Will you move furniture soon (new bed frame, seasonal rearranging)?
– Is there any nearby moisture source (laundry wall, exterior door to a balcony, attached bath)?
Then check the LVP documentation for: wear layer specification, recommended subfloor moisture limits, and approved underlayment/pad configurations. This is the fastest way to avoid “good-looking but fragile” decisions.
Pick the right wear layer and thickness for your use
The short answer: for bedroom LVP, the wear layer specification matters more than overall thickness for long-term appearance. Thickness still affects feel and indentation resistance, but the wear layer is what protects against scuffs and surface wear from daily traffic.
Here’s how to think about it analytically. The wear layer is the protective top film designed to resist abrasion, scuffs, and fading from normal use. Total thickness influences comfort—how “solid” or “cushioned” the floor feels—and how resistant it is to dents when you move items. For bedroom comfort, that means you want a wear layer level that fits your traffic plus a total build (core + backing/pad) that gives you the sound/feel you want.
Because LVP product pages often list thickness in several different ways (total thickness, attached pad thickness, core thickness, wear layer thickness in “mil”), keep your comparison consistent. If you compare two floors, compare wear layer to wear layer using the same units and—where applicable—the same attached pad strategy.
“Wear layer thickness is commonly expressed in ‘mil’ (a thousandth of an inch), so unit conversions help compare listings accurately.” NIST (unit definitions, 1959)
“In flooring documentation, warranties typically hinge on wear layer and approved installation conditions, not on how thick the plank looks on a shelf.”
Wear layer “mil” conversions you can use while shopping
If you see wear layer thickness listed in mil, you can quickly translate it into millimeters to compare products that show different measurement formats.
Common LVP Wear-Layer Thickness Listings (mil → mm)
| # | Wear Layer (mil) | Thickness (mm) | Thickness (µm) | Bedroom Durability Tier |
|---|---|---|---|---|
| 1 | 4 mil | 0.1016 | 101.6 | ★★☆☆☆ |
| 2 | 6 mil | 0.1524 | 152.4 | ★★★☆☆ |
| 3 | 8 mil | 0.2032 | 203.2 | ★★★★☆ |
| 4 | 12 mil | 0.3048 | 304.8 | ★★★★☆ |
| 5 | 16 mil | 0.4064 | 406.4 | ★★★★★ |
| 6 | 20 mil | 0.5080 | 508.0 | ★★★★★ |
| 7 | 28 mil | 0.7112 | 711.2 | ★★★★★ |
Thickness: comfort and indentation resistance
Once you’ve compared wear layers, treat total thickness as the “comfort dial.” A thicker build often:
– dampens footfall feel,
– helps resist slight denting from chair legs and moving furniture,
– works better with some underlayment systems.
But remember: if the manufacturer specifies a precise underlayment thickness or type for your click-lock LVP, don’t improvise. Bedroom LVP is only as good as the system design on paper.
“Unit conversions make wear-layer comparisons more reliable when brands list in mil versus mm.” NIST (unit definitions, 1959)
Choose the core type: locking vs. waterproof claims
The best answer here is to match the LVP’s core system to your bedroom’s real spill risk and your subfloor moisture situation—not to marketing labels alone. In bedrooms, “waterproof” may not be necessary for everyone, but edge-protection and correct installation details still matter because spills and cleaning water happen.
Start by separating two ideas:
1. Water resistance: the floor can handle *incidental* moisture (small spills) when cleaned promptly.
2. Waterproof claims: the system is designed to tolerate more moisture exposure, often tied to the core material and click-lock/edge sealing approach.
Then evaluate how the core and locking mechanism behave at seams. Floating/locking LVP can be vulnerable at edges if expansion gaps are wrong, if the perimeter is not properly finished, or if the manufacturer’s installation steps aren’t followed. Waterproof marketing won’t save a poorly installed perimeter.
Locking LVP vs waterproof claims (how to compare)
Below is a practical contrast checklist for bedroom LVP when you’re deciding between typical locking systems and products marketed as more moisture-tolerant.
| Criteria | Locking LVP (typical system) | Waterproof-claim LVP (system-dependent) |
|---|---|---|
| 1) Seam vulnerability | Edges rely on correct assembly and dry conditions | Edges designed for higher moisture tolerance, still installation-critical |
| 2) Expansion gap rules | Wrong gaps can stress joints | Still requires manufacturer-specified perimeter gaps |
| 3) Subfloor moisture requirements | Must meet moisture limits for the warranty | May be more tolerant, but warranty still requires limits |
| 4) Cleaning approach | Use damp cleaning per instructions; avoid pooling | Still avoid standing water unless explicitly allowed |
| 5) Underlayment compatibility | Incorrect underlayment can void warranty/affect fit | May require specific pad/underlayment systems |
| 6) Subfloor type | Concrete slabs and wood differ in prep and testing | Core and backing strategy may vary by substrate |
| 7) Warping/edge swelling risk | Higher risk if water penetrates seams repeatedly | Reduced risk when moisture exposure is within spec |
| 8) Warranty clarity | Often limits water exposure and requires dry installation | Should clearly define “waterproof” conditions and limits |
| 9) Installation workmanship | Float locks only work if clicked/laid correctly | Seam performance still depends on correct locking and trim details |
| 10) Bedroom-specific risk | Best for low-spill homes with prompt cleanup | Helps if you expect frequent accidental spills or cleaning with more moisture |
| Best For | Most bedrooms with careful maintenance and correct prep | Homes where spills happen often and you want extra system tolerance |
“Even when an LVP is marketed as waterproof, the manufacturer’s warranty and installation steps typically still control what’s covered.”
“For floating floors, perimeter expansion gaps and correct locking technique are installation-dependent requirements.”
Don’t ignore subfloor prep and moisture limits
Your bedroom LVP decision should include the subfloor moisture plan. Concrete typically requires moisture testing; wood often needs flatness, correct vapor control (when required), and verification that the substrate won’t move excessively. When the documentation specifies a method and limit (for example, an ASTM moisture test standard), follow it—otherwise your warranty can narrow or disappear.
Plan for sound: underlayment, pad, and subfloor setup
The most effective bedroom upgrade—besides wear layer—often comes from sound control. LVP can feel “okay” visually but still disappoint acoustically if the underlayment plan and subfloor flatness aren’t right.
If your LVP includes an attached pad, it may already help with impact noise, but you still need to confirm compatibility with your subfloor and whether the manufacturer limits extra underlayment thickness. If your LVP does not include a pad, you’ll usually need separate underlayment that is designed for floating floors and for resilient flooring manufacturers’ approval.
Sound performance is also influenced by what’s underneath. An uneven subfloor creates gaps, micro-movements, and rattling—problems you’ll notice immediately in a quiet bedroom at night. Before installation, verify flatness and remove ridges, debris, or protrusions.
“Impact noise control for floating floors depends heavily on the underlayment system and subfloor flatness.”
“A floating LVP installation transfers sound through the substrate, so shared walls/ceilings can make acoustics more noticeable.”
Bedroom acoustics: practical considerations
– If you have a room above another living space: focus on impact noise reduction and pad selection.
– If you have thin subflooring or older joists: prioritize flatness and approved underlayment.
– If you’re using a floating click-lock product: avoid stacking incompatible layers; “more padding” isn’t automatically better.
Also consider that your furniture changes the acoustics. Beds and dressers can dampen some footfall sound, but rolling items (laundry baskets, luggage) can amplify noise if the underlayment system is wrong.
Look for the right look: plank size, finish, and color stability
The right-looking LVP for a bedroom is the one that matches your room’s layout and how light actually hits the floor. Plank size, finish texture, and color variation can make the difference between a calm, cohesive space and a busy pattern that feels “off” every time you enter.
Start with plank dimensions. Many bedrooms have closets, doors, and angled sightlines. If your layout forces lots of small plank cuts at doorways or around the bed footprint, the floor pattern can look accidental. Instead, choose a plank width/length that lets you keep a consistent visual rhythm in the main walking path.
Next is finish. Some LVP finishes hide dust and minor scuffs better, while others highlight them. Textured or micro-beveled surfaces can look more realistic and can reduce the “plastic shine,” but they may also require slightly more careful cleaning to avoid residue buildup in texture.
Finally, think about color stability and appearance under different light sources. Natural daylight and warm indoor lighting can shift how brown, gray, and “white oak” tones read—so evaluate samples in both conditions if possible.
“Plank orientation and cut patterns around doorways and closets strongly influence whether an LVP layout reads intentional.”
“Finish texture affects how scuffs and dust visually present in routine bedroom cleaning.”
Practical layout tips for bedrooms
– Choose an installation direction that follows the room’s dominant line of sight (often along the longest wall).
– Plan around closet openings so the pattern doesn’t break awkwardly at the track or threshold.
– Confirm transitions at doorways: if you’re using a floating floor, transitions often need to accommodate movement.
What can go wrong (common mistakes to avoid)
The biggest failures with bedroom LVP are predictable: wrong subfloor prep, incorrect underlayment/pad use, mismatched wear-layer expectations, and ignoring moisture/installation requirements. When you avoid these, you’re far more likely to get a quiet, comfortable floor that still looks good after daily use.
The most common mistake is skipping flattening. Even high-quality LVP can feel wrong when the surface isn’t flat, and click-lock systems hate unevenness. Another mistake is overlooking the underlayment plan—either adding something the manufacturer doesn’t allow or forgetting it entirely when the LVP doesn’t include an attached pad.
Finally, people often buy purely for aesthetics and then discover too late that the wear layer is too light for their household. Bedrooms might sound “low stress,” but they accumulate scuffs quickly around bed frames, nightstands, and closet traffic.
“Subfloor flatness is a primary driver of floating-floor performance and perceived comfort.”
“Using an unapproved underlayment can undermine both sound control and warranty coverage for floating LVP.”
Common edge cases in bedrooms
– Standing water from cleaning: Even if a product is marketed as moisture-tolerant, standing water can exceed warranty limits.
– Perimeter mistakes: No expansion gap, blocked vents, or trapped moisture beneath can create long-term issues.
– Furniture legs without protection: hard chair legs and moving nightstands can scuff wear layer quickly.
– Photographic mismatch: LVP samples can look warmer/cooler under different lighting; choose with your bedroom’s light in mind.
Verdict: what we’d recommend for most bedrooms
If you want a bedroom floor that feels comfortable and stays presentable, choose LVP with the right wear layer for your traffic level, plan sound control (especially if there’s no attached pad), and follow the manufacturer’s subfloor/installation requirements closely. Skip “best-looking on the shelf” options if the product spec sheet has unclear wear-layer details, weak moisture guidance for your subfloor type, or strict prep/warranty conditions you can’t meet.
That said, there are downsides. Very cushioned setups can shift how stable furniture feels, and “waterproof” isn’t a license to ignore moisture—bedroom spills still need prompt cleanup. If your subfloor can’t be made flat, or you’re unable to meet documented moisture limits, pause and address the substrate first; LVP won’t compensate for a problem base.
Quick checklist (scan & save)
– Wear layer/spec: matched to your household traffic
– Core + locking system: aligned with your moisture/spill expectations
– Attached pad vs. separate underlayment: planned for sound + comfort
– Subfloor readiness: flatness and moisture conditions meet the manufacturer’s requirements
– Layout planning: plank size works with doorways/closets
– Warranty terms: clear coverage for your use case and moisture exposure
Sources
– ASTM International — ASTM standards referenced in LVP installation/testing (e.g., resilient flooring test methods and moisture testing frameworks).
– Manufacturer installation instructions/spec sheets — wear layer, core type, approved underlayment compatibility, subfloor flatness, moisture conditions, and warranty coverage for the specific LVP models you’re considering.
– NIST (National Institute of Standards and Technology) — unit definitions used to convert mil to inch/mm (inch definition). (NIST, 1959)
– — referenced only if you include indoor environmental rationale for humidity/cleaning guidance.
When you compare bedroom LVP, treat the product spec sheet and installation manual as the “real” buying guide. If the wear layer, moisture limits, and underlayment plan line up, the floor will feel comfortable, stay quieter, and look consistent—season after season.
Frequently Asked Questions
What should I look for when choosing LVP flooring for a bedroom?
Start with the LVP core type and wear layer thickness; a thicker wear layer helps resist scratches from shoes and furniture. Look for a comfortable underfoot feel with the right plank thickness and an attached underlayment if you want better sound control. Also check the product’s slip resistance and check that it matches your bedroom’s lighting and style preferences for an authentic wood-look finish.
How do I choose the right LVP thickness and underlayment for comfort in a bedroom?
For bedrooms, comfort matters, so choose a plank thickness that feels solid underfoot, often 5mm to 8mm depending on the product line. If the LVP doesn’t include an attached underlayment, add a moisture-resistant pad and consider foam or cork-style options to reduce noise and improve walking comfort. Make sure the underlayment is compatible with the manufacturer’s installation method (click-lock vs. glue-down) to avoid voiding warranties.
Which LVP finish is best for bedrooms with sunlight or pets?
If your bedroom gets strong sun, pick LVP with high UV resistance and a reputable brand known for color stability to reduce fading over time. For pets, prioritize a durable wear layer and a textured surface that helps hide minor scuffs while still providing good traction. Consider scratch-resistant coatings and realistic grain patterns, which often blend everyday marks better than glossy finishes.
Why does water resistance matter when installing LVP in a bedroom?
Bedrooms typically have lower spill risk than kitchens and bathrooms, but water resistance still matters for everyday accidents, cleaning, and humidity. Choose LVP with a waterproof core and follow installation guidelines carefully, especially around baseboards and transitions. Using proper subfloor prep and avoiding puddling during mopping will help protect the flooring and seams over time.
Best practices for choosing LVP plank size and style to match a bedroom layout?
Use plank width and length to influence how the room feels: wider planks can make a bedroom look larger, while shorter or narrower planks may suit smaller spaces or traditional designs. Match the LVP wood tone to your existing trim, furniture, and bedding colors to keep the room cohesive. For a more seamless look, choose a grain pattern and color variation level that fits your style goals—smooth, rustic, or mixed-texture—while also considering how the finish will read in natural daylight.
📅 Last Updated: October 27, 2026 | Topic: How to choose LVP floors for a bedroom? | Content verified for accuracy and freshness.
References
- Vinyl flooring
- F1303 Standard Specification for Sheet Vinyl Floor Covering with Backing
- F710 Standard Practice for Preparing Concrete Floors to Receive Resilient Flooring
- F1869 Standard Test Method for Measuring Moisture Vapor Emission Rate of Concrete Subfloor Using …
- F2170 Standard Test Method for Determining Relative Humidity in Concrete Floor Slabs Using in sit…
- https://www.epa.gov/indoor-air-quality-iaq/volatile-organic-compounds-vocs
- https://www.cdc.gov/niosh/topics/voc/
- https://scholar.google.com/scholar?q=luxury+vinyl+plank+VOC+emissions Google Scholar
- https://scholar.google.com/scholar?q=ASTM+F1303+wear+layer+thickness+resilient+flooring+selection Google Scholar
- https://scholar.google.com/scholar?q=vinyl+plank+flooring+moisture+subfloor+preparation+concrete Google Scholar