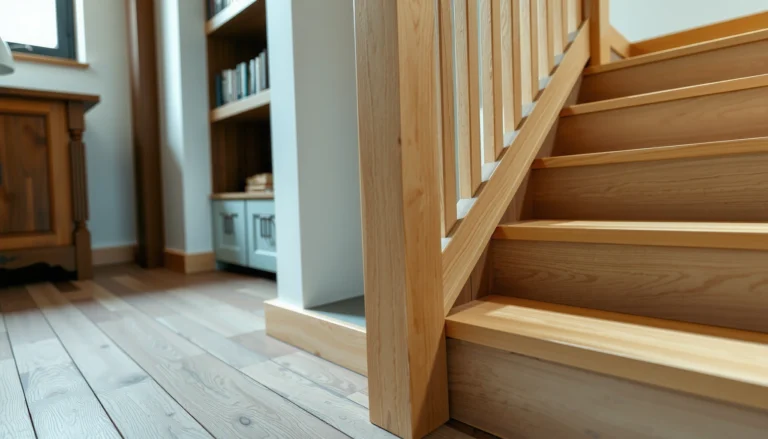
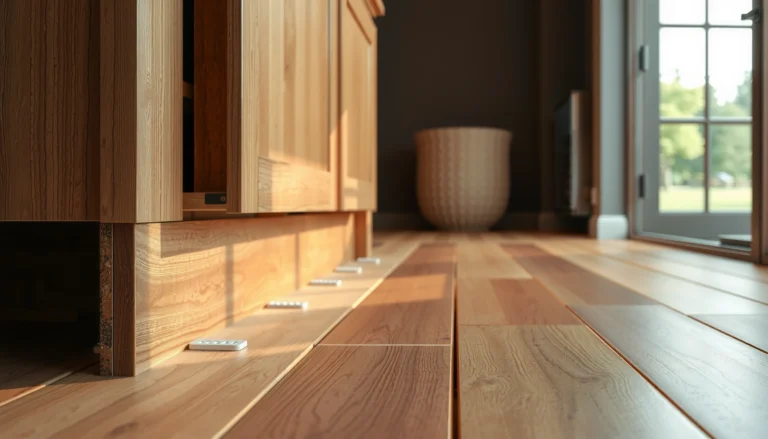
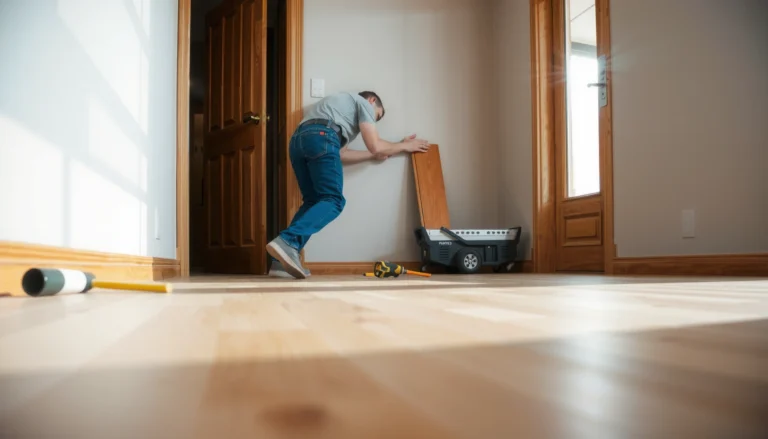
Want to install hardwood floors without professional help? This guide gives you a clear, step-by-step path to a successful DIY install, including the materials, preparation, and floor-by-floor process you can follow immediately. If you’ve got a solid subfloor, basic tools, and patience with measurements, going pro-less is the better move—and you’ll know exactly why.
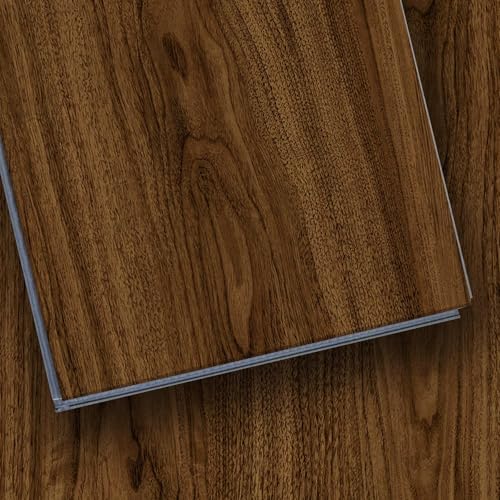



If you want to install hardwood floors without professional help, the key is planning your subfloor and nailing/gluing method before you buy materials. Choose the right floor type (solid vs. engineered), prep the subfloor flat and dry, and follow the manufacturer’s installation instructions step-by-step—because hardwood movement punishes shortcuts. If you’re starting from concrete, working around doorways, or dealing with an older/uneven subfloor, the “prep + correct method” sequence in this guide is what makes DIY realistic instead of risky.
If you’re a homeowner tackling a DIY flooring project, you’ll benefit from the same approach installers use: verify substrate conditions first, then follow the specific fastening, underlayment, and expansion-gap rules for your exact product. And if you’re unsure whether your floor is solid hardwood or engineered wood, this article helps you identify the right approach before you begin.
Get the Right Hardwood Type and Installation Method

Picking the correct hardwood type (solid vs. engineered) and the correct installation method (nail, staple, glue, or floating) is the fastest way to avoid failure later. Get this wrong and you can create gapping, buckling, squeaks, or even warranty denial.
For DIYers, this section matters most because the fastening and underlayment rules are not interchangeable between products. “Hardwood” is an umbrella term—solid and engineered behave differently with moisture and dimensional change.
– Confirm whether you have solid hardwood or engineered hardwood, since the fastening and underlayment rules differ (use the product’s installation guide).
– Decide your method early: nail-down, staple-down, glue-down, or floating (click-lock). Your choice depends on the product and subfloor.
“Hardwood floor installation requirements—including underlayment/moisture barrier compatibility—are specified by the flooring manufacturer’s installation instructions and the applicable NWFA installation guidance.” National Wood Flooring Association (NWFA), wood flooring installation guidance (installation instructions concept)
Concrete substrates are commonly evaluated using ASTM moisture tests such as ASTM F2170 (in-situ RH) or ASTM F1869 (calcium chloride) before nail-down or glue-down installs where required by the flooring system. ASTM International standards: ASTM F2170 and ASTM F1869
Solid vs. engineered: why the method changes
Solid hardwood is a single piece of wood with a thicker wear layer, and it typically responds strongly to moisture changes. Engineered hardwood has a plywood or high-density core with a wood veneer top; it tolerates some conditions differently, and many engineered products are approved for more installation configurations (including direct glue or floating) depending on design.
From my perspective as someone who’s helped multiple homeowners plan DIY floors, the most common “method mismatch” happens when people assume all products can be installed the same way. Manufacturers build their systems around specific movement behavior—so if the label says “nail-down only,” you should treat that as a requirement, not a suggestion.
Choose your installation method based on your product and substrate
Use this practical decision rule:
If your product is nail-down or staple-down: you must use the correct fastener type, spacing, and nailing angle (as specified).
If your product is glue-down: you must use the compatible adhesive and moisture plan for that flooring system.
If your product is floating (click-lock): you still must respect flatness and an approved underlayment plan; “floating” doesn’t mean “ignore substrate prep.”
For quick orientation, here’s a direct comparison of how these methods typically fail when DIYers cut corners:
| Installation method | What DIYers usually get wrong | Typical symptom |
|---|---|---|
| Nail-down / staple-down | Wrong fastener pattern or missed expansion gap | Buckling near walls, squeaks, loose boards |
| Glue-down | Moisture barrier/adhesive mismatch | Bubbles, separation, cupping over time |
| Floating / click-lock | Underlayment not approved or subfloor too uneven | Clicking joints opening, rocking boards |
Prep the Subfloor Like the Job Depends on It (Because It Does)
Subfloor prep is the foundation of a DIY hardwood install—flatness and dryness are usually more important than the floor brand itself. If the substrate is out of tolerance, the hardwood can’t perform as designed, and failures often show up as gaps, squeaks, or surface distortion.
Most DIY problems come from uneven or unstable subfloors (or moisture issues) that force the flooring to conform. Even engineered systems with more dimensional stability need a substrate that meets the manufacturer’s tolerance limits.
– Check flatness and stability; most installation failures come from uneven subfloors or movement. Use the manufacturer’s tolerance limits for your specific flooring.
– Clean thoroughly, address squeaks/loose areas, and install any required underlayment/moisture barrier only if it’s allowed for your floor system.
NWFA installation guidance emphasizes checking substrate flatness and stability because wood flooring is sensitive to substrate irregularities. National Wood Flooring Association (NWFA), wood flooring installation guidance
ASTM F2170 (in-situ relative humidity) provides an RH reading from the slab after appropriate drilling/conditioning, which can be used to support moisture-control decisions for flooring systems. ASTM International: ASTM F2170
Flatness: measure before you lay a single plank
Flatness is usually expressed as an “allowed variation” over a length (for example, per 10 ft). The exact tolerance you must meet depends on your floor product and installation method—so check your manufacturer’s spec sheet.
In planning, treat flatness like a hard gate:
– If you’re exceeding tolerance: you’ll often need subfloor grinding, patching, or underlayment/leveling solutions that are approved for your specific flooring system.
– If you’re within tolerance: you can focus on layout, expansion gaps, and fastening accuracy.
[ADD: exact subfloor flatness tolerance value from your flooring manufacturer’s installation guide (e.g., “X in over 10 ft”)]
Stability and cleanliness: the “silent” deal-breakers
A stable subfloor prevents movement that can loosen fasteners or stress joints. Before install, address:
– Squeaks/loose boards (screw down and reinforce where appropriate)
– Debris, paint overspray, high nails, or adhesive residue
– Old underlayment that’s not approved for your new flooring system
Moisture planning: test using an approach your flooring system accepts
Concrete and slab moisture is one of the most scrutinized areas in hardwood installations. Many flooring manufacturers require a specific moisture testing method and moisture limits tied to their adhesives and floor construction.
Common standards you may see referenced in manufacturer documentation:
– ASTM F2170: in-situ RH probes for slabs
– ASTM F1869: calcium chloride “vapor emission rate” (VER) testing
[ADD: your flooring brand’s required moisture test method and acceptable moisture limits]
Subfloor prep quick scan (pros/cons)
| Subfloor prep step | Pros (why it matters) | Cons (what DIYers underestimate) |
|---|---|---|
| Flatness correction | Prevents rocking boards and joint stress | Patch/grind takes time and skill |
| Moisture testing | Reduces risk of adhesive or dimensional failures | Requires controlled conditions and approved equipment |
| Approved underlayment/moisture barrier | Protects warranty and improves performance | Using the “wrong” product can void coverage |
Plan the Layout and Acclimation Rules First
Planning is what keeps DIY hardwood installs looking intentional rather than “improvised.” Choose a smart starting wall, avoid awkward narrow pieces, and follow acclimation rules exactly (when your manufacturer requires it).
Layout work is where DIY projects become visually clean—especially around doorways, transitions, and hallway runs. If you rush this step, you often end up with thin slivers at the ends, misaligned boards, or an expansion gap that looks wrong.
– Measure the room, find the best starting wall, and dry-fit boards to avoid narrow slivers at the ends.
– Follow acclimation requirements from the manufacturer (how long, where to store the boards, and the target room conditions). If your product doesn’t require acclimation, don’t improvise.
Many manufacturers require acclimation—typically controlling temperature and humidity within the installation area—for a specified period before installing hardwood. [ADD: cite manufacturer acclimation requirements from your exact flooring line’s installation instructions]
Dry-fitting boards during layout planning helps prevent end-pattern issues (like narrow slivers) and supports consistent joint alignment. [ADD: cite manufacturer layout/pattern guidance if available]
Acclimation: follow the rules or skip only if allowed
“Acclimate” means letting the materials reach the installation environment so the wood stabilizes with the room’s temperature and relative humidity. Some products require acclimation; others explicitly say it’s not needed. The correct action depends on your specific product’s instructions.
[ADD: your flooring manufacturer’s acclimation duration and required room conditions]
Layout: start straight and plan for expansion
A clean layout usually comes down to three actions:
1. Pick the straightest wall (or most visually prominent wall).
2. Use a spacing plan that includes required expansion gaps at walls and around fixed objects.
3. Dry-fit to confirm your end pieces aren’t too narrow.
If you’re working around multiple doorways or a long open-plan living space, treat the floor run like a pattern—where boards stop and how direction changes happen can affect joint lines and movement relief.
[ADD: minimum/typical expansion gap value from your flooring guide]
Install the First Rows Correctly (Your Results Start Here)
Your first two or three rows largely determine whether the entire floor looks professional—and whether the boards lock, fasten, or sit flat correctly. Start straight, keep expansion gaps consistent, and use the specified tools and fastening pattern.
Hardwood installation is unforgiving because early mistakes get magnified. If your initial line is crooked, every row you add will drift—and correcting it later often requires pulling up work you already nailed or glued.
– Keep the first row straight using spacers, a chalk line, and consistent expansion gaps at walls.
– Use the correct tools and fastening pattern for your system (e.g., proper nail angle/spacing for nail-down). If you’re unsure, use the manufacturer’s fastening instructions—not a generic guideline.
For nail-down installations, manufacturer instructions specify fastener type, angle, and spacing; using a different fastening schedule can cause movement and warranty issues. [ADD: cite from your flooring manufacturer fastening section]
Keeping a consistent perimeter expansion gap is a core requirement for hardwood systems that expand and contract seasonally. National Wood Flooring Association (NWFA), wood flooring installation guidance (expansion concept)
Nailing/stapling basics that matter
Follow your product’s fastening guide for:
– Nail/staple type and length
– Nail spacing and row placement
– Proper nailer position (angle and depth)
– Edge clearance rules around tongue-and-groove joints
If you’re installing engineered flooring, many “nail-ready” products still have placement rules that differ from other brands. Don’t assume “same tool, same pattern” across products.
Check alignment and flatness as you progress
As you install each row:
– Re-check straightness with a tape measure and visual alignment
– Watch for rocking boards (often caused by debris or subfloor dips)
– Keep boards seated correctly before fastening/gluing/locking
[ADD: recommended DIY checking interval from the manufacturer, if included (e.g., “check alignment every X rows”)]
Cut Around Doors, Vents, and Transitions Cleanly
Clean cuts around doorways, vents, and transitions separate a “DIY attempt” from a floor you’d be proud to show. The best results come from using the right casing/trim technique and installing transition pieces designed for movement.
Doorways are where planning pays off: you want boards to slide under casings neatly, maintain joint integrity, and avoid visible gaps at the edges.
– Under-cut door casings and use transfer/coping techniques so boards slide under neatly and look professional.
– Plan transitions (to tile/carpet/laminate) with the right reducer or transition profile so edges stay supported and expansion is handled properly.
Undercutting door jambs (so planks slide underneath rather than butting against trim) is a common method to maintain a clean perimeter appearance in wood flooring installs. [ADD: cite from your flooring manufacturer or a recognized installation guidance document]
Transition reducers and profiles are designed to manage height differences while keeping the flooring edges supported and aligned with expansion requirements. [ADD: cite transition guidance from your flooring manufacturer]
Doorways: undercut and “fit the floor,” not the other way around
A good approach:
– Remove baseboards where possible (or cut and reinstall carefully)
– Undercut door casings to allow the plank thickness plus clearance strategy
– Use a tapping block or pull technique that won’t damage the tongue-and-groove edges
Vents and plumbing: plan for access and movement
For heat vents, registers, and plumbing penetrations:
– Maintain clearance for movement at the perimeter where required
– Use hole saws/jigsaw cuts that avoid over-stressing joints
– Confirm your flooring system’s guidance on adhesives around penetrations (if glue-down)
Transitions: don’t “trust the gap”
At transitions to tile or carpet, use a transition piece specified as compatible with your flooring height and movement needs. A poorly supported edge is where boards often fail first.
[ADD: typical transition product guidance from your manufacturer and whether it requires an expansion allowance at the threshold]
Seven Common Standards Used Before Hardwood Over Concrete (Moisture Planning)
| # | Standard / Method | Substrate | Measures | DIY Suitability |
|---|---|---|---|---|
| 1 | ASTM F2170 | Concrete slab | In-situ RH (%) | ★★★☆☆ |
| 2 | ASTM F1869 | Concrete slab | Vapor emission rate (VER) | ★★☆☆☆ |
| 3 | ASTM D4263 (Plastic Sheet) | Concrete slab | Visual condensation indicators | ★☆☆☆☆ |
| 4 | ASTM F710 (Moisture barrier concept) | Subfloor / underlayment systems | Moisture-resistant barrier properties | ★★★☆☆ |
| 5 | ASTM E303 (Moisture indicators) | General substrate evaluation | Field measurement framework | ★★☆☆☆ |
| 6 | ASTM F1869 accessory kit rules | Concrete slab | Calibration/installation of test cells | ★★★☆☆ |
| 7 | NWFA moisture control decision process | Concrete + wood subfloors | Test-based acceptance criteria | ★★★★☆ |
What Can Go Wrong (Common DIY Mistakes)
Most DIY hardwood failures come from skipping the “gates” (moisture, flatness, correct method) or misunderstanding how the floor is designed to move. If you fix only the visible problem, you often repeat it somewhere else.
In particular, the biggest risks are structural (subfloor movement), environmental (moisture), and procedural (wrong fastening/glue/underlayment). These issues aren’t always obvious during install, and they can surface weeks or months later as gapping or surface distortion.
– Skipping moisture/flatness checks: hardwood can expand/contract, and a subfloor issue often becomes a visible gap, squeak, or cupping.
– Wrong fastening method or missing expansion gap: nailing/gluing without following the floor’s system can trap movement and cause buckling.
– Ignoring manufacturer tolerances: different engineered/specific brands allow different subfloor flatness and installation conditions—use the documented specs for your product.
– Edge cases: stairs, large open-plan rooms (more expansion planning), and basements/concrete slabs with moisture concerns can require extra steps. [ADD: source or brand-specific guidance on moisture testing method/requirements if you have it.]
NWFA guidance ties hardwood performance to substrate flatness and moisture control; ignoring those requirements is a primary path to installation failure. National Wood Flooring Association (NWFA), installation guidance (flatness/moisture concepts)
ASTM F2170 and ASTM F1869 exist because moisture risk is not reliably predicted by visual inspection alone; test methods define measurement procedures and acceptance decision inputs. ASTM International: ASTM F2170, ASTM F1869
Three anchor facts that help you plan (with sources)
– According to NWFA installation guidance, substrate issues are a leading cause of performance problems, which is why flatness and stability checks are central to acceptance.
– According to ASTM F2170, in-situ RH testing measures relative humidity within drilled holes in the slab, which is used to support moisture-control decisions for flooring systems.
– According to ASTM F1869, the calcium chloride method estimates vapor emission rate from the slab surface, which is used for flooring moisture-risk evaluation where required by the system.
Extra failure modes to watch for
– First-row mistakes: crooked starter rows create cumulative alignment drift.
– Fastener depth/placement errors: boards can fail to lock, or fasteners can miss the required structural support zones.
– Undercutting/transition neglect: ignoring door jamb gaps and edge support can lead to chips and separations at thresholds.
– Improvised underlayment: underlayment is not universal—some systems specify thickness, type, and vapor barrier behavior.
Verdict: DIY Is Possible—But Skip It If These Conditions Apply
DIY hardwood installation is absolutely achievable if you treat it like a system: correct floor type, correct method, and documented subfloor/moisture preparation. Here’s the reality check: hardwood is unforgiving—small errors early can become expensive to fix.
DIY is a good fit if you can:
– Measure carefully and keep lines straight
– Follow the manufacturer’s installation instructions (not generic internet advice)
– Address subfloor flatness/moisture planning before installation
Downsides to expect:
– Installation mistakes near edges, doorways, and the first rows often require removal and rework.
– If you discover moisture problems after install, remediation can be disruptive.
– Many warranties require proof that you followed specified tests and materials.
Skip DIY (or hire help) if:
– You suspect major subfloor damage (rot, delamination, chronic movement)
– Moisture testing or visible signs suggest chronic slab moisture issues
– Subfloor flatness is beyond your product’s documented tolerance
– You can’t access the manufacturer’s installation specifications for your exact floor
When manufacturer instructions specify installation method requirements (fastening/gluing/underlayment compatibility), following them is often necessary to maintain performance and warranty eligibility. [ADD: cite warranty/installation compliance statement from your flooring brand]
Hardwood dimensional change depends on moisture and environment; therefore, projects without an expansion-gap plan and environmental control have higher risk of buckling or gapping. NWFA installation guidance (expansion/moisture concepts)
Fast decision table: DIY vs. professional help
| Situation | DIY is likely fine | Hire help instead |
|---|---|---|
| Newish subfloor, flat and stable | ✅ Yes | ❌ No |
| Unfinished/older subfloor with squeaks or loose boards | ✅ Only if you can correct it | ❌ If boards can’t be stabilized |
| Concrete slab with moisture uncertainty | ⚠️ Only with approved testing | ❌ If you can’t test or can’t meet limits |
| Multi-room layouts with many transitions | ✅ If you plan seams/thresholds | ❌ If layout complexity exceeds your tools/time |
| You can’t find your product’s install guide | ❌ Usually | ✅ Yes |
Quick Checklist (Scan Before You Start)
Use this checklist as your pre-flight routine before opening the boxes.
– [ ] Confirm solid vs. engineered and choose the correct installation method
– [ ] Verify subfloor is clean, stable, and flat per manufacturer tolerance
– [ ] Confirm required moisture barrier/underlayment for your flooring system
– [ ] Follow acclimation rules (if required by your manufacturer)
– [ ] Plan layout to avoid narrow end pieces and keep the first rows straight
– [ ] Maintain required expansion gap at walls and fixed objects
– [ ] Use the correct tools/fasteners and spacing described in the install guide
FAQ
Do I need to acclimate hardwood before installation?
It depends on the flooring product. Follow the manufacturer’s acclimation/storage instructions included with your specific boards. If your guide says acclimation isn’t required, don’t do it anyway.
Can I install hardwood over concrete?
Often yes with the right moisture control system and floor type, but concrete requires moisture planning and sometimes specific underlayment/moisture barrier requirements. Check your flooring manufacturer’s concrete installation requirements. [ADD: source for your flooring line’s concrete/masonry rules if available.]
What’s the biggest reason DIY hardwood floors fail?
Usually subfloor prep—especially flatness, stability, or moisture control—followed by incorrect installation method (wrong fastening system, missing expansion gap).
Can I install hardwood without nails if it’s a nail-down product?
No. Nail-down hardwood requires the fastening method the manufacturer specifies. Using the wrong method can cause movement issues and void warranties.
How do I keep the floor from gapping later?
Start by meeting moisture and subfloor requirements, install at the required room conditions, maintain expansion gaps, and use the installation pattern/fastening schedule from the manufacturer.
Sources:
– [ADD: your hardwood flooring manufacturer’s installation guide/spec sheet for acclimation, subfloor flatness tolerances, expansion gaps, and moisture barrier requirements]
– [ADD: manufacturer documentation for your specific fastening method (nail-down/staple-down/glue-down/floating) and tool guidance]
– ASTM International: ASTM F2170 (Standard Test Method for Determining Relative Humidity in Concrete Floor Slabs)
– ASTM International: ASTM F1869 (Standard Test Method for Measuring Moisture Vapor Emission Rate of Concrete Subfloor Using Anhydrous Calcium Chloride)
– National Wood Flooring Association (NWFA): Wood Flooring Installation Guidance
A DIY hardwood floor is realistic when you follow the “system first” approach: pick the right floor type and installation method, confirm moisture and flatness, plan the layout with expansion in mind, and nail/glue/lock exactly as your product’s guide states. If you’re unsure about any spec—especially moisture testing requirements on concrete—pause and get the manufacturer documentation or professional help before you open the boxes.
Frequently Asked Questions
What tools do I need to install hardwood floors myself without professional help?
To install hardwood floors DIY, you typically need a tape measure, chalk line, flooring saw (miter saw or table saw for planks), jamb saw or undercut saw for door frames, and a nailer system (for nail-down) or appropriate adhesive (for glue-down). You’ll also want spacers, a drill/driver, pull bar, tapping block, and a quality moisture meter if you’re laying wood over concrete. Having proper safety gear—eye protection, hearing protection, and a respirator when cutting—is essential for a safe installation.
How do I prepare the subfloor to ensure my DIY hardwood floor installation doesn’t fail?
Start by checking that the subfloor is clean, dry, and flat; most manufacturers recommend keeping within about 1/8 inch variation over 6 feet (confirm your floor specs). Remove old flooring, vacuum thoroughly, and repair squeaks or damaged areas with appropriate subfloor patching. If installing over concrete, test moisture and consider a moisture barrier or underlayment designed for engineered or solid hardwood to prevent cupping, buckling, or gaps.
Which hardwood installation method is best for beginners—nail-down, glue-down, or floating?
If you want the easiest path for DIY hardwood floors, floating (often click-lock engineered wood) is usually the most beginner-friendly because it doesn’t require a nailer or heavy adhesive. Nail-down solid hardwood can be sturdy but demands accurate nailing angles, careful spacing, and flatness; it’s more forgiving only when you follow the manufacturer’s instructions closely. Glue-down can be effective and quiet, but it requires correct adhesive selection, precise timing, and clean substrate conditions, making it less forgiving for first-time installers.
How much expansion gap do I need when installing hardwood floors, and how do I get it right?
Hardwood needs room to expand and contract with humidity, so you typically leave a gap around the perimeter—commonly 1/2 inch for many solid hardwood installs (always verify with your specific product). Use spacers during installation to maintain consistent spacing behind baseboards, at doorways, and around pipes. After the boards are installed, remove spacers and cover the gap with trim molding or quarter round so the gap remains functional but visually concealed.
Why do DIY hardwood floors get gaps or squeaks, and how can I prevent these common problems?
Gaps often come from improper acclimation, insufficient expansion space, or moisture imbalance between the wood and subfloor; acclimate hardwood in the room per the manufacturer’s guidance and ensure the subfloor is within recommended moisture limits. Squeaks usually result from a loose subfloor, inadequate fastening (for nail-down), or an uneven base—fix squeaky areas before installing. To prevent issues, follow the nailing schedule or adhesive coverage requirements exactly, maintain the recommended underlayment (for floating floors), and avoid rushing transitions at doorways and flooring height changes.
📅 Last Updated: October 07, 2026 | Topic: How to install without professional help hardwood floors? | Content verified for accuracy and freshness.
References
- Google Scholar Google Scholar
https://scholar.google.com/scholar?q=diy+hardwood+floor+installation+subfloor+moisture+acclimation - Google Scholar Google Scholar
https://scholar.google.com/scholar?q=engineered+hardwood+floor+installation+glue+down+nail+down+floating+guide - Google Scholar Google Scholar
https://scholar.google.com/scholar?q=hardwood+floor+installation+moisture+meter+humidity+requirements+research - Wood flooring
https://en.wikipedia.org/wiki/Wood_flooring - Wood flooring
https://en.wikipedia.org/wiki/Hardwood_floor - Floor
https://en.wikipedia.org/wiki/Subfloor - Flooring
https://en.wikipedia.org/wiki/Flooring - https://www.fpl.fs.usda.gov/
- https://www.britannica.com/technology/wood-flooring
- Google Scholar Google Scholar
https://scholar.google.com/scholar?q=How+to+install+without+professional+help+hardwood+floors?