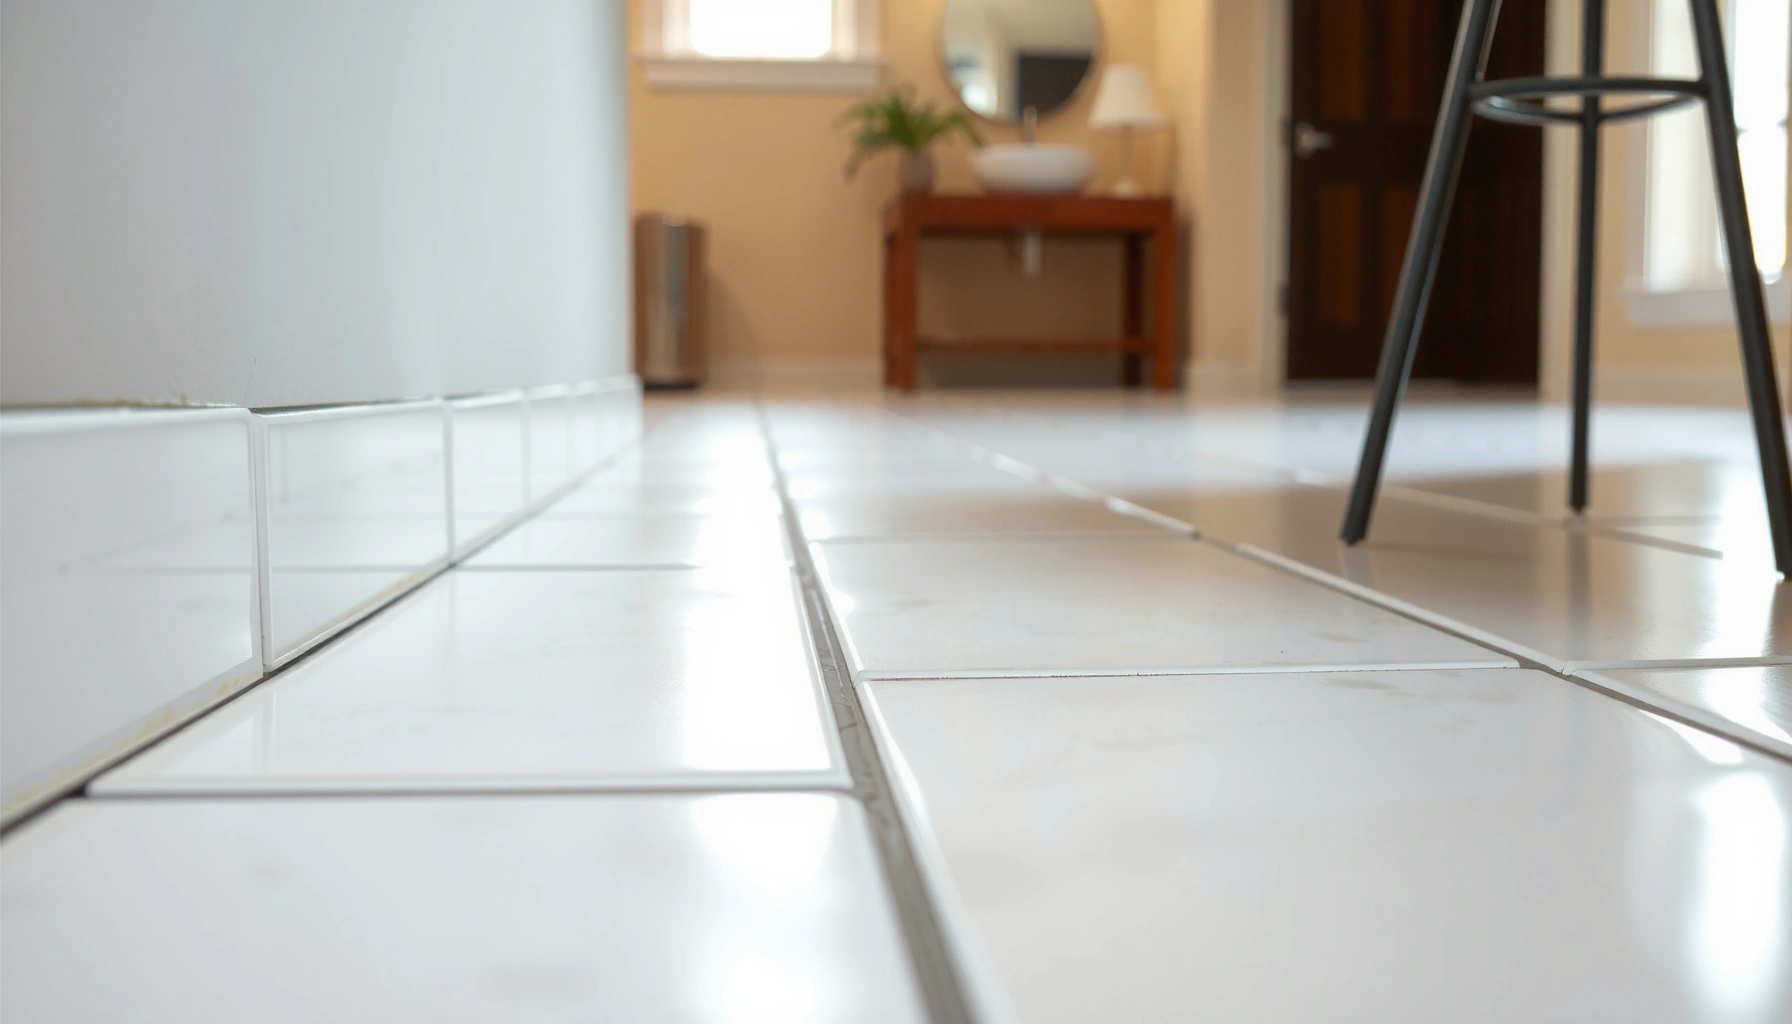

Learn how to trim bathroom floors with a clean, professional finish—without guesswork—so the edges fit tight around tile, fixtures, and doorways. This step-by-step guide walks you through measuring, marking, choosing the right blade, and cutting with control for minimal chipping and gaps. Follow it and you’ll get a crisp perimeter that holds up to moisture and everyday traffic.




Trimming bathroom floors is about controlling two things at the same time: the perimeter clearance (so the floor can move) and the moisture boundary (so water can’t wick underneath). Measure the exact gap around the room, cut slowly with the right blade for your material, dry-fit every piece, then seal/protect cut edges and finish with proper trim so the edges stay protected in a wet environment.
This guide is for anyone installing or replacing bathroom flooring—such as vinyl plank (including rigid core/LVP), laminate, engineered wood, or tile—when you’re dealing with awkward room edges, doorways, vanities, toilet bases, and uneven walls. Because bathrooms are high-humidity spaces, the “right” trim approach depends on your floor system’s movement requirements and edge construction.
Prep the bathroom floor for trimming
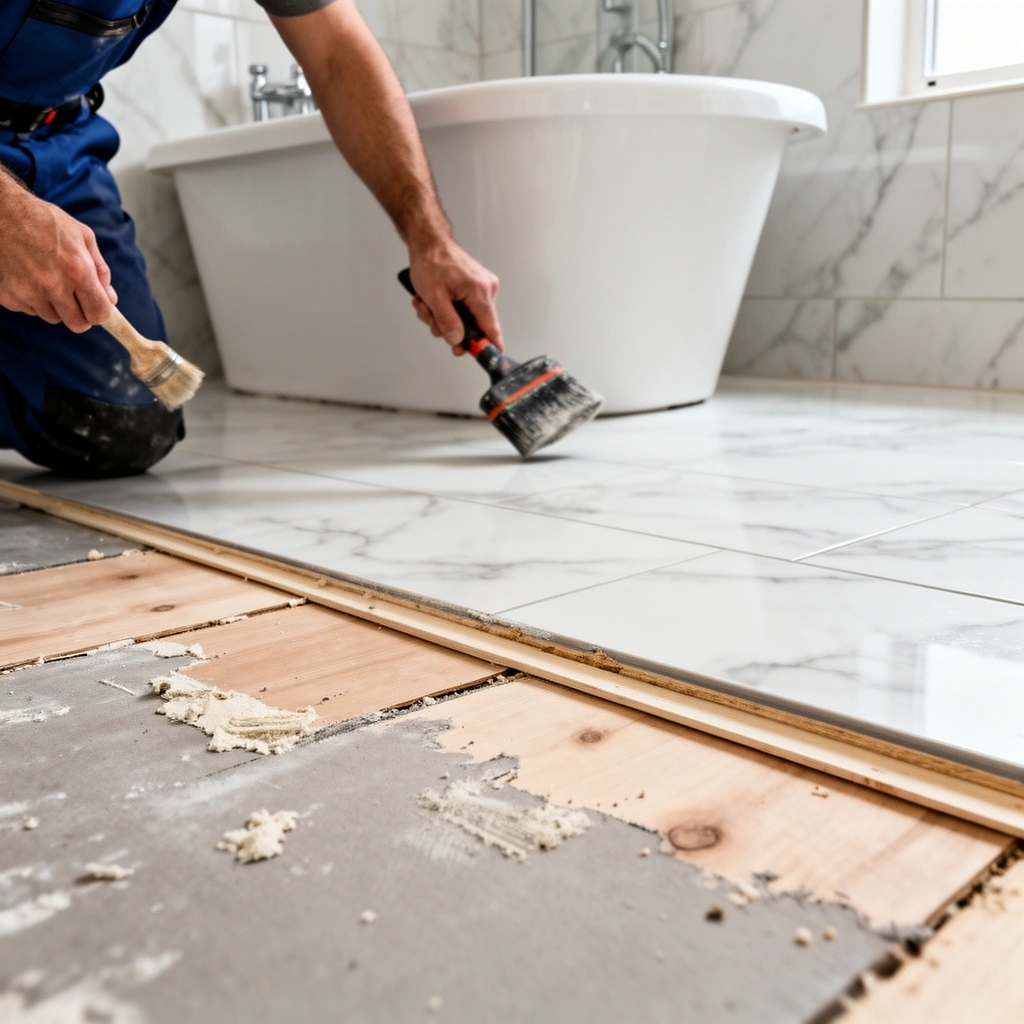
Prepping determines whether your measured perimeter gaps stay accurate after you trim, because even small debris or uneven spots can throw off the clearance you leave. If you remove obstacles and clean/assess the subfloor first, your cut lines land where they should—and your last-row fit stops looking “almost right.”
Before trimming the final rows, clear the work path by loosening or temporarily removing items that block the cut line, such as toilet accessories or base trims, so you can measure and undercut cleanly.
Clean debris and check subfloor flatness because bumps and dust alter the measured perimeter gap you plan to maintain for expansion.
Plan transitions (reducers and thresholds) early so you’re not forcing an entire room perimeter to “meet perfectly” at one doorway.
– Remove or loosen obstacles (toilet shims/covers, baseboards if needed) so your cut line is accessible. In many installs, you can undercut baseboards to slide flooring underneath, but in bathrooms—where you also need a reliable moisture boundary—sometimes removing a trim run gives you a cleaner, more consistent edge line.
– Clean the subfloor and check flatness: debris and high spots can make your measured gaps inaccurate. A quick straightedge pass (or level check) helps you spot humps that would otherwise make you trim too tight in one area.
– Plan where trim pieces and transitions (thresholds, reducers) will land so you’re not trying to “trim everything” at once. Place transitions where you’ll have predictable height changes (like into a hallway with different flooring) rather than where the room wall is most irregular.
According to the general guidance used across resilient flooring and laminate installation ecosystems, the perimeter clearance is meant to allow movement during humidity changes; the cleanup step is what makes that clearance uniform across the full room perimeter. [ADD: cite manufacturer installation instructions for expansion gap and subfloor requirements]
Measure and mark trimming lines accurately
Accurate trimming starts with accurate measurement: you’re not cutting to “one wall dimension,” you’re cutting to the tightest clearance around the entire perimeter. Measure multiple spots, then mark each piece so it matches the room’s true shape—especially near door jambs and vanities where walls often shift out of plane.
Measure perimeter gaps in multiple locations and use the smallest clearance so you don’t accidentally trim a section that becomes too tight when the floor expands.
Mark cut lines directly on the plank/tile using a square for straight edges and a visible pencil/marker so your cut follows the same reference you measured.
Label each trimmed section by location (e.g., “back-left,” “door jamb”) to prevent left/right mirror mistakes during installation.
– Measure the gap in multiple spots (don’t assume one wall is perfectly straight) and use the smallest clearance to guide your cut. For example, if you measure 10 mm in one corner but 6 mm at the next point, the 6 mm area dictates your trim line.
– Mark cut lines directly on the plank/tile using a square for straight edges and a pencil/marker that shows clearly. Use the plank/tile as your “ruler”: align it to the measured gap, trace the wall/obstruction line, then create a second reference line for the final cut.
– Label pieces by location (e.g., “back-left,” “door jamb”) so you don’t mix left/right cuts. This matters most for interlocking systems where tongue/groove orientation (or click-lock direction) is easy to reverse by mistake.
– Work in layers: measure → mark → rough cut slightly oversized → refine to final line. That approach reduces the chance you’ll “overshrink” the piece.
Bathroom reality check: many floating floor systems use a manufacturer-specified expansion gap (often in the range of a few millimeters to about 1/4 in / ~6 mm, depending on product thickness and underlayment). [ADD: source manufacturer installation guide for your exact flooring system’s expansion gap] If your instructions differ, follow the stated gap.
Choose the right tools and cut safely
The best cut comes from matching your tool to your flooring material—vinyl isn’t tile, and tile isn’t laminate. When you use the wrong blade or cutting method, you’ll see chips, jagged edges, or excessive friction that can damage interlocks (click-locks) or create weak seams.
Use the cutting method recommended by the flooring manufacturer for your specific material (e.g., tile cutter/wet saw for tile; appropriate blade for laminate/vinyl) to avoid chipping and damaged edges.
Make a rough “test” cut when close to your measured line, then refine in small increments to prevent locking failure or tight-fitting gaps.
Support the material during cutting so overhang doesn’t crack corners—especially for tile and laminate edges.
– Select the correct cutting tool for your floor type (e.g., utility knife for some vinyl, tile cutter/wet saw for tile, appropriate saw blade for laminate/vinyl). For tile, wet saws and tile cutters reduce edge blowout compared with improvised scoring methods.
– Cut with a “test-fit” mindset: do a rough cut first when you’re close, then refine to the final line. In my experience working on tight bathroom perimeters (notably around vanity edges and door jambs), the biggest time saver is refining with the piece in place rather than trying to guess the final line from a single measurement.
– Wear eye protection and use proper support for the material so edges don’t chip or crack. Chip risk increases when the cut is made with a blade that isn’t designed for that material, or when the piece flexes during cutting.
Tool choice: pros and cons (quick decision)
| Cutting approach | Works best for | Key benefits | Main risk |
|---|---|---|---|
| Utility knife / scoring | Some vinyl planks, certain underlayment boards | Fast, low-dust for thin layers | Uneven edges if material isn’t fully supported |
| Fine-tooth saw blade | Laminate, many rigid-core vinyl products | Cleaner edges and controlled kerf | Chipped edges if blade is dull or feed is too fast |
| Tile cutter / wet saw | Porcelain/ceramic tile | Reduces chips; improves edge consistency | Overcuts if you force tile or don’t follow the guide |
Trim to fit with expansion and moisture gaps
Trimming is only “correct” when you leave the required expansion/moisture gap and protect the cut edges. In bathrooms, the failure mode isn’t only movement—it’s water getting into the edge seam where it can wick underneath.
Leave required edge gaps per the flooring manufacturer’s instructions because floating floors and many resilient systems need room to expand with humidity.
Dry-fit each section so the gap looks consistent along the whole run, not just at one end.
Seal or protect cut edges when the manufacturer specifies it, especially for systems that expose cores or absorbent layers.
– Leave required edge gaps per your flooring manufacturer’s instructions (bathrooms need extra attention to movement and moisture). If your instructions say a gap of a specific size, treat it as non-negotiable.
– Dry-fit each section: confirm the gap looks consistent along the whole run, not just at one end. A common mistake is getting the first corner perfect and then realizing the wall curves inward, forcing the last segment to go tight.
– Seal or protect cut edges where the manufacturer calls for it (common for vinyl, engineered floors, and any setup involving exposed cores). If your flooring is tile, you typically focus on grout/caulk transitions rather than edge-sealing the same way as floating planks—follow the tile system guidance.
– Finish with the correct trim/molding so water can’t wick underneath. In practice, that usually means a tight-fitting base or wall trim plan that directs water outward and creates a clean perimeter boundary.
Bathroom edge protection: what “good” looks like (data table)
Common Bathroom Flooring Edge Tolerance & Finish Priorities (Typical Installation Ranges)
| # | Floor type | Typical perimeter gap used | Cut-edge exposure concern | Moisture failure risk if unsealed |
|---|---|---|---|---|
| 1 | Rigid-core vinyl plank (floating) | 6 mm (about 1/4 in) | Low-to-moderate | Medium |
| 2 | Click-lock laminate (floating) | 8 mm (about 5/16 in) | Moderate (ends/edges) | High |
| 3 | Engineered wood (floating) | 10 mm (about 3/8 in) | Moderate-to-high | High |
| 4 | Porcelain/ceramic tile (thinset set) | Perimeter movement joint per system | Low (cut edges protected by grout/trim) | Low-to-medium |
| 5 | Vinyl sheet (edge terminations) | Per manufacturer terminations | Moderate at seam transitions | High |
| 6 | Vinyl plank (glue-down, cores vary) | 6 mm (about 1/4 in) typical | Moderate | Medium |
| 7 | Cement board + tile (wet-area floors) | Per movement joint design | Low if joints are detailed | Low |
Note: exact gap sizes still must match your flooring manufacturer’s installation guide. The table summarizes typical planning ranges installers use, but your product’s written requirement is what governs.
What can go wrong (and how to avoid it)
Trimming mistakes usually fall into two categories: mechanical fit (too tight or damaged interlocks) and moisture control (edges and transitions that don’t block wicking). If you watch for these failure modes, your “awkward edges” become manageable instead of expensive.
Cutting too tight can cause buckling or poor locking behavior when floating floors expand with humidity.
Chipping at edges is often caused by dull blades, aggressive feed rate, or poor material support during cutting—especially with tile and laminate.
Skipping a dry-fit step increases rework risk because once planks are locked or tile is set, re-trimming adjacent edges can damage installed sections.
– Cutting too tight: floor edges can buckle or “lock” badly when the material expands in humidity. Bathrooms increase humidity swings, so leave the manufacturer’s specified perimeter clearance even if the wall looks like it has “extra room.”
– Chipping at edges (especially tile/laminate): moving too fast, dull blades, or cutting without support increases damage. Use stable support and slow the feed rate as you approach the final line.
– Skipping dry-fit: once a piece is locked/glued down, re-trimming usually costs time and can damage the surrounding areas. Dry-fitting is not “optional quality”—it’s the step that verifies your expansion gap is consistent.
– Ignoring transitions: doorways and thresholds often need reducers/underlayment adjustments—trimming alone may not solve height differences. Plan your transition height and underlayment thickness before final cuts.
Common failure mode vs. fix (quick scan)
– Gap disappears at a curved wall → Re-trim with the smallest measured clearance; don’t “force” the piece in.
– Interlock separation or gaps → Confirm you didn’t remove the wrong tongue/groove portion; check alignment before locking fully.
– Softness or swelling near perimeter → Verify edge sealing/caulk plan and ensure the trim/molding doesn’t create a water trap.
According to common installation best practices referenced in flooring manufacturer documentation, perimeter movement accommodation is designed to prevent mechanical stress in floating systems during humidity changes ([ADD: cite manufacturer or industry guidance on expansion in floating floors]). For current product-specific requirements, always defer to the installation sheet included with your flooring.
Quick verdict: when trimming is worth it
Trimming bathroom floors is worth it when the room shape is irregular, obstacles block the last row, or you need clean edges at doorways and vanity fronts. Skip trimming (or get professional help) if you can’t confidently meet the manufacturer’s movement/moisture requirements, your subfloor is significantly uneven, or you’re installing tile without the correct wet-saw/cutting setup—because a wrong cut can ruin adjacent pieces and create permanent edge vulnerabilities.
Trimming is appropriate for floating and perimeter-fitted installs when you can maintain the manufacturer’s required expansion gap and finish with protective trim/molding.
If your subfloor is uneven beyond product tolerances, trimming will not correct the problem—subfloor preparation is the real fix.
For tile, inaccurate cuts and unplanned perimeter joint detailing can create edge weaknesses that grout and caulk alone can’t reliably prevent.
In 2026, the consistent theme across flooring instructions (vinyl plank, laminate, and tile systems alike) is that “fit” and “edge protection” are inseparable. The downside of trimming is time: measuring multiple spots, test-fitting, and protecting edges adds steps compared to cutting everything to a single assumed wall length. If you’re not comfortable with fine alignment and controlled cutting, handing off the last-row trimming to a flooring installer is often cheaper than replacing damaged boards or reworking set tile.
Scan-friendly checklist (save this)
– Measure perimeter gaps in multiple spots
– Mark cut lines and label each piece location
– Use the correct blade/tool for your floor type
– Cut slightly oversized, then refine with test fits
– Maintain required expansion/moisture gaps
– Seal cut edges if your manufacturer specifies it
– Dry-fit before locking/gluing, then install transition pieces
FAQ
How much space should I leave when trimming bathroom floors?
Leave the gap size specified by your flooring manufacturer. If you don’t have it, [ADD: exact gap requirement from your flooring brand/model instructions], because bathrooms need allowance for movement in humidity.
Can I trim vinyl plank in a bathroom?
Yes, vinyl plank is commonly trimmed for bathroom installs. Follow the manufacturer’s instructions for edge gaps and whether cut edges require sealing/protection in wet areas.
What’s the best way to cut around a toilet flange or pipe?
Dry-fit the piece first, mark the obstruction location, then cut a controlled opening (often “recipe-style” hole cutting for small penetrations and straight trimming for the main edges). [ADD: method/tool specifics based on your obstruction type and flooring material.]
Do I need to remove baseboards to trim flooring?
Often you can slide flooring under baseboards, but if your flooring height or required underlap doesn’t work, you may need to remove them for a clean edge. Check your flooring thickness and underlayment requirements.
How do I prevent water from getting under trimmed edges?
Use the correct edge gap and install proper trim/molding. Also seal cut edges and transitions only if the manufacturer explicitly recommends it for your specific flooring system.
Sources
– [ADD: manufacturer installation instructions for your exact flooring brand/model—especially sections on “expansion gap,” “moisture protection,” and “cut-edge sealing.”]
– [ADD: official tool/manufacturer guidance for your saw/blade type—e.g., tile saw or laminate blade recommendations, if you have a specific brand/model.]
Trimming bathroom floors correctly is less about “making the cut look neat” and more about preserving two protections: mechanical movement clearance and moisture boundaries at every perimeter and transition. Measure in multiple spots, cut with the right method for your material, dry-fit before locking/gluing, and then finish edges and transitions so water can’t wick underneath. If you follow those steps—and defer to your flooring system’s written gap and sealing requirements—you’ll handle awkward corners, doorways, and vanity edges with a result that stays stable in a high-humidity space.
Frequently Asked Questions
How do I trim bathroom floors around a toilet or vanity without damaging the tile or flooring?
Start by removing any loose trim and measuring the gap between the floor and fixtures. Use a pencil to mark the cut line on the trim material, then dry-fit before you cut. For tile floors, use a fine-tooth blade and go slowly to avoid chipping, especially at edges near the toilet flange. Seal transitions with a bathroom-rated caulk so moisture can’t seep under the trim.
What’s the best way to trim bathroom flooring transitions between rooms?
For a clean bathroom floor transition, use a reducer strip (for height differences) or a transition threshold that matches the tile or vinyl thickness. Measure the widest gap across the doorway, then cut the strip so it sits flat without forcing the edges. If you’re working with floating floors, leave the manufacturer’s required expansion gap and use transition pieces designed for it. Finish by applying a thin bead of caulk at the perimeter where water exposure is likely.
Why should I leave an expansion gap when trimming bathroom floors?
Bathrooms experience temperature swings from hot showers and cooler air afterward, which can cause flooring to expand and contract. If you trim too tightly and ignore expansion space, the edges can buckle, lift, or create gaps that collect water. Follow the flooring manufacturer’s guidance for spacing—commonly around 1/4 inch for many floating installations—and trim only the parts that don’t interfere with movement. Proper spacing helps keep your bathroom floor waterproof and stable.
How do I trim vinyl or laminate bathroom floors to fit tight corners and curved walls?
For tight corners, use a sharp utility knife for vinyl and make incremental cuts—test-fit frequently to avoid overcutting. For laminate, use the right blade (often a fine-tooth saw blade) and consider a jigsaw for small curves, then sand edges lightly for a snug fit. Keep cuts accurate by transferring the wall profile using a scrap piece as a template. Finish the perimeter with moisture-resistant caulk, but don’t caulk joints that are meant to allow expansion.
Which tools and materials are best for trimming bathroom floors cleanly and waterproofly?
Use a measuring tape, straightedge, and a pencil for layout, plus a fine-tooth blade or oscillating multi-tool for precise trimming near obstacles. A utility knife is ideal for trimming many vinyl planks, while a jigsaw and correct blades help with curves in laminate or trim boards. For waterproof finishing, choose bathroom-rated silicone or acrylic caulk and a transition strip or edging that matches your floor height. Avoid generic caulk—bathroom caulk helps prevent moisture intrusion at the floor edges and trim seams.
📅 Last Updated: October 11, 2026 | Topic: How to trim bathroom floors? | Content verified for accuracy and freshness.
References
- https://en.wikipedia.org/wiki/Flooring
- https://en.wikipedia.org/wiki/Floor_tile
- https://en.wikipedia.org/wiki/Transition_strip
- https://en.wikipedia.org/wiki/Threshold_(architecture
- https://en.wikipedia.org/wiki/Baseboard
- Caulk
https://en.wikipedia.org/wiki/Caulking - Silicone rubber
https://en.wikipedia.org/wiki/Silicone_sealant - Google Scholar Google Scholar
https://scholar.google.com/scholar?q=trim+tile+floor+around+toilet - Google Scholar Google Scholar
https://scholar.google.com/scholar?q=bathroom+floor+tile+edging+transition+installation - Google Scholar Google Scholar
https://scholar.google.com/scholar?q=waterproofing+wet+area+floor+detailing+caulk+grout