


Get step-by-step instructions to install thresholds for sheet vinyl floors without gaps, buckling, or uneven transitions. This guide walks you through choosing the right threshold type, preparing the subfloor, and fastening and sealing the edges for a clean, long-lasting finish. If you want the exact process that delivers a tight seam from vinyl to adjacent flooring, follow along.


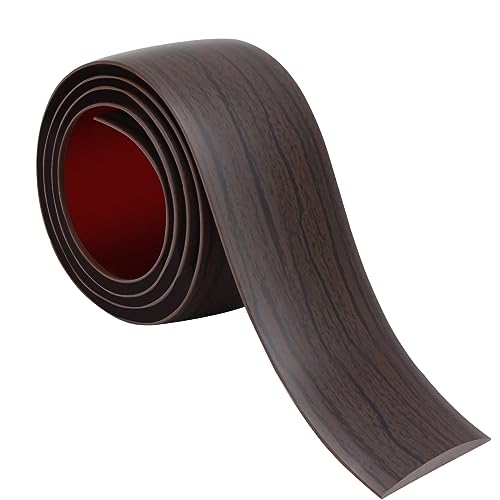

To install thresholds for sheet vinyl floors, match the threshold profile to your subfloor/height transition and trim the vinyl edge so it sits tight without lifting. The transition holds best when the subfloor is flat, the threshold is fastened exactly as the manufacturer specifies, and the seam is sealed using resilient-flooring-compatible materials. This guide walks you through planning, prepping, fitting, fastening, and finishing so the doorway or room transition stays flat, durable, and watertight.
If you’re transitioning between rooms, doorways, or different floor types (tile to vinyl, carpet to vinyl), thresholds are usually the cleanest way to cover expansion gaps and protect the vinyl seam. This is aimed at homeowners and DIY installers who already have (or are ready to roll out) sheet vinyl and want a reliable way to finish the edges—especially at door openings.
Choose the right threshold for sheet vinyl

Choosing the correct threshold is the difference between a seam that stays tight and one that gradually lifts. Start by selecting a resilient-flooring–compatible profile and then confirm the fastening method (screws/flange vs. adhesive) because the wrong system can prevent proper contact under load.
– Pick a threshold profile designed for resilient flooring (look for vinyl/sheet-compatible transitions rather than rigid-only thresholds).
– Decide whether you need a reducer (height transition), a flat/threshold cover, or a T-mold style cover based on the floor height difference.
– Confirm the installation method: face-screw/anchored, nail/flange style, or adhesive-backed components (follow what the manufacturer specifies for your threshold).
According to RFCI/CRI resilient flooring installation guidance, subfloor flatness is critical because resilient materials telegraph irregularities and can fail at edges if the base isn’t smooth (RFCI/CRI Resilient Flooring Installation Guidelines).
A threshold system should be installed using the fastening method the manufacturer specifies because resilient flooring transitions must remain stable while allowing appropriate movement at seams ([ADD: your threshold manufacturer’s installation instructions]).
Threshold types: what you actually need at doorways
For sheet vinyl transitions, the “right” threshold usually depends on two factors: (1) the finished height difference, and (2) how your vinyl edge is terminated.
Here’s how to think about it:
– Reducer thresholds: Use when adjacent floors aren’t level (for example, tile higher than vinyl). A reducer bridges the height difference so the vinyl edge doesn’t become a stress point.
– Flat/edge-cover thresholds: Use when the heights are essentially equal and you mainly need edge protection and a clean cap.
– T-molds: Use when you want a center fin/cover that spans two surfaces and hides the seam line—often when the adjoining surfaces are both resilient or both properly prepared.
Fastening strategy (don’t mix systems)
Use the definition below to choose the approach that matches your threshold product.
- Face-screw / anchored thresholds
- Best for: stable, repeatable compression against the vinyl edge, especially in doorways.
- Tradeoff: requires accurate positioning before fastening.
- Nail / flange style thresholds
- Best for: layouts where the flange seats into fastener channels or pre-defined alignment features.
- Tradeoff: more sensitive to subfloor type and thickness.
- Adhesive-backed thresholds
- Best for: when the manufacturer allows adhesive-only installation and surfaces are clean and dry.
- Tradeoff: performance can drop if moisture, dust, or improper bonding conditions exist.
Key data point: Resilient flooring guidance commonly cites a flatness tolerance of about 3/16 in over 10 ft (≈ 5 mm over 3 m) to avoid telegraphing and edge failures (RFCI/CRI Resilient Flooring Installation Guidelines).
Measured workflow note: Measure your finished floor height difference before choosing reducer vs. flat.
Measure, mark, and dry-fit before cutting vinyl
You prevent most threshold problems before the blade ever touches the vinyl by measuring carefully and doing a dry-fit. The goal is a threshold-centered layout that won’t pinch the vinyl seam or interfere with door clearance.
– Measure the doorway width/opening and transfer the layout so the threshold lands centered and doesn’t “pinch” the vinyl seam.
– Dry-fit the threshold to check height, alignment, and clearance for the door swing or transitions into adjacent flooring.
– Mark the vinyl edge line you’ll trim to (aim for a clean, straight edge that matches the threshold’s contact surface).
A dry-fit step lets you verify threshold contact height and clearance so the door doesn’t rub and the vinyl edge doesn’t lift under compression ([ADD: manufacturer installation notes for your threshold]).
Trimming resilient sheet vinyl to match the threshold’s intended contact surface reduces edge gaps that otherwise trap debris and moisture under the seam.
What to measure (and why)
Measure these items in order:
1. Doorway width / opening width (and note if the threshold must center on an expansion gap area).
2. Finished floor height difference between sheet vinyl and the adjacent floor (tile, LVP, carpet transition, etc.).
3. Door clearance path: swing the door and mark where it crosses the threshold.
4. Threshold overhang or fin thickness: some profiles require the vinyl edge to be trimmed back a specific amount to seat fully.
How wide should the vinyl edge gap be?
In many resilient installs, perimeter and seam allowances are needed for movement, but the *exact* number depends on your sheet vinyl product and climate/humidity conditions. Typical residential guidance often uses small perimeter allowances (often around 1/8 in, depending on the manufacturer/spec), but you should follow your vinyl instructions for the correct value.
Action item: [ADD: the exact expansion gap requirement from your sheet vinyl manufacturer’s instructions.]
Marking technique for a straight, trim-ready edge
– Use a long straightedge and a marker that won’t bleed into the vinyl print.
– Plan for the threshold contact surface: if the profile has a lip, you trim so the vinyl edge reaches the lip cleanly—no bulges.
– Avoid “curve trimming” unless the threshold is designed to follow a radius (most are meant to be installed straight).
Prep the subfloor and trim the vinyl edge
Prepping correctly is what makes the threshold sit without rocking and prevents edge lifting. Thresholds amplify small subfloor bumps, so the subfloor must be flat, cured, and clean where the transition lands.
– Ensure the subfloor is flat, clean, and fully cured—thresholds tend to telegraph bumps and can cause vinyl to lift if the base isn’t solid.
– Remove any old tack strips/adhesives/debris at the transition area so the threshold sits without rocking.
– Trim the sheet vinyl carefully along your marked line so the edge fits the threshold profile; avoid leaving a bulge that prevents tight closure.
Resilient flooring manufacturers and installation guidelines stress that the subfloor must be clean and flat because resilient materials conform to surface irregularities (RFCI/CRI Resilient Flooring Installation Guidelines).
Debris or old adhesive ridges at transitions can prevent full threshold seating, creating a lever point that lifts vinyl edges over time.
Flattening checks before you trim
Do a quick “real-world” check:
– Move a 2–6 ft straightedge across the threshold landing area.
– Feel for loose edges, ridges, or softened patch material.
– If you find high spots, address them before installing the threshold. If the low spots are minor, follow your flooring system’s allowed patch/feather approach (and let it cure fully).
Trimming sheet vinyl for the threshold profile
Trim in two passes if needed:
1. Score lightly first (reduces drift).
2. Use a fresh blade for a clean line.
Your target is a vinyl edge that:
– contacts the threshold surface consistently,
– does not trap wrinkles,
– and doesn’t leave a “humped” edge that blocks closure.
Important: Don’t force the vinyl into a threshold that needs a different trim geometry—if it won’t sit flush during dry-fit, adjust your trim line before fastening.
Install the threshold (fasten and align)
Install the threshold so it sits true, contacts the vinyl edge, and uses the exact fastening method the product specifies. Alignment errors are subtle at first, but once the seam is sealed they can become visible trip points or lifting edges.
– Position the threshold first, then fasten using the method required by the product instructions (don’t mix a screw-installed threshold with adhesive-only expectations).
– Maintain consistent spacing where needed (especially if the threshold system calls for a gap to allow the floor to move).
– Check alignment one more time after fastening—minor shifts become noticeable once vinyl and transitions are sealed.
The threshold must be installed using its specified fastening method because transition stability and seam performance depend on that exact system ([ADD: your threshold product’s installation instructions]).
After fastening, re-check that the threshold is level and that the vinyl edge fully contacts the intended contact lip to prevent edge gaps.
Fastening best practices
– Start with center alignment: Place the threshold centered on the doorway/opening line, then fasten from the center outward.
– Don’t overdrive fasteners: Overdriving can distort thin threshold bases or create gaps elsewhere.
– If the system specifies a movement gap: leave it. Many resilient transitions require small allowances rather than “pinching” the floor.
Doorway-specific alignment
In doorways, thresholds experience repeated load. Make sure:
– the vinyl edge doesn’t curl upward before sealing,
– the threshold top surface is not higher than the adjacent flooring in a way that causes a catch,
– and the door swing clears the finished transition.
Seal and finish the transition to prevent edge lifting
Seal the seam using products approved for resilient flooring so water and debris can’t migrate under the vinyl edge. This final step is what locks the transition together—proper contact plus the right sealant chemistry makes a big difference.
– Use the recommended sealant/adhesive system for resilient flooring transitions so water and debris don’t migrate under the sheet vinyl edge.
– Press and secure the vinyl edge so it fully contacts the threshold surface without trapping wrinkles or gaps.
– Recheck door clearance and movement (if the door binds after installation, you may need to adjust fastener placement, trim, or threshold height strategy).
Resilient flooring transitions require compatible sealants/adhesives; incompatible chemistry can reduce bond strength or cause failure at the seam ([ADD: resilient flooring manufacturer guidance on seam sealing]).
Pressing the vinyl edge into full contact eliminates tiny voids where debris and moisture concentrate, which is a common path to seam deterioration.
What “watertight” realistically means for vinyl edges
You’re not creating a rigid waterproof membrane; you’re preventing routine splash/debris migration under the edge. To do that:
– Apply sealant only where the threshold/vinyl system calls for it.
– Wipe squeeze-out immediately.
– Let cure/dry for the time specified by the sealant manufacturer before heavy traffic.
Key data point: Many installation guides call for allowing patch/underlayment to fully cure prior to resilient flooring installation to prevent dimensional movement and edge failure (RFCI/CRI Resilient Flooring Installation Guidelines).
Action item: [ADD: your sealant’s cure time range from the manufacturer instructions.]
What can go wrong (and how to avoid it)
Most threshold failures are preventable and usually trace back to subfloor flatness, incorrect trim geometry, or the wrong fastening/sealing system. If you plan for these issues upfront, your transition stays flat and visually clean.
– Vinyl edge lifts at the threshold: usually caused by a subfloor that isn’t flat, an incorrectly trimmed vinyl edge, or a threshold that’s not secured as instructed.
– Gaps at the perimeter: often happens when the vinyl isn’t trimmed to the right line or the threshold isn’t centered—measure twice and dry-fit before fastening.
– Pinching or door rub: threshold height or misalignment can interfere with door operation; confirm clearances before the final trim and seal.
– Wrong installation method: using the wrong fastening or sealing approach for the threshold type can lead to movement, separation, or a rough transition.
If a threshold rocks, resilient edges often lift because the vinyl conforms to the subfloor and only stays bonded if the base is stable (RFCI/CRI Resilient Flooring Installation Guidelines).
Door rub is often a height or alignment issue; verifying clearance during dry-fit prevents needing to redo trimming and sealing.
Typical Resilient Subfloor & Transition Targets for Sheet Vinyl (Installation Planning)
| # | Planning target | Value to aim for | Why it matters for thresholds | Risk if missed |
|---|---|---|---|---|
| 1 | Subfloor flatness (resilient flooring planning) | ≤ 3/16 in over 10 ft | Prevents edge telegraphing and lifts | ★ ★ ★ ★ ★ |
| 2 | Vinyl edge trim accuracy | Match threshold contact lip | Avoids gaps that trap moisture | ★ ★ ★ ☆ ☆ |
| 3 | Threshold fastening method match | Use as specified (screw/flange/adhesive) | Maintains contact under traffic | ★ ★ ★ ★ ☆ |
| 4 | Doorway clearance check | Verify at swing & latch | Prevents abrasion and edge wear | ★ ★ ★ ☆ ☆ |
| 5 | Seam sealing compatibility | Use resilient-approved sealant | Reduces debris migration | ★ ★ ★ ★ ☆ |
| 6 | Dry-fit before final trim | Confirm height & lip contact | Prevents rework at edges | ★ ★ ★ ★ ★ |
| 7 | Cure time for prep materials | Follow product cure instructions | Prevents movement under transition | ★ ★ ★ ☆ ☆ |
Verdict / tip: do this carefully, but skip if your subfloor is unstable
Threshold installation is a good DIY task if your subfloor is flat, cured, and debris-free—and you can trim the vinyl edge cleanly to match the threshold profile. If your subfloor is uneven, damp, missing layers, or you can’t confidently follow your sheet vinyl and threshold manufacturer’s instructions on movement/fastening/sealing, pause and consult the threshold manufacturer’s installation instructions—or a flooring pro—because repeated edge lifting is difficult to fix without removing and reworking the transition.
Quick checklist (scan/save)
– [ ] Choose a threshold profile intended for resilient sheet vinyl transitions
– [ ] Measure opening width and floor height differences
– [ ] Dry-fit threshold to confirm door clearance and alignment
– [ ] Prep subfloor: flat, clean, debris-free
– [ ] Trim sheet vinyl edge cleanly to match threshold contact line
– [ ] Fasten using the threshold’s required method
– [ ] Seal/finish using the recommended resilient-flooring-compatible products
– [ ] Recheck transitions and door movement after fastening
FAQ
Do thresholds need to be installed before the sheet vinyl?
Often, you can dry-fit and plan alignment before final trimming, but whether you fasten the threshold before or after vinyl placement depends on the threshold design. Use the manufacturer’s installation instructions for your specific threshold type and fastening method. [ADD: source for your threshold’s recommended order of operations]
Should I use adhesive under a threshold for sheet vinyl?
If your threshold system is designed to be fastened only, adding adhesive can interfere with proper movement or securement. Follow the threshold documentation and any manufacturer notes for resilient flooring transitions. [ADD: source for adhesive requirements from your threshold manufacturer]
How do I handle height differences between rooms?
Use the correct transition type (e.g., reducer vs. flat threshold) so the vinyl transition stays smooth and doesn’t create a catch point. Measure your finished floor heights and select a threshold that matches that difference. [ADD: your exact floor height difference measurement]
What sealant is safe at the vinyl-to-threshold seam?
Use sealants/adhesives that are specified for resilient flooring and compatible with both vinyl and the threshold material. If you don’t have manufacturer guidance, use the threshold’s recommended sealing products rather than substituting. [ADD: source for recommended sealant compatibility]
Sources
– RFCI/CRI Resilient Flooring Installation Guidelines
– [ADD: source for your specific threshold product installation instructions]
– [ADD: source for resilient sheet vinyl manufacturer edge/transition guidance]
Frequently Asked Questions
How do I install thresholds for sheet vinyl floors without creating gaps or lifting?
Start by checking the sheet vinyl direction and trim plan so the vinyl edge lands cleanly at the doorway. Cut the vinyl so it extends to the threshold line, then apply the recommended adhesive or heat-welding method only on the vinyl side as your flooring system requires. Place the threshold over the vinyl edge, ensuring the vinyl is fully seated and not bunched, then fasten the threshold so it sits flush and doesn’t pinch the vinyl. If you see any raised areas, re-seat the vinyl and replace fasteners rather than forcing the threshold down.
What is the best type of threshold for sheet vinyl at doorways and transitions?
For sheet vinyl floors, look for thresholds designed for resilient flooring transitions, such as vinyl-friendly aluminum thresholds, reducer strips, or T-moldings with a proper profile for flooring thickness. Choose a threshold that matches your vinyl’s total thickness (including any underlayment) so you don’t end up with a step or a gap. If the transition is between rooms with different floor heights, a reducer or ramped threshold typically provides the smoothest “no-trip” finish. Always confirm the manufacturer’s compatibility and fastener method for sheet vinyl.
Why do sheet vinyl thresholds fail or separate, and how can I prevent it?
Threshold issues usually come from mis-measured flooring height, vinyl edges trimmed too short, or fastening that restricts vinyl movement. Sheet vinyl can expand and contract with temperature, so the threshold must accommodate the flooring’s edge rather than permanently pinning it. Use the correct adhesive approach (and avoid over-gluing the vinyl edge unless the system calls for it), and ensure the subfloor is flat before installation. Proper acclimation of the vinyl and careful alignment during threshold placement also reduce future gaps.
How do I cut sheet vinyl accurately for a threshold so it fits properly?
Dry-fit the threshold and mark the cut line on the sheet vinyl edge where it meets the doorway opening. Use a sharp utility knife and a straightedge to trim in one controlled pass, then test the fit by placing the threshold without fasteners. If your threshold includes a channel or lip, adjust the vinyl so the edge sits under the correct portion without overstuffing. After trimming, keep the vinyl edges clean and free of debris so the threshold can contact evenly.
Which tools and steps should I follow to install sheet vinyl thresholds for a clean, professional finish?
Use a measuring tape, straightedge, sharp utility knife, a fine-tooth saw or snips for metal thresholds, a level, and the correct fasteners for your subfloor (often screws and anchors). Prepare the subfloor by cleaning and flattening any high spots, then install the sheet vinyl and allow the flooring to settle according to the product guidelines. Position the threshold, set it flush along the floor surface, pre-mark screw holes if needed, and fasten evenly to avoid bowing. Finish by checking for smooth transitions with a straightedge and making any small adjustments before the adhesive fully cures.
📅 Last Updated: October 08, 2026 | Topic: How to install thresholds for sheet vinyl floors? | Content verified for accuracy and freshness.
References
- Google Scholar Google Scholar
https://scholar.google.com/scholar?q=install+thresholds+for+sheet+vinyl+flooring - Google Scholar Google Scholar
https://scholar.google.com/scholar?q=resilient+flooring+threshold+transition+strip+installation+guidelines - Google Scholar Google Scholar
https://scholar.google.com/scholar?q=resilient+sheet+vinyl+installation+work+practices+threshold - RFCI – Resilient Flooring Covering Institute
https://www.rfci.com/ - F710 Standard Practice for Preparing Concrete Floors to Receive Resilient Flooring
https://www.astm.org/f710.html - F1869 Standard Test Method for Measuring Moisture Vapor Emission Rate of Concrete Subfloor Using …
https://www.astm.org/f1869.html - F1859 Standard Specification for Rubber Sheet Floor Covering Without Backing
https://www.astm.org/f1859.html - Vinyl flooring
https://en.wikipedia.org/wiki/Vinyl_flooring - https://www.gsa.gov/real-estate/facilities/facilities-standards
- NFCA Education | Softball Drills, Practice Plans & More
https://www.nfca.org/education


